How To Create Dotted Lines with Affinity Designer
How To Create Dotted Lines with Affinity Designer https://logosbynick.com/wp-content/uploads/2021/09/dotted-line-affinity-designer.png 800 470 Nick Saporito https://secure.gravatar.com/avatar/8e31bf392f0ba8850f29a1a2e833cdd020909bfd44613c7e222072c40e031c34?s=96&d=mm&r=gIn today’s tutorial we’ll be going over a simple process for creating dotted lines using Affinity Designer. Creating dotted lines with Affinity Designer is simply a matter of creating strokes and then changing the style of the stroke to dashed. If you want to change the properties of your dotted lines, however, then there’s a bit more to go over.
Much like any other vector design tool, Affinity Designer allows you to create dotted lines by drawing strokes and then changing the style of the stroke from a solid line to a dashed line. From there you can change the length of the dashes and the spacing between them as well. All of this is done via the Stroke panel. Let’s dig in!
Create Dotted Lines with Affinity Designer
The following video tutorial will walk you through the entire process, step-by-step:
Continue on for a written overview of the lesson.
Table of ContentsCreating Dotted LinesEditing Dotted Line Properties |
Creating Dotted Lines
In this first part of the lesson we will go over how to draw dotted lines with Affinity Designer, in case you’d like to create new dotted lines. If you’d like to know how to apply dotted lines to an already existing shape or object then skip down to the second part of the lesson.
How to draw dotted lines with Affinity Designer
To draw dotted lines with Affinity Designer, grab the Pen Tool (keyboard shortcut: P) and draw a line across your canvas:

Draw a line with the Pen Tool to start.
With your line now drawn, navigate over to the Stroke tab located near the upper-right corner of your screen, where the color picker typically is:
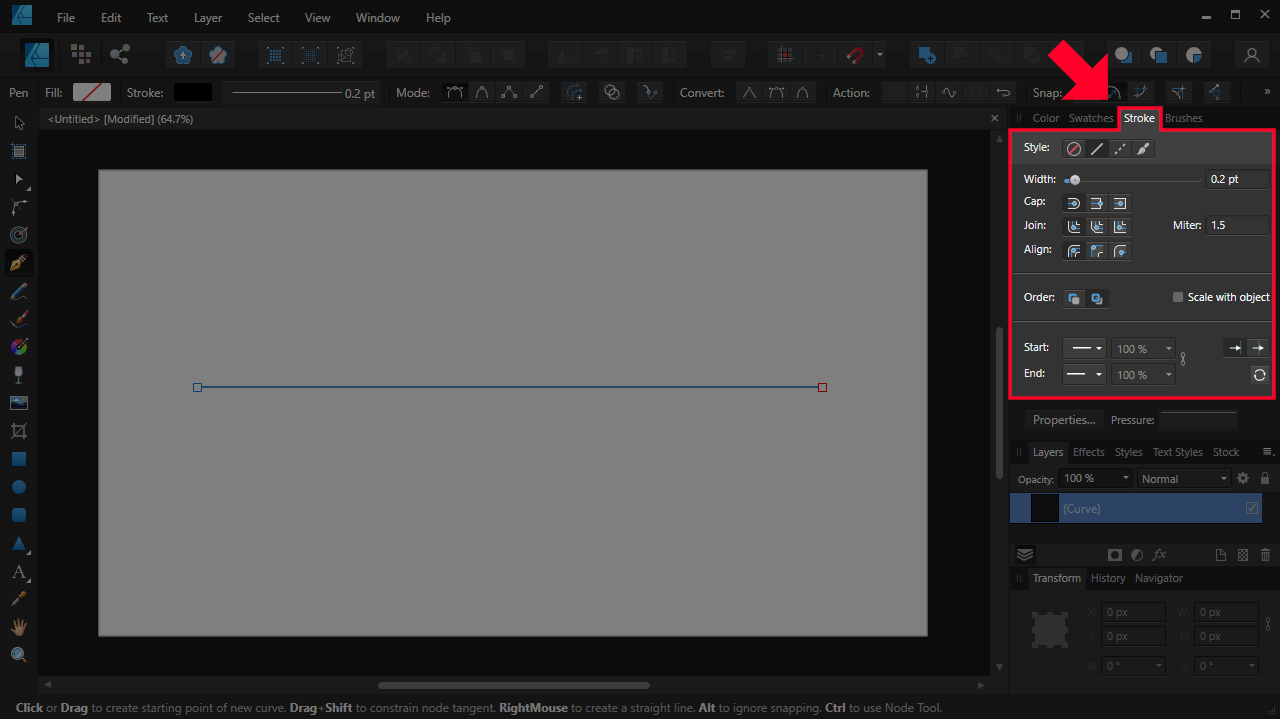
Open the Stroke tab to change the properties of the line.
At the top of the Stroke menu you will see an option labeled as Style, along with 4 boxes next to it. Click the box that reads “Dashed” when hovering your cursor over it. It should be the third box in from the left:

Change the stroke setting to Dashed.
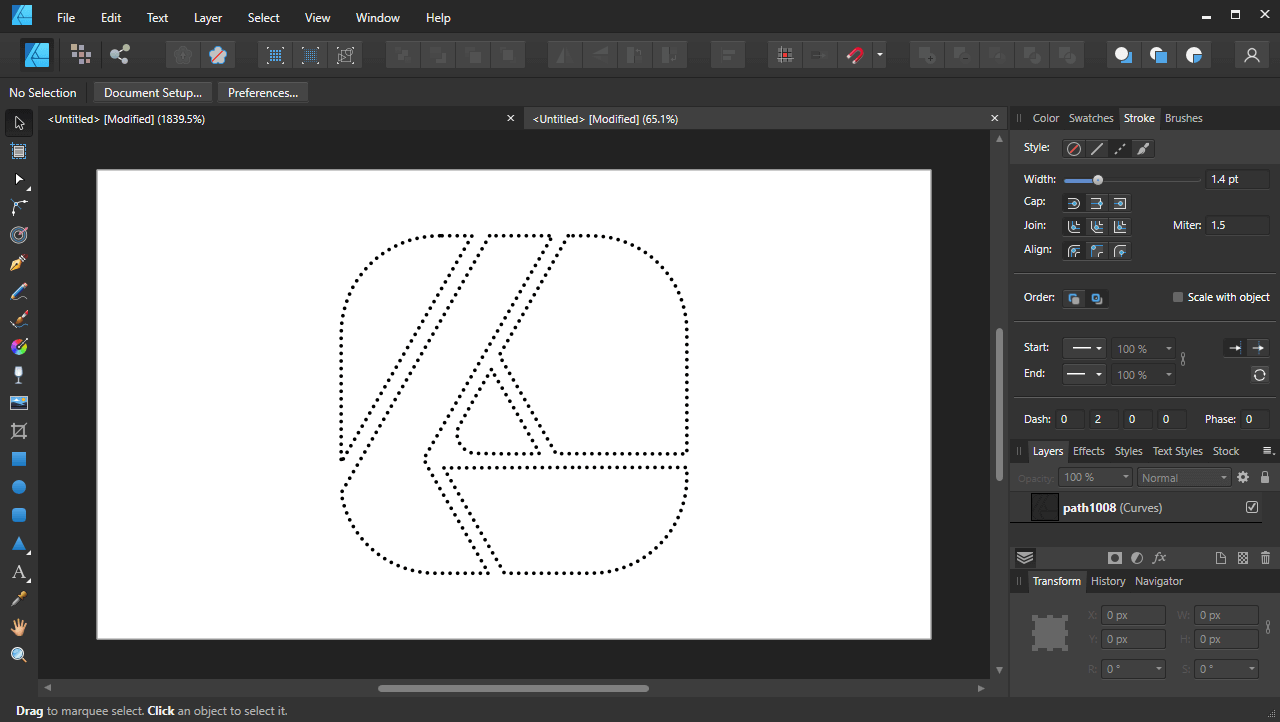
Once applied, the stroke that you have drawn with the Pen Tool will be converted from a solid line to a dashed line:
Once applied, the line will change to a dashed line.
Your dashed line may be too small to see at the default size it was when drawn, so go ahead and increase the Width of your stroke (in the Stroke menu) to see it better.
Now that you’ve created a dashed line, you can convert it into a dotted line by simply adjusting the Dash input at the bottom of the Stroke menu. Set the first input box to 0 to make your dashed line into a dotted line:
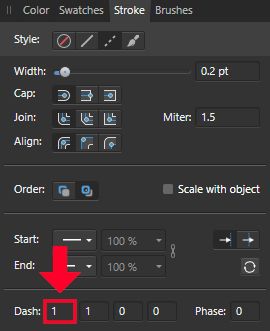
Change this input to 0 to make the dashes into dots.
If you’d like to edit the properties of your dotted line further, skip down to the editing section of the lesson.
How to convert a shape into dotted lines
Let’s go over how to take an existing shape or object and convert it into dotted lines, rather than drawing them manually.
To do so, first make sure that your object has a stroke applied to it. Then, navigate to the Stroke tab and set the Style option to Dashed:
Change the stroke setting to Dashed.
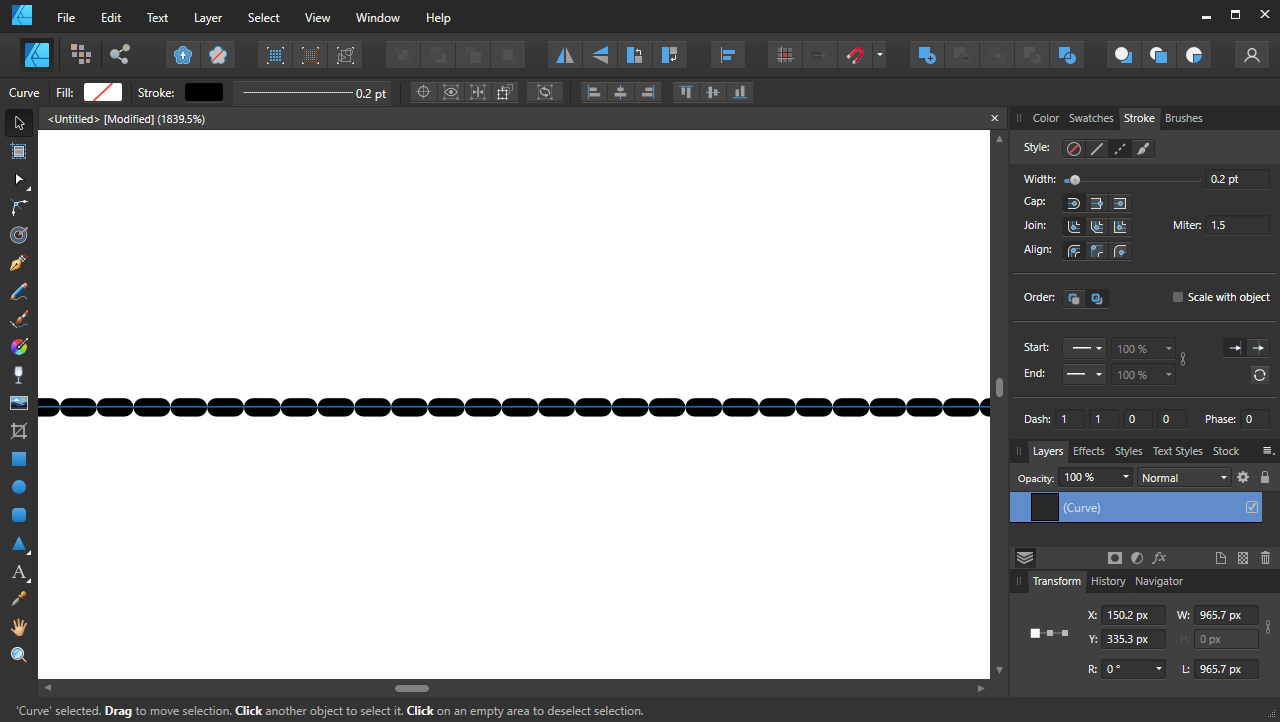
Once applied, you shape will then be converted from a solid line to dashed lines:

Click to enlarge.
Now navigate down to the bottom of the Stroke menu where is says Dash and set the first input box to 0. This will make the dashes into dots:
Setting the input to 0 make the dashes into dots.
Continue on to the next part of the lesson to edit the properties of the dotted line further.
Editing Dotted Line Properties
Now that we’ve gone over how to create dotted lines with Affinity Designer, let’s go over editing those lines further so you can stylize them however you’d like.
Change the thickness of the line
To change the thickness of your dotted line, change the Width setting in the Stroke menu:
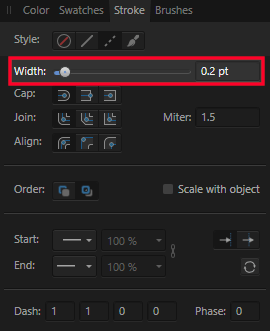
The Width preset allows you to change the thickness of the dotted line.
Increasing it will make the dotted line thicker, whereas decreasing it will make it thinner.
Change the length of the dashes/dots
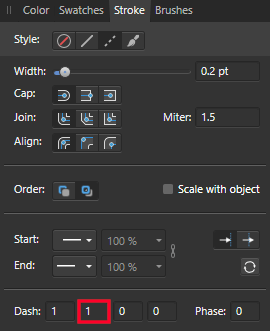
You can change the style of your dashes by using the first input box of the Dash setting at the bottom of the menu:
Changing this setting makes the dots/dash longer or shorter.
Simply hover your cursor over the box and roll up on your mouse wheel to increase the length of your dashes. You can decrease the length of them by rolling down.
Decreasing the Dash value to 0 will make the dashes so short in length that they become circles or squares (depending on the Cap style you’ve chosen,) effectively making them into dotted lines.
Change the spacing between dashes/dots
You can increase or decrease the space between the dashes/dots by using the second input box in the Dash setting:
Changing this setting will allow you to increase and decrease the spacing between the dots/dashes.
Hover your cursor over the box and roll up on your mouse wheel to increase the spacing between dots/dashes. Rolling down will decrease the spacing.
Make the dashes/dots rounded or squared
You can make your dashes/dots into circles or squares by using the Cap setting in the stroke menu:
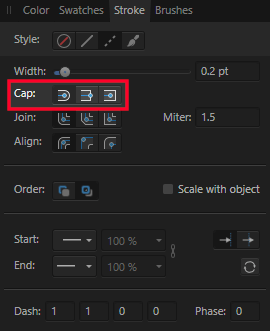
The Cap setting allows you to make the corners of your dashes/dots rounded or squared.
There’s three cap styles to choose from:
- Round Cap: will make your dashes/dots have rounded corners
- Butt Cap: will make your dashes/dots have squared corners that end where the path ends
- Square Cap: will make your dashes/dots have squared corners that have added padding to make them consistent with the width of the stroke
Change the color
Finally, you can change the color of your dotted line by navigating back to the Color tab. Make sure that you have the Stroke fill enabled:
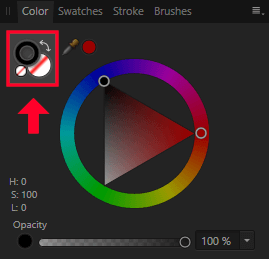
Make sure you have the stroke fill enabled in order to change the color of the dotted line.
From there you can simply use the color wheel to choose whatever color you’d like
Conclusion
And that should be everything you need to know about creating dotted lined with Affinity Designer! If I missed anything though, or if you have any questions, do not hesitate to leave a comment below.
Learn To Master The SoftwareGain a complete understanding of your favorite design apps with my comprehensive collection of video courses. Each course grants access to our private community where you can ask questions and get help when needed.
|
||||||||||||||||||||||||||||||||


I know this from Illustrator. But how to change the gap to 5mm? I put that in the 2nd box, and it changes back to a “1.” I’m trying to make stitching holes for leather projects.
I don’t think there is a way to set the gap size in such units of measurement.