How To Install Fonts In Procreate for The iPad
How To Install Fonts In Procreate for The iPad https://logosbynick.com/wp-content/uploads/2021/05/install-fonts-procreate.png 800 470 Nick Saporito https://secure.gravatar.com/avatar/8e31bf392f0ba8850f29a1a2e833cdd020909bfd44613c7e222072c40e031c34?s=96&d=mm&r=gUsing an iPad for graphic design comes with lots of benefits, and in order to fully enjoy those benefits you’re going to need access to your favorite fonts. Unfortunately, installing fonts on an iPad is a bit more complicated than it is on a desktop. However, it can be done, and in this tutorial I’ll be demonstrating how to install fonts in Procreate so you can use them on your iPad.
In order to install fonts in Procreate we’re actually going to install them into the operating system first, at which point they will populate in the fonts list in Procreate. Since we’re working in a mobile environment though, we’re going to need help from a third-party application.
Once the font is installed, you’ll also be able to use it in other applications as well.
Install Fonts In Procreate
| To install fonts in Procreate, install the iFont app from the App Store first. Then, open the font file with iFont and follow the instructions to install the font. |
The following video tutorial will walk you through the process of installing fonts on your iPad so you can use them in Procreate:
Read on for the written instructions.
Table Of Contents |
Step 1: Download and install iFont
In order to install fonts in Procreate we first need to download and install a third-party application known as iFont.
Unfortunately, this step is unavoidable. Fonts are typically designed for a desktop environment, so in order to install them on a mobile operating system we’re going to need outside help.
Go to the App Store and search for “iFont”.
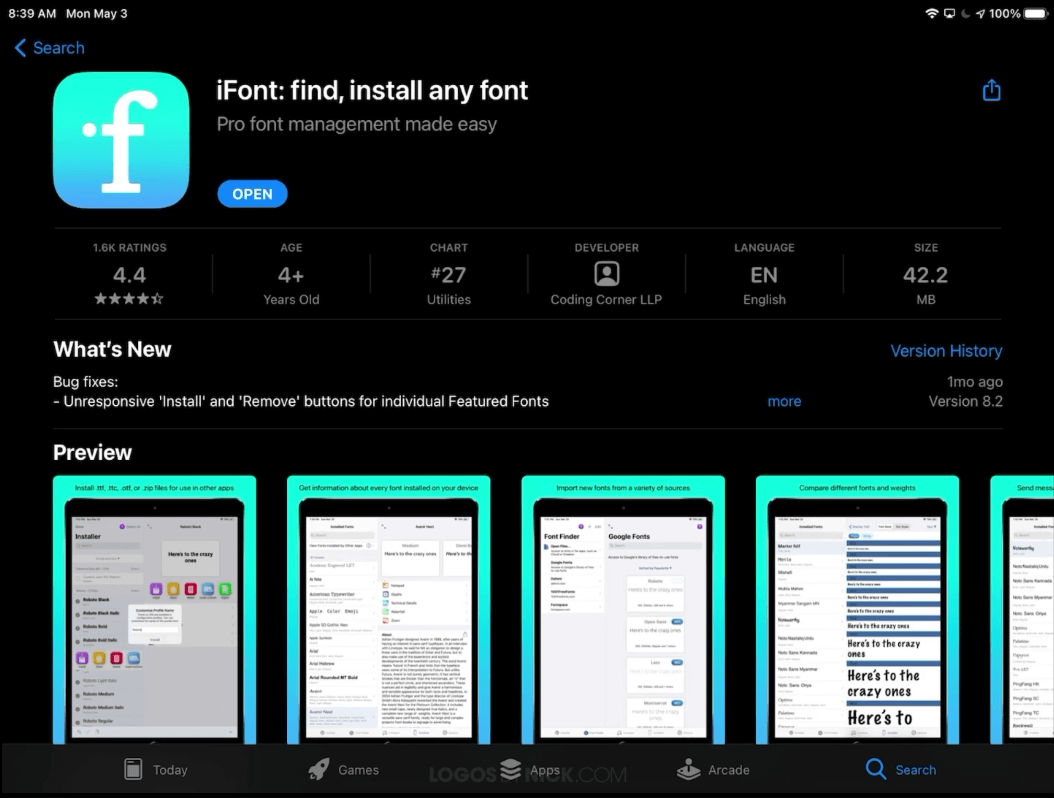
The iFont app is needed to install fonts in Procreate
Install iFont and then close out of the App Store. You don’t need to open iFont just yet.
Step 2: Download a font
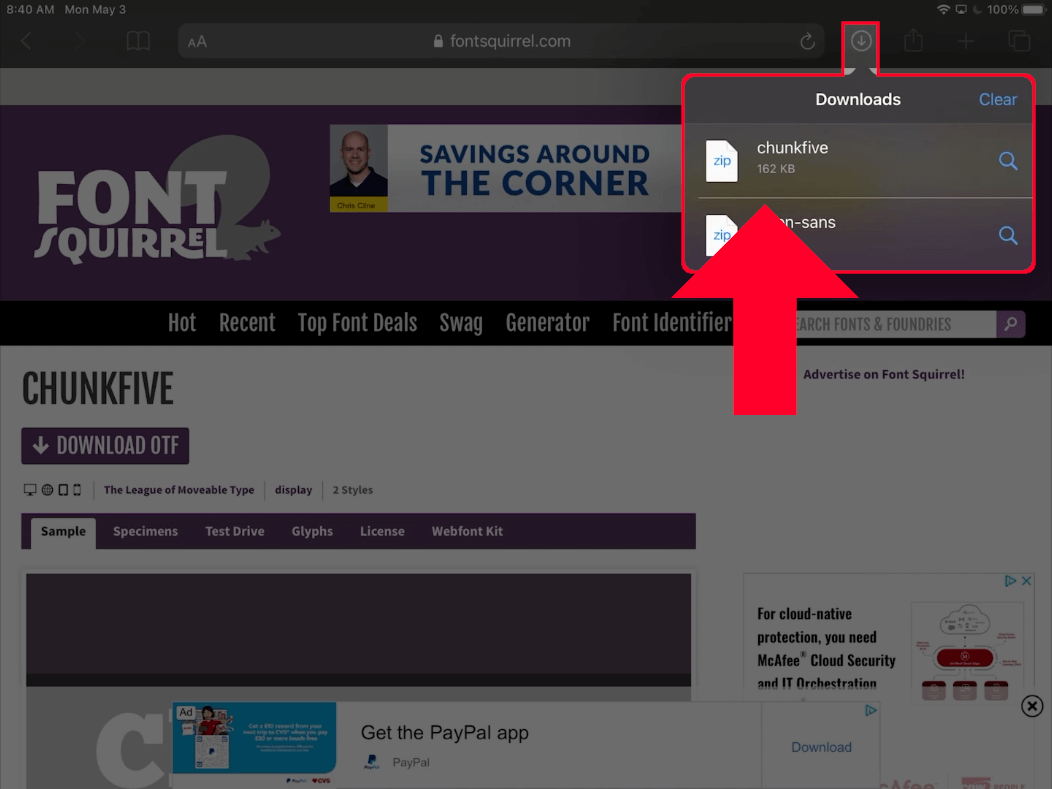
Now we’re going to find a font to download. For this demonstration I am going to download and install Chuck Five from FontSquirrel.com, but you can download any font you’d like.
Open a web browser and find a font to download. The download should come as a .zip file.
For this demonstration I used the Safari web browser. Once the ZIP file is done downloading, you should be able to access it using the downward-facing arrow icon in the top-right corner:
Tapping the ZIP file will open the file in its download location. Then, tapping on the ZIP file will unzip the file and create a new folder where it is located:
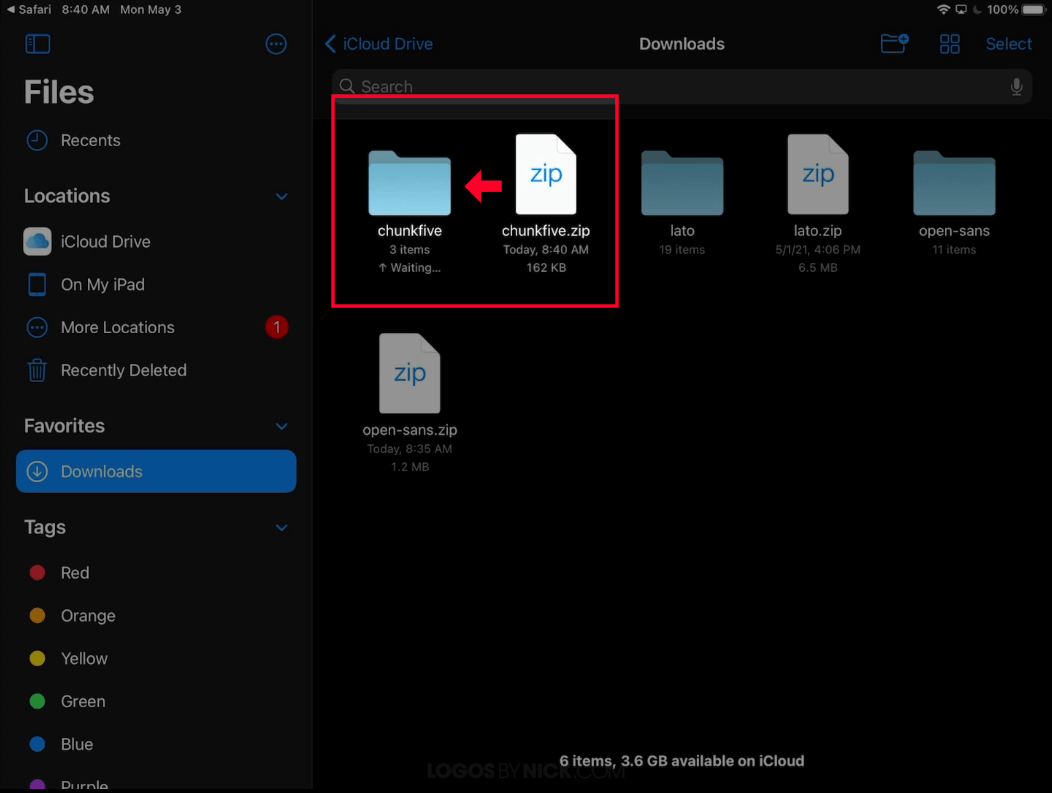
The operating system will automatically unzip the file once tapped on.
From there, you can access the font files by tapping on that new folder.
Step 3: Open the font with iFont and install the font Profile
Now that you’ve downloaded your font, it’s time to open it so that we can install it on the operating system.
Tap the folder to open it. Within the folder you should see at least one file that ends in .otf or .ttf. These are the files for the font that need to be installed.
If you have multiple font files then that means that your chosen font comes with various different styles (for example: bold, italics, underlined, etc.) Each of these variations will need to be installed one at a time, but for this tutorial we’re only going to install one variation.
Tap the font file (either the OTF or TTF file) to open it:
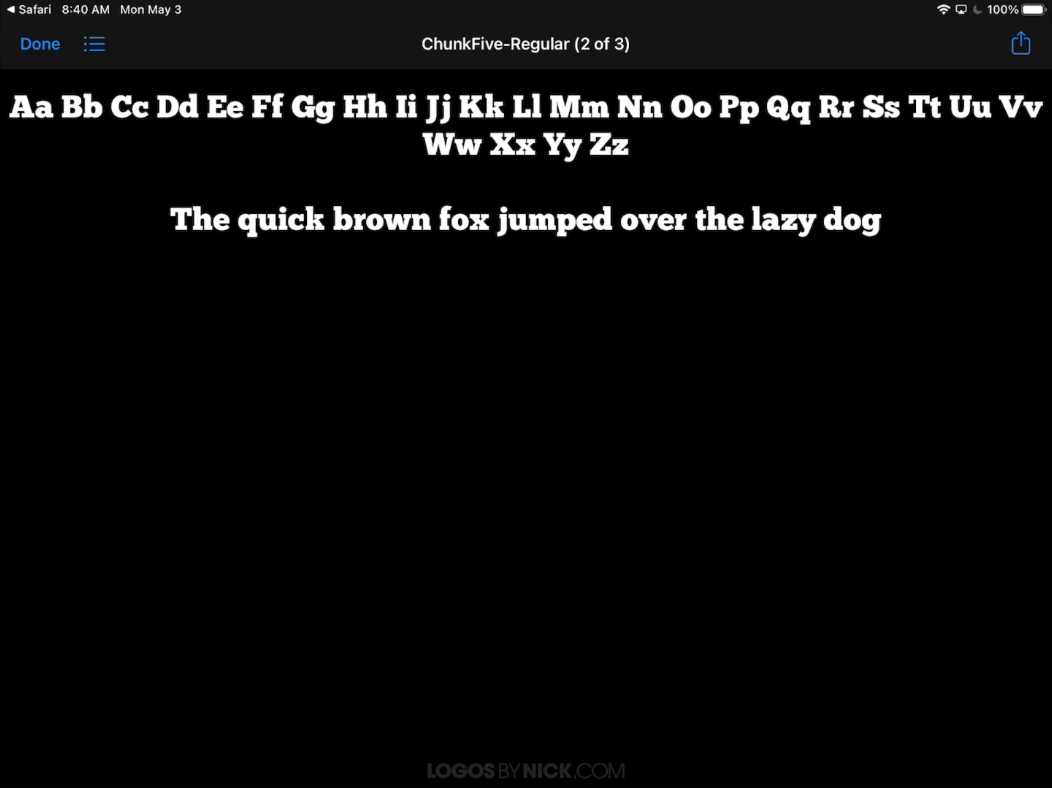
How the font file looks once opened.
Tap the share icon in the top-right corner (represented by an upward-facing blue arrow icon) to open the font with another app, and choose the iFont app from the list:
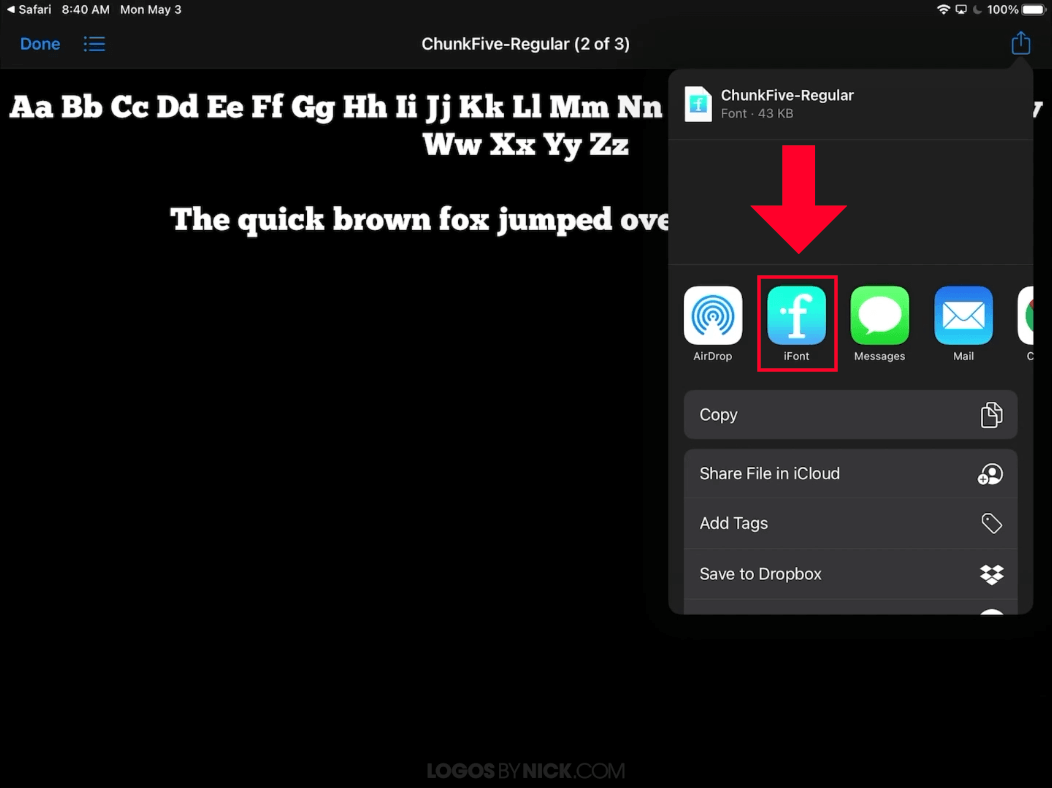
Once you’ve opened the font with iFont, you should see the font listed within the app with a blue button next to it that reads “install”. Tap on that install button:
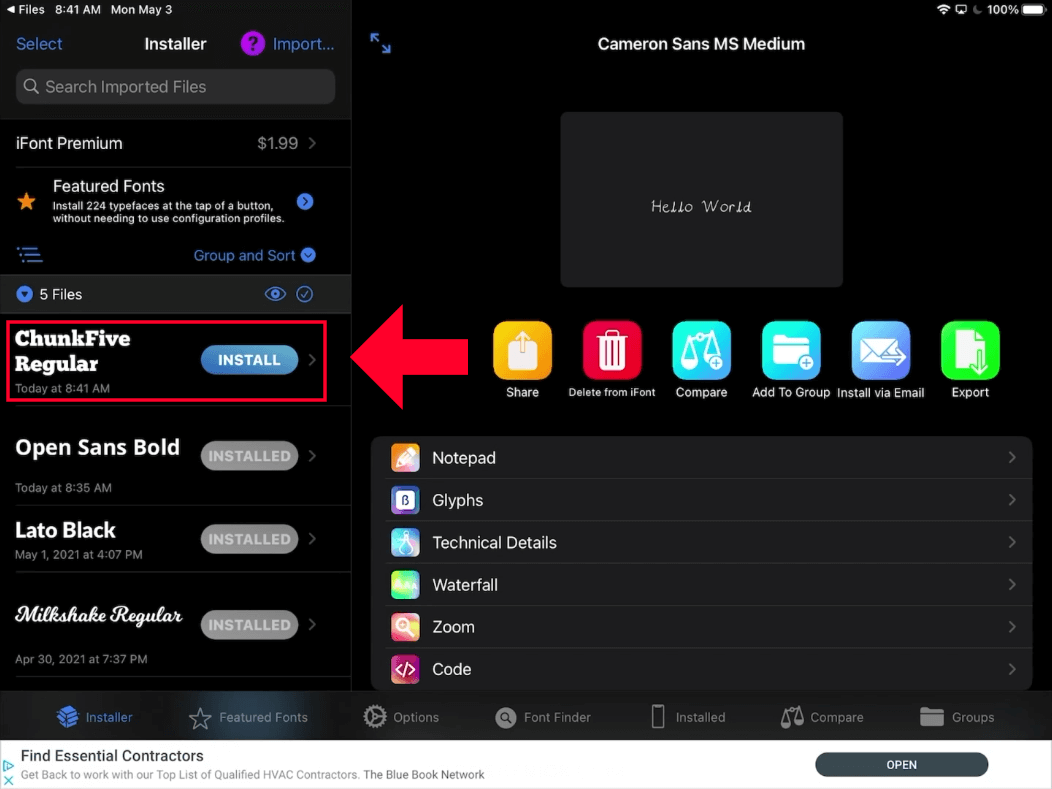
Follow the prompts that populate after tapping install. You will have to give permission for iFont to install the font profile.
It’s important to note that at this point, despite the misleading “install” label on the button, your font isn’t actually installed yet. This function installs a font profile instead, and in order to install the font so you can use it in Procreate, you’ll have to navigate to the Settings app and install the font from its profile. We’ll be covering this in the next step.
Step 4: Install the font from within the Settings app
Now that iFont has installed a font profile, we need to navigate to the Settings app and look for where it says Profiles:
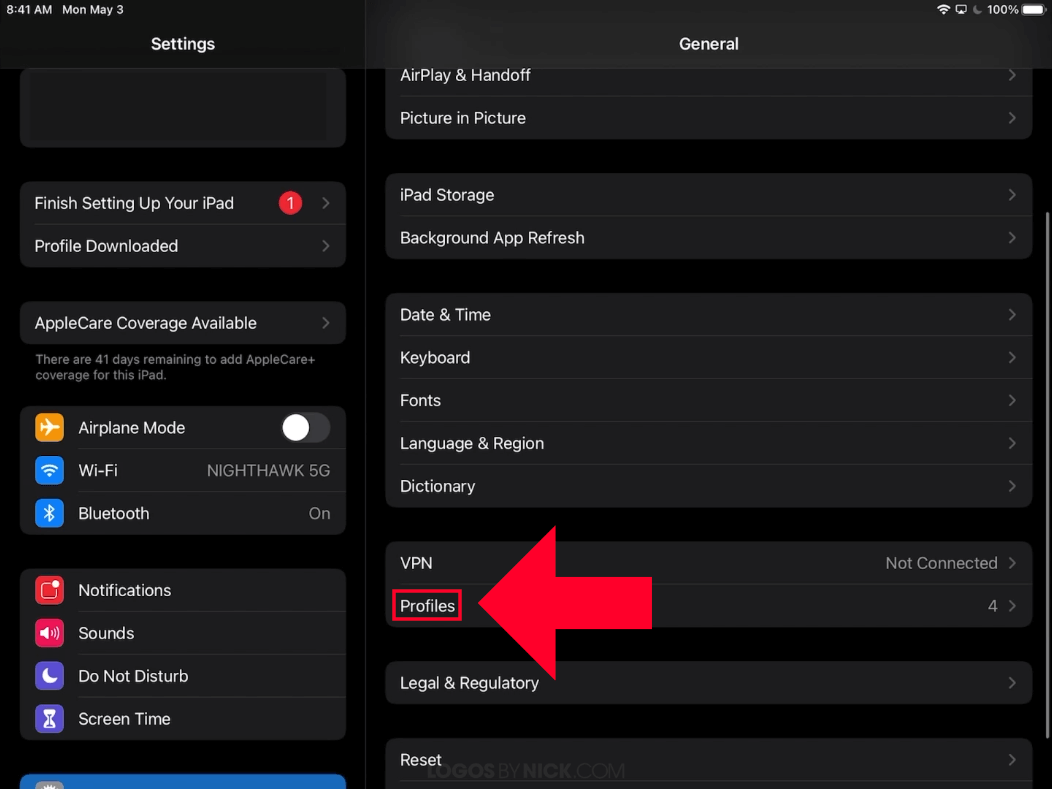
Profiles is located on the main screen when you first launch the Settings app. Scroll down towards the bottom of the list to locate it.
You should see a profile for your font, waiting to be installed:
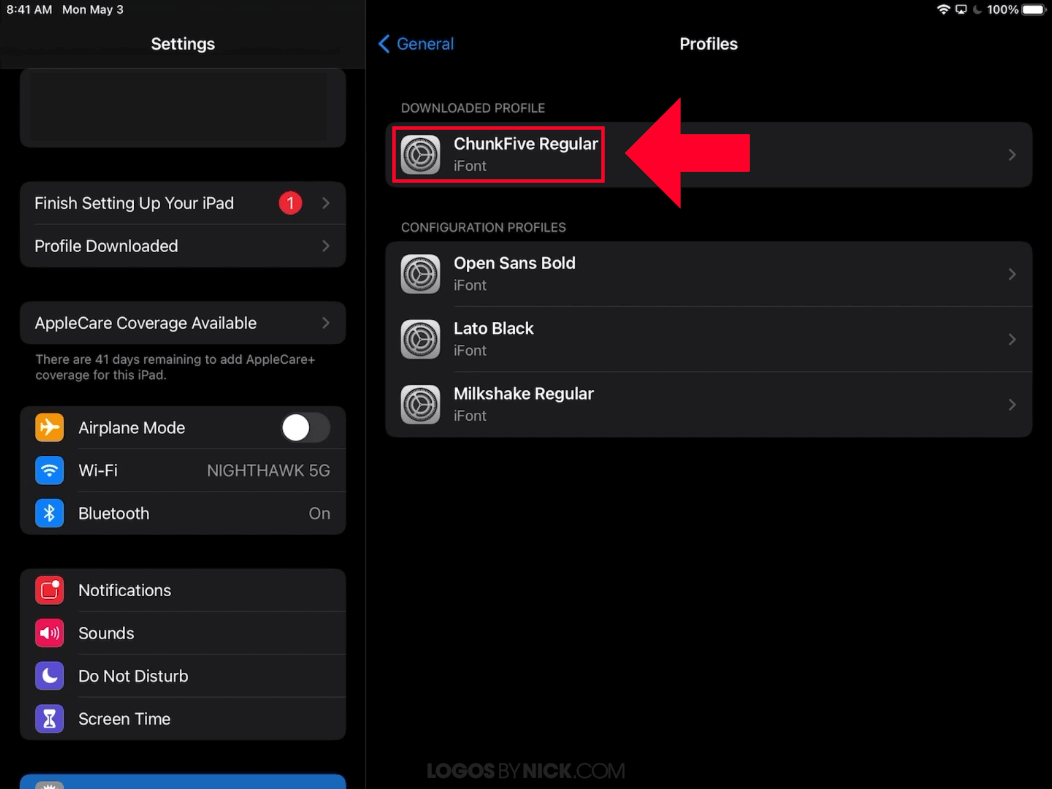
Within the Profiles section, the uninstalled profiles will be located at the top. Profiles that have already been installed are indexed below.
Simply tap on the profile to open it. Follow the prompts to install it. You will have to authorize permission and type in your 6-digit lock screen passcode.
Once completed, you have finished installing your font on your iPad. You can close out of the Settings app.
Step 5: Open Procreate to verify that the font has been installed
The final step in our quest to install fonts in Procreate is to simply open the Procreate app and add some text to verify that the font has indeed been installed.
As you can see in the screenshot below, the Chunk Five font has been installed and is ready for use in Procreate:
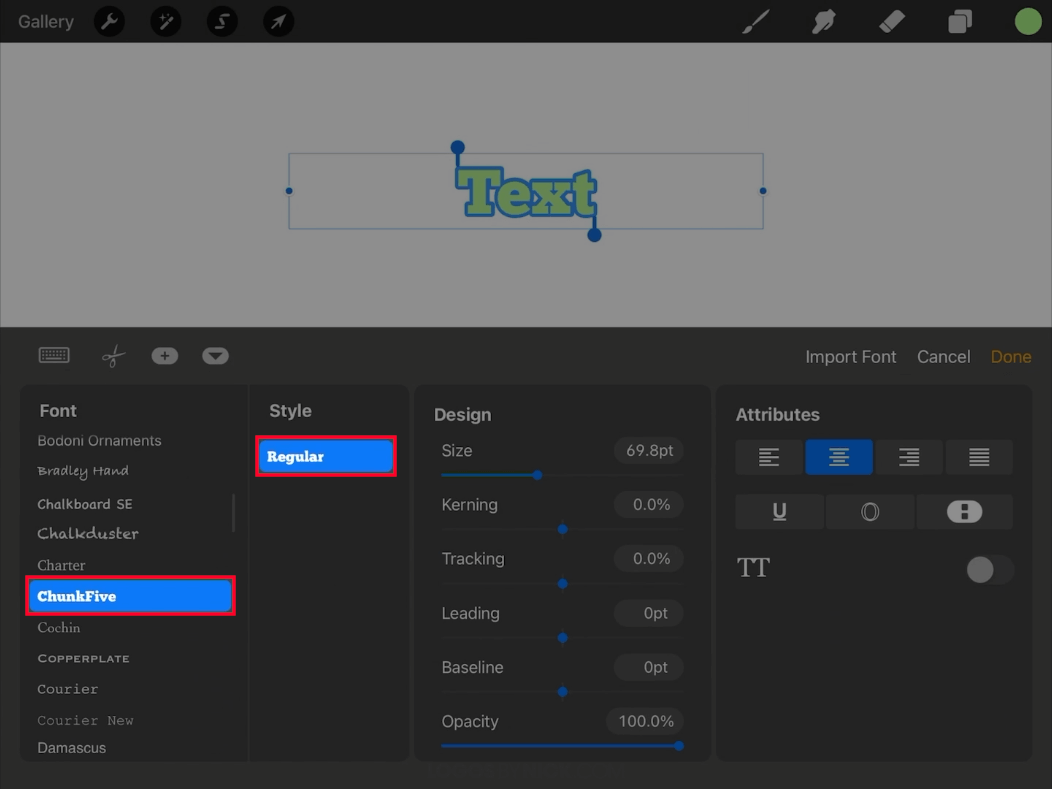
Installed font in Procreate
If your font isn’t populating in the Fonts list then you may have to close out of the app and restart it.
Once installed, you’ll be able to use your new font in every other app, because the font wasn’t actually installed in Procreate, it was installed on your device.
Conclusion
Installing fonts in Procreate can be a bit cumbersome, and it’s one of the drawbacks to using a mobile operating system for graphic design. However, with the help of a third-party app, it’s entirely possible to use all of your favorite fonts in Procreate.
If you have any questions, or if any part of this lesson was unclear, simply leave a comment below.
Learn To Master The SoftwareGain a complete understanding of your favorite design apps with my comprehensive collection of video courses. Each course grants access to our private community where you can ask questions and get help when needed.
|
||||||||||||||||||||||||||||||||


