How To Convert RGB to CMYK with Affinity Designer
How To Convert RGB to CMYK with Affinity Designer https://logosbynick.com/wp-content/uploads/2020/11/convert-rgb-to-cmyk-with-affinity-designer-1.png 800 470 Nick Saporito https://secure.gravatar.com/avatar/8e31bf392f0ba8850f29a1a2e833cdd020909bfd44613c7e222072c40e031c34?s=96&d=mm&r=gIf you’ve created a design for print then chances are you’re going to need to use a color profile that is suitable for print, which would be the CMYK color space. Using the standard RGB format can cause the colors of your design to look dull and muddy once printed, and some print shops will outright refuse to print your document if it has an RGB color profile. In this tutorial I’ll be demonstrating how to avoid this problem altogether by converting RGB to CMYK with Affinity Designer.
| To convert RGB to CMYK with Affinity Designer, open your document and navigate to Document Setup under the File menu. In the Document Setup menu, select the Color tab and change the Color Format dropdown from “RGB” to “CMYK” and click OK. |
RGB vs CMYK
RGB and CMYK represent different color models used when creating visual design. Every document that you create with your design software has a color profile assigned to it. By default, RGB is typically used because it can generate a larger spectrum of colors, whereas CMYK has a smaller gamut. This would naturally lead you to believe that RGB is the more desirable model to use, but it’s not appropriate in all contexts. There are instances where, because of color limitations, you’ll need to keep your designs within the gamut of the CMYK color space.
RGB
RGB is a subtractive color model that uses light to generate color. RGB uses some combination of red, green and blue to form all of the colors within its spectrum.
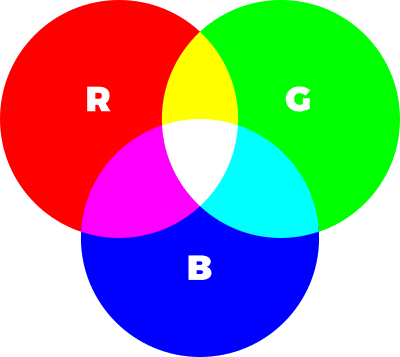
In an RGB color model, some combination of red, green and blue are used to generate every other color in the spectrum.
Since light is being used to generate color in an RGB model, it provides for a more vibrant array of colors to choose from than its CMYK counterpart. This makes RGB the ideal format to use when designing anything that will be used exclusively on a digital display, like computers, laptops, televisions, and phones.
RGB would not be the ideal color model to use when designing something for print though because many of the colors within the RGB space can only be generated with light. Since you’ll be printing your work, you’re going to need to use colors that can be generated with ink. This is where the CMYK color space comes into play.
CMYK
CMYK is an additive color model that uses some combination of cyan, magenta, yellow and black (k) to produce all of the colors within its spectrum.
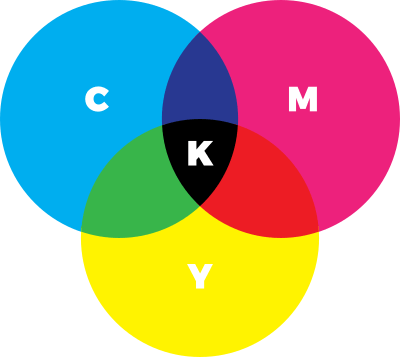
In a CMYK color model, colors are generated by combining cyan, magenta, yellow black (k).
Although the CMYK color space may contain less color options than its RGB alternative, you can rest assured that any color you use within its gamut can be reproduced with ink.
Why It Matters
Whenever you’re designing something for print, it’s important to ensure that your document has a CMYK color profile embedded so that you don’t accidentally use colors that are out of gamut, or outside of the range of what can be produced with ink.
The diagram below depicts how several color models overlap with each other. Notice how the RGB variations encompass a wider change of colors than the CMYK (represented as “2200 Matt Paper”) do.
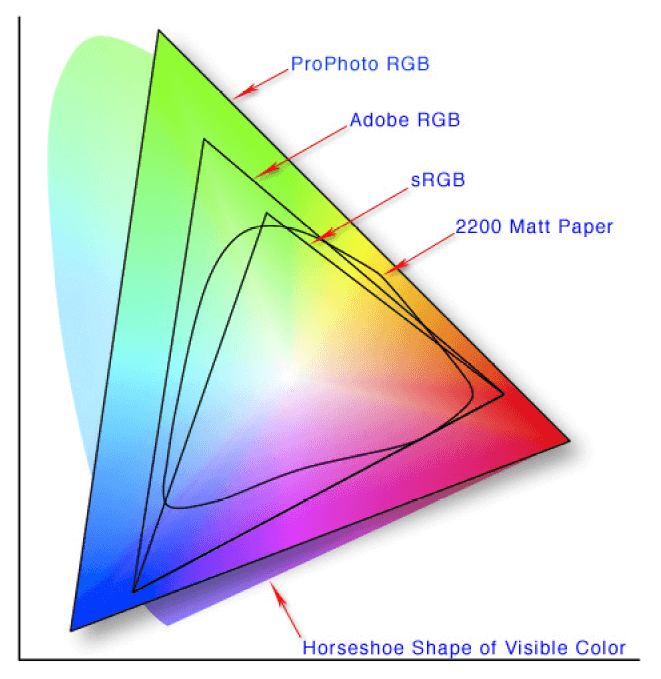
Source: https://en.wikipedia.org/wiki/Color_space
If you were to print a document that has an RGB profile embedded, chances are the colors would turn out faded and muddy. The below picture is an accurate representation of how RGB colors look once converted to CMYK.

Source: https://en.wikipedia.org/wiki/File:RGB_and_CMYK_comparison.png
Even if you only use colors within the CMYK color space, you could still end up with muddy results after print if your document has an RGB color profile embedded. Converting any RGB document to CMYK, which is necessary for print, will always result in visible changes to your artwork regardless of the colors used.
To ensure that your design looks the same in print as it does on your screen, it’s important to make sure that your document has a CMYK color profile embedded from the start.
How To Convert RGB to CMYK with Affinity Designer
Let’s say you’ve created a vector design that you need to have printed, but you’ve designed it in the RGB color space, using the RGB color profile that is embedded in your document by default. Lucky for you, Affinity Designer allows you to convert RGB to CMYK, then make the necessary color corrections, all with relative ease (this can be done with Illustrator as well if you prefer the Adobe suite.)
The following are instructions for how to convert RGB to CMYK with Affinity Designer. Before we get started it should be noted that since Affinity Designer is a vector graphics editor, this lesson is strictly for vector documents, or documents that end with any of the following extensions…
- AI
- SVG
- EPS
If you’re looking to convert a rasterized image, like the JPG or PNG format, you’ll have to use a different method. For raster images I would recommend either Krita (free and open source design application) or possibly a web-based color converter like Rgb2cmyk.org.
Follow the video tutorial below or continue on for the written instructions:
Step 1: Open Your Document
The first thing you’ll have to do is open your document. To open a document, navigate to File > Open, or press Control + O on your keyboard, then navigate to your file’s location on your hard drive so you can select it.
Open your document by pressing Control + O on your keyboard.
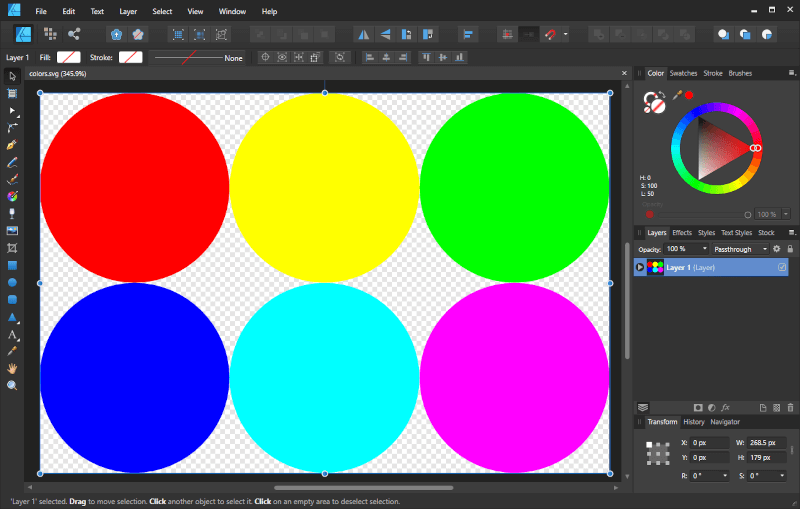
For this demonstration I’ll be using the example document depicted above, which includes a series of colored circles that will serve as a good representation of how color profiles affect the appearance of your artwork.
Step 2: Open The Document Setup Menu
Next, we’ll need to access the Document Setup menu. The Document Setup menu will allow you to choose the color profile to be embedded in your document.
To open it, navigate to File > Document Setup or press Control + Shift + P on your keyboard.
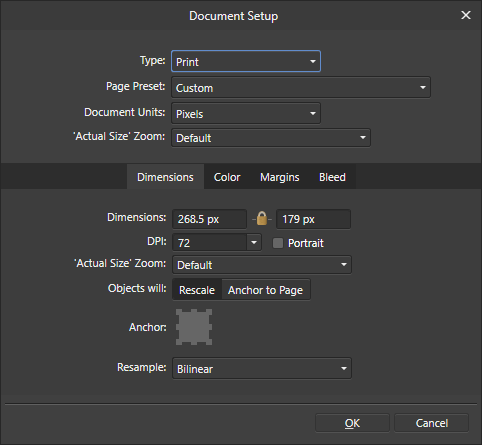
The Document Setup menu in Affinity Designer allows you to set various properties of your document, including its embedded color profile.
Once opened, navigate to the Color tab and change the Color Format dropdown from “RGB” to “CMYK” and click OK.
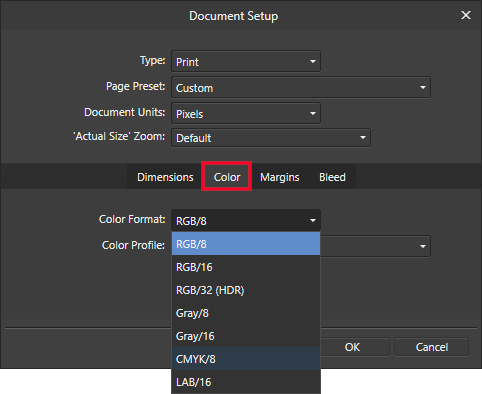
Navigate to the Color tab to adjust your document’s color settings.
If your print shop has requested a specific color profile then it would be wise to see if it’s listed under the Color Profile dropdown. Using it will ensure even more accuracy between the colors on your screen and what is produced when printed.
If you don’t have a specific color profile you’d like to use then simply leave the default profile and click OK. Your document will now have a CMYK color profile embedded.
Step 3: Adjust The Colors As Needed
Once you’ve converted RGB to CMYK with Affinity Designer, you may notice that your colors now look muddy and faded.
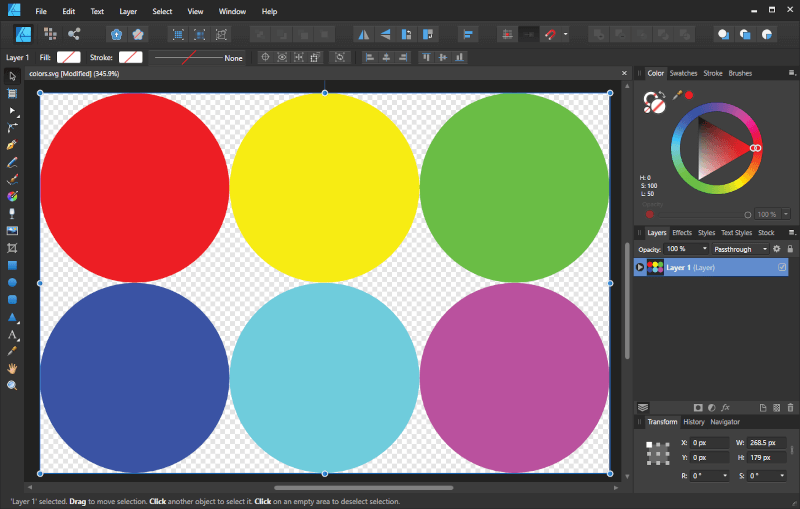
You may notice that some of your colors appear faded and muddy after converting them from RGB to CMYK.
Every document is different, so it’s entirely possible that your colors aren’t noticeably different. If this is true for you then you can simply save or export your work and call it a day. However, if your colors look drastically different than they originally did (as in my example above,) then you’ll need to correct them.
To correct your colors, simply select each object individually and manually adjust its shade using the Color menu at the top-right of your screen.
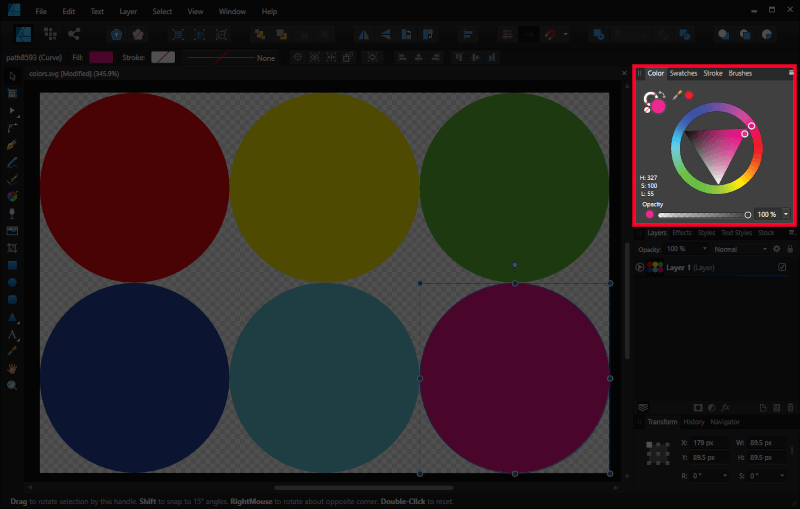
Use the Color menu to manually adjust the shade of each object in your vector design.
If you’re having trouble with this step then I would recommend watching the video tutorial at the top of the page where I demonstrate these steps in real time.
If you can’t edit the individual parts of your design then check out my tutorial on editing SVG files with Affinity Designer.
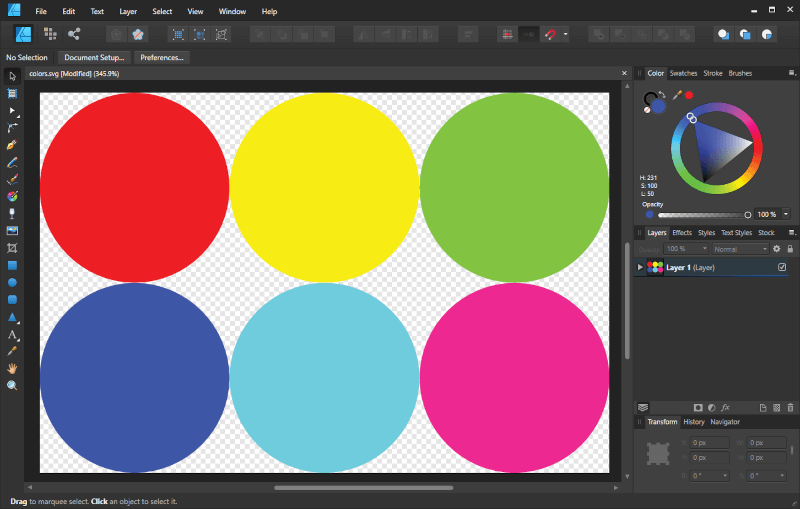
With some manual adjustments, you can make your colors look nearly as vibrant in CMYK as they did in RGB.
As you can see, I was able to correct the colors so that they look nearly identical to how they were in their RGB form. It should be noted though that you’re likely not going to get an exact match. Some shades — such as lime green — are nearly impossible to produce with CMYK colors. You’ll have to settle for its closest alternative.
Step 4: Export Your Work
The final step in our quest to convert RGB to CMYK with Affinity Designer would be to save and/or export your work.
If you’d like to save your work as a native Affinity Designer file (files ended in .afdesign or .aftemplate) then all you have to do is navigate to File > Save As or press Control + Shift + S on your keyboard.
If you’d like to export your work to any other format then you can open the Export menu by navigating to File > Export or pressing Control + Alt + Shift + S.
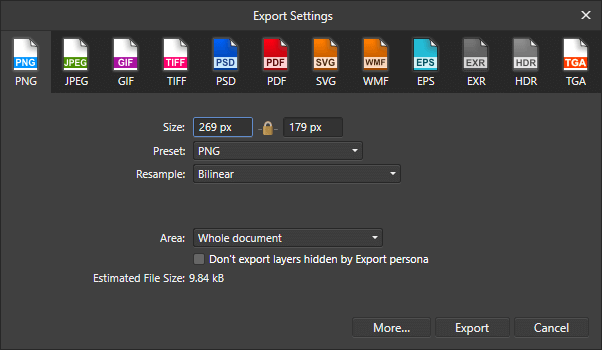
Use the Export menu (Control + Alt + Shift + S) to save your work in your desired format.
From there you can choose from a variety of file formats to save your work in.
Conclusion
Converting RGB to CMYK isn’t always a desirable approach. The best approach is to create your design in the CMYK color space, with an embedded CMYK color profile, from the start. However, if it’s too late to turn back and you need to make a conversion, then Affinity Designer is an excellent tool for doing so!
If you have any questions, or if any part of these instructions were unclear, then simply leave a comment below. As always, thanks for stopping by!
Learn To Master The SoftwareGain a complete understanding of your favorite design apps with my comprehensive collection of video courses. Each course grants access to our private community where you can ask questions and get help when needed.
|
||||||||||||||||||||||||||||||||


You might also like


8 comments
-
-
Allen Peterson
Great info! Thanks for the help in figuring out color modes in Affinity Designer.
I’m still trying to figure out how to set up color modes in Affinity Photo, ha, but that’s a whole different ballgame I bet.
FYI, in color theory RGB is the additive color system and CMYK is a subtractive color system. -
Manu Schwendener
Hi Nick
> that they’re grayed out once CMYK is selectedNo: one of them is greyed out and the other isn’t, so we either have to chose assign or convert.
-
N
Thanks for the infomative post!👍🏻 How can I apply this if I use affinity designer on my iPad?😌 I have tried the https://www.rgb2cmyk.org/ but am struggling how to edit the converted raster image, do you have a tutorial on that or can you give me some advise (I use procreate and affinity designer). Thanks again!😊
-
Dimitar
Thanks for the beneficial information Nick, but here’s my question. When you open the Document Setup Menu and change the color space from RGB to CMYK, there is an option where you can either select “convert”, which is the default option and it changes the colors to a degree as you showed us. But the other option called “assign” only embeds the new color space without making a change to the color slider’s values. Do you know how the two options work?
Thanks a lot for writing about this!
-
Nick
I’m not entirely sure what those options are for, but I do know that they’re grayed out once CMYK is selected so it shouldn’t have much bearing on this lesson.
-
Alice
WOW, Nick! This article saved me from a lot of headache!! Thank you! I am new to the POD world, and color, but not new to loving digital art. I have a question: Since I have bought thousands of pieces of beautiful watercolor painted clipart to create collage art that I will have printed on apparel and sold in my (future) ETSY store, the clipart files are already created in RGB. The POD store I am using to create scarves and clothing requires that the files/artwork be submitted in the standard RGB (Adobe RGB 1998) color scheme. I ordered a scarf for a friend to test out (before I read your article and understood this concept) and omg, it looked muddy, like in the pic you placed above. (Thank you for such a clear explanation!) I am using Affinity Designer to create the collages, and I just followed your instructions to convert the exported file of one of my collages to CYMK. Should I convert this document to RGB (Adobe RGB 1998) now? (I did not see a difference on the screen when I converted the file to CYMK, but maybe it’s not visible to the naked eye?) What do you think? I want to use this POD company because of the quality of their work, but I need colors on the screen to look close the colors in the items – and not muddy. Thanks a million in advance!!!