
How To Flatten An Image In Illustrator And Combine Multiple Layers
How To Flatten An Image In Illustrator And Combine Multiple Layers https://logosbynick.com/wp-content/uploads/2021/11/flatten-image-illustrator.png 800 470 Nick Saporito https://secure.gravatar.com/avatar/8e31bf392f0ba8850f29a1a2e833cdd020909bfd44613c7e222072c40e031c34?s=96&d=mm&r=gWorking with layers in a vector environment (such as Adobe Illustrator) can be an excellent way to organize complicated and elaborate designs so that they’re easier to work with and navigate through. What if you want to combine multiple layers though, or even flatten the image altogether? Today we’ll be going over how to flatten an image in Illustrator, whether you want to flatten the entire image or just a handful of chosen layers.
In short, you can flatten an image in Illustrator by simply opening the Layers menu, clicking the menu icon in the top-right corner of the menu and selecting “Flatten Artwork”. This will merge all of your layers into a single layer. If you just want to merge multiple layers (and not all layers) then you can select them at once and choose the “Merge Selected” option instead. Let’s go over this in more detail.
Flatten An Image In Illustrator
There’s two ways to go about flattening images in Illustrator — you can merge all layers, which will effectively flatten the entire image; or you can combine multiple layers of your choosing together. The process for each is similar but slightly different.
The following video tutorial will walk you through the entire process for flattening images, as well as combining multiple layers in Illustrator, in just 1 minute:
Continue on for the written instructions.
Table of ContentsFlatten An Image In Illustrator
Combine Multiple Layers In Illustrator |
Flatten An Image In Illustrator
In this first part of the lesson we’ll be going over how to combine all layers into a single layer. This is what will allow you to flatten an image in Illustrator.
Step 1: Open the Layers menu
The first step is the open the Layers menu, which can be accessed by navigating to:
Window > Layers
Once opened, the Layers menu should look something like this:
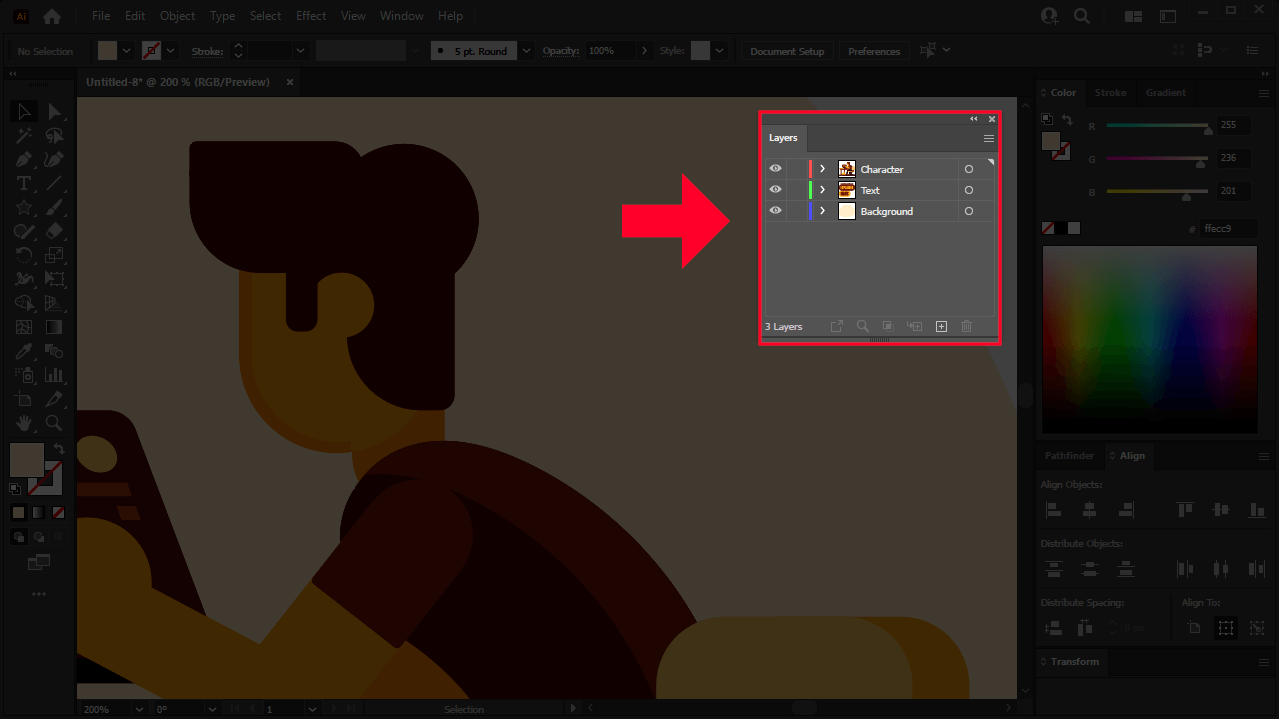
The Layers menu can either be docked to the side of your screen or floating like I have in my screenshot.
As you can see from my screenshot above, I have 3 different layers I’ll be working with for this demonstration.
Step 2: Click the menu icon and select “Flatten Artwork”
Next, click the hamburger-style menu icon in the top-right corner of the Layers menu. You should see a list of options populate:
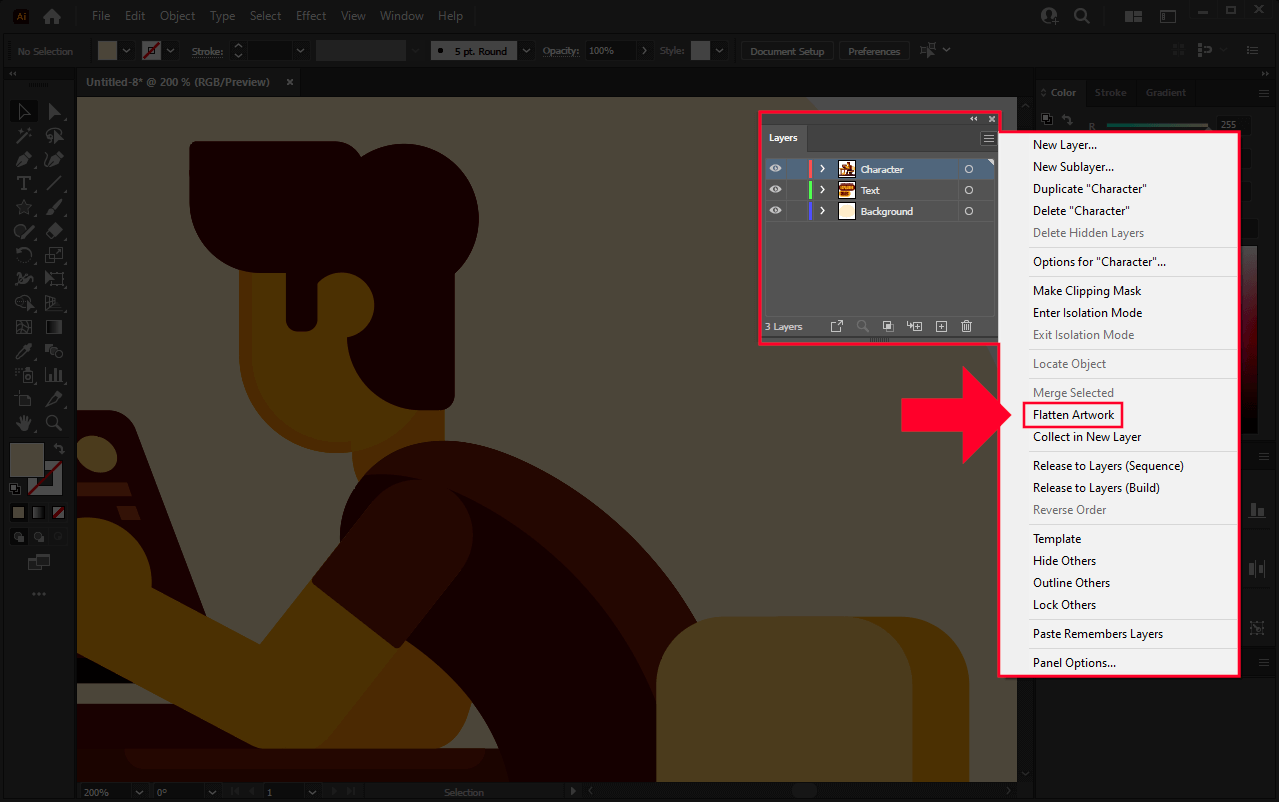
Choosing the Flatten Artwork option from the menu will combine all layers into a single layer (click to enlarge to photo.)
From the list, choose the Flatten Artwork option.
Once selected, all of the layers on your document will be merged together into a single layer, effectively flattening the image:

Once flattened, all of the contents of your artwork will be placed into a single layer.
And you’re done! Flattening an image in Illustrator is that simple.
Combine Multiple Layers In Illustrator
Let’s say you don’t want to merge all layers together and instead would prefer to combine some layers and not others. Let’s go over how that can be done.
Step 1: Open the Layers menu
As we did in the previous part of the less, open the Layers menu by navigating to:
Window > Layers
If you are working with multiple layers (and not just one,) they should all be indexed in the menu.
Step 2: Hold Shift and click on the layers you’d like to merge
In order for us to combine multiple layers in Illustrator, we’ll first have to select them in the Layers menu.
To select multiple layers, hold Shift and click on each layer that you’d like to merge together in order to select them:
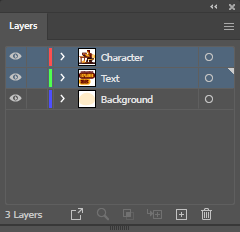
The multiple layers that are selected will be highlighted, as shown in the screenshot above.
As you can see in my example screenshot above, I have 3 total layers, but I’ll only be combining the two that are selected.
Step 3: Click the menu icon and select “Merge Selected”
Once you have your chosen layers selected you will then be able to merge them all together.
To do so, click on the hamburger-style menu in the top-right corner of the menu. A dropdown menu should populate:
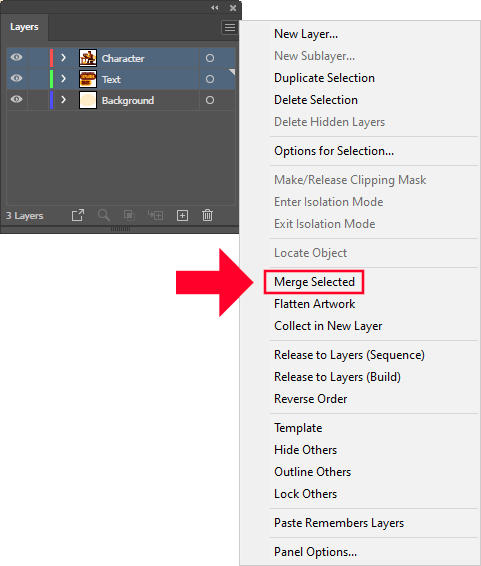
The Merge Selected option will be grayed out unless you have multiple layers selected.
From the list, choose the Merge Selected option. This will combine the selected layers together into a single layer:

The selected layers were merged while the deselected layers remain in place.
The layer they are combined into isn’t a new layer. Instead, Illustrator combined all of the selected layers into the layer at the bottom of the order.
And that is how you can combine multiple layers in Illustrator.
Conclusion
Unlike a previous lesson where we went over the intricacies of merging layers in Affinity Designer, knowing how to flatten an image in Illustrator is more of a traditional and straightforward approach, making it more familiar (and likely easier to understand) to anyone who has used other design applications in the past.
Of course, you could always combine layers together manually by simply clicking and dragging them into each other as sub-layers (or layer groups,) but this could quickly become a tedious and cumbersome process if you’re working with large designs with lots of elements. Knowing the processes outlined in this tutorial can save you lots of time and improve the efficiency of your workflow.
If you have any questions or need clarification on any of the steps taken in this lesson, simply leave a comment below.
Learn To Master The SoftwareGain a complete understanding of your favorite design apps with my comprehensive collection of video courses. Each course grants access to our private community where you can ask questions and get help when needed.
|
||||||||||||||||||||||||||||||||


