How To Erase In Inkscape | Complete Eraser Tool Tutorial
How To Erase In Inkscape | Complete Eraser Tool Tutorial https://logosbynick.com/wp-content/uploads/2021/11/erase-inkscape.png 800 470 Nick Saporito https://secure.gravatar.com/avatar/8e31bf392f0ba8850f29a1a2e833cdd020909bfd44613c7e222072c40e031c34?s=96&d=mm&r=gIn today’s tutorial we’ll be going over how to erase in Inkscape using the Eraser Tool. This tool allows you to delete portions of objects that happen to be vector paths and can serve as a more efficient process for shape building than using standard Boolean operations. Knowing how to use the Eraser Tool can save you a ton of time, depending on what you’re creating.
Before we begin the lesson though, let’s first clarify what you can and cannot erase in Inkscape.
Inkscape is a vector design application, meaning it is not intended for working with photos and raster images. Therefore, if you want to erase parts of an image in Inkscape then unfortunately this is not possible. You will have to use a photo editing app for that, such as GIMP. Knowing how to erase in Inkscape will allow you to erase vector paths and shapes only and not photos.
How To Erase In Inkscape
The following video tutorial will walking you through the ins and outs of using the Erase Tool in Inkscape:
Continue on for the written tutorial.
Table of ContentsEraser ModesEraser Tool Settings |
Eraser Modes
In Inkscape, the Erase Tool, which can be accessed by pressing Shift + E on your keyboard, breaks down into three core modes:
- Delete
- Cut
- Clip
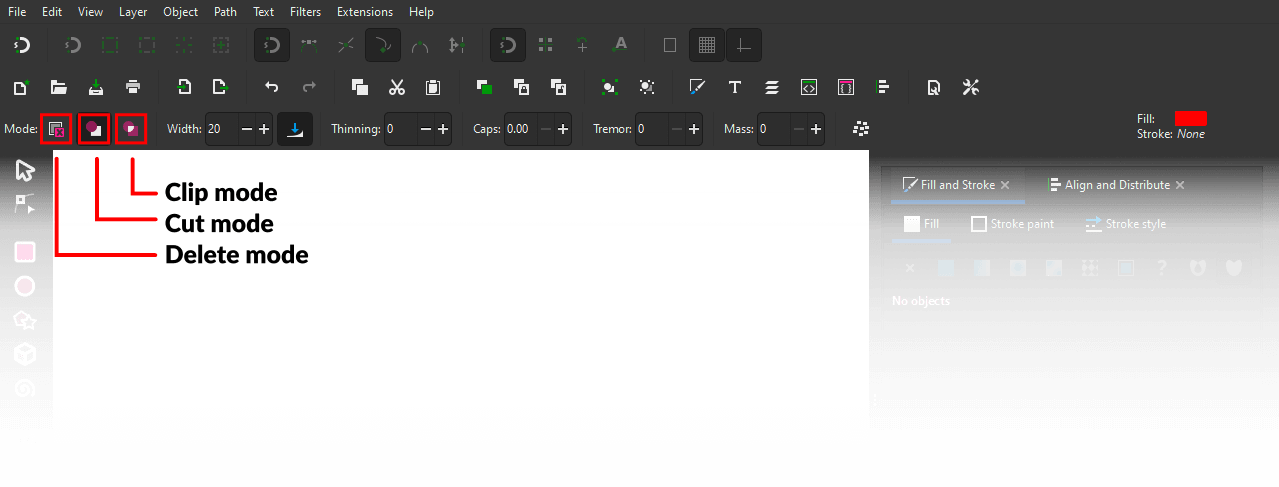
The location of the three erase modes (click to enlarge.)
Each of these modes dictate how objects are erased, so it’s important to understand what they are if you want to know how to erase in Inkscape.
In this part of the lesson we’ll be going over each of these modes, and then digging into all the tool settings later on in the tutorial.
Delete objects touched by the eraser
The first mode that dictates the behavior of the eraser tool is the delete mode.
With this mode enabled, clicking and dragging on across your canvas will generate a red line that follows your hand movement. Every object the red line touches will be deleted entirely:
Delete mode causes every object you touch to be deleted rather than erased.
So in essence, this doesn’t actually “erase” any part of an object. Instead, it’s a way of erasing entire objects from your artwork.
Cut out from shapes and paths
This next mode is what allows you to erase in the most traditional sense and is the default mode for this tool.
When enabled, clicking and dragging on your canvas will create a red stroke that follows your hand movement. Everything that the red stroke touches will be erased, but only partially:
Cut mode allows you to erase portions of objects.
This means that if you want to erase parts of a single object, this would be the ideal mode to use.
Clip from objects
This final mode is a new feature that was added to the Erase Tool for the version 1.0 release of Inkscape.
The clip mode essentially does the same thing that the cut from shapes mode does. The difference is that instead of erasing the object. this mode creates temporary negative space using a clipping mask:
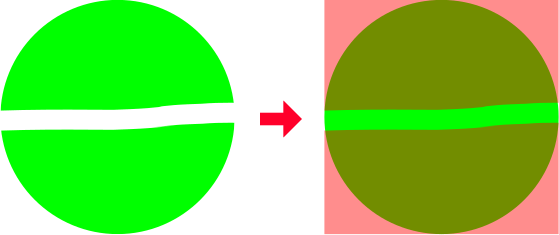
The benefit of using this mode is that it’s non-destructive, meaning you can undo any alterations made with the eraser later on if need be by selecting the object and navigating to:
Object > Clip > Release
You can test it out for yourself to see how it works. However, it should be noted though that this is an Inkscape-specific feature, meaning if you save your work and open it in another application (such as Illustrator or Affinity Designer) then the changes may not be preserved.
For this reason it is advised that you use the standard cut-from-shape mode when intending to work cross-platform.
Eraser Tool Settings
Now that we’ve gone over how to erase in Inkscape based on the Erase Tool’s various modes, let’s get into the nitty gritty details of the tool so you can unlock its full potential.
These tool settings are all located near the top of your screen, just above your canvas:
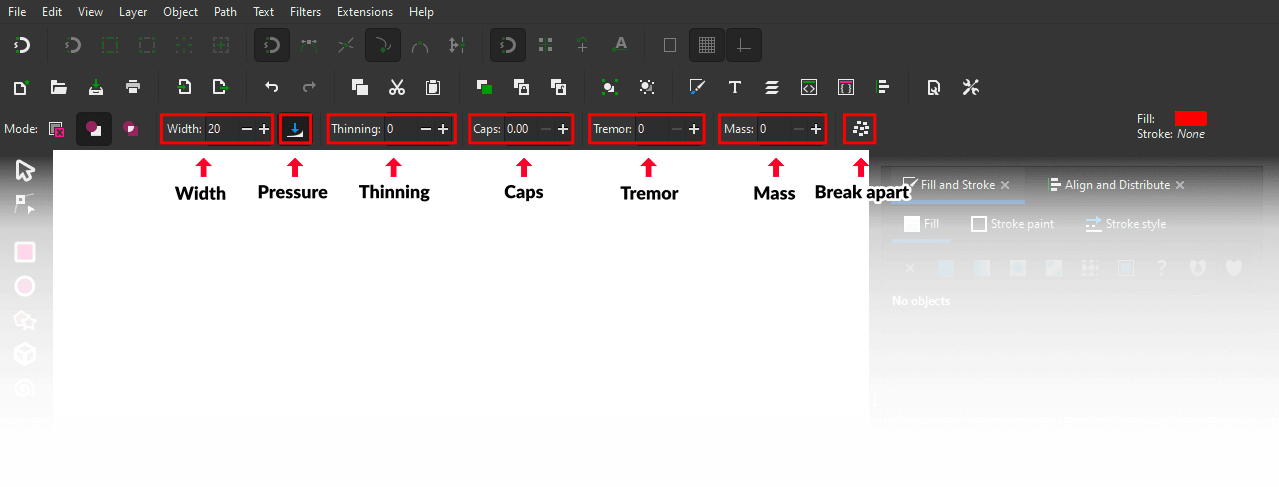
This tool options will only be visible when the Erase Tool is selected.
Let’s have a look at what all of these presets do.
Width
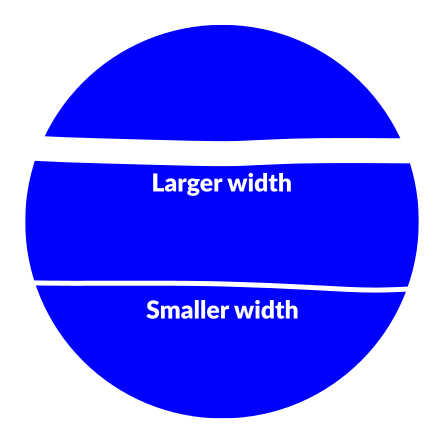
The first tool setting — Width — dictates the size of your erased brush.
Increasing the width values will create larger erase strokes, whereas decreasing it will make them smaller/thinner:
Unlike other design applications, Inkscape does not use the cursor as an indication of the size of your brush relative to your artwork, which means you’ll have to find the right size by trial and error.
Pressure Sensitivity
The Pressure Sensitivity setting is intended for use with drawing tablets. With this setting enabled your eraser will function in response to the amount of pressure you are placing on your pen/stylus.
If you are on a desktop working with a mouse then this setting is not relevant.
Thinning
The Thinning setting makes your eraser strokes responsive to the speed (or velocity) of your hand movement.
With an input value greater than 0, moving the eraser quickly will create thin strokes, whereas moving it slowly will make larger strokes:

To disable this setting you can simply reset the input box back to 0 and press Enter.
Caps
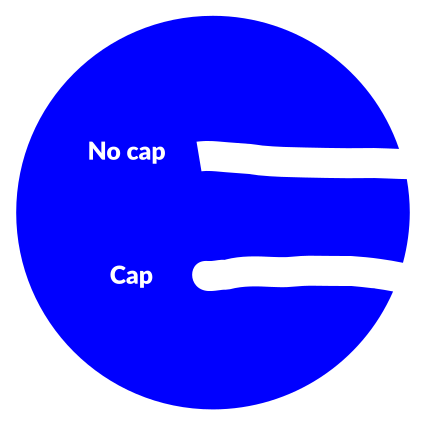
The Caps setting will apply rounded caps to the ends of your brush strokes.
With an input value great than zero, rounded caps will be applied to your eraser strokes based on the numerical input. Without it, eraser strokes will have squared caps:
Tremor
The Tremor setting is useful if you’d like to erase objects using a whimsical brush stroke that looks more like it was drawn with an ink pen; as opposed to the straight, fluid lines the tool typically generates:
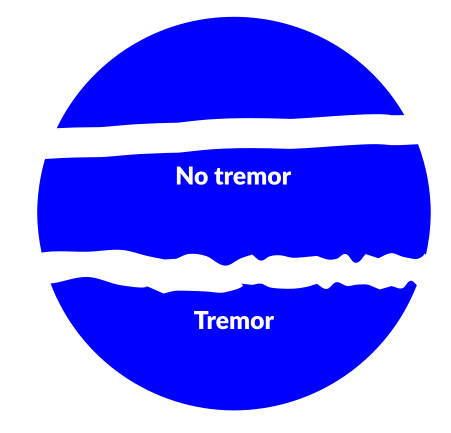
The greater the input value the more your eraser will tremor when drawing.
As is the case with the other settings, this can be disabled by simply resetting the input value back to 0.
Mass
The Mass setting will make it so your eraser strokes trail behind your cursor as if they’ve been slowed by inertia.
The benefit of using this feature is that it allows you to erase objects in Inkscape with more precision. The delayed erasing makes it easier to change course while erasing without having to undo and start over again.
Increasing the mass will make the eraser move slower and trail further behind, whereas decreasing this value will reduce it.
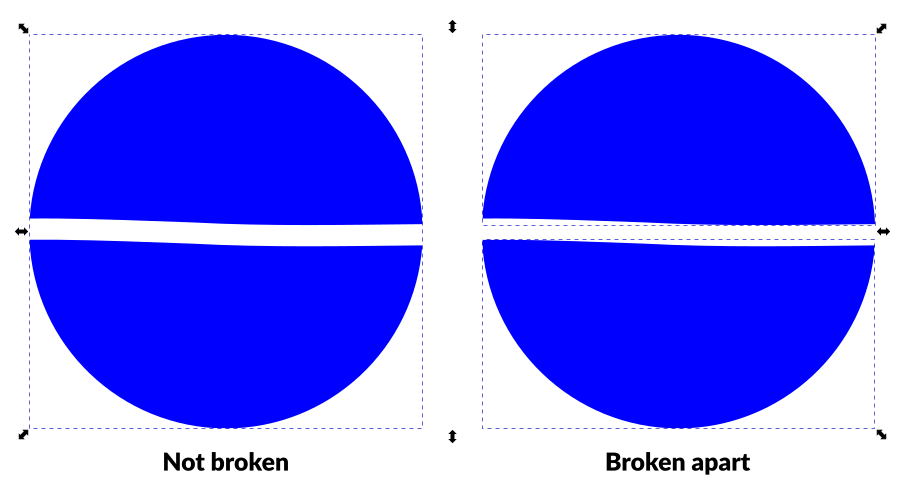
Break apart cut items
Finally, the Break Apart setting makes it so that objects you erase will be broken apart into separate objects.
By default, erasing portions of a single object in Inkscape will result in the object remaining a single object, even if you split it in half by erasing through the middle. However, with this setting enabled, all objects that you erase through will be broken up into separate objects:
It should be noted that this setting is only available in Cut mode as that is the only mode where it would be relevant.
Conclusion
Knowing how to erase in Inkscape is simply a matter of familiarizing yourself with the Erase Tool. As we’ve demonstrated in this lesson, the tool is nearly as complicated as you may have thought, and with a little bit of practice you can master its use and be well on your way to erasing objects!
If you have any questions or need clarification on any of the steps taken in this lesson, simply leave a comment below.
Learn To Master The SoftwareGain a complete understanding of your favorite design apps with my comprehensive collection of video courses. Each course grants access to our private community where you can ask questions and get help when needed.
|
||||||||||||||||||||||||||||||||


Sadly, despite your excellent article, I am still unable to erase parts of the shape I had created. It was only an oval which had been reduced to a half-oval with a line across the top.
I wanted to erase the line, and leave a parabola, but every time I erased the line, it sprang back as soon as I had taken my finger off the mouse.
Any thoughts on how I can erase part of a shape I’ve drawn?
It doesn’t seem a huge ask for a drawing programme after all.
Thanks,
David
As crazy as it may sound, the Eraser doesn’t seem to work on lines (I just tested it out myself.) It only works on closed shapes that have a fill.
As a workaround you could convert the stroke to a path and then it would work. Select it and go to: Path > Stroke to path
Edited to add: You don’t have to use the Eraser to erase part of a line. You could always draw a rectangle over the area of the line you want to erase, select both objects then go to “Path > Cut Path” and then delete the unwanted segment.