Create A Dripping Paint Text Effect with Procreate
Create A Dripping Paint Text Effect with Procreate https://logosbynick.com/wp-content/uploads/2021/05/dripping-paint-procreate.png 800 470 Nick Saporito Nick Saporito https://secure.gravatar.com/avatar/8e31bf392f0ba8850f29a1a2e833cdd020909bfd44613c7e222072c40e031c34?s=96&d=mm&r=g- Nick Saporito
- no comments
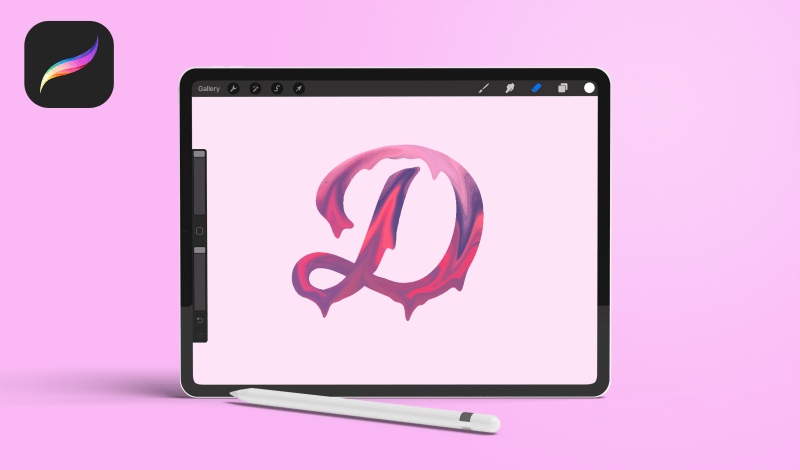
The biggest advantage you’ll enjoy when using a tablet for graphic design is having the ability to draw freehand like you would with a paintbrush. In today’s tutorial we’ll taking advantage of that benefit by creating a dripping paint text effect with Procreate for the iPad.
In order to do this, we’ll be sampling a photo of a sunset for its composition, then using the Liquify effect to turn those vibrant colors into dripping paint in the shape of a hand-drawn letter.
The finished design can be used a logo, icon, badge, and so on.
Dripping Paint Text Effect with Procreate
The following video tutorial will walk you through the process of using Procreate to create a dripping paint text effect:
This is one of those lessons where you’ll need to watch the video tutorial as these techniques are difficult to convey through text. That said, the following is simply a brief overview of the steps we’ll be taking.
Step 1: Import the sunset image
To get started, you’ll need to grab a copy of the following sunset image:
We’ll be using the composition of this image for the paint’s color.
Copy the image and paste it as a new canvas:

Step 2: Add text over the image
Next, we’re going to add some text on top of the image.
For this demonstration I will be using just a single letter — “D” for “dripping” — and I’ll be using the Milkshake font.
Although this technique will work with any font, it’s best to use a font with a hand drawn style because it really “sells” the paint effect. Please refer to my tutorial on installing fonts in Procreate if you need assistance with that.
Place the letter over the area of the sunset that includes the colors you’d like used, and bring down to opacity to roughly 25% so you can see the image through it:

Step 3: Use the Liquify effect to warp the image
Now we’re going to use the Liquify effect to warp the sunset image in the shape and direction of the letter.
This can be done by simply tapping and dragging, either with your finger or your Apple Pencil:

As depicted in the screenshot above, the settings we’ll be using for the Liquify effect are as follows:
- Type: Push
- Size: 19%
- Pressure: Max
- Distortion: None
- Momentum: None
At this point the dripping paint text effect is starting to come to life!
Step 4: Delete the portion of the image outside of the text
In this next step we’ll be creating a selection around the text and then erasing it with the Eraser:

You will be left with a white background. Grab the Select tool and move the letter to the center of the canvas.
Step 5: Add drips to the letter
The final step to creating this text effect with Procreate is to use the Liquify effect once again to add some drips to the letters:

And then you can change the color of the background if you’d like, to something more complementary:

And we’re done! That is how you can create a dripping paint text effect with Procreate!
Conclusion
As you could imagine, the Liquify effect can be used in all sorts of creative ways. Whether it be for simulating dripping paint from an image’s composition or creating unique patterns, the possibilities are endless once you let your imagination run wild.
If you have any questions, or if any part of this lesson was unclear, simply leave a comment below.
Learn To Master The SoftwareGain a complete understanding of your favorite design apps with my comprehensive collection of video courses. Each course grants access to our private community where you can ask questions and get help when needed.
|
||||||||||||||||||||||||||||||||
Nick Saporito
Hi, I'm Nick— a Philadelphia-based graphic designer with over 10 years of experience. Each year millions of users learn how to use design software to express their creativity using my tutorials here and on YouTube.
All stories by: Nick Saporito


