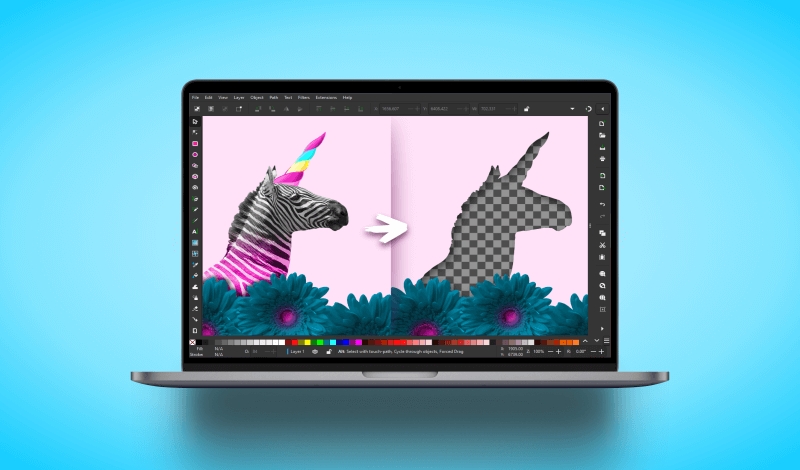
How To Delete Part Of An Image In Inkscape
How To Delete Part Of An Image In Inkscape https://logosbynick.com/wp-content/uploads/2022/10/delete-part-of-image-inkscape.png 800 470 Nick Saporito https://secure.gravatar.com/avatar/8e31bf392f0ba8850f29a1a2e833cdd020909bfd44613c7e222072c40e031c34?s=96&d=mm&r=gIn past tutorials we’ve gone over various ways to use Inkscape for removing backgrounds from images and isolating subjects from the rest of the image. In this tutorial, however, we’ll be going over how to delete part of an image in Inkscape. This will be accomplished by creating what’s called an inverse clipping mask.
In short, we’ll be using the Bezier Pen to trace a selection around the area of the image we’d like to delete, and then creating an inverse clipping mask where only the selection will be removed from the image.
That said, this approach requires a workaround. The inverse clip feature that is built into Inkscape only works on vector paths, so we’ll need to create it manually in order to produce the same effect on a pixel-based image. Let’s dig in.
Delete Part Of An In Inkscape
The following video tutorial will walk you through the entire process of creating an inverse clipping path manually so you can remove areas of images using Inkscape:
Continue on for the written tutorial.
Table of ContentsDelete Part Of An Image
How To Restore The Deleted Area |
Delete Part Of An Image
In this first part of the lesson we will go over how to delete part of an image in Inkscape, then we’ll go over how to undo the changes in case you’d like to revert back to the starting point.
Step 1: Use the Bezier Pen to draw a path over the area of the image you’d like to delete
The first step is to create a vector path to place over the area of the image you’d like to delete. For this we will use the Bezier Pen (keyboard shortcut: B) to manually trace a shape over the area in question.
For this demonstration we will be removing the zebra from the following example image:
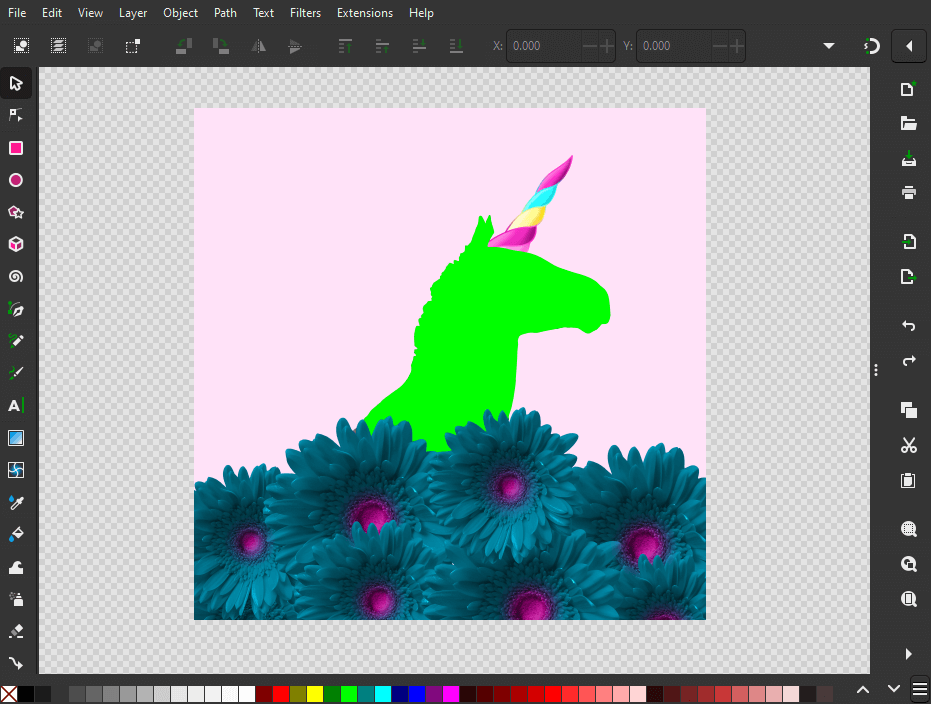
Generate a vector path in the shape of the area you’d like to delete.
It should be noted that if the area you’d like to delete from your image is more of a simple shape then you do not need to manually trace it with the Bezier Pen. You could also use simple shapes, such as circles, squares and polygons. The idea is that we have a vector path generated over the area of the image that needs deleting.
Step 2: Create a rectangle in the size of your image and position it beneath the drawn path
As mentioned earlier, we’re going to have to create an inverse clipping mask in order to delete part of an image in Inkscape. Standard clipping masks — such as that used in a previous lesson where we went over how to cut out a shape from an image — will result in the opposite of what we’re trying to accomplish in this lesson.
Inkscape introduced the inverse clip effect in it’s 1.0 release in the spring of 2020. However, this feature only works with vector objects, so we’ll have to execute this manually when working with pixel-based images.
To do this, create a rectangle that is the same size as your image and align it with your image vertically and horizontally. Then, position beneath the vector path that you generated in this previous step:
This workflow requires that we place a rectangle over the image that is the same size.
Tip: the easiest way to make your rectangle the same size as the image is to copy the image, then select the rectangle and navigate to:
Edit > Paste Size > Paste Size
To position the rectangle beneath the drawn path, use the Page Down key on your keyboard. You can also use the Align & Distribute menu (keyboard shortcut: Control + Shift + A) to align it with the image.
Refer to the video tutorial above if you do not know how to do any of this.
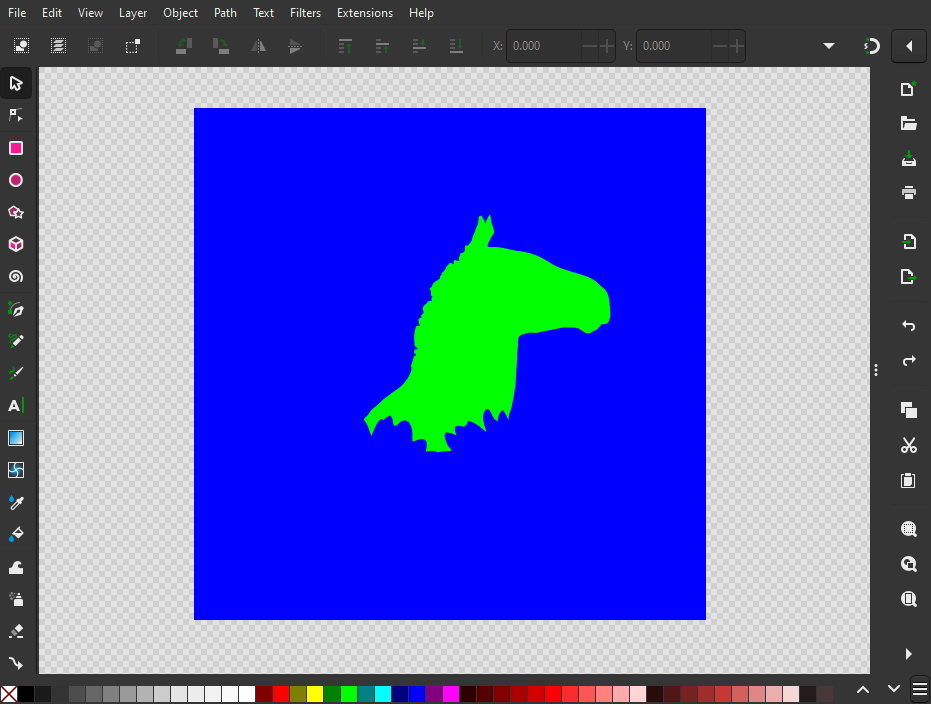
Step 3: Subtract the path from the rectangle use path operations
Now we need to create an area of negative space within the rectangle that is represented by the drawn path from step 1– or the area of the image you’d like deleted.
To do this, simply select the path and the rectangle at the same time (click both while holding Shift to select multiple objects) and navigate to:
Path > Difference
The result should look something like the screenshot below where the only part of the image that is visible is the area you’d like to delete:
If done correctly, the area of your image that is targeted for deletion should be the only visible part at this step.
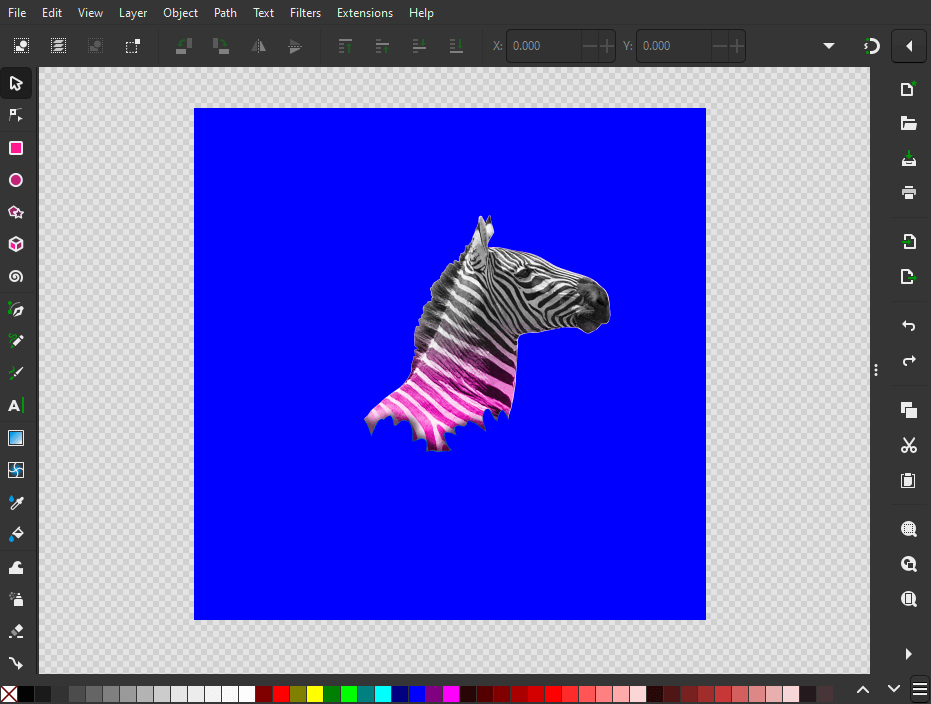
Step 4: Create a clipping mask using the path and the image
This final step is where the magic happens. To delete part of an image in Inkscape, all you have to do now is select both the rectangle and the image itself and create a clipping mask out of it by navigating to:
Object > Clip > Set
If done correctly, your image should render, but with the specified area removed:

How the finalized image looks with the target area deleted. You can inspect this image yourself to confirm that it is indeed deleted to transparency.
You can verify that the area has indeed been removed by clicking and dragging the image elsewhere to see if the canvas (and all of its contents) appear within the negative space of the image.
To finalize the changes, you’ll want to export your work as a PNG image (JPEG doesn’t support transparency, so the deleted area will have a white fill by default.) The PNG format provides you with a usable copy that has a transparent background.
How To Restore The Deleted Area
Let’s say you’ve changed your mind and no longer want to delete part of your image. Fortunately, the feature we used to accomplish this is completely non-destructive, meaning it can be undo at any point in time.
Release the clipping mask
To restore the deleted area from your image, all you have to do is release the clipping mask by select the image and navigating to:
Object > Clip > Release
If done correctly, this will take you back to where you were after step 3. All you have to do is remove the rectangle you created.
Conclusion
Knowing how to delete part of an image in Inkscape is an exercise in creative clipping mask usage. Hopefully in the future the Inkscape team will update the inverse clip setting to work on raster imagery as well. But until then we will just have to settle for the manual workaround.
If you have any questions or need clarification on any of the steps taken in this lesson then simply leave a comment below.
Learn To Master The SoftwareGain a complete understanding of your favorite design apps with my comprehensive collection of video courses. Each course grants access to our private community where you can ask questions and get help when needed.
|
||||||||||||||||||||||||||||||||


omg why isn’t this function built into the software to avoid this multi-step tedium required to perform a simple task
It would be really helpful if there were a feature for that. Inkscape is a vector app though so I don’t think they focus on this sort of thing.