How To Create Outlines In Illustrator | Outline Text And Objects
How To Create Outlines In Illustrator | Outline Text And Objects https://logosbynick.com/wp-content/uploads/2022/03/create-outlines-illustrator.png 800 470 Nick Saporito https://secure.gravatar.com/avatar/8e31bf392f0ba8850f29a1a2e833cdd020909bfd44613c7e222072c40e031c34?s=96&d=mm&r=gOne of the most common design tasks you may look to perform is applying an outline to an object — whether it be text, a shape, or any other design element. If you’re looking to do this in Illustrator then you’re in luck! In this tutorial we’ll be going over how you can create outlines in Illustrator by applying a stroke to subject.
In short, the way to create outlines in Illustrator is by applying a stroke to the subject and then changing the settings of the stroke so that it’s positioned beneath the subject and not above it (as is the case by default.)
Using this method you will be able to change the size of the outline, its color, and whether it has rounded or square corners. Let’s dig in!
Create Outline In Illustrator
The following video tutorial will walk you through the entire process, from start to finish:
Continue on for the written lesson.
Step 1: Ensure that the object you’re applying the outline to is a vector path
In order to create outlines in Illustrator we must first ensure that the subject we’re applying them to is a true vector path and not a bitmap, image, or text object.
The reality is that Illustrator is a vector design tool, therefore its tools and features are meant for working with vector objects. If you’re looking to apply outlines to PNG images and other rasterized elements then check another tutorial I did on applying outlines with Photoshop.
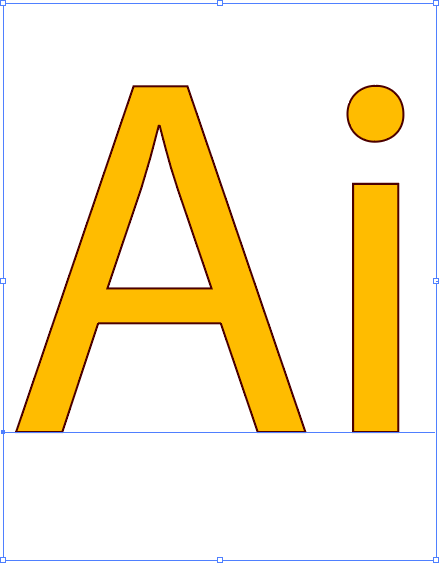
For this demonstration I will be applying an outline to the following text object:
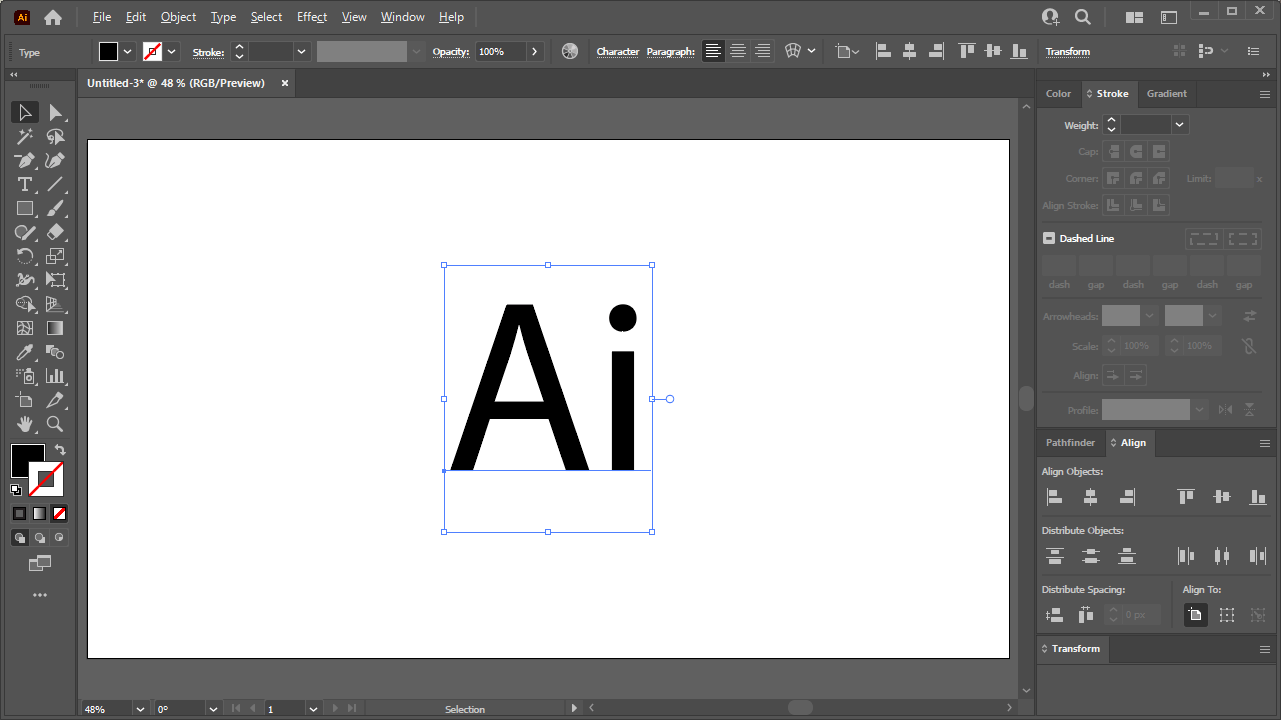
In this tutorial we’ll be applying an outline to text.
In order to apply an outline using the method in this lesson though we’ll need to convert this text object to a vector path. To do so, select it and navigate to:
Type > Create Outlines
Alternatively, you can use the keyboard shortcut, which is Shift + Control + O.
Once applied, the text will no longer be an editable text object and will now simply be a vector path that is shaped like text.
Step 2: Use the Fill and Stroke menu to apply an outline to the object in the desired color
In Adobe Illustrator, outlines are known as “strokes”. So in order to apply an outline to some text in Illustrator, we’ll need to apply a stroke.
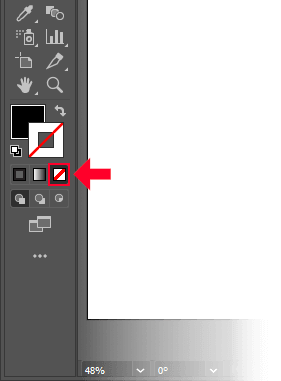
Locate the Fill and Stroke menu and double-click the box to the bottom-right of the order:
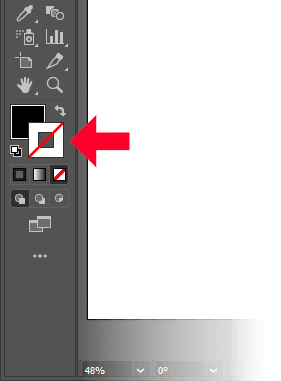
The stroke box has a red slash going through it by default.
This box represents an item’s stroke. Right now there is no stroke applied to the object, so the box has a red slash going through it.
Once you double-click the box you will be prompted with a color picker menu:
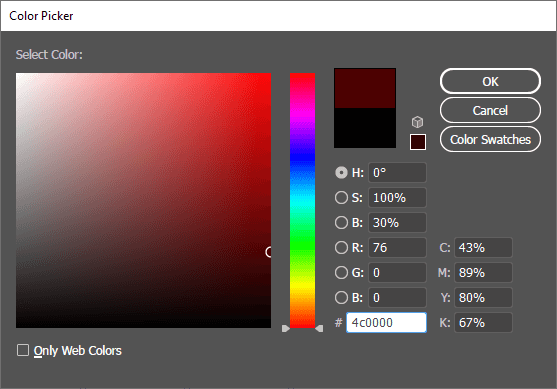
The color picker menu allows you to choose a color for your outline.
Use this menu to choose a color for your outline. As indicated in this menu, you can choose colors by:
- HSB values
- RGB values
- CMYK values
- HEX code
- Manual selections
Once you’ve chosen a color, click OK to apply the changes. Your subject should now have a small outline going around it in the chosen color:
A thin outline in the chosen color is applied to the subject.
Step 3: Navigate to the Stroke menu and use the Weight input to dictate the size of the outline
Now it’s time to determine the size of the outline (or stroke.) To do this we will need to access the Stroke menu.
If you do not currently have the Stroke menu active then you can access it by navigating to:
Window > Stroke
The menu should look something like this:
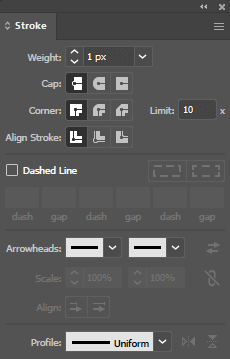
Use the Weight input value to change the thickness of the outline. Increasing this value will make the outline larger, whereas decreasing it will make it smaller and remove it completely if lowered to 0.
Step 4: Within the Stroke menu, change the Align Stroke setting to place the outline behind the subject
Depending on the subject you’re applying it to, you may notice that your outline is layered on top of your subject when increasing its size.
This can be problematic because it makes the subject (or in my case the text) less legible:
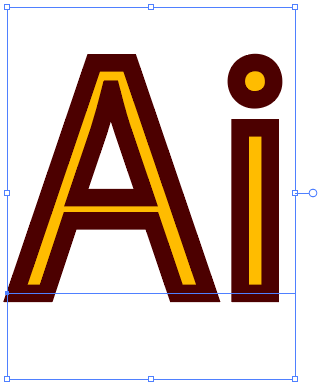
By default, the outline is layered above the subject.
To correct this, we must change a setting in the Stroke menu.
Navigate down to where says Align Stroke. You will see three options, each represented as little boxes:
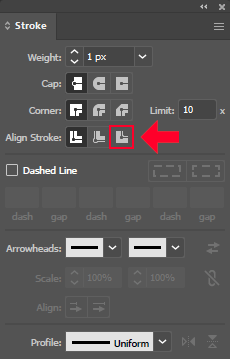
Change the Align Stroke setting to place the outline beneath the subject.
If you hover your cursor over each box, a label will populate indicating what the setting represents. Seeing as how we’re using strokes to create outlines in Illustrator, the desired setting for this context is the box all the way to the right labeled as Align Stroke To Outside.
Choosing that setting will place the outline behind the subject rather than in front of it:

Step 5: Apply squared, rounded or beveled corners to your outline
The final step is to determine what kind of corners you’d like your outline to have.
Within the Stroke menu locate the section labeled as Corners. You should see three options:
- Miter Join: this will make it so that your outlines have squared corners and is the default setting
- Round Join: will make the corners of your outline rounded when selected
- Bevel Join: will make the corners of your outline “beveled”, or appearing as if they’re cut off
You can hover your cursor over each of these icons to populate a label indicating their use.
Here’s a depiction of each:

How each corner type looks once applied to your stroke.
How To Remove The Outline
Now that we’ve gone over how to create outlines in Illustrator, let’s have a look at how you can remove the outline if desired.
There’s actually two ways of doing this — using the Fill and Stroke dialog, or by using the Stroke menu.
To remove your outline using the Fill and Stroke dialog, simply click on the stroke box to activate it, then click the small box beneath it that has a red slash going through it:
The stroke can be removed by clicking the small box with a red slash going through it.
This will remove the stroke from the selected object, effectively removing the outline.
To remove your outline using the Stroke menu, simply access the Weight input value and reduce it all the way down to 0. This too will remove your outline.
Conclusion
Knowing how to create outlines in Illustrator is a lesson in working with strokes. And the great thing about using strokes is that they can be used for a lot more than just creating outlines. They can be used to make all kind of borders, patterns and dotted lines.
What’s more, when using strokes to create outlines you are not just limited to solid color fills. You can also fill your outlines will gradients, textures and other design elements once you’ve become more familiar with how strokes work.
If you have any questions or need clarification on any of the steps taken in this lesson just leave a comment below.
Learn To Master The SoftwareGain a complete understanding of your favorite design apps with my comprehensive collection of video courses. Each course grants access to our private community where you can ask questions and get help when needed.
|
||||||||||||||||||||||||||||||||


Awesome