5 Common Mistakes New GIMP Users Make and How To Avoid Them
5 Common Mistakes New GIMP Users Make and How To Avoid Them https://logosbynick.com/wp-content/uploads/2020/10/common-gimp-mistakes.png 800 470 Nick Saporito https://secure.gravatar.com/avatar/8e31bf392f0ba8850f29a1a2e833cdd020909bfd44613c7e222072c40e031c34?s=96&d=mm&r=gWhenever you’re using a piece of software for the first time, there’s always going to be somewhat of a learning curve involved, but you can speed the learning process up just by learning from the mistakes of others and making an effort to avoid making them yourself. In this post I’ll be going over 5 of the most common mistakes that new GIMP users make, and how you can avoid making them yourself. Getting these misunderstandings out of the way early will hopefully make your learning experience a little easier and more enjoyable.
The following is a written transcript for a video I made on this subject. If you’d rather watch a video than read an article, I’d recommend checking out the video version at the top of the page!
Common GIMP Mistakes
Below you will find 5 of the most common mistakes new GIMP users make. These were all chosen based on some of the most frequently asked questions and help requests I get as it regards to GIMP.
1. Editing The Wrong Layer
The most common mistake that you’ll probably make as a new GIMP user is editing the wrong layer. This is a mistake that I even make myself sometimes when I’m not paying attention to what I’m doing.
Documents that you create in GIMP exist on a series of layers. Even if you’re just editing a single image, it’s going to exist on its own single layer that will be selected by default.
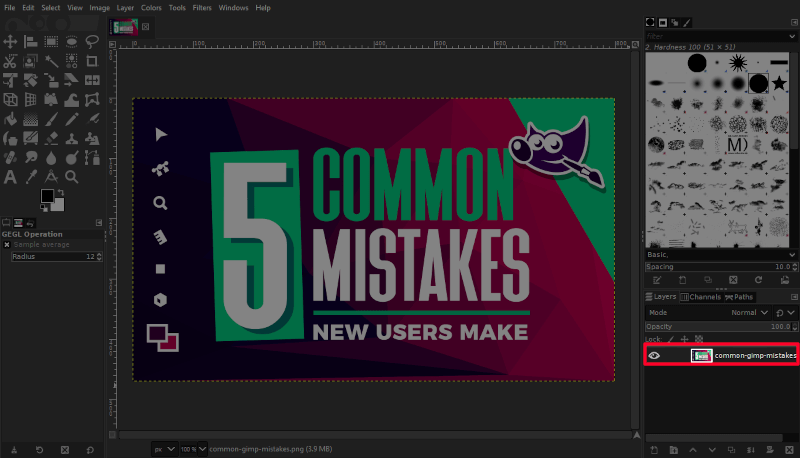
GIMP opens documents with images on their own layers.
If you’re doing any kind of extensive editing, or maybe even just adding text to an image, you’re probably going to end up with multiple layers.
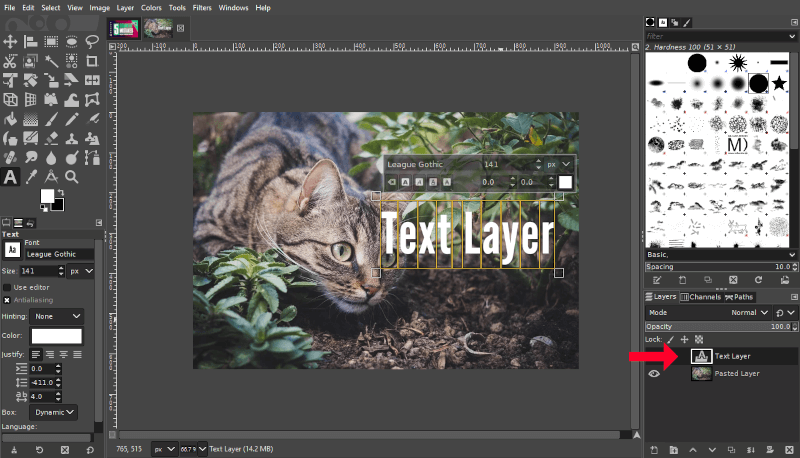
Notice how added text is delegated to its own layer.
This can create confusion for a new user because you can only have one layer selected at a time, and whatever tool or effect you’re trying to apply will only be applied to the layer that you have selected (in most cases.)
This means that if you’re trying to erase portions of your image, for example, and it’s not erasing, the problem could be that you have the wrong layer selected.
In order to erase your image, you’ll have to select the layer that the image is located on first. And this is true for most of the other tools and effects in GIMP, so make sure to always be mindful of your layers when you’re working.
2. Forgetting To Add An Alpha Channel
A few years ago I wrote an article about why the Eraser Tool in GIMP might not be erasing to transparency, and to this day it’s one of the most popular articles I’ve written. This just goes to show that this is a really common problem that GIMP users run into, and the biggest reason why you may not be able to erase to transparency in GIMP is because you don’t have an alpha channel added.
Every document that you open in GIMP consists of 3 color channels. You can view them by clicking on the Channels tab located next to the Layers tab.
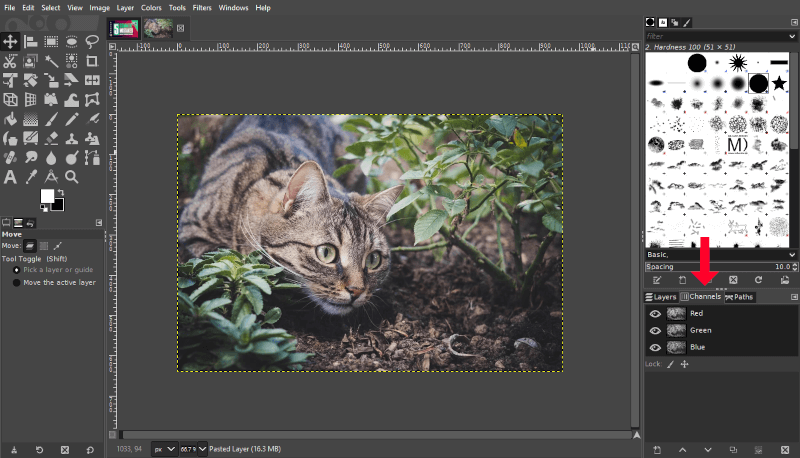
Color channels are located next to the Layers tab.
Channels control the color data of an image. You can learn more about how this works in my tutorial about color channels in GIMP.
Depending on the type image you’re editing, you may have a 4th channel as well. This is known as the alpha channel. This channel represents transparency.
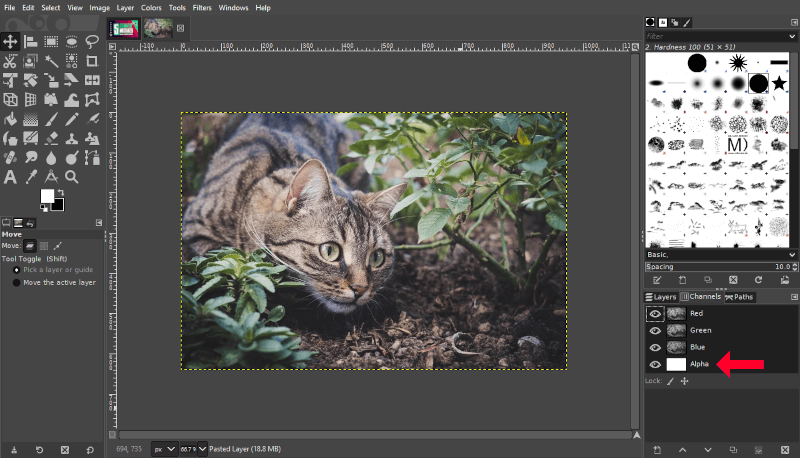
Some images have an alpha channel, which represents transparency.
If you’ve opened a JPEG image with GIMP then chances are you won’t have an alpha channel because the JPEG format doesn’t support transparency like the PNG or GIF formats do. This means that when you try erasing your image, it’s not going to erase to transparency. It’s going to use white as the default background instead.
To add an alpha channel to your image, just right-click the layer you’re working on and select Add Alpha Channel from the menu. Once added, you’ll able to erase your image to transparency.
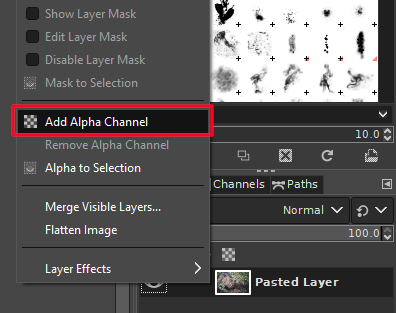
You can add an alpha channel in GIMP by right-clicking the layer and selecting “Add alpha channel”.
Once added, you’ll be able to erase your image to transparency.
3. Transforming Images More Than Once
Another common mistake that new GIMP users make is trying to transform an image more than once. And when I say “transform”, I’m referring to things like scaling, rotating, sheering, and altering the perspective.
GIMP is a raster image editor, meaning you’ll be editing digital images that are made of pixels. And whenever you transform a raster image, there’s always going to be some kind of unavoidable artifacting that results.
Raster images are made of individual colored boxes known as pixels
A good example of this would be when you rotate an image. If you rotate an image in GIMP, you may notice that there’s a slight reduction in quality and resolution once applied. And rotating the image again will result in even more quality loss.
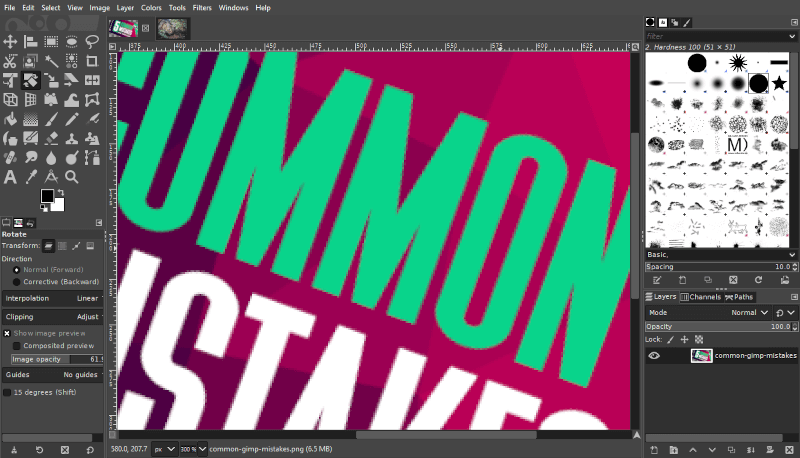
Making multiple transformations will usually result in quality loss of the image.
This means that if you must transform an image, it’s best to only do so once. If you rotate your image and realize you didn’t rotate it far enough, don’t rotate it even more! You’re better off undoing the previous rotation (control + z) and trying again.
4. Forgetting To Clear Selections
Another mistake you may run into as a new user is forgetting about a selection that you may have created earlier and is still active.
Selections allow you to manually define a specific area of your image to manipulate further. Any alteration made to an active selection will be localized to that specific area only, and the rest of the image will be unaffected.

A good example of this would be blurring. With no selections enabled on your document, you can blur your entire image. But if you have a selection enabled, the blur will only be applied to the selection area.
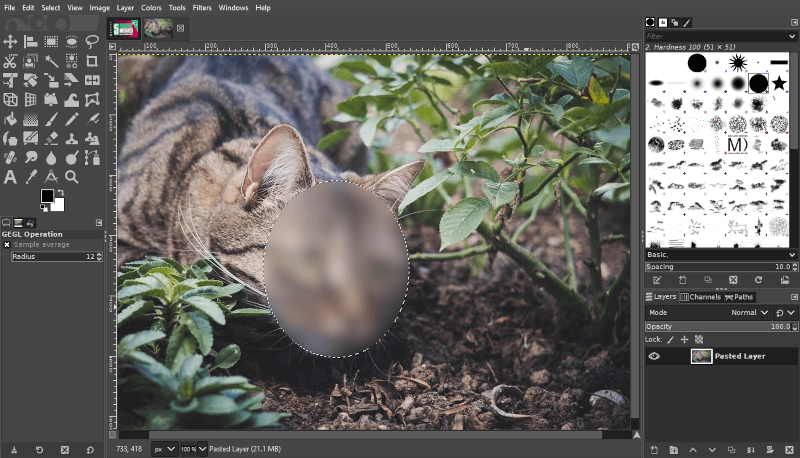
Selections allow you to manipulate areas of the image that you define.
This can be problematic if you’re trying draw, sketch, paint, or do anything else, and you’ve forgotten that you have a selection enabled. Or maybe your selection isn’t visible because it’s disguised by your image’s composition. In this instance, your tools may not be working the way you expect, and it could be frustrating.
In order to continue on with editing your image, you’ll have to clear your selection first by navigating to Select > None.
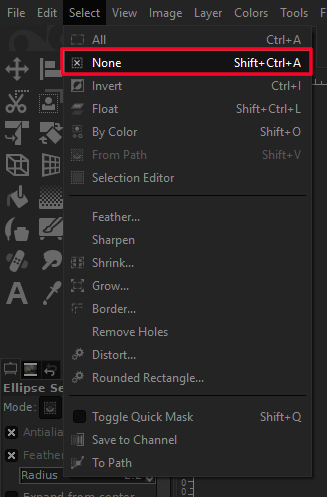
You can clear all selections by navigating to Select > None.
Once cleared, you can continue on with what you were doing.
5. Neglecting Tools Options
The final most common mistake new GIMP users make is neglecting to acknowledge the tool options menu. This is a problem because a lot of times you’ll run into an issue where a tool isn’t working the way it used to, and the reason why is because some kind of setting has been changed.
A good example of this would be the Eraser Tool. If you have the opacity setting turned down, it’ll only erase your image partially.
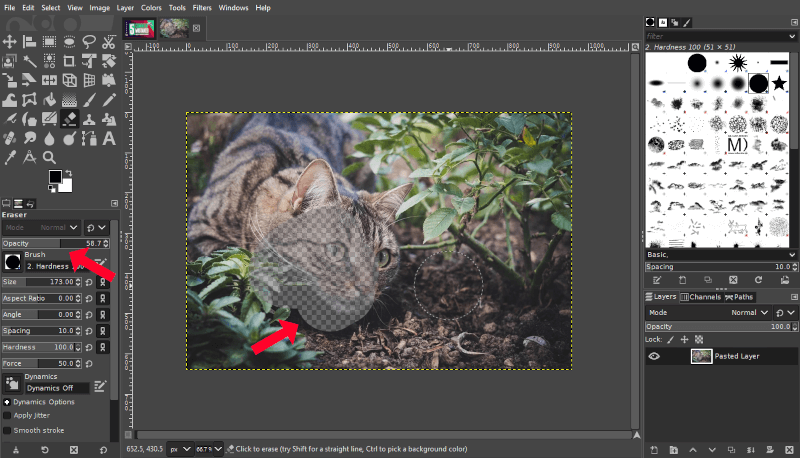
Notice how the Eraser is only erasing to partial transparency. This is because the Opacity tool setting has been reduced.
Or maybe there’s too much spacing between your brush strokes because the Spacing setting is turned up a little higher than it should be.
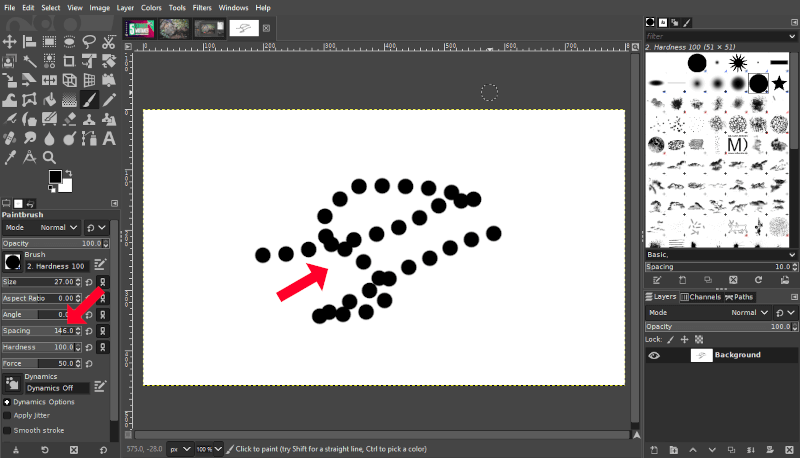
In this example, the brush spacing has been increased, resulting in brush strokes that are spaced apart rather than smooth strokes.
This is why it’s important to familiarize yourself with the tool options menu so that when something goes wrong, you’ll have a good starting point for your troubleshooting.
Conclusion
That should do it for this post about some of the more common mistakes GIMP users make. This doesn’t cover everything — you’ll still have to climb the learning curve if you’re a new user — but knowing some of the more common mistakes can help make for smoother sailing.
If you have any questions leave a comment below. As always, thanks for stopping by!
Learn To Master The SoftwareGain a complete understanding of your favorite design apps with my comprehensive collection of video courses. Each course grants access to our private community where you can ask questions and get help when needed.
|
||||||||||||||||||||||||||||||||


I love using Gimp and these have been very helpful! I have been producing some designs on paper etc which I have scanned into the computer then into Gimp but when trying to enlarge them they can go a bit blurry. I wonder if there’s any advice to keep them sharp once made bigger?
Thank you!
Hi Andy, if it’s a pixel-based image then it’s always going to become blurry if you enlarge it. Only vector graphics are scalable like that.
Thank you! It’s great to be able to use GIMP to solve problems and create more exciting images that I’ve imagined but didn’t know how to make it happen. And it’s hair ripping when the art doesn’t come together because of a problem, so thanks for explaining so very well.
Glad I could help