The Easiest Way To Make A Clipping Mask In Illustrator
The Easiest Way To Make A Clipping Mask In Illustrator https://logosbynick.com/wp-content/uploads/2022/02/illustrator-clipping-mask.png 800 470 Nick Saporito https://secure.gravatar.com/avatar/8e31bf392f0ba8850f29a1a2e833cdd020909bfd44613c7e222072c40e031c34?s=96&d=mm&r=gClipping masks are one of the most useful tools you can equip yourself with as a vector artist. They allow you to fill objects with other objects, including photos, vectors, textures, and more. And when it comes to making a clipping mask in Illustrator, chances are you’ve been doing it wrong this whole time. There is an easier way then navigating through the menu system, and in this tutorial we’ll be going over clipping masks in depth.
In short, the easiest way to make a clipping mask in Illustrator is to select both objects that you’d like to use for the clip and the mask, then right-click them and select “Make Clipping Mask”.
This all assumes that you already know what clipping masks are and why they’re useful though. Let’s address that.
What Is A Clipping Mask?
Let’s first go over what exactly clipping masks are and why they’re so useful, then we’ll delve into how to work with them in Adobe Illustrator.
Basically, a clipping mask is a way of taking one object and using it as a fill property for another object:
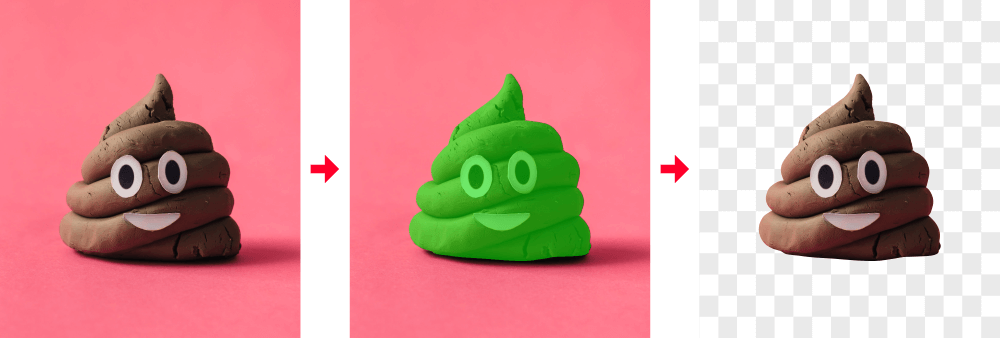
The object furthest to the left will serve as the mask. The green object (middle) will be the clip. Furthest to the right is the resulting clipping mask.
Think of it sort of like a cookie cutter. The mask is the dough, and the clip is the cutter that you use to cut the dough and make it take its shape.
Clipping masks work the same way. In the sample demonstration above, I used the Pen Tool to manually draw a path that traces over the subject of the photo. This path acts as the clip, and the photo is the mask. Once you make the two of them into a clipping mask, the result is that the path is fill with the photo.
Using this approach you can effectively remove backgrounds from images in Illustrator, among various other tasks.
Why Clipping Masks Are Useful
The most powerful aspect of working with clipping masks in Illustrator is that they allow you to work with rasterized imagery (images made of pixels rather than vectors.)
Here are a few use cases where clipping masks can be beneficial:
- When trying to extract a subject from its background
- Making cool text designs that include photos
- They’re handy when designing things like headers and thumbnails and you need to keep the contents confined within a defined space
- Any kind of design work where you’ll be including both vector and raster elements
What’s more, clipping masks in Illustrator are non-destructive and completely reversible! This means that at any moment you can release the clipping mask and both subjects will be returned to their previous state (for the most part, anyway. More on that later.)
Make A Clipping Mask In Illustrator
The following video tutorial will walk you through the entire process:
This video is an excerpt from my Illustrator course where I go over all of the tools and features in Illustrator and explain how they work. Check it out if you’d like to see more!
Continue on for the written tutorial.
Table of Contents |
How To Make A Clipping Mask
Let’s go over two different ways in which you can make a clipping mask in Illustrator.
First, locate two objects that you’d like to use as the clip and the mask. Make sure that the clip is positioned on top of the mask. This is important as the way clipping masks work in Illustrator is that the object on top is used as the clip, and the object beneath it is used as the mask.
For this demonstration I will be using the following two subjects as an example:
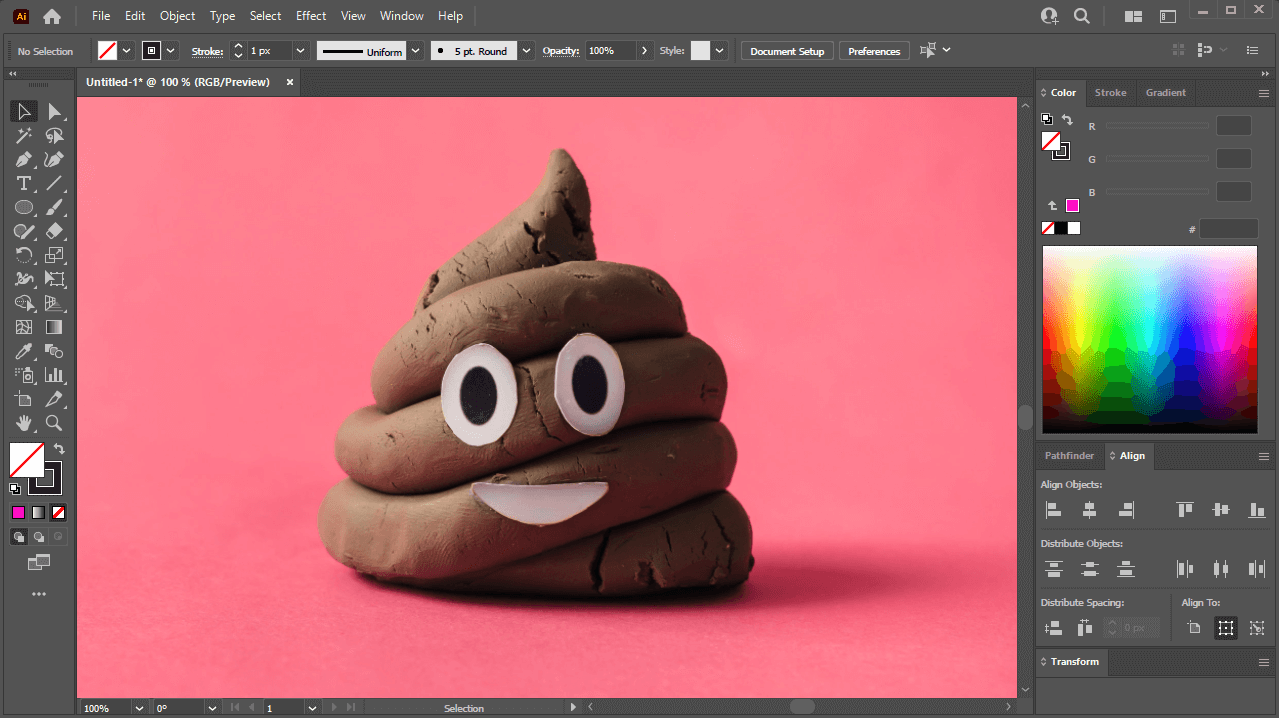
A clipping mask will be made from the subject in the image above.
Clips and masks can consist of literally anything you want, including:
- A single shape or path
- A group of shapes or paths
- A compound path
- A rasterized image
- A text object
- And more
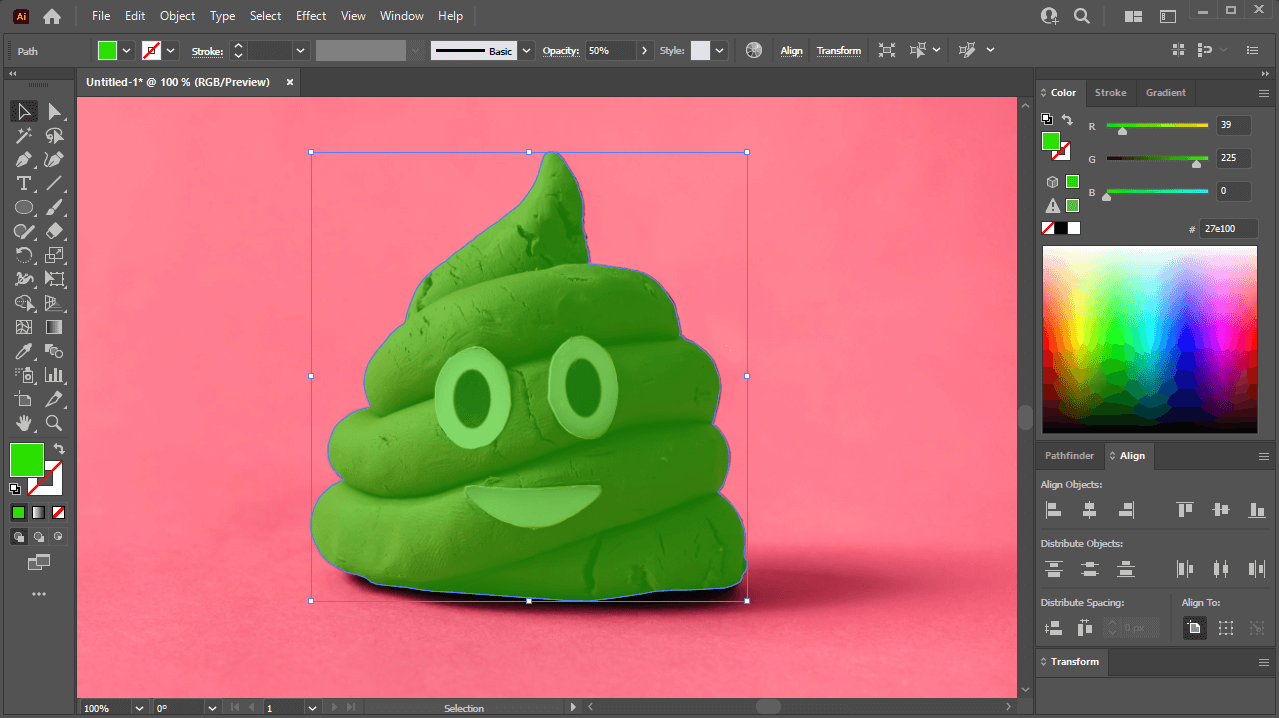
The green object in the image above was drawn with the Pen Tool and will be used as the clip.
To make the two objects into a clipping mask, simply select both of them by either clicking on them with the Selection Tool while holding Shift, or by clicking and dragging a selection around them.
With both objects selected, there are three ways in which you can make your clipping mask. The easy way, the easier, and the easiest way:
- Method 1: Use the menu system to navigate to:
Object > Clipping Mask > Make - Method 2: Right-click the objects and select Make Clipping Mask
- Method 3: Press Control + 7 on your keyboard
If done correctly, a clipping mask should be made from the two objects:
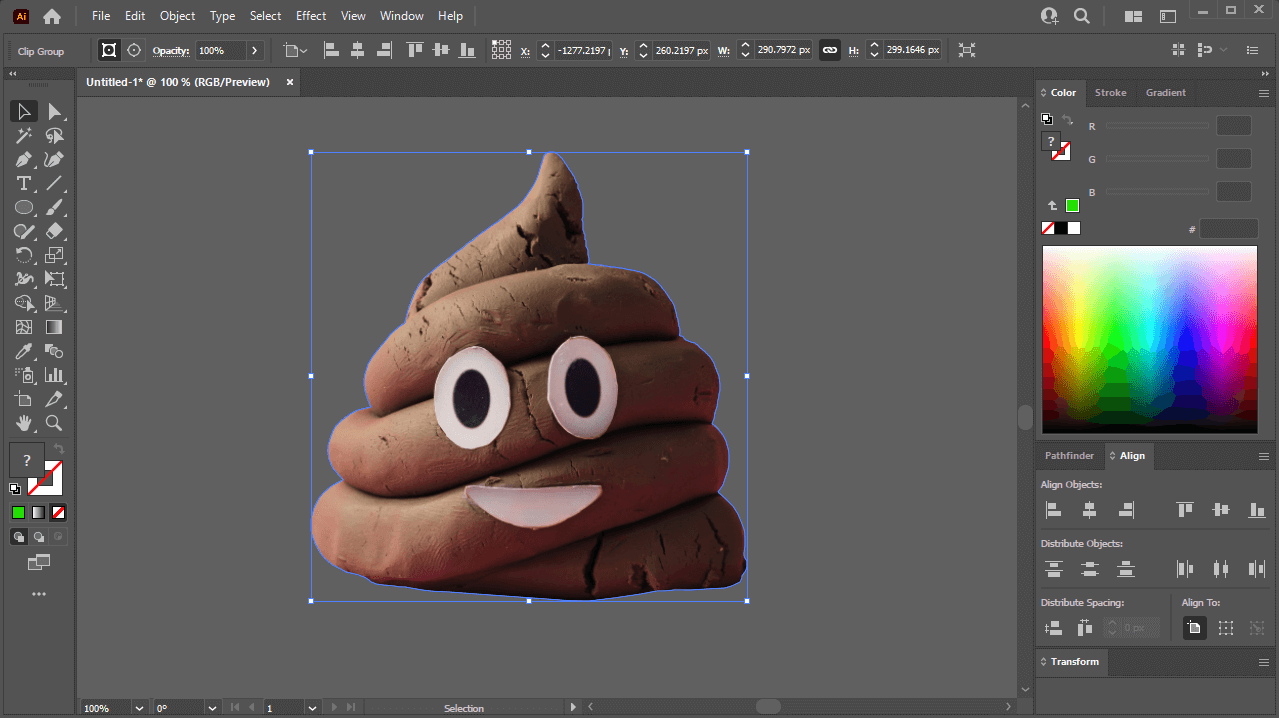
Clipping masks can be used to delete backgrounds from images, as demonstrated in the image above.
How To Edit A Clipping Mask
Now that we’ve gone over a few different ways in which you can make a clipping mask in Illustrator, let’s go over how to edit that clipping mask further, in case you need to make adjustments.
Sometimes when making a clipping mask you may realize that you didn’t quite place the clip in the exact place it needs to be, and now you need to change it.
In other vector applications, this would mean having to release the clipping mask, make your changes, then apply a new mask. Thankfully, Illustrator makes this an easier process for us.
To edit your clipping mask, select it and navigate to:
Object > Clipping Mask > Edit Contents
Once selected, you should see transformation handles applied to your mask:
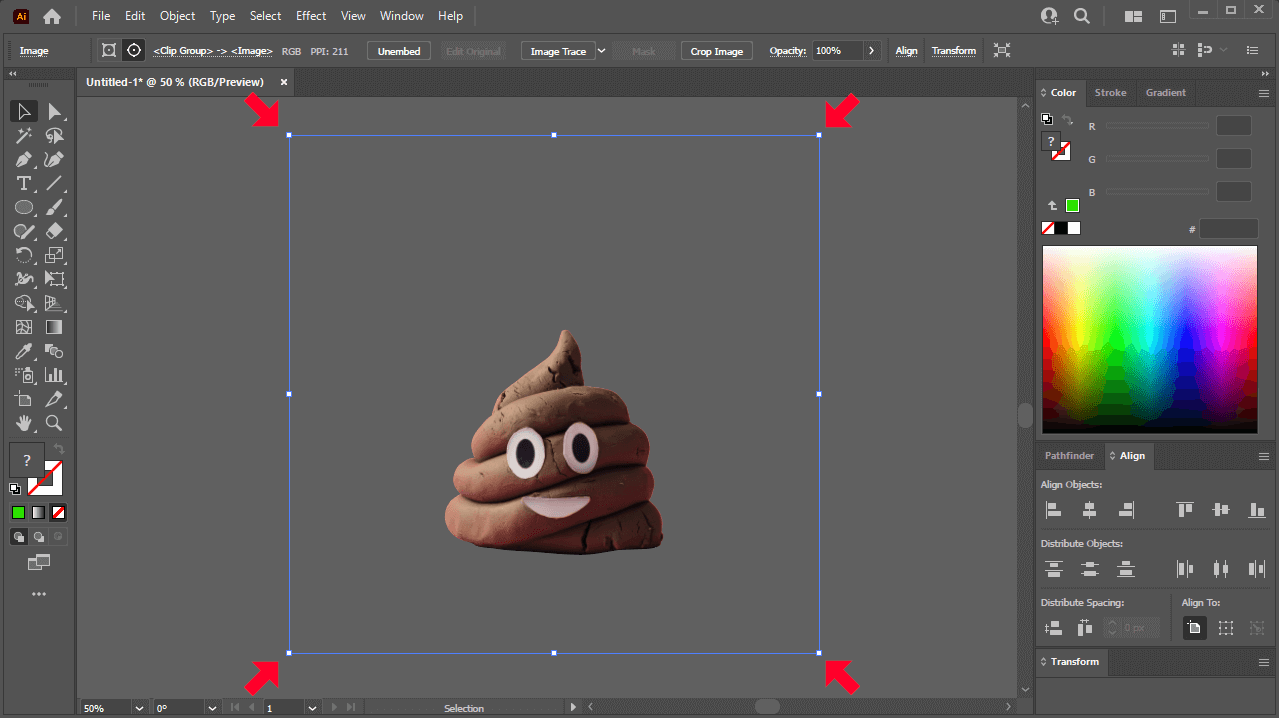
The transformation handles can be used to edit your clipping mask without having to release it.
These transformation handles make it so that you can edit your mask in various ways, including:
- Moving the subject around the canvas
- Scaling the subject
- Rotating
- Shearing
- And more
Once you are finished making your edits, all you have to do to leave edit mode is simply deselect the object. This can be done either by clicking on the canvas or by pressing Control + Shift + A on your keyboard.
How To Release A Clipping Mask
As mentioned earlier on in this post, one of the many benefits of using clipping masks in Illustrator is that they’re completely non-destructive, meaning you can undo them any time you’d like. To do this we must “release” the clipping mask.
To release your clipping mask, select it and navigate to:
Object > Clipping Mask > Release
Or you can simply use the keyboard shortcut, which is Control + Alt + 7.
Your clip and mask will be reverted back to their previous states, before you convert them:
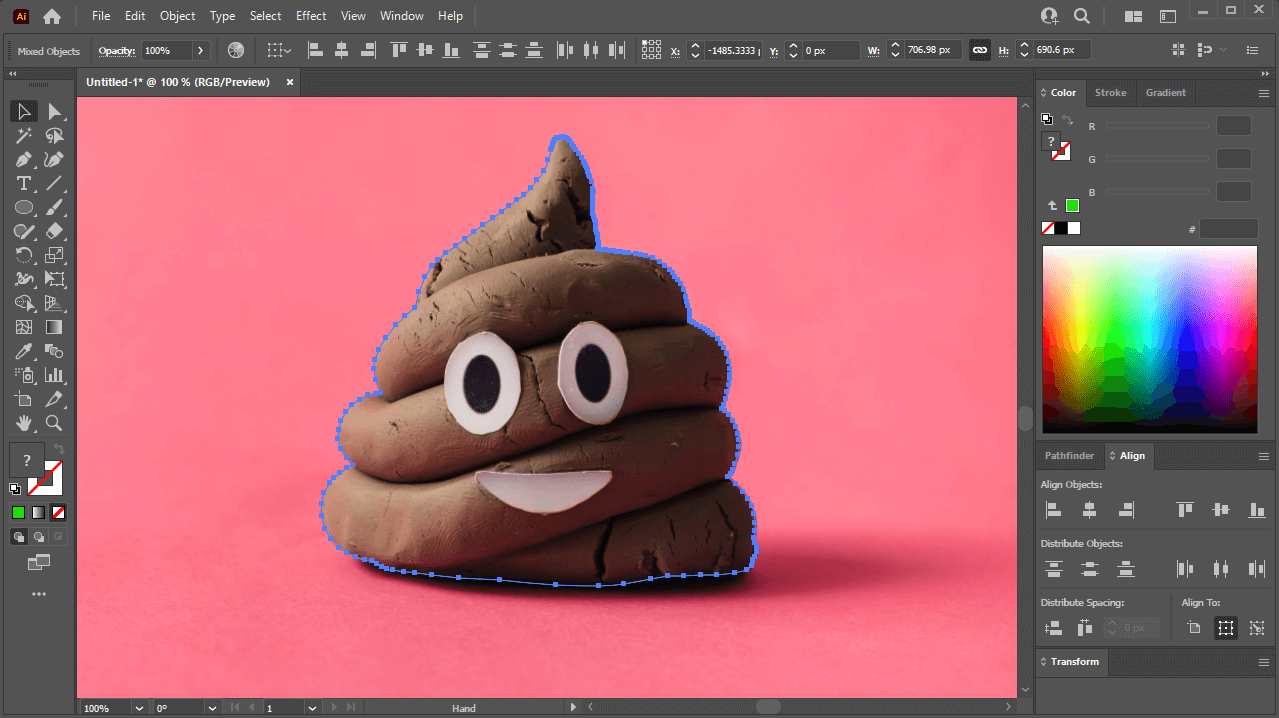
Once released, the clip will lose its fill and stroke properties. You’ll have to add them back manually.
There is one small caveat though. You may notice that the top object — or the object that was used as the clip — is now completely transparent. Both the fill and the stroke have been removed, and now the object is essentially invisible.
This is probably the only downside of using Illustrator to make clipping masks. Every other vector application that I’ve used reverts the objects back to their previous states with fill and stroke data intact. Illustrator, for whatever reason, doesn’t.
A simple remedy for this would be to select the object and reapply your fill and stroke data. However, it should be noted that you cannot select invisible objects by clicking on them.
Instead, you’ll have to click and drag a selection over it. And seeing as how the object is invisible, you’ll have to blindly estimate where it is. This shouldn’t be too much trouble though.
Conclusion
In many ways, making a clipping mask in Illustrator is a quicker and easier process than it is in any other vector application. However, it is not without its downsides. If Adobe could find a way to make it so that the fill and stroke data of the clip is preserved after releasing it from the mask, we would be in a much better place.
Regardless, this powerful little feature can help you take your design work to the next level — especially if you’re a vector artist who wants to incorporate imagery into your work.
If you have any questions or need clarification on anything we’ve gone over in this lesson, simply leave a comment below.
Learn To Master The SoftwareGain a complete understanding of your favorite design apps with my comprehensive collection of video courses. Each course grants access to our private community where you can ask questions and get help when needed.
|
||||||||||||||||||||||||||||||||


