How To Make Your Own Snow Overlay In Photoshop
How To Make Your Own Snow Overlay In Photoshop https://logosbynick.com/wp-content/uploads/2022/02/photoshop-snow-overlay-1.png 800 470 Nick Saporito https://secure.gravatar.com/avatar/8e31bf392f0ba8850f29a1a2e833cdd020909bfd44613c7e222072c40e031c34?s=96&d=mm&r=gIn today’s tutorial we’ll be going over how you can create your own snow overlay in Photoshop, without having to download any templates or third-party elements from anywhere else. All it requires is a little bit of design magic, and best of all, it’s simple enough that even a beginner could follow along!
In short, the way that we’ll be making our snow overlay in Photoshop is by filling a new layer with noise, blurring it, adjusting the color curves, and then changing the blend mode so that the image below shows through between the snow flakes.
After following along with this tutorial you will be able to add falling snow to any image you’d like!
Create A Snow Overlay In Photoshop
The following video tutorial will walk you through the entire process, step-by-step, and with voice narration:
If you prefer the written tutorial then continue on.
Step 1: Open your image in Photoshop
In order to add a snow overlay in Photoshop we will first need an image to add the snow to.
To open your image with Photoshop, navigate to:
File > Open
Locate your image on your hard drive and select it to open it.
For this demonstration we will be adding a snow overlay to this example image:
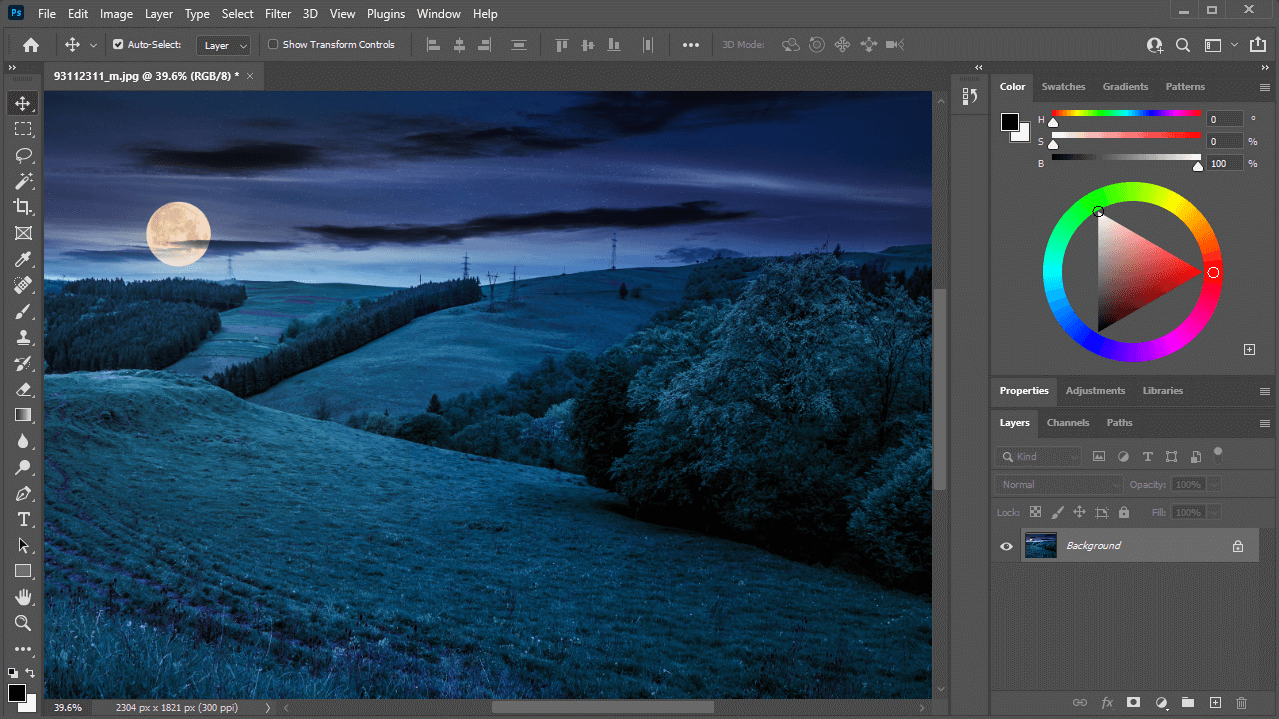
This photo has a darker composition, meaning the snow overlay will render nicely on it.
It should be noted that this tends to work best with images that have a darker composition.
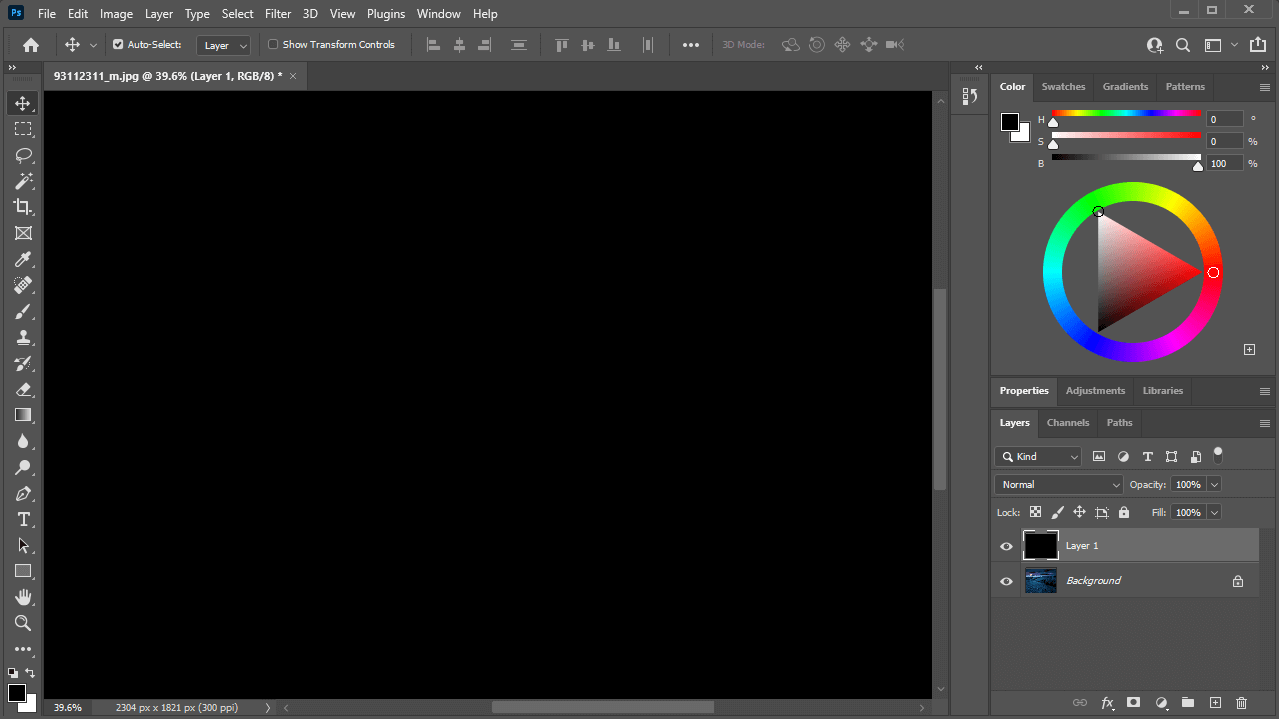
Step 2: Add a new layer to the image and fill it with black
Our snow overlay will be created on its own layer, so let’s add a new layer to the document by navigating to:
Layer > New > Layer
Leave the defaults as they are when prompted and press OK. You should notice a new layer added to the Layers menu.
Now we are going to fill this layer entirely with black, so make sure you currently have black set as your foreground color.
Navigate to:
Edit > Fill
When prompted, leave the defaults presets as they are and press OK. Your layer should then be filled entirely with black:
Step 3: Use the Noise filter to add noise to the black layer
Now we are going to use the Noise filer to add a pattern to the layer that can be manipulated to look like snow.
Navigate to:
Filter > Noise > Add Noise
When prompted, input the following presets:
- Amount: 60%
- Distribution: Uniform
- Monochromatic: Yes
Once set, click OK to generate noise on the layer. It should look something like this:
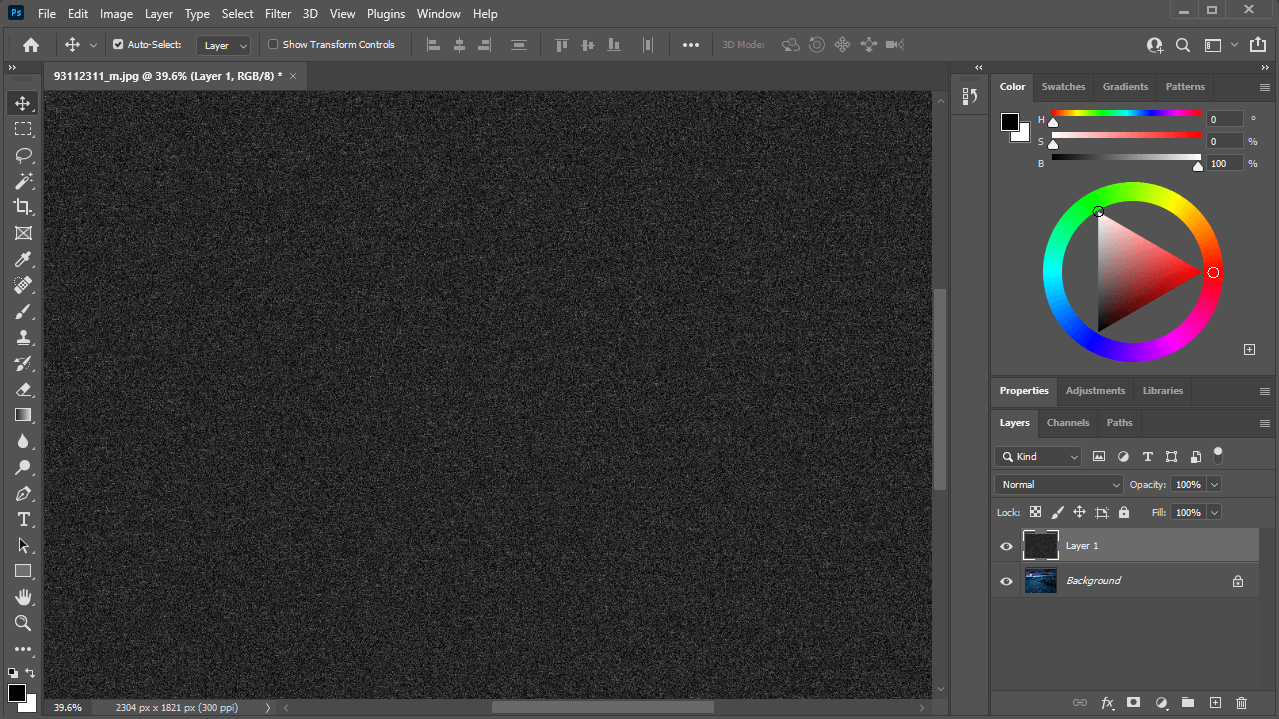
This noise pattern will be manipulated to look like falling snow flakes.
Step 4: Blur the noise layer using the Gaussian Blur filter
Now we are going to blur the noise pattern ever so slightly, using the Gaussian Blur filter.
To do so, navigate to:
Filter > Blur > Gaussian Blur
When prompted, choose to blur the image by 1 pixel and click OK to apply the changes.
The result should be very subtle. The noise will still be there, but it should look a little blurred, or fuzzy.
Step 5: Add a Curves adjustment layer and create a clipping mask from it
The next step in our quest to create a snow overlay in Photoshop is to add a new adjustment layer for Curves.
To do so, click on the Adjustments icon in the Layers menu and select Curves from the list:
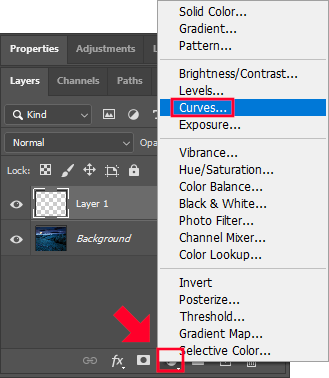
The adjustment layer icon is depicted as a circle that is half filled.
You should see the new Curves adjustment added as a new layer at the top of the stacking order.
We are now going to create a clipping mask from that layer right-clicking it and selecting Create Clipping Mask. This will make it so that the adjustments we’re about to make are applied only to the noise layer (or the snow overlay) and not the image itself.
Step 6: Set the layer’s blend mode to Screen
These next two steps is where the design magic happens!
First, we must change the noise layer’s blend mode to Screen. This can be done by clicking the layer to select it and using the dropdown located in the Layers menu:

Change the blend mode to Screen.
If done correctly, your image should now be showing through the noise layer as it is depicted above.
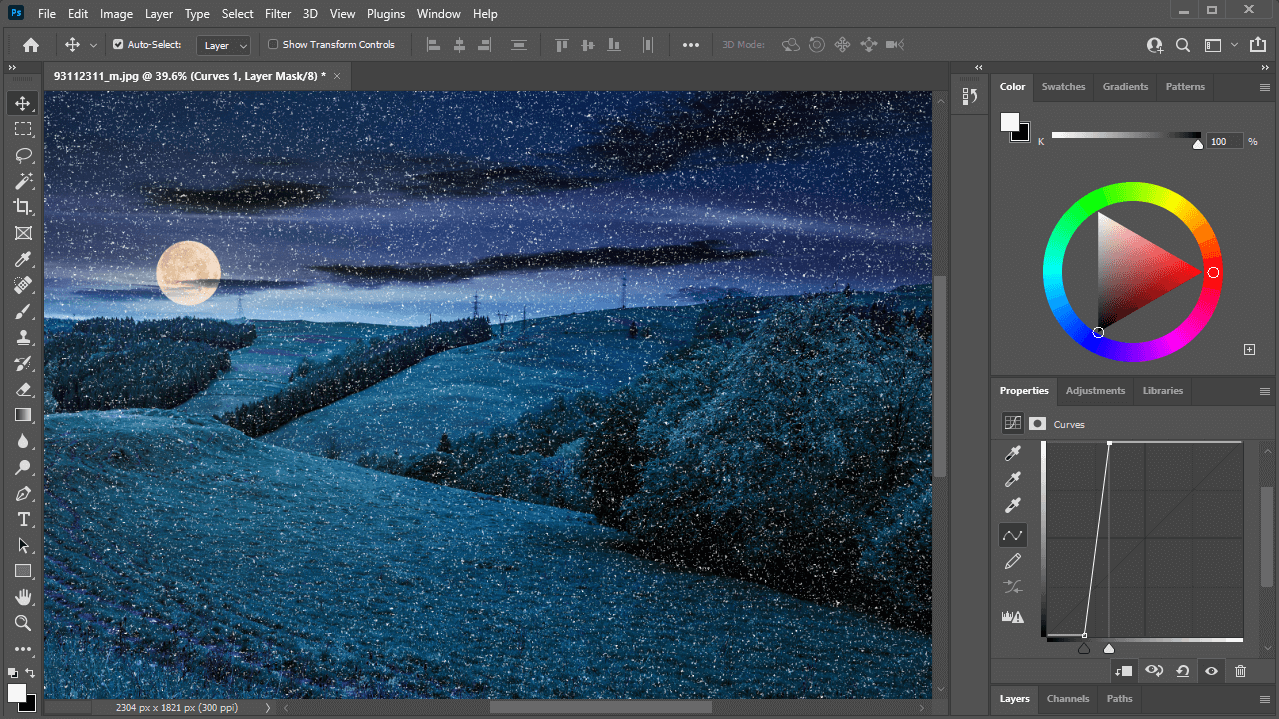
Step 7: Adjust the Curves handles until the noise appears as falling snow
The final step to finish creating your snow overlay in Photoshop is to adjust the Curves layer so that the noise layer looks like falling snow.
Click on the Curves layer to select it. Under the Properties menu, you should see two slider handles for adjusting the curves:
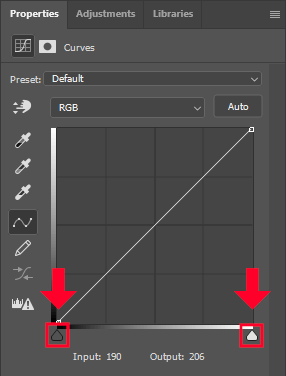
Move these handles around to change how the snow appears on your image.
Start clicking and dragging these handles closer towards each other, and notice how the appearance of the image changes.
If done correctly, the noise layer should begin to look like falling snowflakes:
You can continue tweaking these two sliders to control the amount of falling snow, its density and its intensity.
If you need to make the snowflakes larger then you can undo back to step 4 and apply a greater blur. Try 2 or 3 pixels to start and go from there.
If at any point you’d like to remove the snow overlay, simply toggle off the visibility of the noise layer.
Conclusion
Creating a snow overlay in Photoshop is a relatively simple task. However, it does involve a lot of steps. If followed correctly though, you’ll be able to add the appearance of falling snow to virtually any image you’d like!
If you have any questions or need clarification on anything we’ve gone over in this tutorial then simply leave a comment below.
Learn To Master The SoftwareGain a complete understanding of your favorite design apps with my comprehensive collection of video courses. Each course grants access to our private community where you can ask questions and get help when needed.
|
||||||||||||||||||||||||||||||||