How To Erase In Procreate Using The Eraser Tool
How To Erase In Procreate Using The Eraser Tool https://logosbynick.com/wp-content/uploads/2022/02/procreate-eraser.png 800 470 Nick Saporito https://secure.gravatar.com/avatar/8e31bf392f0ba8850f29a1a2e833cdd020909bfd44613c7e222072c40e031c34?s=96&d=mm&r=gHaving the ability to erase parts of your image is a fundamental task for any image editing software, and Procreate does not disappoint in this regard. In this tutorial we’ll be going over how to erase in Procreate by using the Eraser Tool and adjusting its settings to our needs.
In Procreate, the Eraser Tool works somewhat like a brush. You can change the brush type, size, hardness and opacity. Then, once your eraser brush settings in place, you can swipe to erase parts of your image the same way you would paint with a paintbrush. Let’s examine this in more detail.
How To Erase In Procreate
The following video tutorial will walk you through the entire process of using the Eraser, including all of its settings and properties:
Continue on for the written tutorial.
Table of ContentsHow To Erase
How To Undo Eraser Strokes
|
How To Erase
In this first part of the lesson we will go over how to erase in Procreate. Then, we’ll take a look at how to undo your brush strokes in the event that you slip up and make a mistake while erasing.
Step 1: Locate the Eraser Tool towards the top-right of your screen
First, locate the Eraser Tool towards the top-right of your screen. It is represented by an icon that depicts an eraser:
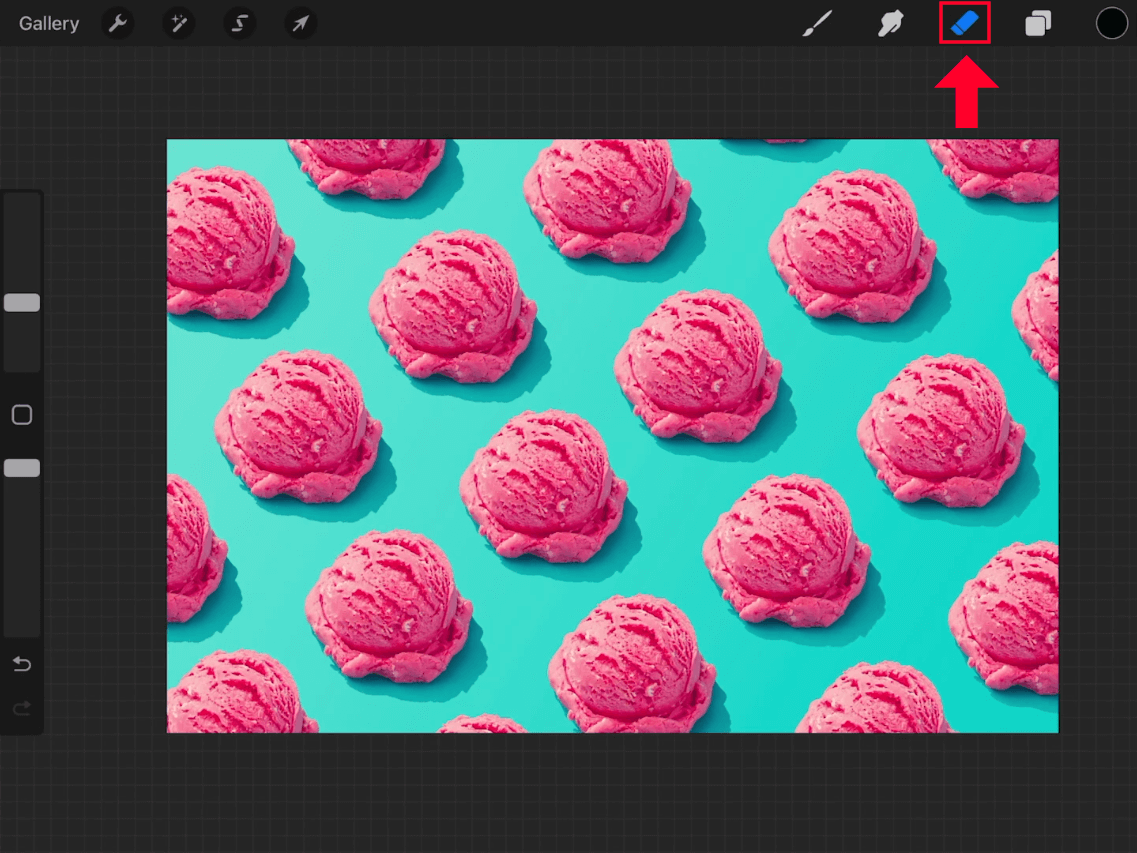
The location of the Eraser Tool is outlined in red above.
The icon will be highlighted in blue once you’ve selected it.
Step 2: Choose a brush to erase with
Once you’ve selected the Eraser Tool, simply tap on the tool’s icon again to populate the Brush Library menu:
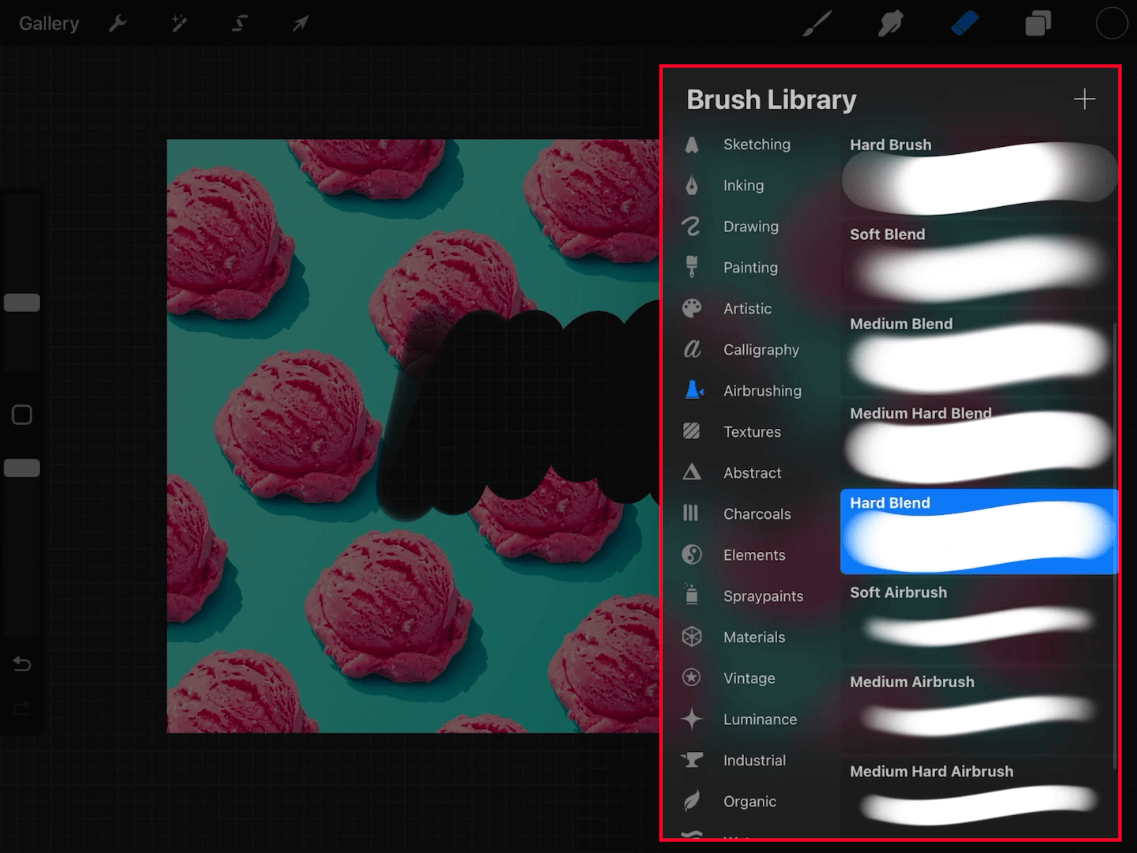
The Brush Library lets you choose a brush type to erase with.
Here you will be choosing the type of brush to be erasing with. Brush styles range from hard, soft, decorative, and you can even install third-party brushes if you’d like.
Choose the brush style that is most suitable for your use case. For this demonstration I will be using a hard brush.
Step 3: Set the brush size and opacity
One of the most important aspects of knowing how to erase in Procreate is setting the size of the eraser and its opacity as well.
On the left-hand side of your screen you will see two sliders — one for the brush’s Size, and the other for its Opacity:
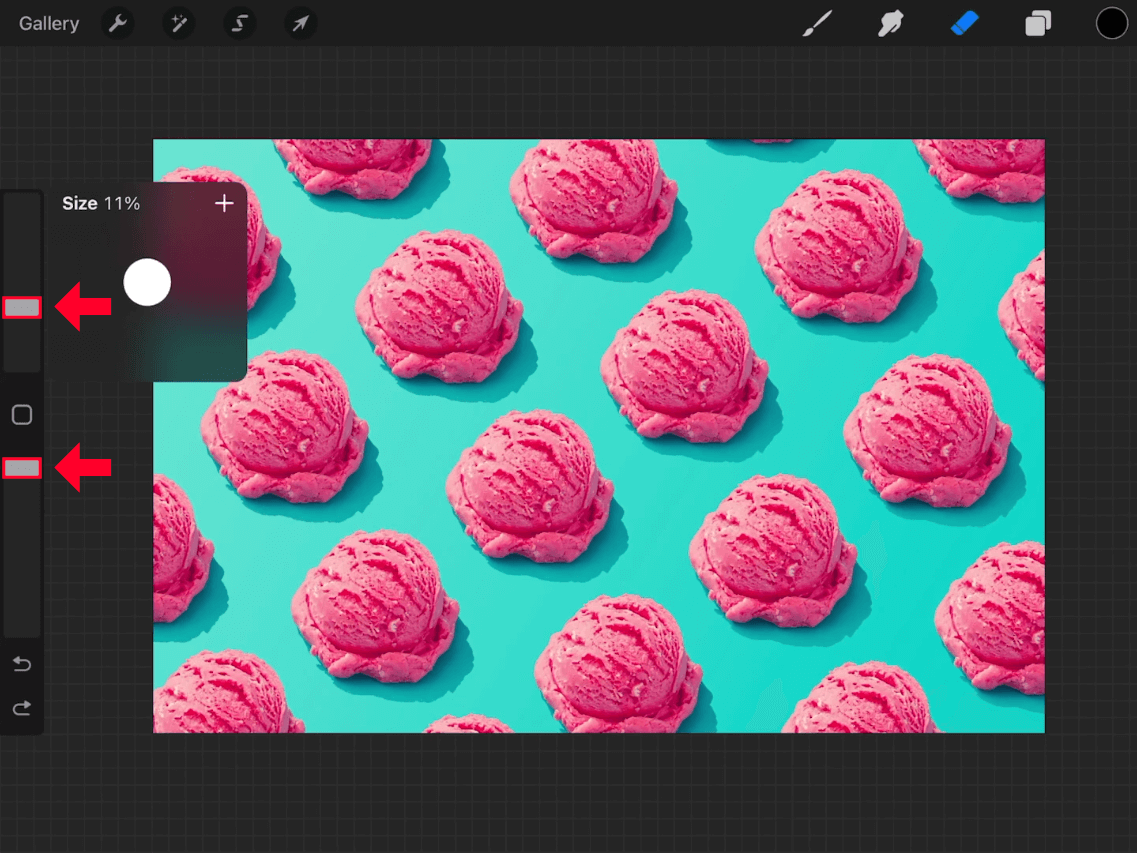
The Size slider is on top; the Opacity slider is beneath it.
- Size: use this slider to increase or decrease the size of your brush. A larger size will erase with larger brush strokes, whereas a smaller size will erase with smaller brush strokes.
- Opacity: this slider increases or decreases the opacity of your brush. Lowering the opacity will make it so that your eraser only partially erases subject areas.
As you change these properties, a dialog menu will populate with a preview of the changes. You can also swipe on your canvas real quick to see if these settings are appropriate for your image.
These “test swipes” can be undone once you’ve confirmed your brush size and opacity.
Step 4: Swipe to erase
Once your settings are in place, all you have to do to erase in Procreate is simply tap and swipe, the same way you would with any other brush:
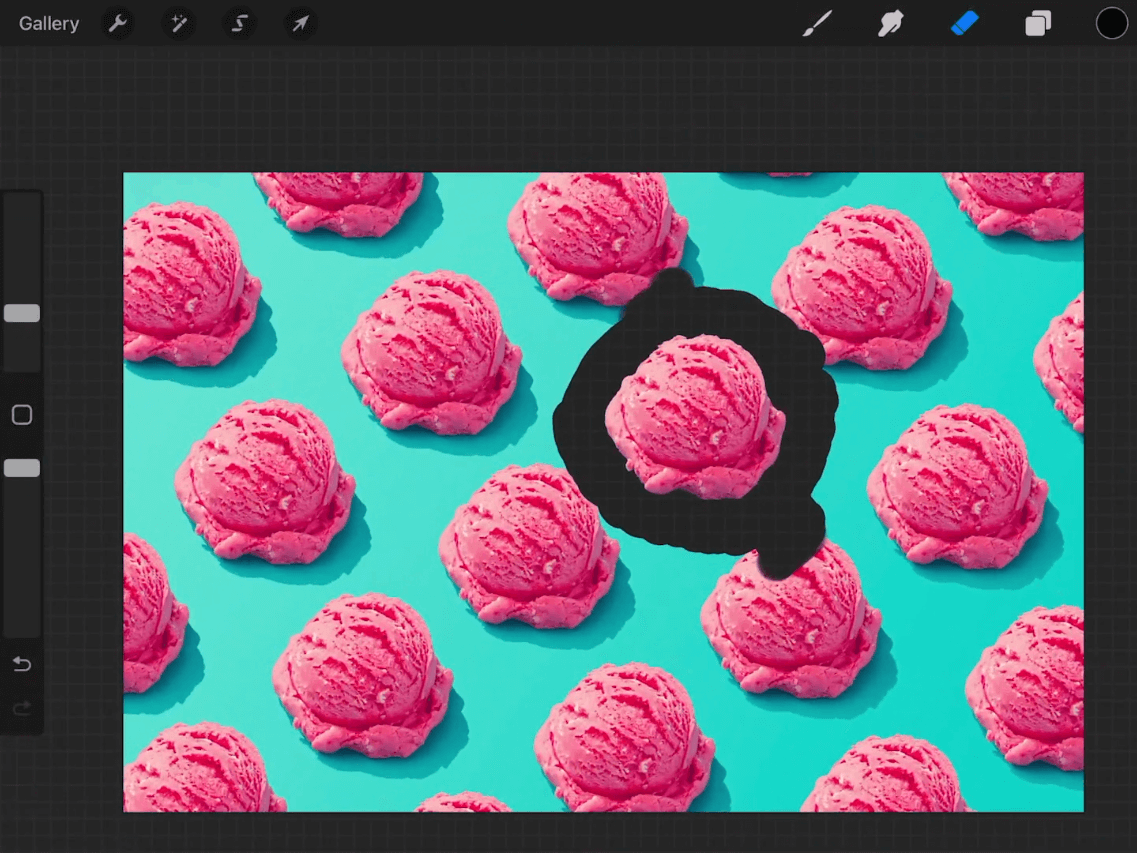
In this demonstration the background layer’s visibility is turned off, meaning the black workspace will show through the erased areas.
As you erase, you should notice the background data showing through the erased areas.
If you have contents on layers positioned beneath the layer you’re currently erasing then those layers should show through. If you have no other layers beneath the target layer then the background color should show through.
If you disable the visibility of the background layer then the black canvas should show through the erased areas, as depicted in the screenshot above.
Tips For Erasing In Procreate
For the demonstration used in the tutorial video, the objective was to erase around the subject in order to remove the background.
In the event that you’d like to use the eraser for a similar task, it is advised that you use a small, hard brush to erase around the edges first, and then use progressively larger brushes to erase around it afterwards.
This may be a time-consuming process, but this approach makes makes erasing in Procreate accurate and effective. Refer to the video tutorial above for a working demonstration.
How To Undo Eraser Strokes
Whenever you’re using the eraser to erase in Procreate, chances are you’re going to slip up and erase something you didn’t intend to. Let’s go over how you can quickly correct these mistakes.
Option 1: Tap with two fingers
The first method you can use to undo your eraser strokes is to simply tap on the screen with two fingers — namely your index and middle fingers.
When done correctly, two-finger tapping functions as an “undo” shortcut and will reverse your most recent action.
Option 2: The Undo button
The other way in which you can undo your eraser strokes is by simply tapping the Undo button in the UI, located just beneath the brush size and opacity sliders:
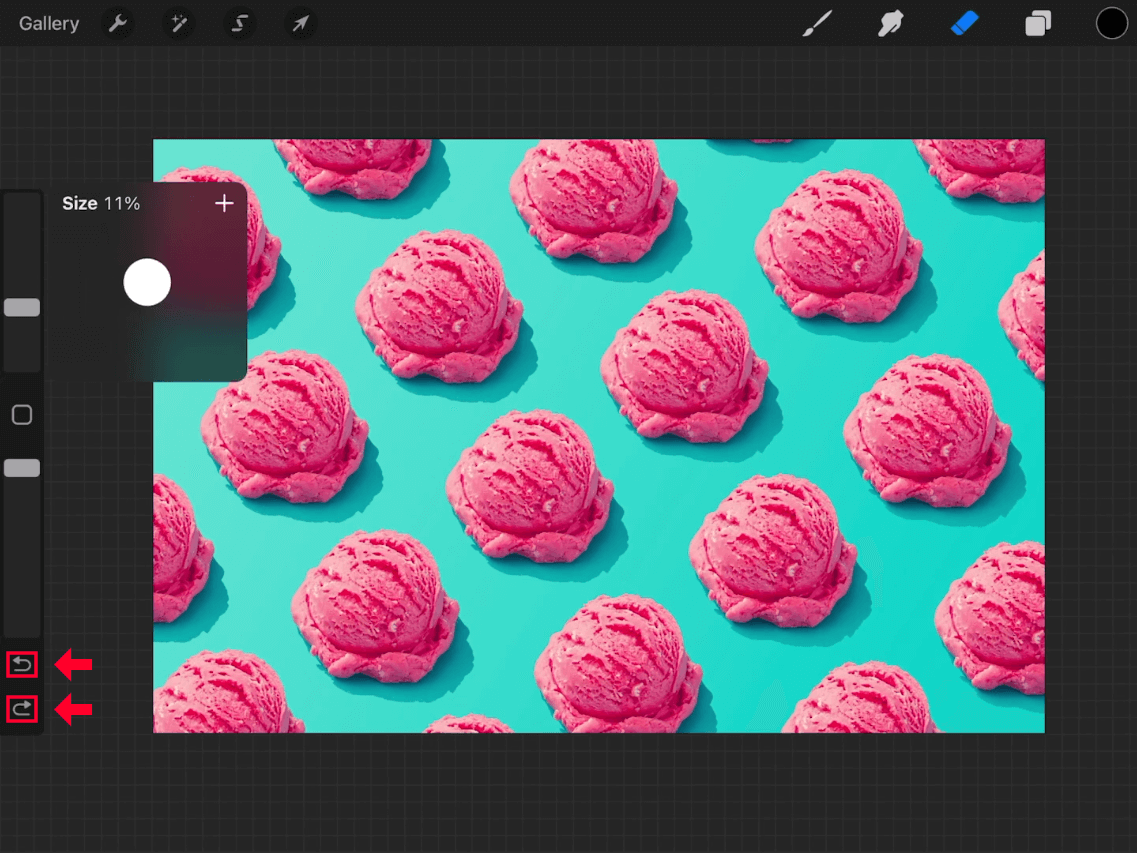
The Undo button is on top; the Redo button is on the bottom.
There are two buttons — one for “undo” and another for “redo”.
The arrow at the top that points left is to Undo, and the arrow just beneath it that points right is to Redo.
Conclusion
Knowing how to erase in Procreate is simply a matter of setting the properties and brush attributes to your liking. If you already know how to paint and draw in Procreate then you also know how to erase, because erasing functions in the same fundamental way. The main difference being that when erasing you are deleting pixels, whereas with painting and drawing you are adding pixels.
If you have any questions or need clarification on anything covered in the lesson, simply leave a comment below.
Learn To Master The SoftwareGain a complete understanding of your favorite design apps with my comprehensive collection of video courses. Each course grants access to our private community where you can ask questions and get help when needed.
|
||||||||||||||||||||||||||||||||


