How To Warp Text Into Shapes with Adobe Illustrator CC
How To Warp Text Into Shapes with Adobe Illustrator CC https://logosbynick.com/wp-content/uploads/2019/07/illustrator-text-to-shapes-1024x602.jpg 1024 602 Nick Saporito https://secure.gravatar.com/avatar/8e31bf392f0ba8850f29a1a2e833cdd020909bfd44613c7e222072c40e031c34?s=96&d=mm&r=gIn this tutorial I’ll be going over some of the ways in which you can warp text into different shapes using Adobe Illustrator CC. One of the things I really love about Illustrator is how easy it is to work with and transform text into different shapes. Inkscape requires that we manually transform each individual letter, but Illustrator has some really convenient warping features built in.
I would recommend checking out the video tutorial below for a more immersive experience. What I’m about to go over now is pretty much just a written overview.
Warping Text Into Shapes
Illustrator allows us to warp text in two different ways — predefined shapes and custom shapes. Let’s explore this a bit further.
Make With Warp
The first way in which you can warp text into shapes with Illustrator is by using the make with warp feature. This allows you to transform your text into a series of different predetermined shapes.
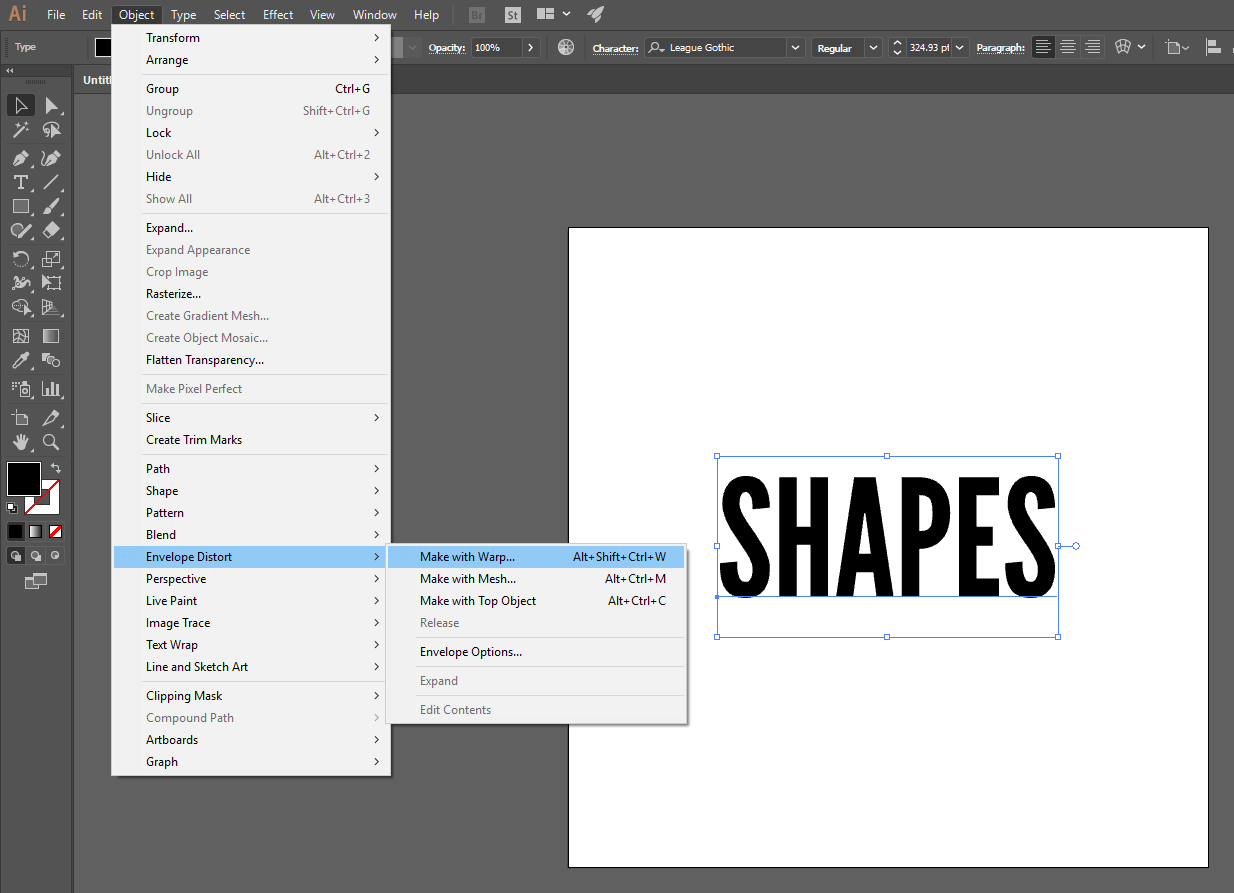
Create a text object, select it, then go to Object > Envelope Distort > Make with Warp.
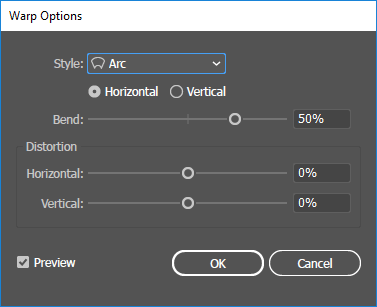
The Warp Options window should appear with some presets for warping your text object.
The Style drop down references all of the different shapes you an warp your text into. You can cycle through them individually if you’d like, otherwise here’s a guide I laid out that depicts how all of the different styles look…
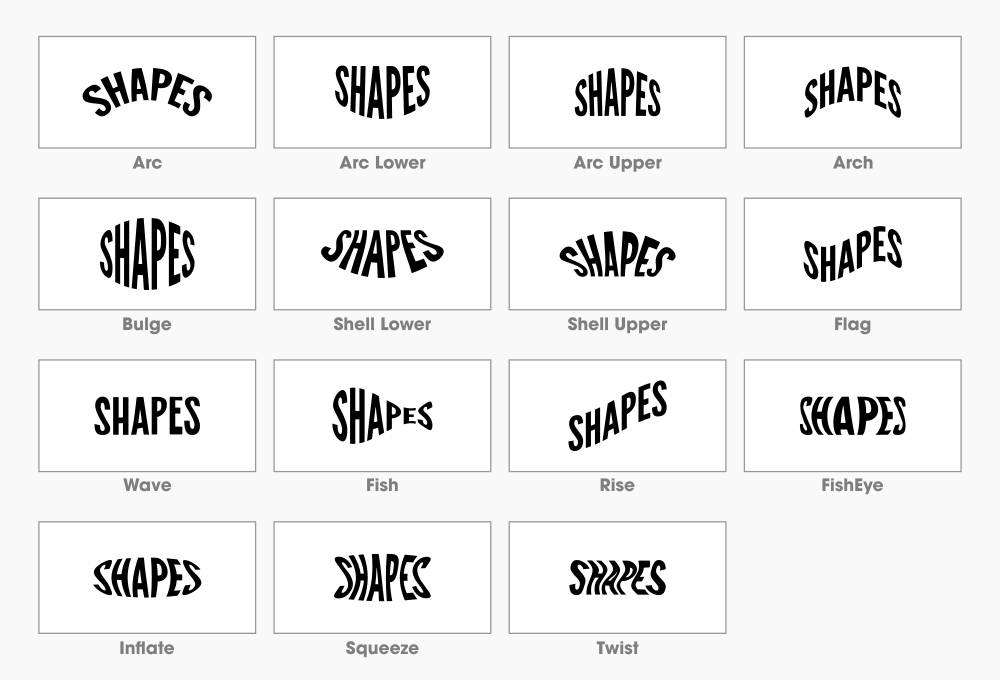
Click to enlarge
In the Warp Options menu you’ll be prompted to choose between Horizontal or Vertical orientation. This refers to the axis on which the warp is applied. Here’s a demonstration…
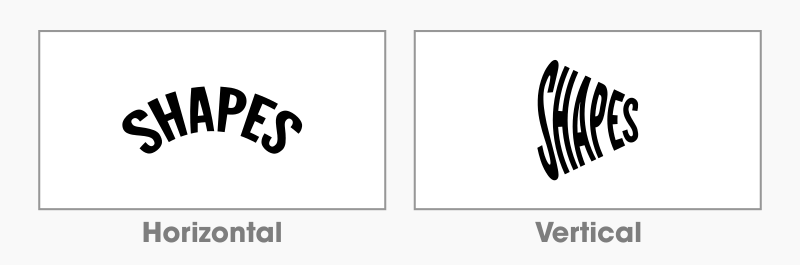
For this example I’m using the Arc style. When I have Horizontal selected, it applies the effect to the horizontal axis. When I have Vertical selected, it’s applied to the vertical axis.
The rest of the settings in the Warp Options menu are pretty self-explanatory. They allow you to control the strength and intensity of the warp (for example, give the arc more or less of a bend,) as well as the position of the warp (make the peak of the arc more towards the left rather than the right, etc.)
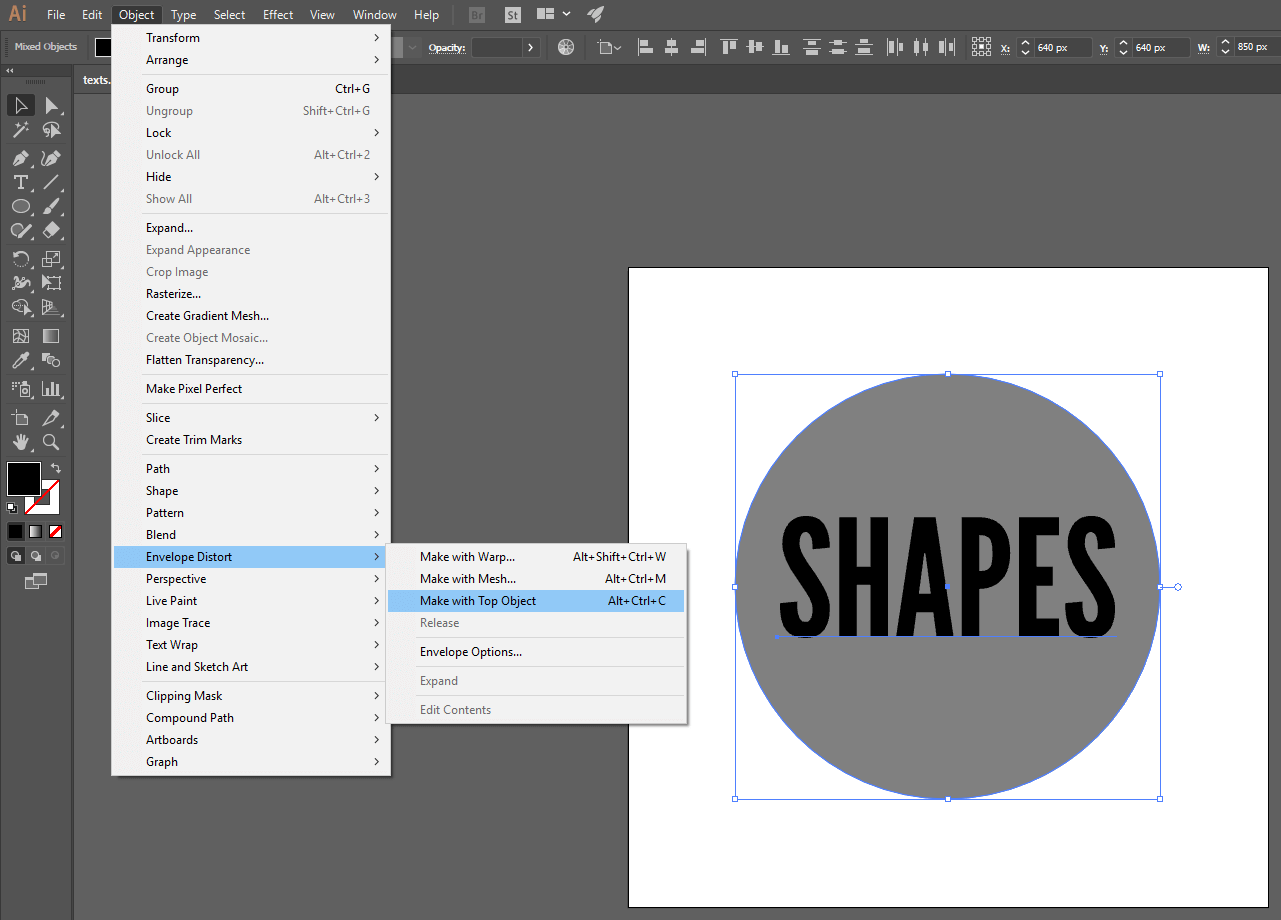
Make With Top Object
If none of the shape presets in the warp options window provides you with your desired shape for your text, another way in which you can warp text into shapes with Illustrator is to create your own custom shape and use it as a reference for transforming your text.
The way that this feature works is quite simple. First, create your custom object, then make sure it’s raised above your text by right-clicking on it and going to Arrange > Bring to Front. Then select both the custom shape and the text object and align them on the horizontal and vertical axis.
With both objects selected, go to Object > Envelope Distort > Make with Top Object.
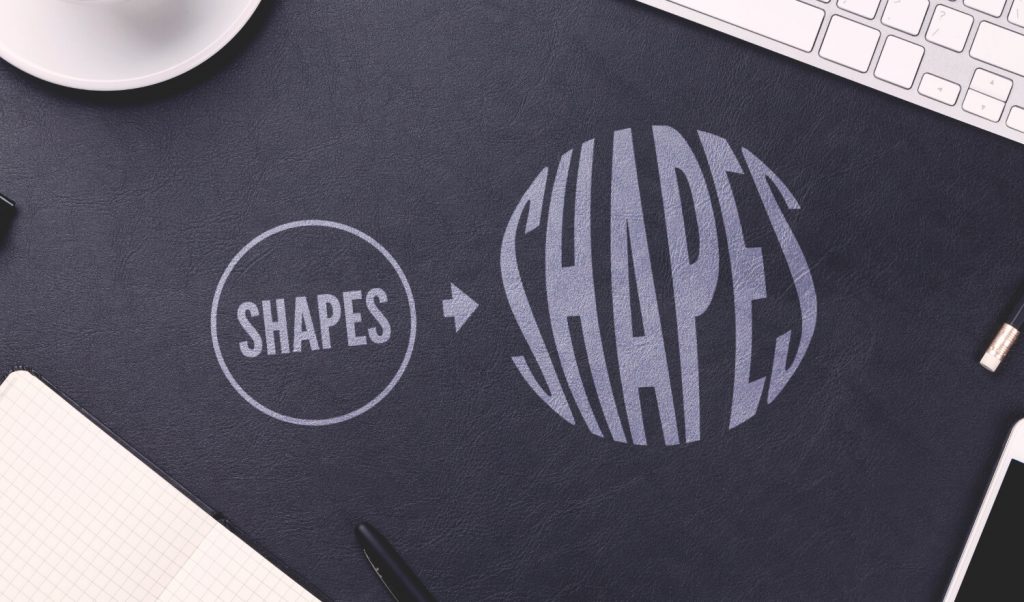
Here’s how it looks once the effect is applied to both a circle and a diamond shape…
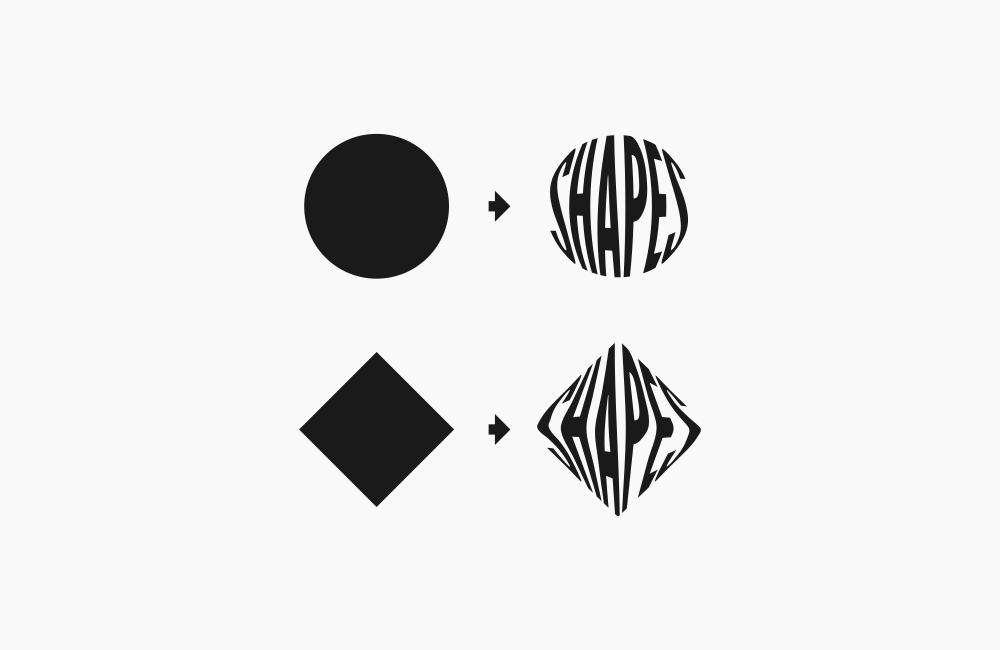
As you could imagine, you can really let your creativity run wild with all of the different ways of warping text into different shapes with this feature!
Finalizing
Once you’ve transformed your text into a shape that you’re happy with, you’re not quite done yet. You need to finalize it by selecting it, then going to Object > Expand. This will render your text into a true vector curve that can be altered and worked with the same way you would any other object.
If you have any questions just let me know, and as always, thanks for watching!
Learn To Master The SoftwareGain a complete understanding of your favorite design apps with my comprehensive collection of video courses. Each course grants access to our private community where you can ask questions and get help when needed.
|
||||||||||||||||||||||||||||||||


You might also like


9 comments
-
-
Anonymous
hi I have a question I tries the make with top object but it always pop up ” this requires a selection of multiple objects. the top object must be a single path r mesh, or a symbol containing a single path or mesh ” do u know how to help with this problem
-
-
jeanette kangas
Hello Nick.
THx for the video. I find however that my letters never take to the shape in an even manner but always skew with a weird unappealing bend. This never happens to you? Always on the search on these video’s as to why…but never seems to happen in tutorials. Am i missing something? My shapes aren’t that elaborate that I’m trying to take shape with.-
Marco
I found the same, but discovered that these ‘crazy bends’ are caused by the way of drawing.
Use the ALT-key to click your points where you do not want curved letters, and it’s solved.
-
-
Anonymous
slay