Create Mesh Gradient Backgrounds with Inkscape
Create Mesh Gradient Backgrounds with Inkscape https://logosbynick.com/wp-content/uploads/2019/07/mesh-gradient-1024x602.png 1024 602 Nick Saporito https://secure.gravatar.com/avatar/8e31bf392f0ba8850f29a1a2e833cdd020909bfd44613c7e222072c40e031c34?s=96&d=mm&r=gIn today’s tutorial I’ll be demonstrating how to create mesh gradient background patterns with Inkscape. The idea behind the effect here is that the design is made up of a bunch of individual triangles that all have a single solid fill color, but when viewed in totality they create the illusion of a mesh gradient.
The following is just a brief outline of the steps taken to achieve the effect. For complete step-by-step instructions, please refer to the tutorial video at the top of the page.
Create A Mesh Gradient Background Pattern
The first step is to create a simple rectangle in whatever size you’d like your background to be.

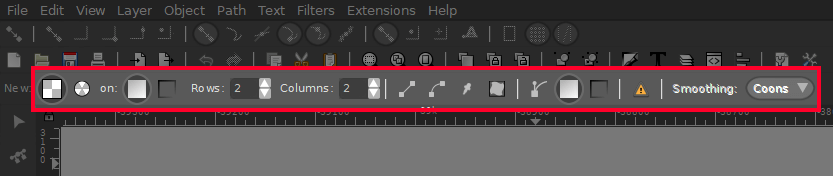
Next we will grab the Mesh Gradients tool and make sure your presets match mine depicted in the screenshot below…
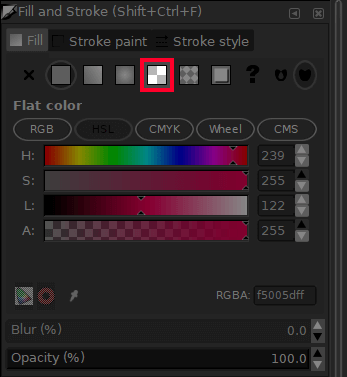
Now select your rectangle and apply a mesh gradient by clicking on the Mesh Gradient button in the Fill & Stroke window.
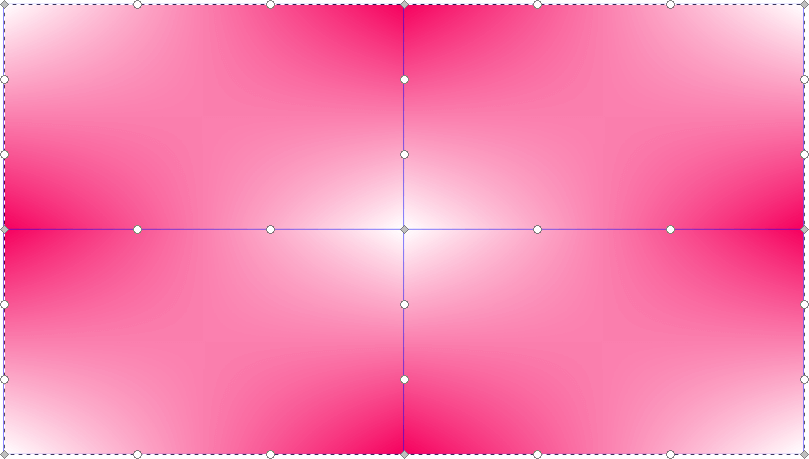
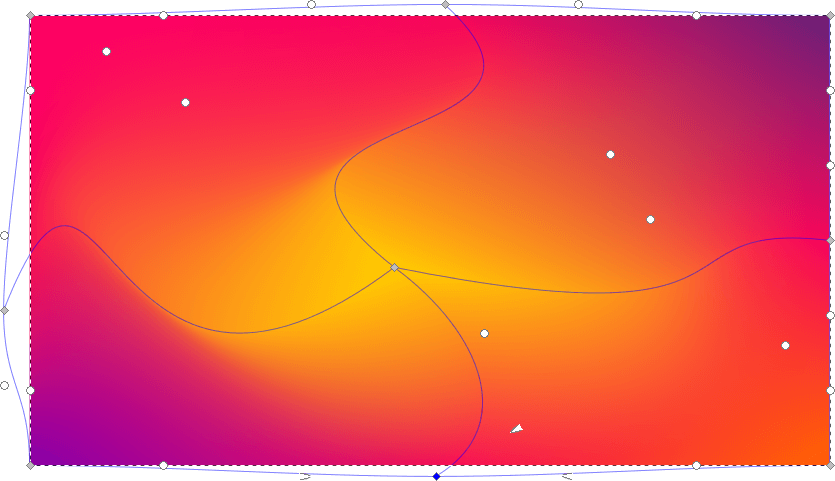
Your rectangle should now look something like this…
With the Gradients tool selected, click on each individual node and click on a color from the color bar at the bottom of your screen in order to fill that area of the mesh with your chosen color. Do this for all of the nodes until you have a nice balance of your desired colors.
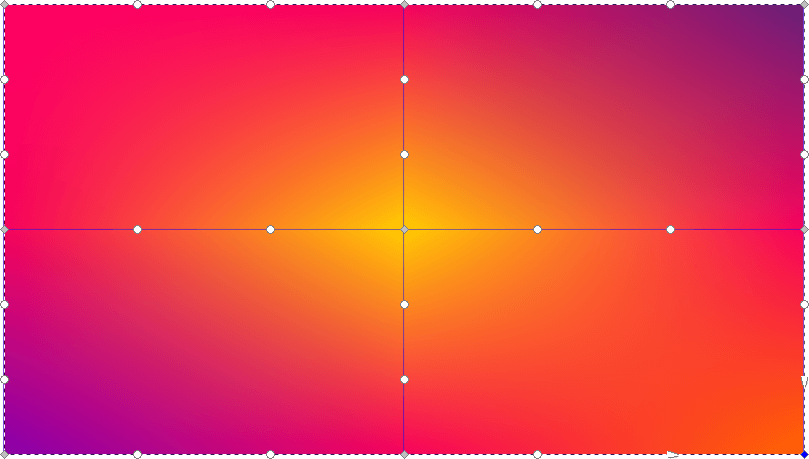
You can now click and drag each of the individual nodes in order to give the design a whimsical, swirling sort of look.
The gradient portion of the design is complete. Now we will move on to applying a polygonal overlay.
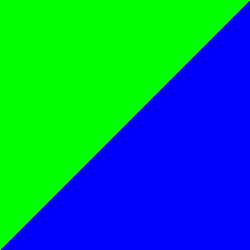
Create a perfectly symmetrical square and divide it into two separate objects diagonally.
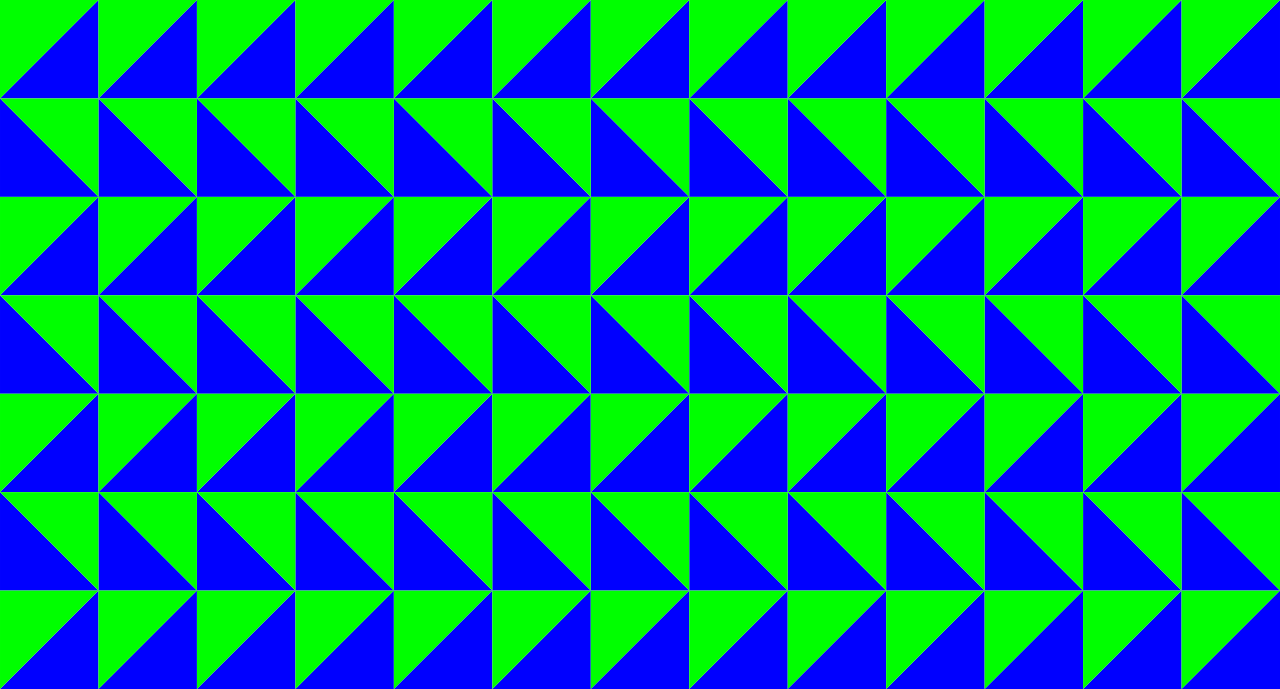
Now simply create a bunch of copies of the two pieces and overlay them onto the rectangle containing your mesh gradient in order to form a triangle pattern.
Next, cycle through each individual triangle and remove the fill color. Use the Dropper tool to fill it with the color of the gradient beneath it. You should end up with something like this…
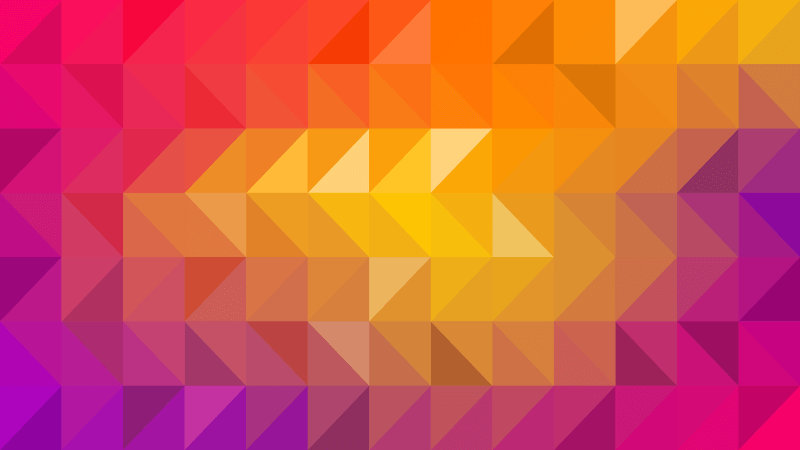
If you want, you can go through and darken and/or lighten individual triangles manually as I’ve done. This can give your design a more personalized touch.
Now go ahead and export your design, and that should do it! Our mesh gradient background is complete. If you have any questions or run into any problems, simply leave a comment below. As always, thanks for watching!
Learn To Master The SoftwareGain a complete understanding of your favorite design apps with my comprehensive collection of video courses. Each course grants access to our private community where you can ask questions and get help when needed.
|
||||||||||||||||||||||||||||||||


Thank you for this. It is easy to understand and do-along. You explain and show your process in a very clear way.
Thank you Pats
how do i do this?
“Create a perfectly symmetrical square and divide it into two separate objects diagonally.”
It’s difficult to explain via text. Check out the video at the top of the page. It explains everything in detail.
Thanks a lot Nick