
Resize The Artboard In Illustrator | Manually and Numerically
Resize The Artboard In Illustrator | Manually and Numerically https://logosbynick.com/wp-content/uploads/2022/09/resize-artboard-illustrator.png 800 470 Nick Saporito https://secure.gravatar.com/avatar/8e31bf392f0ba8850f29a1a2e833cdd020909bfd44613c7e222072c40e031c34?s=96&d=mm&r=gIn this tutorial we’ll be going over how you can resize the artboard in Illustrator. This is done by using a dedicated tool that allows you to scale the width and height in a multitude of ways.
When it comes to resizing documents in other applications, the default protocol is to look for some kind of document settings or properties menu. This is true for other vector design applications. However, in Illustrator, there is a dedicated tool known as the Artboards Tool which allows you to resize your artboards with relative ease.
Resize The Artboard In Illustrator
The following video tutorial will walk you through the entire process for each, step-by-step, and in under 3 minutes:
Continue on for a written explanation.
Table of ContentsResize The Artboard Manually
Resize The Artboard To A Specific Size |
Resize The Artboard Manually
Let’s first go over how you can resize the artboard in Illustrator manually by using the transformation handles to scale it, the same as you would for any other object.
Step 1: Grab the Artboards Tool
Grab the Artboards Tool from your toolbar on the left-hand side of the screen. It should look something like this:
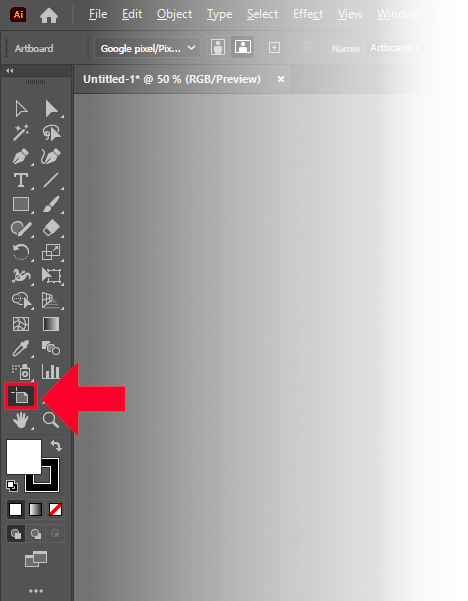
The Artboards Tool can be accessed in the tools menu to the left of the screen, outlined in red above.
Alternatively, you can access this tool using the keyboard shortcut: Shift + O
Step 2: Click and drag the transformation handles
Once you have selected the Artboards Tool, transformation handles — represented as little square nodes — should be visible at the corners of your artboard as well as the sides:
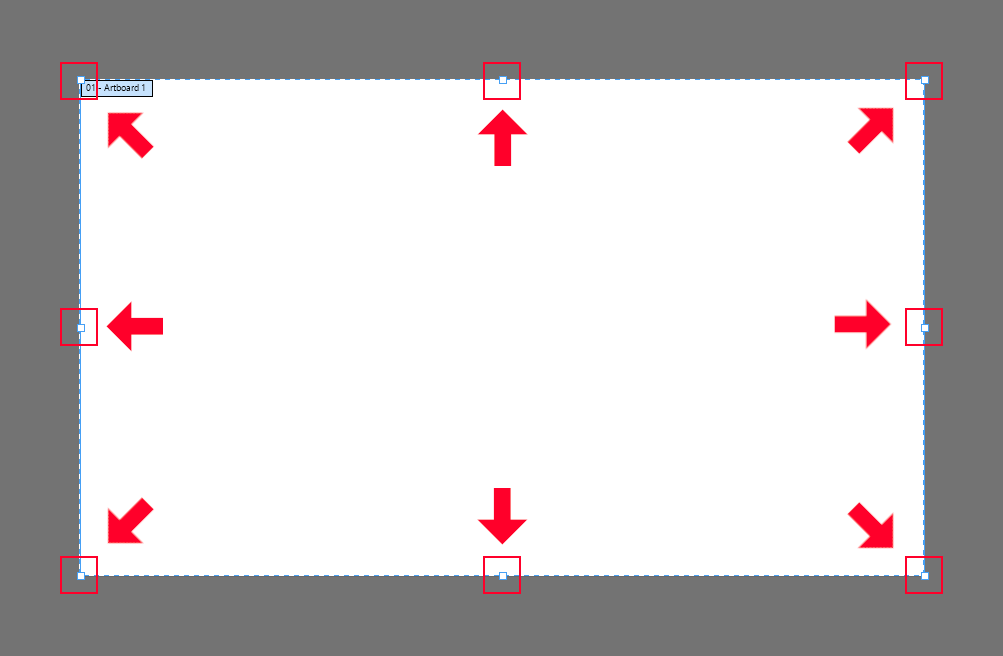
These little handles allow you to scale your artboard as if it were an object.
Clicking and dragging on one of the corner handles will allow you to change the width and height of the artboard as if it were an object:
Click and drag the transformation handles to scale your document
To preserve the aspect ratio when scaling, holding the Shift key. This will make it so that the width and height each scale in accordance with each other. If you want to scale from the center then hold the Alt key as well (or Option if you’re a Mac user.)
The transformation handles around your artboard allow you to resize it in several ways:
- The handles in the corners allow you to scale both the width and height at the same time
- The handles on the left and right sides allow you to change the artboard’s width only
- The handles on the top and bottom allow you to change the artboard’s height only
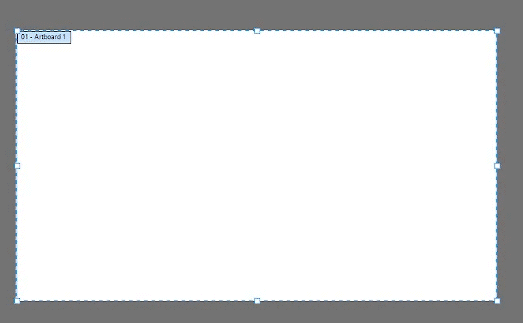
Once you are finished resizing your artboard, all you have to do is deselect the Artboards Tool to finalize the changes. In fact, the changes are finalizing in real time. There’s no need to press Enter or click any of the menu interface buttons.
Resize The Artboard To A Specific Size
Another way that you can resize the artboard in Illustrator is by inputting a specific numerical value into the width and height fields. This is useful if you need your artboard to be a specific size (1,280 x 720 pixels, for example).
Step 1: Grab the Artboards Tool
As we did for the first method, access the Artboards Tool in your toolbar or by pressing Shift + O on your keyboard.
Step 2: Input numerical values into the width and height fields
With the Artboards Tool selected, you should see a tool settings menu towards the top of your screen:
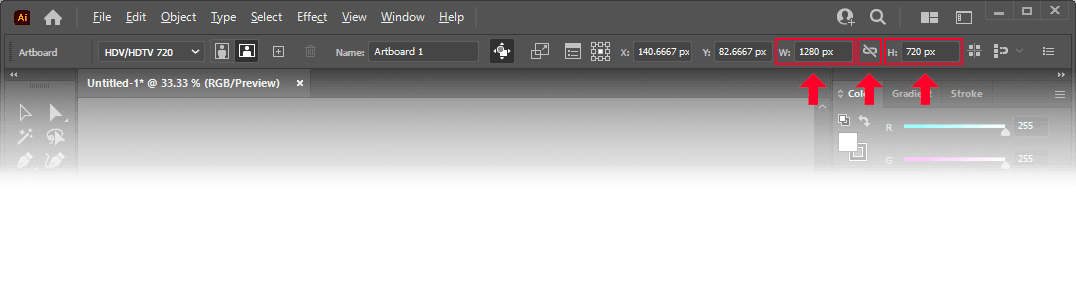
Use the input fields to specify whatever size you’d like your artboard to be
If this menu is not visible on your screen then navigate to:
Window > Control
Within the tool settings menu you will see various input fields. Seeing as how we’re looking to resize the artboard, the inputs we’re looking for are width, which is represented by the W field; and height, which is represented by the H field.
Manually type in whatever size you’d like your artboard to be for each dimension and press the Enter key to apply the changes. Your artboard should be resized accordingly.
If you’d like to use a different unit of measurement than pixels, simply type in the abbreviation for that unit after your numbers. For example:
- Inches: IN
- Centimeters: CM
- Millimeters: MM
- Points: PT
You can even scale the artboard by a percentage by using the % symbol after the number. So, for example, if you wanted to make your 1,000-pixel wide artboard 50% smaller, all you’d have to do is type 50% into the W field and the artboard’s width should scale down to 500 pixels once applied.
The chain link icon between the width and height input fields (outlined in red above) represents the aspect ratio. Enabling it will make it so that each dimension will scale proportionately. So if you make the width 50% smaller then the height will also become 50% smaller.
Leaving this icon disabled allows you to scale each dimension independent of the other.
Seeing as how the changes are applied in real time, once you are finished you can simply proceed with your artwork.
Conclusion
Adobe Illustrator is unique in how it handles document resizing. Instead of navigating through the menu system to find the document’s properties, you are provided with a dedicated tool that is both handy and convenient to use. What’s more, the tool allows you to resize the artboard in Illustrator in various ways– not just with numerical inputs.
If you have any questions or need any clarification, simply leave a comment below.
Learn To Master The SoftwareGain a complete understanding of your favorite design apps with my comprehensive collection of video courses. Each course grants access to our private community where you can ask questions and get help when needed.
|
||||||||||||||||||||||||||||||||


