How To Duplicate Objects Around A Circle In Affinity Designer
How To Duplicate Objects Around A Circle In Affinity Designer https://logosbynick.com/wp-content/uploads/2022/09/duplicate-objects-around-circle-affinity-designer.png 800 470 Nick Saporito https://secure.gravatar.com/avatar/8e31bf392f0ba8850f29a1a2e833cdd020909bfd44613c7e222072c40e031c34?s=96&d=mm&r=gHaving the ability to distribute objects on your canvas in an organized and evenly-spaced way is an essential function for graphic designers. This is especially true for some of the more advanced distributions, such as positioning around a circle. In this tutorial we’ll be going over how to duplicate objects around a circle in Affinity Designer.
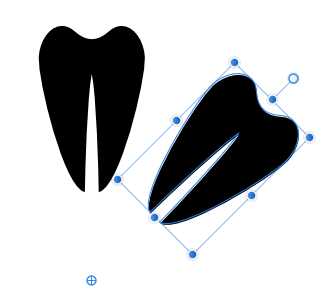
In short, the way we’ll be accomplishing this is by activating the Enable Transform Origin setting in the tool options menu of the Move Tool. When enabled, a small round cross hair will populate in the center of your selected object. This cross hair represents the axis that the object rotates around, so all you have to do is move it over and begin rotating duplicated copies around it. Let’s have a closer look.
Duplicate Objects Around A Circle In Affinity Designer
The following video tutorial will walk you through the entire process for duplicating objects around a circle in roughly 2 minutes:
Continue on for an outlined overview.
Table of Contents |
Step 1: Select the object and enable the transform origin
The first step to duplicating objects around a circle in Affinity Designer is to select the object you’d like to duplicate using the Move Tool (keyboard shortcut: V).
Once selected, you should see an option in the tool settings menu that reads Enable Transform Origin when you hover your cursor over it:
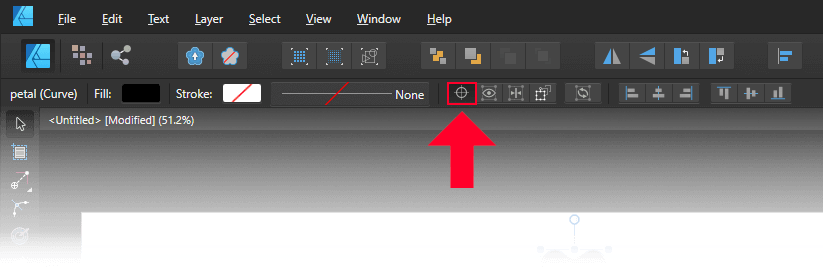
The Enable Transform Origin setting allows you to change an object’s rotation center.
Click on the button to enable the feature. Once enabled, you will see a small, round cross hair placed at the center of your object:
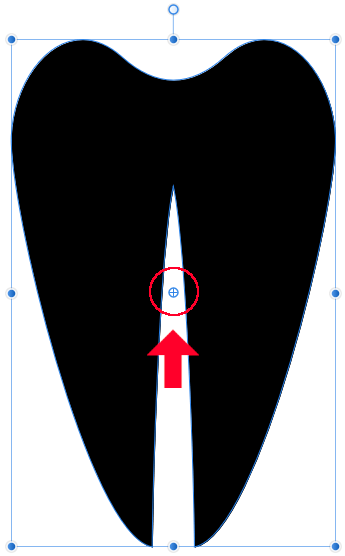
The rotation center is located in the middle of the object.
This cross hair represents the object’s rotation center. The object will rotate around this point wherever it is placed, making it easy for use to duplicate the object around a circle.
Click and drag the rotation center to place it beneath the object. Hold Shift on your keyboard while doing so to ensure that it remains on the same vertical plane:
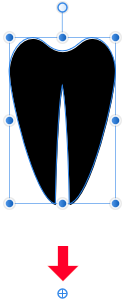
Moving the rotation center away from the object allows us to rotate it in a circular pattern.
Step 2: Duplicate the object by pressing Control + J
Now that we’ve placed the rotation center outside of the object, let’s duplicate the object by pressing Control + J on the keyboard (or Cmd + J if you’re a Mac user.)
You can ensure that the object has been duplicated by checking the Layers menu to the right of your screen. There should be two layers now instead of one.
Step 3: Rotate the object once and repeat the process
All we have to do now is rotate the object once and then use the keyboard shortcut to repeat the process.
Hover your cursor just outside of the top-right transformation handle of the object to bring up the rotation tool, then click and drag while holding Shift to rotate your object 1 or 2 steps in the clockwise direction:
The duplicate copy is rotated 1 or 2 steps.
Now, simply repeat this process by pressing Control + J on your keyboard (or Cmd + J if you’re a Mac user.) For every time it is pressed, a duplicate copy of the object will be generated and rotated by the same amount of degrees as the original:

The copies are now duplicated around the rotation center, positioning them in a circle.
And that should do it for this lesson. If you’d like to change the size or density of the rotated copies, all you have to do is change how far out you place the rotation center. Moving it further away from the object will create more copies around a larger circle, whereas keeping it closer to the object will generate less copies around a smaller circle.
Conclusion
Duplicating objects around a circle in Affinity Designer can be a little tricky if you aren’t aware of the duplicate feature and how it works. It would be nice if there were a simplified workflow for this, but for now this will do.
If you have any questions or need clarification on any of the steps taken in this lesson, simply leave a comment below.
Learn To Master The SoftwareGain a complete understanding of your favorite design apps with my comprehensive collection of video courses. Each course grants access to our private community where you can ask questions and get help when needed.
|
||||||||||||||||||||||||||||||||


