Pixel Stretch Effect with GIMP
Pixel Stretch Effect with GIMP https://logosbynick.com/wp-content/uploads/2018/05/pixel-stretch-gimp-tutorial-1024x602.jpg 1024 602 Nick Saporito https://secure.gravatar.com/avatar/8e31bf392f0ba8850f29a1a2e833cdd020909bfd44613c7e222072c40e031c34?s=96&d=mm&r=gIn today’s tutorial I’ll be demonstrating how you can create a pixel stretch effect using GIMP. This is a rather simple technique that would make for a great first tutorial if you’re new to GIMP. The effect will work on virtually every image, but I do recommend using images where your subject is either completely forward-facing or completely in a side profile position.
Let’s do a quick outline of the steps. Feel free to skip to the end of the post for the video tutorial.
Pixel Stretch Effect
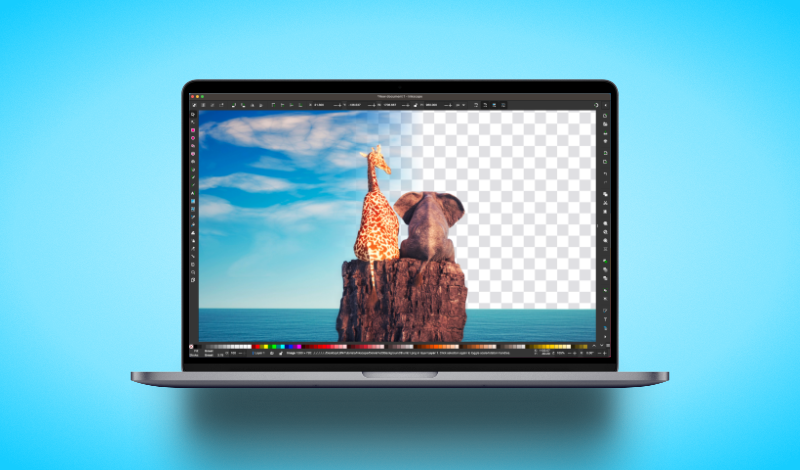
The first step, obviously, is to find a photo to work with. If you’d like to follow along with what I’m doing then feel free to grab this photo and paste it as a new image in GIMP.

Copy this image then in GIMP go to Edit -> Paste As -> New Image
Next, we’re going to use the rectangle tool to divide our image up into three separate layers — the left side, the right side, and a tiny sliver of the middle. This little sliver is going to be what we use as the stretched part of the design.

In order to divide a single image into separate layers, we’re going to float each individual section then set it as new layers. If this doesn’t make sense, don’t worry. It’s all explained in the video.
The final step is to grab the middle sliver of an image using the scaling tool, then stretch it out all the way to the left and right sides of the document.

Make sure to pull both the left and right sides of the sliver far beyond the boundaries of the accompanying images on it’s left and right hand side. The stretch image will have a tapered effect that transitions to transparency on each side, so we need to make sure we account for that when sizing it.
And with that, our design is complete.
Video Tutorial
For complete step-by-step instructions with voice narration, check out the video tutorial below. If you have any questions about anything just leave a comment. As always, thanks for watching!
Learn To Master The SoftwareGain a complete understanding of your favorite design apps with my comprehensive collection of video courses. Each course grants access to our private community where you can ask questions and get help when needed.
|
||||||||||||||||||||||||||||||||