
How To Make A Gradient In Procreate | Linear and Radial
How To Make A Gradient In Procreate | Linear and Radial https://logosbynick.com/wp-content/uploads/2021/06/make-gradients-procreate.png 800 470 Nick Saporito https://secure.gravatar.com/avatar/8e31bf392f0ba8850f29a1a2e833cdd020909bfd44613c7e222072c40e031c34?s=96&d=mm&r=gAlthough Procreate doesn’t come with any tools or features that directly allow you to create gradients, that doesn’t mean it can’t be done manually. It also doesn’t mean that it can’t be done with ease either. The brilliance in Procreate’s simplicity will be on full display for today’s tutorial as we go over how to make a gradient in Procreate using a manual method.
In short, the way that you can make a gradient in Procreate is by filling separate layers with the colors you’d like used in the gradient, then blurring them together using the Gaussian Blur effect. This may sound like a convoluted process, but I can assure you it’s not. It takes mere seconds to generate various types of gradients. In this tutorial I’ll be demonstrating how to do so for both linear and radial gradients.
How To Make A Gradient In Procreate
| To make a gradient in Procreate, create separate layers that are filled with the colors you’d like used in your gradient. Then, blend them together using the Gaussian Blur effect and merge the layers together. |
The following video tutorial will walk you through the process of creating a linear gradient using Procreate. I also demonstrate how to fill a text object with that gradient, so check it out if you’re looking for a practical application for the gradients you’ll be creating:
Continue on for the written instructions.
Table of ContentsMake A Linear Gradient In Procreate
Make A Radial Gradient In Procreate
|
Make A Linear Gradient In Procreate
First, let’s go over how to make the simplest type of gradient there is, which would be a linear gradient.
A linear gradient is a gradient that blends two colors together following a single straight (or “linear”) path.
Step 1: Create separate layers and fill each with the colors you’d like to use
The first step in making a linear gradient is to create two separate layers and fill each of the with the color you’d like used in your gradient.
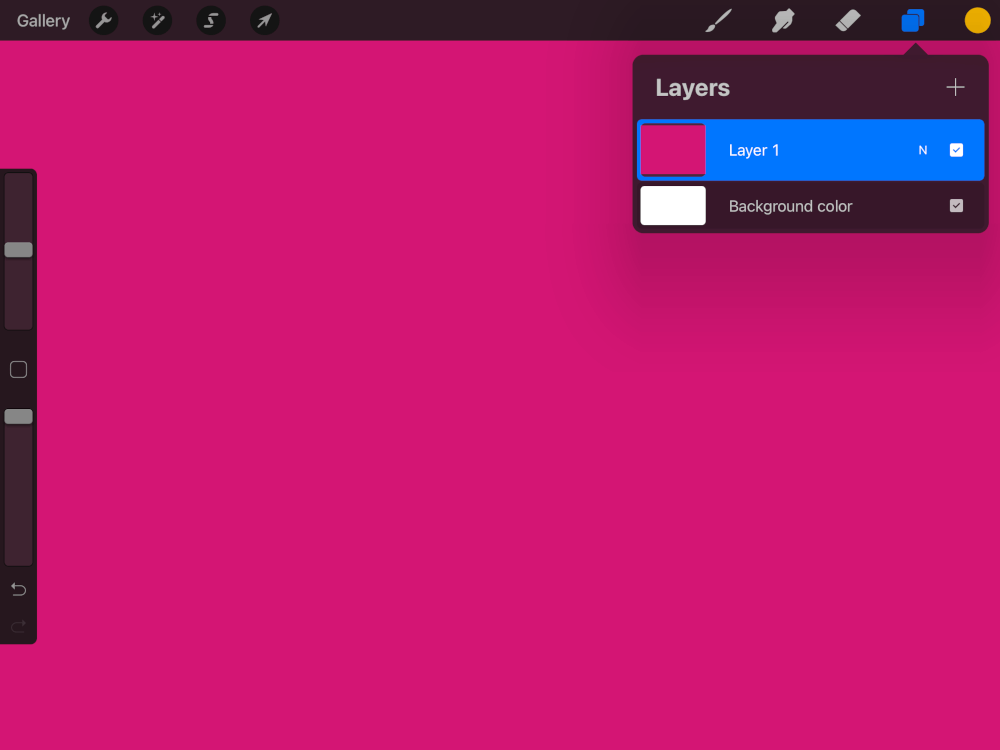
For example, I’ll be making a gradient that transitions from pink to yellow, so I’ve created two separate layers, filled one with pink and the other with yellow:
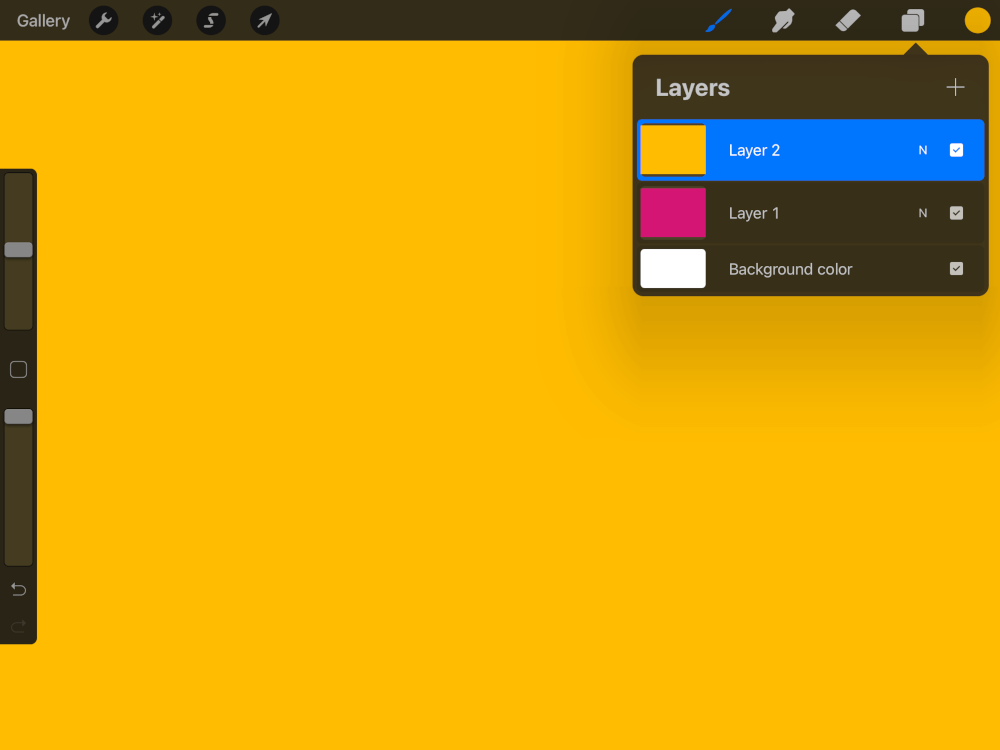
Each color of the gradient must have its own layer.
You can fill your layers by simply clicking and dragging the color disc onto the canvas. Please refer to the video tutorial if you need a more elaborate explanation of how to do so.
Step 2: Move one of the layers over and apply a full Gaussian Blur to it
Next, we’re going to use the Move Tool to move the top layer over:
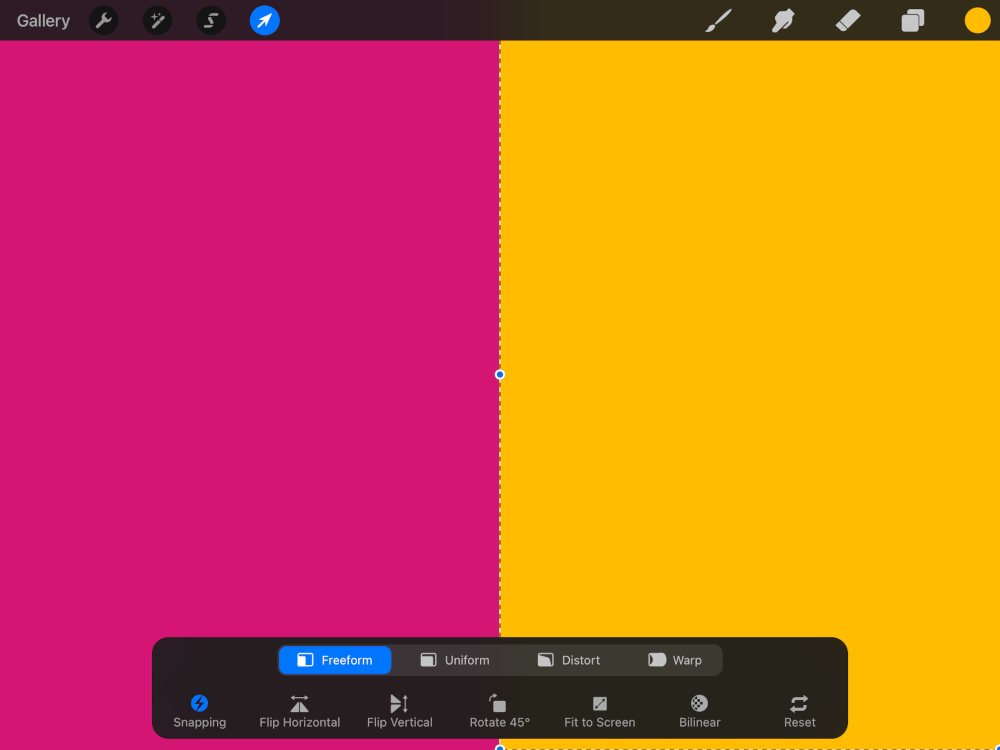
For this demonstration I will be making the gradient go from left to right, so I’ve positioned my layers accordingly.
This placement will determine the direction of your gradient as well as the position of the colors in that gradient. So, move your layer to the top or bottom half of the screen if you’d like the gradient to follow a vertical path. Move it to the left or right half of the screen if you’d like it to follow a vertical path.
It is recommended that you enable snapping while moving your layers. This will ensure that you position your layer exactly halfway across the canvas, and without losing its position of the vertical or horizontal axis.
With the top layer still activated, apply a Gaussian Blur, which can be located in the Effects menu.
Make sure to choose the apply the blur to the Layer (rather than the pencil) when prompted. Then, tap and drag all the way across your screen, from left to right, to blur the top layer. This will effectively create a gradient from your two colors:
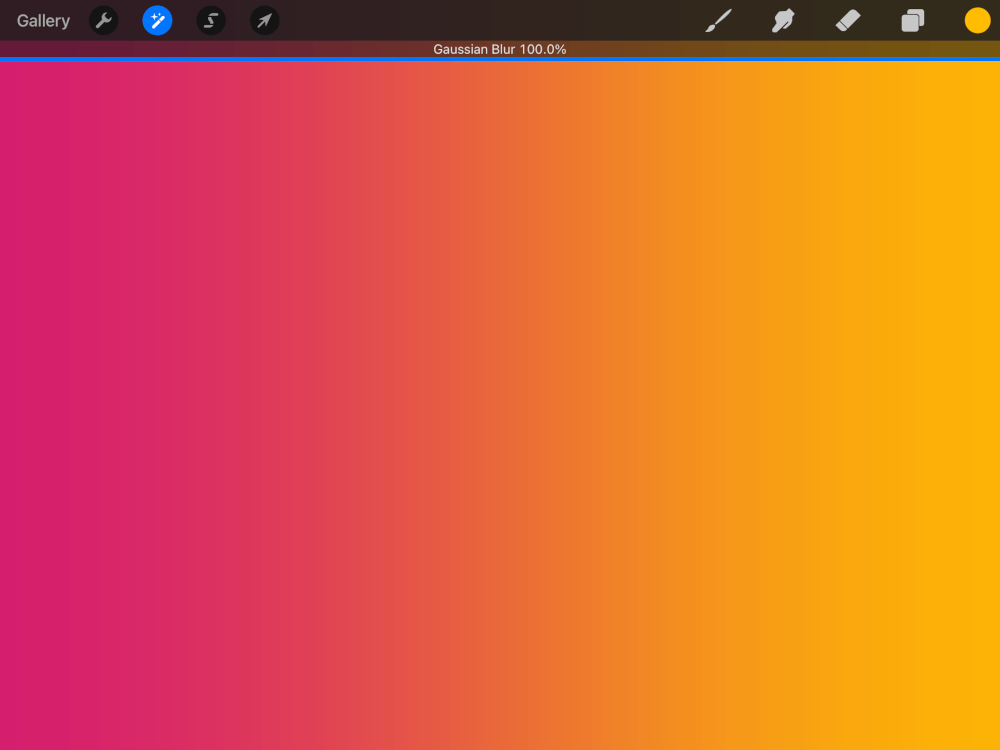
Applying a Gaussian Blur to the top layer will effectively make a gradient from the two layers.
Step 3: Merge both layers together, resulting in a linear gradient
If you’re trying to make a gradient in Procreate then it’s safe to assume that you would probably like to use that gradient to fill other objects with. In order to do so, you’ll have to merge the two layers together first.
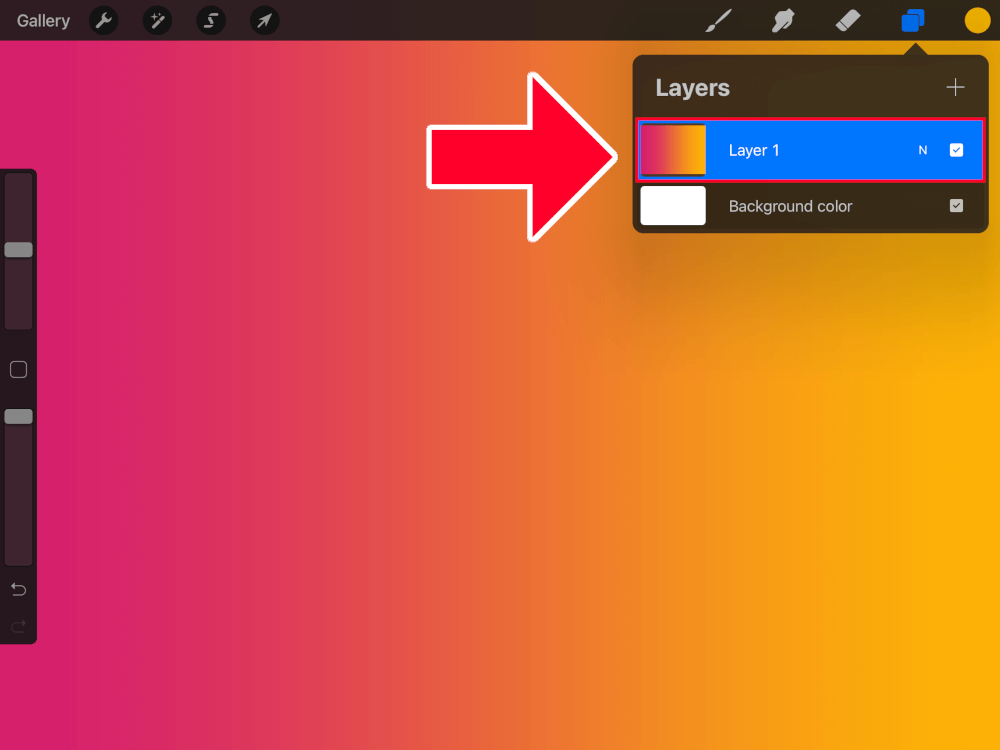
Open the Layers menu, tap on the top layer until the flyout menu populates, and select Merge Down.
This will combine the two layers together, making them into a single usable gradient:
Click to enlarge.
Make A Radial Gradient In Procreate
Another type of gradient that you can make in Procreate is a radial gradient.
Unlike a linear gradient, which follows a straight path, a radial gradient follows a circular path. Let’s go over how to make a radial gradient in Procreate.
Step 1: Create a new layer and fill it with one of the colors you’d like used in the gradient
First, create a new layer and fill it with the outer most color you’d like used in your radial gradient.
For this demonstration I will be making the outside of the gradient pink and the inside yellow, so I’ll be filling this layer with pink:
Step 2: Create a new layer with an ellipse selection that is filled with the other color
Next, add a new layer on top of the previous layer and use the Selection Tool to create an ellipse selection in the center of your canvas:
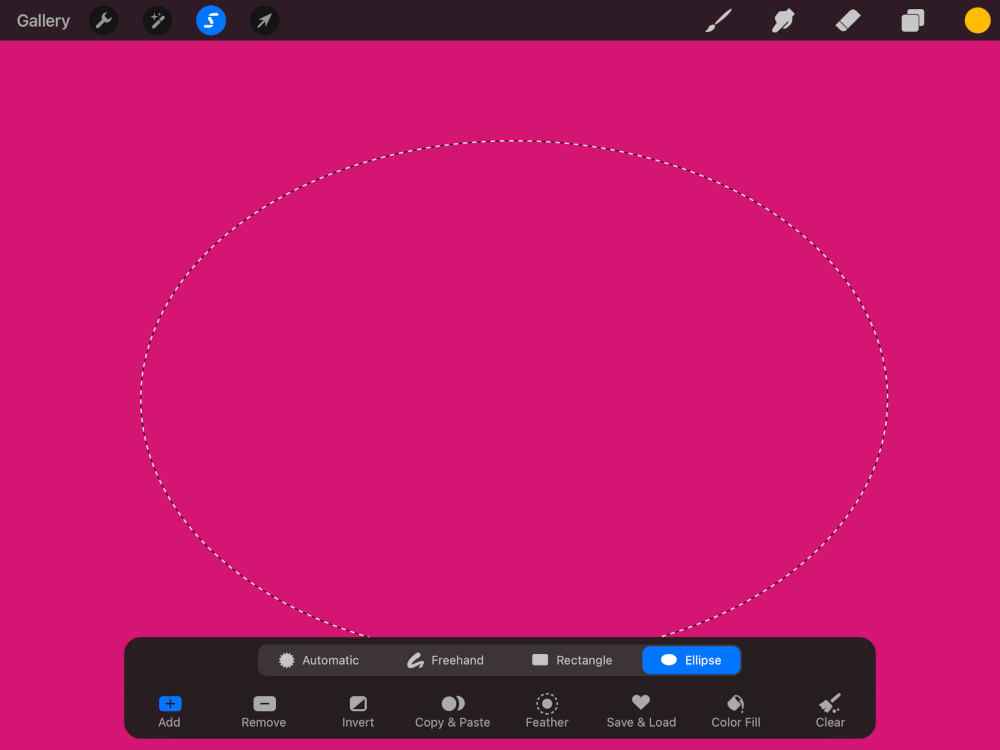
The selection is represented by the dotted outline.
Fill that ellipse selection with the inner most color you’d like used in your radial gradient. In my case, that would be yellow:

Once completed, you may have to align the ellipse to the center of the page using the move tool with snapping enabled.
Step 3: Apply a Gaussian Blur to the ellipse layer
Much like we did for the linear gradient, we will be applying a Gaussian Blur to the layer with the ellipse on it.
With that top layer still activated, open the Gaussian Blur effect, located in the Effects menu. When prompted, make sure to choose to apply it to the Layer rather than the pencil.
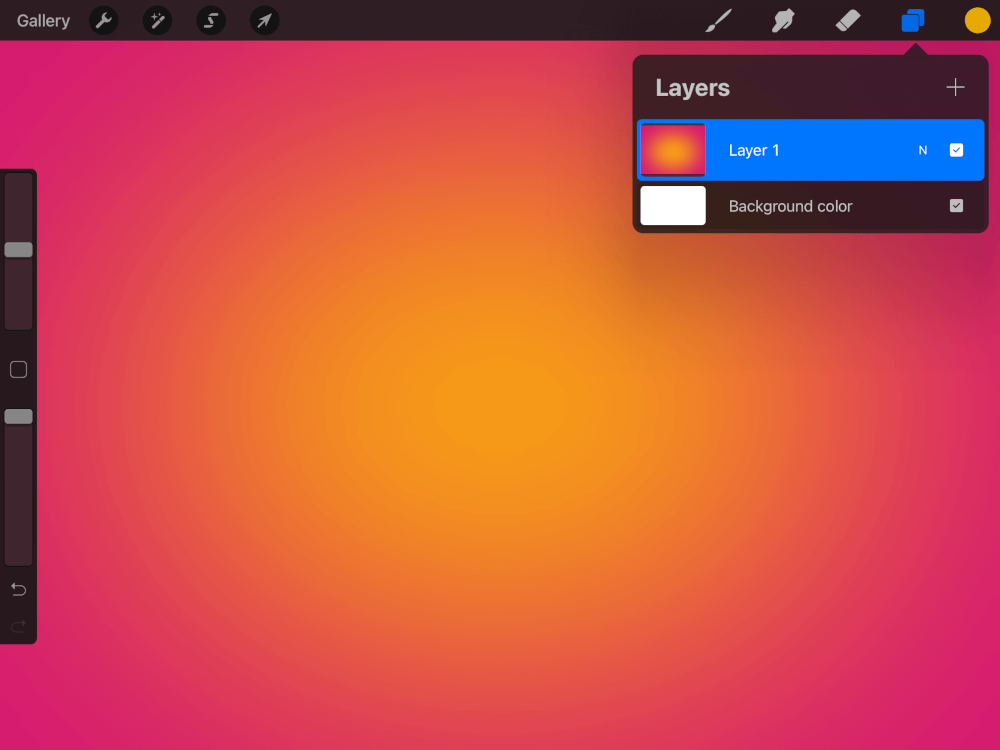
Tap and swipe from the left side of your screen to the right in order to apply a full blur. This will essentially make a gradient from the two layers:

Step 4: Merge both layers together, resulting in a radial gradient
This final step in our quest to make a gradient in Procreate is to simply merge the two layers together so that we will be left with a single usable gradient layer.
To do so, open the Layers menu and tap on the top layer until you get the flyout menu. Then, select Merge Down.
This will combine your two layers together, resulting in a usable gradient:
Refer to the video tutorial at the beginning of the post if you’d like to know how to fill objects (such as text) with your gradient.
Conclusion
Earlier this year when I made a review post comparing Affinity Designer vs Procreate, one of the things I criticized Procreate for was having an inability to create gradients. However, that’s not entirely true. As I’ve demonstrated in this tutorial, you can make a gradient in Procreate with relative ease if you follow a manual approach.
In a way, this just goes to show the brilliance in Procreate’s simplicity. Seeing how easy it is to manually create gradients sort of makes you question the need for a gradient tool in the first place, and this has been a common theme as I’ve continued to explore the program. On various occasions I’ve lamented not having a certain tool or feature, only to find out that I never needed that feature in the first place. This has caused me to completely rethink what makes a great design application.
If you have any questions or need clarification on any of the steps taken in this tutorial, simply leave a comment below.
Learn To Master The SoftwareGain a complete understanding of your favorite design apps with my comprehensive collection of video courses. Each course grants access to our private community where you can ask questions and get help when needed.
|
||||||||||||||||||||||||||||||||


Ted Scott
If ALPHA LOCK is turned on, the gradation will not happen.