
It’s Finally Possible To Save As JPG with Inkscape! Here’s how…
It’s Finally Possible To Save As JPG with Inkscape! Here’s how… https://logosbynick.com/wp-content/uploads/2021/06/inkscape-save-as-jpg-2.png 800 470 Nick Saporito https://secure.gravatar.com/avatar/8e31bf392f0ba8850f29a1a2e833cdd020909bfd44613c7e222072c40e031c34?s=96&d=mm&r=gThanks to an update in version 1.1, it’s now possible to save as JPG with Inkscape. In previous generations, the only file format you could export your work to was PNG. All of that has changed though, and in this tutorial I’ll be going over how you can export a JPEG file for the designs you’ve made in Inkscape.
To those of you who may already be intermediate-to-advanced users, all you have to do to save as JPG with Inkscape is use the Export Menu to export your work as you would for a PNG image. When prompted to choose a name and location for your exported file you’ll be able to choose the file type as well. Simply choose JPEG from the list and click Save. Just make sure you upgrade to the latest version of Inkscape first.
How To Save As JPG with Inkscape
| To save as JPG with Inkscape, open the Export menu by pressing Control + Shift + E. Choose the export area that you’d like to save, then click the Export As button. When prompted to choose a file name and location, change the file type from PNG to JPG. |
For those of you who may need a more detailed explanation than that, I’ve made a video tutorial with a walkthrough of the entire process here:
If you prefer written instructions then continue on.
Table of Contents
|
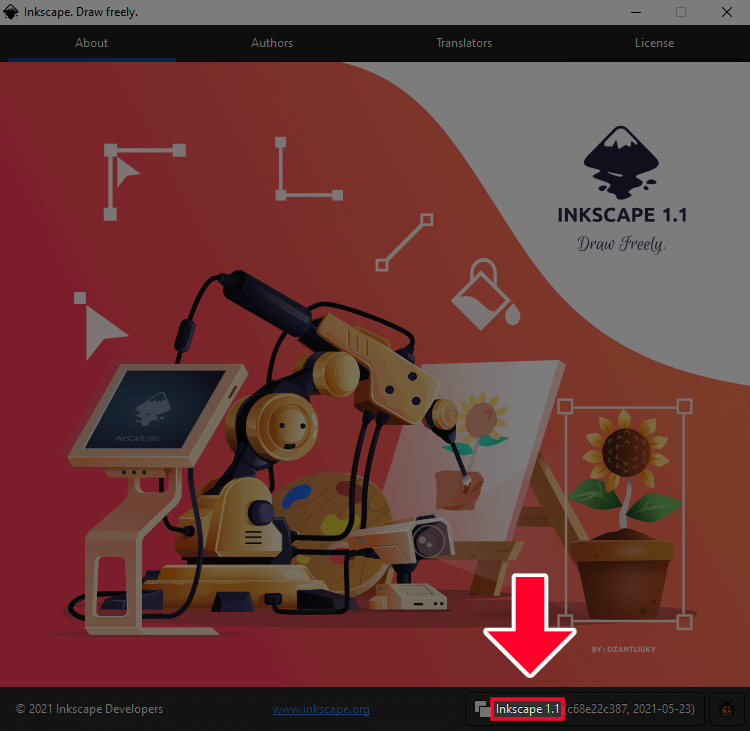
Step 1: Make sure you’re using Inkscape 1.1 or later
In order to save as JPG with Inkscape you must first make sure that you’re using the latest version of Inkscape. Earlier versions, such as 1.0 and 0.92.5, only let you export as PNG. You’ll need to update to version 1.1 or later in order to export a JPEG file.
If you’re unsure about which version you’re using, simply navigate to:
Help > About
An “about” menu will populate on the screen that will indicate the version you’re using:
The About menu will let you know which version of Inkscape you’re using.
You can upgrade to the latest version of Inkscape by going to the Inkscape website.
Step 2: Open the Export PNG menu
Once you’ve ensured that you’re using the proper version of Inkscape, open the Export menu by pressing Control + Shift + E on your keyboard. The menu will populate to the right side of your screen as a dockable menu:
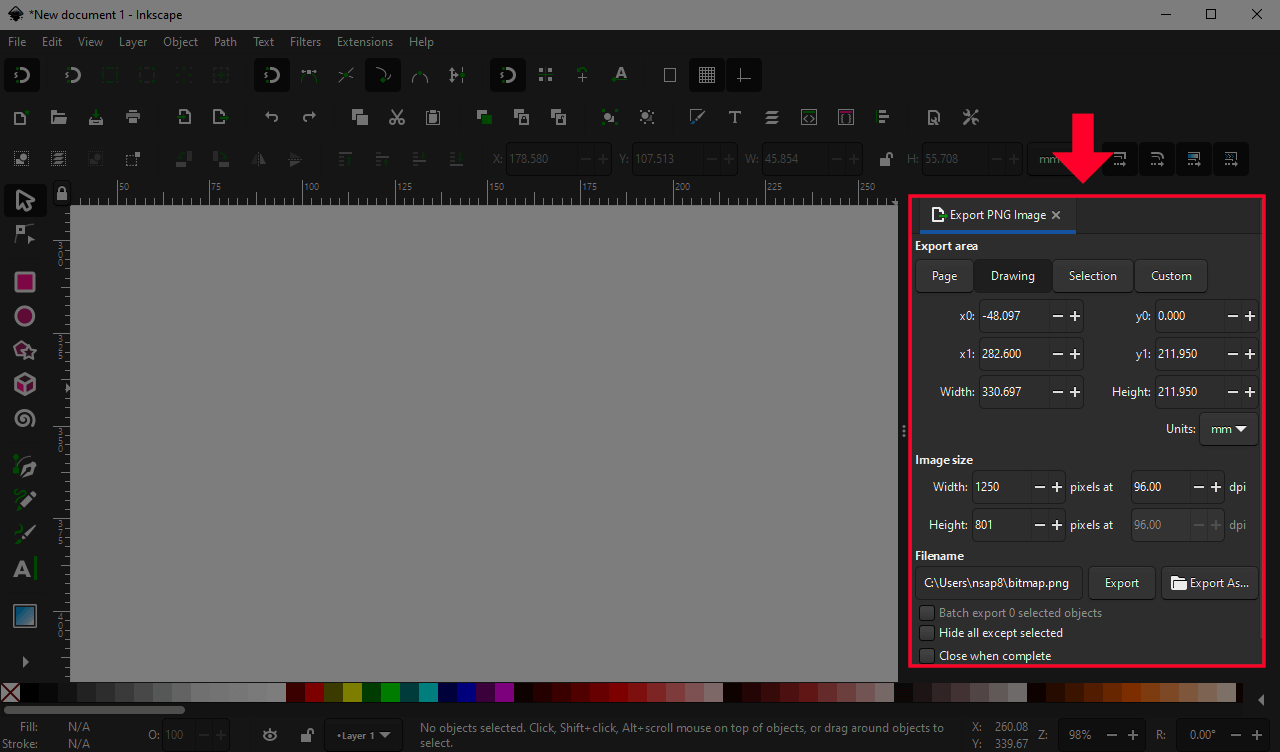
The Export PNG Image menu will open as a dockable menu on the right-hand side of your screen.
Apparently the Inkscape team forgot to update the name of the menu, because it’s still labeled as “Export PNG Image“. This may be confusing as it suggests that you can only export PNG images with it, but that is no longer the case.
Step 3: Choose your export area
The way that you save as JPG with Inkscape is by exporting it rather than saving it. So, if you try to “Save As”, you won’t be presented with the option to choose JPG. The way that we export JPG is by using the Export menu.
Within the Export PNG Image menu on the right-hand side of your screen, choose of the Export Area options. The options are as follows:
- Page: Choosing this option will export everything within the page border on your screen.
- Drawing: Choosing this option will export everything both inside and outside of the page border.
- Selection: Choosing this option will only export an object(s) you have selected and everything within the bounding box surrounding it.
- Custom: This option lets you specify a coordinate point on the X and Y axis of your document to export.
If you want a more in-depth demonstration of the difference between these options then please watch the video tutorial above.
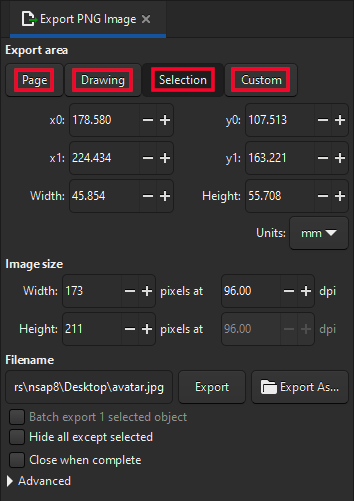
The chosen export area, outlined in red, will be what is saved.
Leave all of the other settings as they are for now. You do not need to change any of the defaults.
Step 4: Choose JPG as the file type when exporting
Once you’ve determined your selection area for exporting, you can export it as a JPEG by clicking the Export As button:
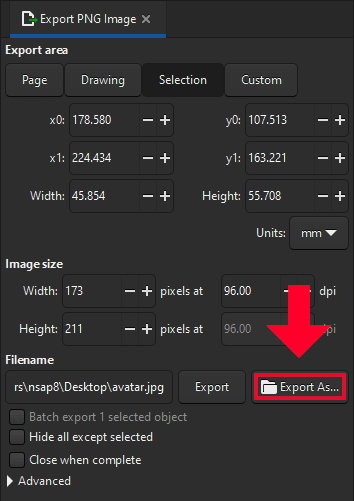
You will be prompted to designate a location on your hard drive and a name for the file.
You’ll also be able to change the file type as well:
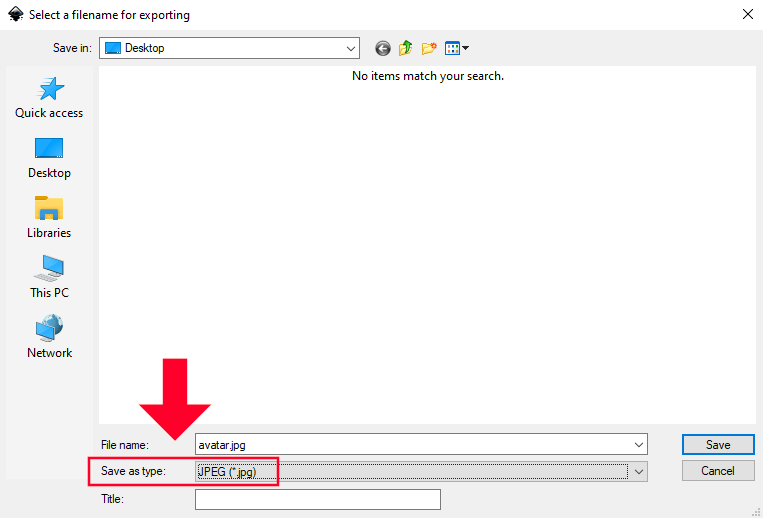
Choose JPG from the file type dropdown.
From the file type dropdown list, you will be able to export your work in any of the following file formats:
- PNG
- JPG
- TIFF
- WEBP
Previously, the only option was PNG. However, there’s now a nice mix of options to choose from.
Seeing as how you want to save your work as a JPEG, choose JPG from the list, and click Save. You will then be prompted with the following menu:

You can read the warning if you’d like but it’s unimportant.
Navigate to the Options tab and choose the quality you’d like your JPEG to be. The higher the number, the better the image quality and larger the file size. The lower the number, the worse the image quality and lower the file size.
Once you click Ok you will have successfully exported a JPEG file with Inkscape!
To verify, navigate to the location on your hard drive where you exported your image to see if it’s there. If your computer is as fickle as mine has a tendency to be, you may have to refresh it.
Conclusion
It’s about time that we have the ability to save as JPG with Inkscape. This is something that has been possible in other applications (such as Adobe Illustrator and Affinity Designer) for a very long time, and the inability to handle such a [seemingly] simple function was very off-putting to many newcomers to the Open Source world. Users who watch my YouTube tutorials and wanted to check out Inkscape with a passing interest had a tendency to become dismissive of Inkscape and didn’t really take it seriously after learning that they couldn’t output JPEG files. Thankfully, that has all changed.
If you have any questions or need clarification on anything from this post, simply leave a comment below.
Learn To Master The SoftwareGain a complete understanding of your favorite design apps with my comprehensive collection of video courses. Each course grants access to our private community where you can ask questions and get help when needed.
|
||||||||||||||||||||||||||||||||


Hi Nick!
I’m new to Inkscape and have found your tutorials super helpful! I can export to JPG successfully but when I open the JPG file, there’s a black border between my image and the page. I’m exporting the full page at 100% Quality and I’ve tried this with “Progressive” check box checked off and on. Any idea how to workaround this?
Ho Nancy, what do you mean by black border? Can you email me a screenshot? If I had to guess I would say that it’s because you’re using the Windows image viewer, which displays images on a black backdrop. But I can’t say for sure without seeing exactly what’s going on.
Hi Nick,
Exporting to JPG does not seem to work for me. It refuses to save the file. I’m simply saving it to my Desktop and then click Export and it pops up with that message, I put the quality to 100 and click Ok and then nothing. It doesn’t appear anywhere on my Desktop. Do you know of anyone having this issue or have you experienced this problem?
Hi Yusuf, have you tried refreshing the desktop? I’ve noticed with Windows it needs to be refreshed quite often, and there are many times when it looks like a file didn’t save but when I refresh the desktop it appears.
This is a follow-up to my previous comment. Apparently it was a problem being encountered by many users and was being discussed recently on Gitlab. There seems to be a solution be removing a lines of code in one of the python files and noted in this answer:
https://gitlab.com/inkscape/inkscape/-/issues/2860#note_701062281
Sadly, I do not know how to edit the python code without a special program, so I will wait until the release of the Inkscape (which a developer in the thread said will include this solution!).
Thankyou that fix my problem , i can export jpg now 🙂
I can save it as a jpeg no problem, but it turns the entire image black, any tips on how to fix this?
I would double check the export area to make sure to set to the proper area.
I’m also having problems with export to .jpg.
Export to webp and png is fine, but although export to .jpg appears to go through the motions of exporting something, no .jpg gets created.
I’m definitely using Inkscape 1.1 .
My target folder is the same one I’ve saved the .svg file to (both formats), and also the .webp and the .png versions. It’s not a question of the folder needing refreshing. (I’ve done that plenty of times).
A practical workaround is to open the webp or .png version in Irfanview, then “save as” .jpg from Irfanview.
(Frustratingly, there also seems to be a bug or limitation in Irfanview in that it’s not reading .svgs correctly, at least the ones I’ve produced. I’ve reported this to the author).
You aren’t producing black output (e.g. text) on a transparent background by any chance?
I made this mistake. A way round this is to give yourself, say, a light grey background … draw a rectangle over the whole page area and colour it light grey (or white it you prefer).
Make sure it is below your text or other black output.
Sir, it would be great if you publish your Inkscape and GIMP Masterclass on Udemy. In our country, there is no PayPal support. And payment through credit card is also hard for us as many of us don’t have credit cards. But yes, we can manage to buy courses from Udemy by a that has been established by the Udemy authority of our country.
I can afford all of your courses. That’s not the problem. The only problem is the payment method. If you consider to publish your courses on Udemy , we will be really grateful to you. Thank you.
Hi Adnan, sorry you’re unable to use any of the payment methods I offer. I looked into using Udemy in the past but their commission structure is unfavorable to the creator when compared to some of the other options out there.
Great news! Some media really needs to be exporte to jpg (jpeg) format
Absolutely. This is important for logo design too.