How To Make A Logo Background Transparent | No Software Required!
How To Make A Logo Background Transparent | No Software Required! https://logosbynick.com/wp-content/uploads/2020/03/how-to-make-a-logo-background-transparent-1.png 800 470 Nick Saporito Nick Saporito https://secure.gravatar.com/avatar/8e31bf392f0ba8850f29a1a2e833cdd020909bfd44613c7e222072c40e031c34?s=96&d=mm&r=gIn this post I’ll be demonstrating how to make a logo background transparent, and this will not require any software whatsoever! This is something that can be done entirely through your web browser, even if you’re a complete beginner who has no prior experience with design tools.
If you’re currently using a logo that does not have a transparent background then you are likely going to have trouble using it, and quite often. Ideally, a logo should retain enough versatility to be used in any possible context, and having a logo with a transparent background that can be overlaid onto any backdrop is a pillar of a versatile logo. This is something I covered in my post about preparing logo files for clients.
If the designer you hired to create your logo did not sufficiently provide you with the all of the proper file formats and variations then it would be in your best interest to reach out to them and see if they can provide that for you.
If you are unable to reach your designer, or if for whatever other reason you are stuck with a logo that doesn’t have a transparent background, then read on to learn how to make a logo background transparent.
How To Make A Logo Background Transparent
The following is a breakdown of the steps taken to achieve this task. For complete step-by-step instructions I would highly advise that you watch the video tutorial below:
The steps we’ll be taking are as follows…
- Step 1: Go to Photopea.com and open your logo using the web interface.
- Step 2: Grab the Magic Wand tool and adjust the Tolerance setting according to your logo’s specifications.
- Step 3: Click on the background of your logo using the Magic Wand tool to create a selection around your background, then press Delete on your keyboard to make it transparent.
- Step 4: Export your logo as a PNG file to retain its transparency properties and save it locally.
Let’s go over these steps a little more in-depth.
Step 1: Go To Photopea.com
Photopea is a free web-based photo editor that is very similar to Photoshop. It looks, feels, and functions just like Photoshop does, but it doesn’t cost anything and you don’t need to download it. You can use it directly within your web browser.
To open your logo with Photopea, navigate to File > Open in the toolbar towards the top of the screen, then select your logo file.
I’ll be using the following example logo for this demonstration…

The goal is to replace the yellow background with transparency.
Once you’ve opened your logo, your screen should look something like this…

Step 2: Create A Selection with The Magic Wand Tool
Next, navigate to the toolbar on the left side of the screen and click and hold on the Object Selection tool (fourth icon from the top) until the following fly-out menu appears…
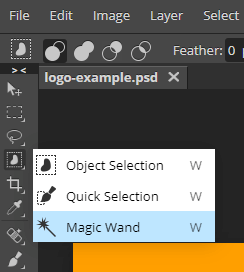
Select Magic Wand, located at the bottom of the list.
With the Magic Wand tool selected, simply click on the background area of your logo to create a selection around it. The selection will be represented by a dotted line, similar to the following screenshot.

Step 3: Delete Your Background
This is the step in which we’ll be directly addressing how to make a logo background transparent. Simply press the Delete key on your board. The background should then be deleted to transparency, as indicated by a checkerboard pattern.
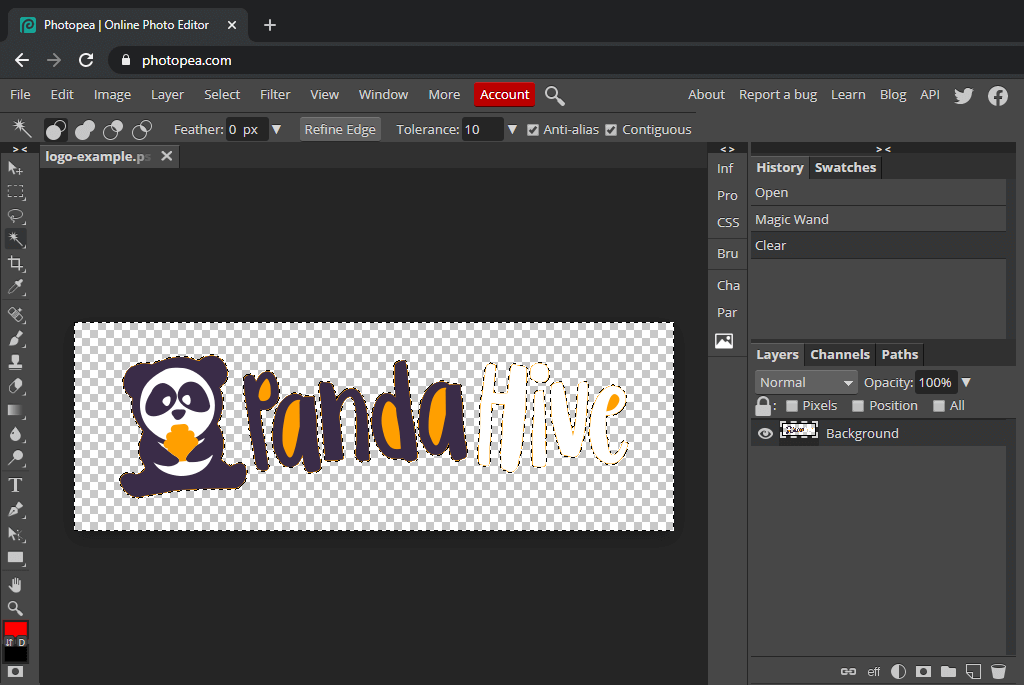
To make sure that the background is deleted in its entirety, zoom in on the logo by holding the Alt key and rolling up on your mouse wheel.
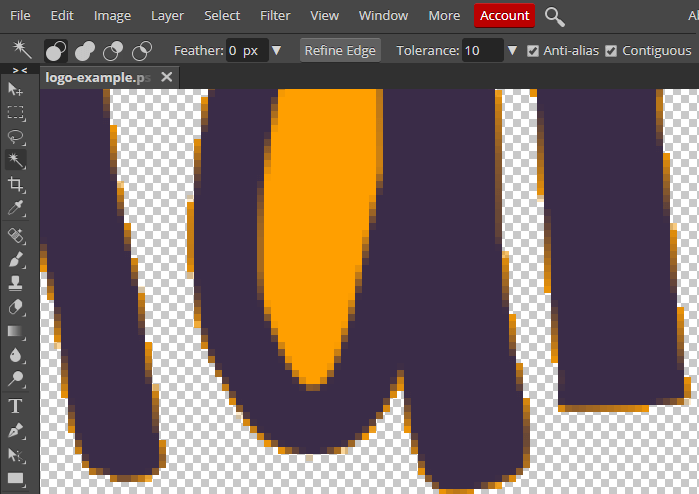
If there’s still some pixel remnants of the background around the edges of your logo, similar to my example above, you can undo this action by pressing Control + z on your keyboard. Press it twice to undo both the deletion of the background and the creation of the selection.
In the tool settings near the top of the page, look for Tolerance and slide it to the right to increase the area of pixels that the Magic Wand tool selects, then try again.
For my example logo I had to increase the tolerance to 126. Your needs may vary depending on your logo.
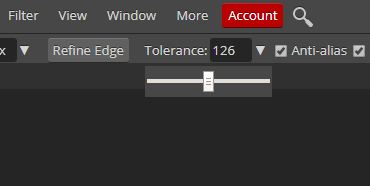
Once you’ve found the proper tolerance setting, you should be able to make your logo background transparent without any pixel discoloration around the edges. Then, you can use the Magic Wand tool to select the areas within the negative space of the letters and delete them as well.
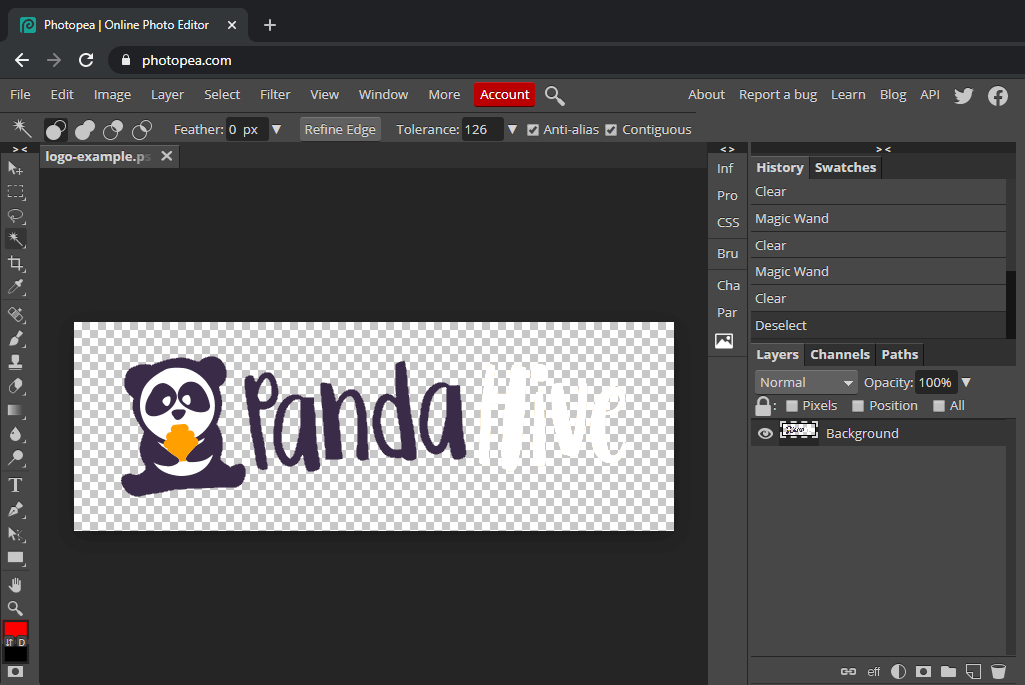
Step 4: Export Your Finished Logo As a PNG File
Once you’ve deleted your logo’s background to transparent, you can save your work by navigating to File > Export As PNG.
It’s important that you choose the .png format because that is the format that retains transparency values. JPEG does not support transparency, therefore I do not recommend saving it in this format. Knowing how to make a logo background transparent is useless if you do not save it in the proper format.
Go ahead and export your logo as a PNG using the default setting from the Export menu. Once you click Save, your new transparent logo should appear in your browser as a download.

And that is how to make a logo background transparent without any design software! If you have any questions or run into any problems simply leave a comment below. As always, thanks for watching!
Disclaimer: this website does not track you, serve ads, or contain affiliate links.
Learn To Master The SoftwareGain a complete understanding of your favorite design apps with my comprehensive collection of video courses. Each course grants access to our private community where you can ask questions and get help when needed.
|
||||||||||||||||||||||||||||||||
Nick Saporito
Hi, I'm Nick— a Philadelphia-based graphic designer with over 10 years of experience. Each year millions of users learn how to use design software to express their creativity using my tutorials here and on YouTube.
All stories by: Nick SaporitoYou might also like
16 comments
-
-
Chris
Hi Nick,
Thank you for taking the time to share and the tutorial on the use of Photopea.
It was easy to follow and a lifesaver.
Great job and many thanks…
-
-
-
-
-
-
Katie
You made this so incredibly simple and easy to understand. Woo Hoo! Thank You!
-
-
Kimberly
Hello! When I save as png, it just goes right back to a white background. Any tips!?
THANK YOU !! -
-
-
-
AS
Hi, I used to this but now it isn’t working for me.
Any tips for what might owrk? -
DP
Hey Nick,
Thanks for this tip. It was very helpful. I also really liked the tutorial about using mockups in Photopea. I really like mockups and I cannot afford Photoshop, so Photopea was a great alternative.
A few quick questions: have you ever created a logo using Illustrator, and do you still use Inkscape all the time? Do you think you can make stuff on Illustrator faster than on Inkscape, or is Inkscape even with Illustrator in terms of workflow and efficiency?
I am also an Inkscape and GIMP user. The software is amazing and I really like it as well.
I look forward to your next tutorial.
Keep up the great work,
DP
-
Nick Saporito
I do use Illustrator a lot for various tasks, but I mostly use Inkscape for logo design. I’m fastest with Inkscape because that’s what I’m most familiar with.
-


AMANDA
YOU SAVED ME!!! I HAVE BEEN TRYING ALL DAY TO FIGURE THIS OUT IN PHOTOSHOP! THANK YOU SO MUCH!