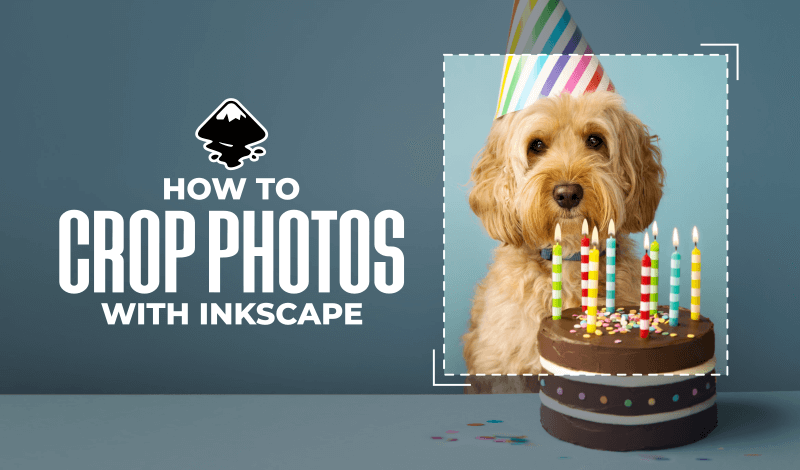
Use Inkscape To Crop An Image In 5 Simple Steps
Use Inkscape To Crop An Image In 5 Simple Steps https://logosbynick.com/wp-content/uploads/2021/02/inkscape-to-crop-an-image.png 800 470 Nick Saporito https://secure.gravatar.com/avatar/8e31bf392f0ba8850f29a1a2e833cdd020909bfd44613c7e222072c40e031c34?s=96&d=mm&r=gAlthough Inkscape is a vector graphics editor, it does have some features built in that allow you to transform photos and raster images. One such feature would be clipping masks, which can be used to crop images. In this tutorial I’ll be demonstrating how you can use Inkscape to crop an image, even if you’re a complete beginner. This isn’t something that is complicated or difficult to understand, and this step-by-step guide will walk you through the entire process — from opening you photo to exporting the cropped image.
Cropping an image in Inkscape is simply a matter of opening your image, creating a rectangle over the area you’d like to crop, then using it as a clipping mask for your image. However, you’ll also need to resize your document to accommodate the newly cropped image, then export it as a usable format, which would be PNG in this instance.
Using Inkscape To Crop An Image
| To crop an image with Inkscape, create a partially transparent rectangle over the area of the image you’d like to crop. Next, select both the image and the rectangle and create a clipping mask from them. |
The following steps will walk you through the process of cropping your image. For a more immersive learning experience, feel free to check out the video tutorial I’ve put together:
If you’d rather follow the written instructions then continue on.
Contents
- Step 1: Open Your Image
- Step 2: Create A Rectangle Over Your Image
- Step 3: Create A Clipping Mask
- Step 4: Resize Your Document
- Step 5: Export Your Image
Step 1: Open Your Image
Before you can use Inkscape to crop an image you first need an image to crop. So let’s open our image.
There’s various different ways to edit images in Inkscape, but for this lesson it is recommended that you open your image in a new document rather than import it onto the document you’re currently working on. This will make it easier for us to export the finalized image once we’re finished.
To open your image, navigate to: File > Open.
Locate your image on your hard drive and select it.
When prompted with the import menu, make sure to choose the following presets:
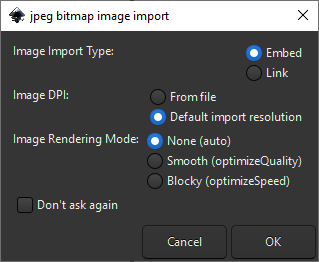
Make sure your import presets match the screenshot above, otherwise your image may import at a different size.
The presets are as follows:
- Import Image Type: Embed
- Image DPI: Default import resolution
- Image Rendering Mode: None
Your image should now be opened in Inkscape, and within its own dedicated document.
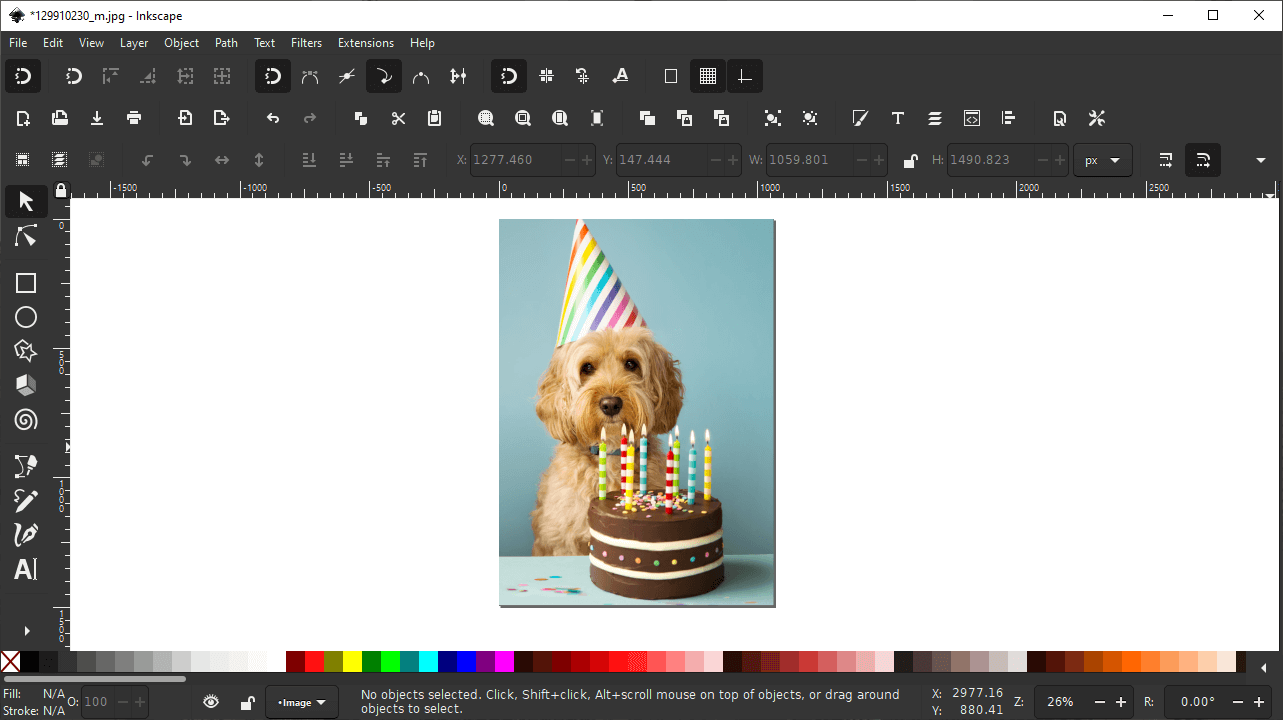
For this demonstration I will be using the following example photo:
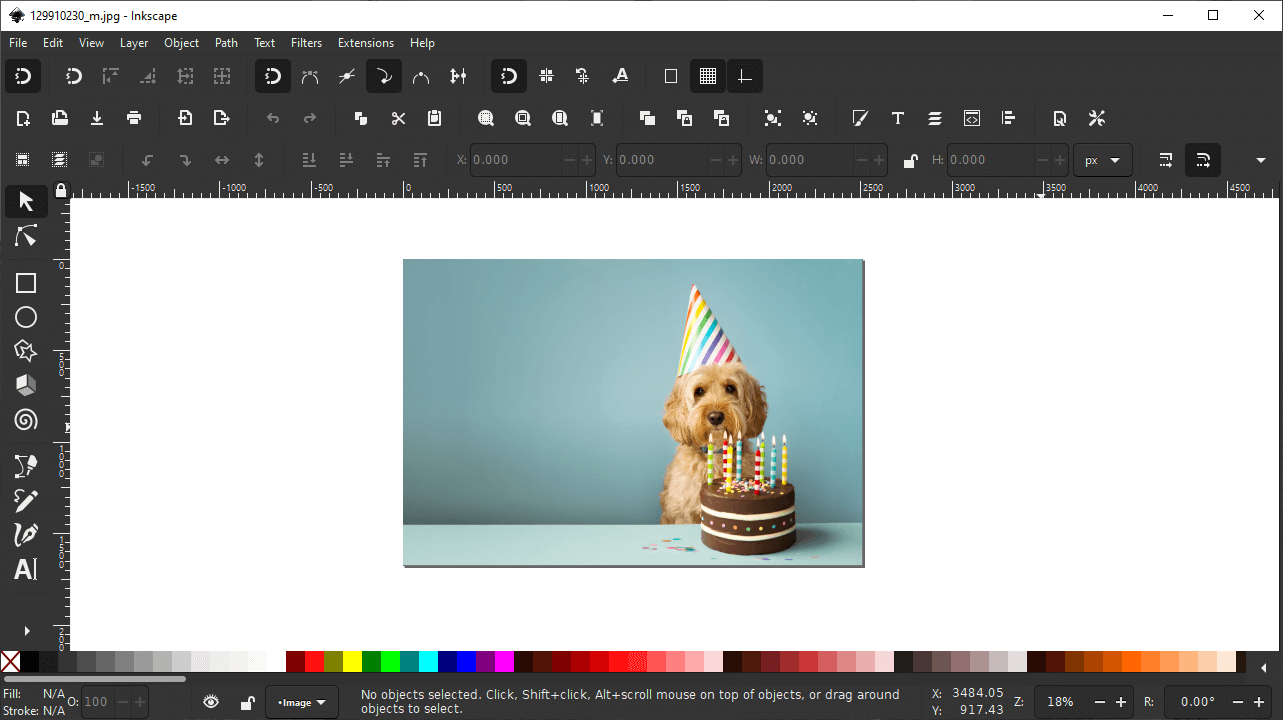
My example photo, opened with Inkscape.
As a side note, if you’re wondering why my version of Inkscape may look different from yours, it’s because I’m using a dark theme. Follow my dark theme tutorial for Inkscape if you’d like to do the same.
Step 2: Create A Rectangle Over Your Image
Now that you have your image opened we can begin the process of choosing the area we’d like to crop.
To do this, grab the Rectangles and squares tool (keyboard shortcut: R) which is located in the tools menu on the left-hand side of your screen. It should be the third tool down from the top:
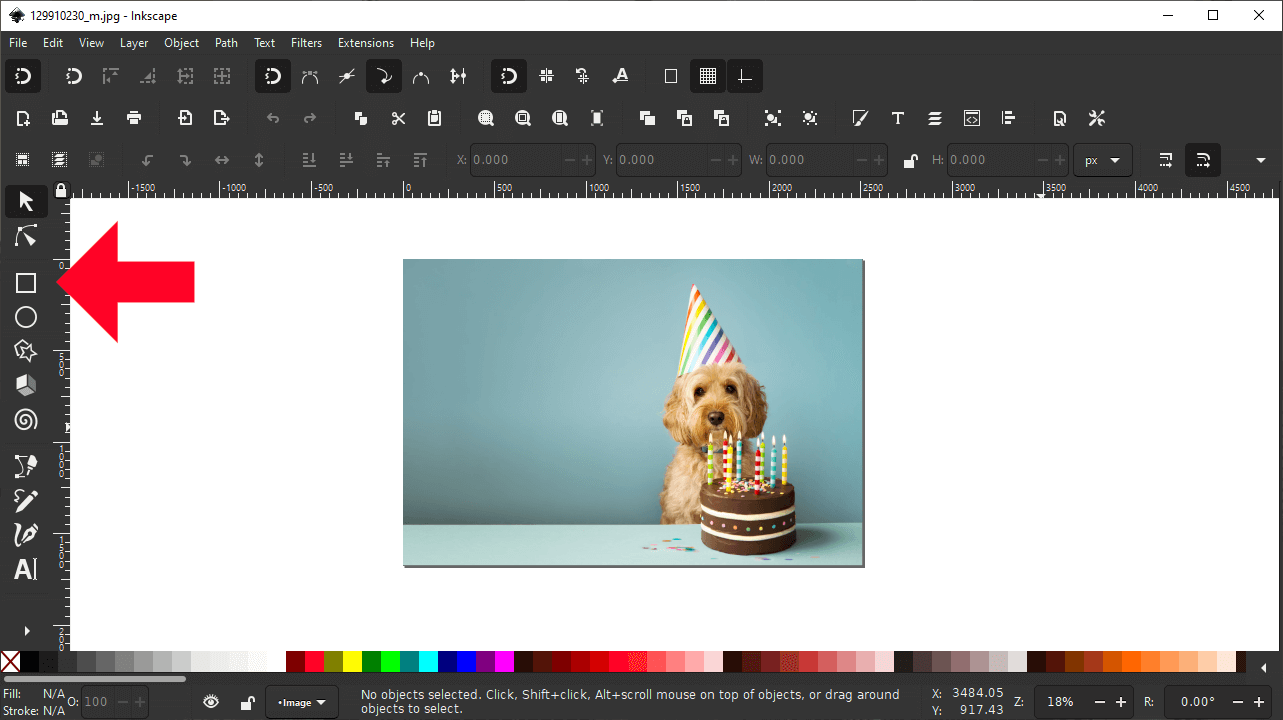
Locate the Rectangle tool in your toolbar.
With the rectangle tool selected, click and drag to create a rectangle over the area of your image you’d like to crop:
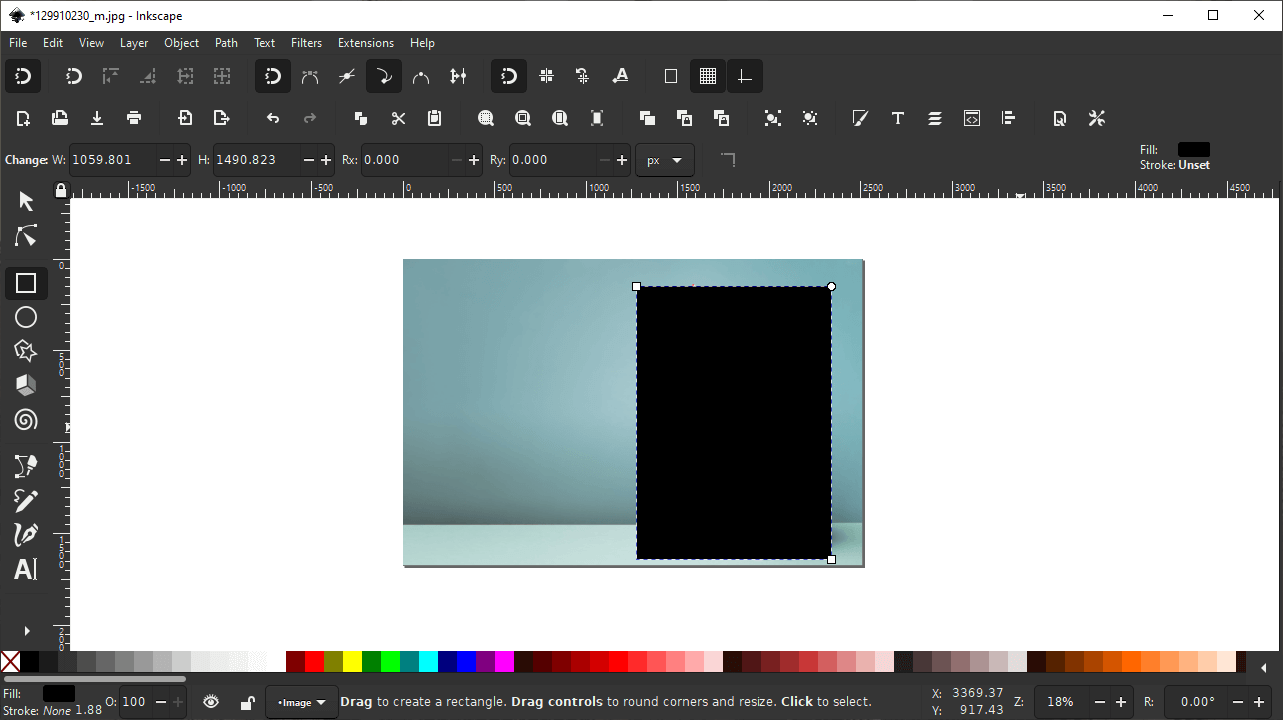
Don’t worry if your rectangle isn’t located precisely where it needs to be. We will be adjusting that later on.
It may be difficult for you to see exactly where the rectangle is situated in relation to the image, so it would be a good idea to reduce the opacity of the rectangle to 50% using the menu at the bottom of the screen:
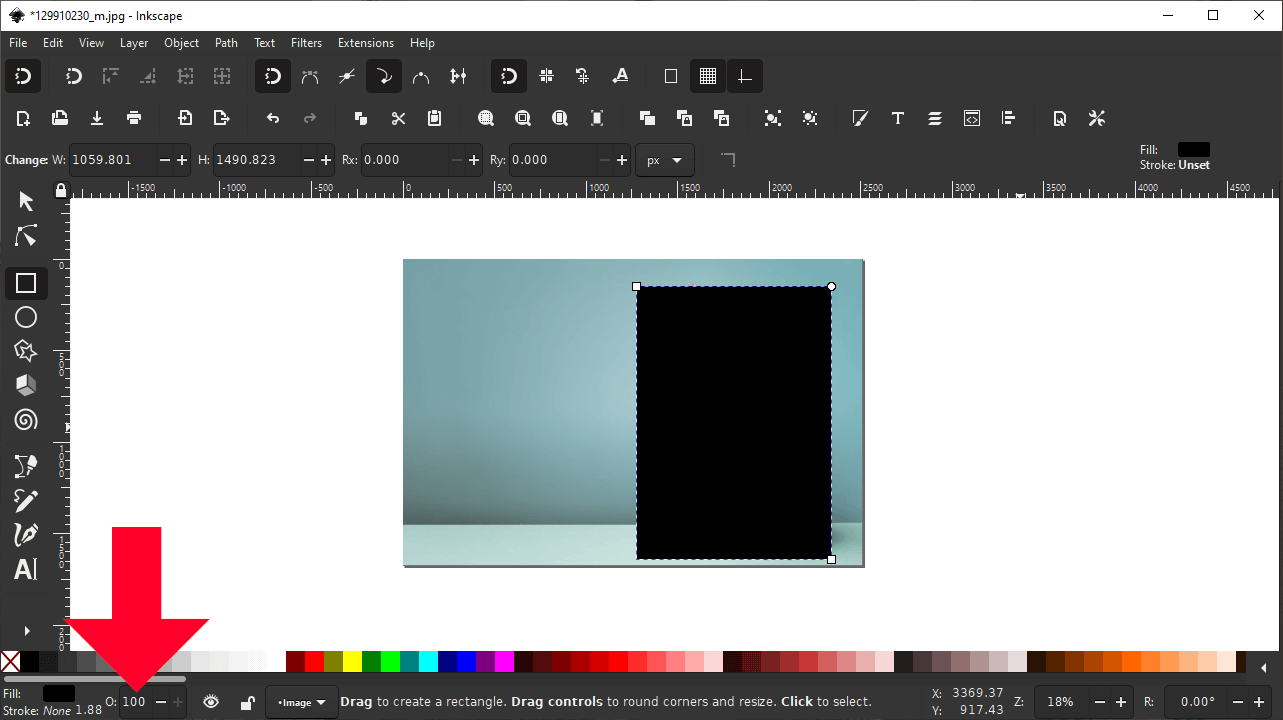
Adjust the opacity using the input values at the bottom of the screen.
Once you’ve reduced the opacity, it would make sense to change the color of the rectangle to a shade that contrasts well with your image’s composition so you can see it better.
For this particular image I’ll be using red because it’s easily visible against the blue-ish green backdrop. The color you should use will depend on your own image.
Reducing the opacity of the rectangle will allow you to see where the image is located beneath it.
Now you can grab the Select tool (keyboard shortcut: S) — located at the top of your tools list — and use it to adjust the width, height, and location of your rectangle until it is placed exactly over the area of the image you’d like to crop.
To make your adjustments more precise, you can zoom in on the image by holding Control on your keyboard and rolling up and down on the mouse wheel to zoom in and out respectively.
Step 3: Create A Clipping Mask
Once you have your rectangle placed exactly over the areas of your image you’d like to crop, it’s time to create a clipping mask, which is the tool required when using Inkscape to crop an image.
In short, clipping masks allow you to make one object take the shape of another object. It’s similar (in concept) to how a cookie cutter works. A cookie cutter is used to make cookie dough take the shape of the cutter. That’s what we’ll be doing with our rectangle and our image.
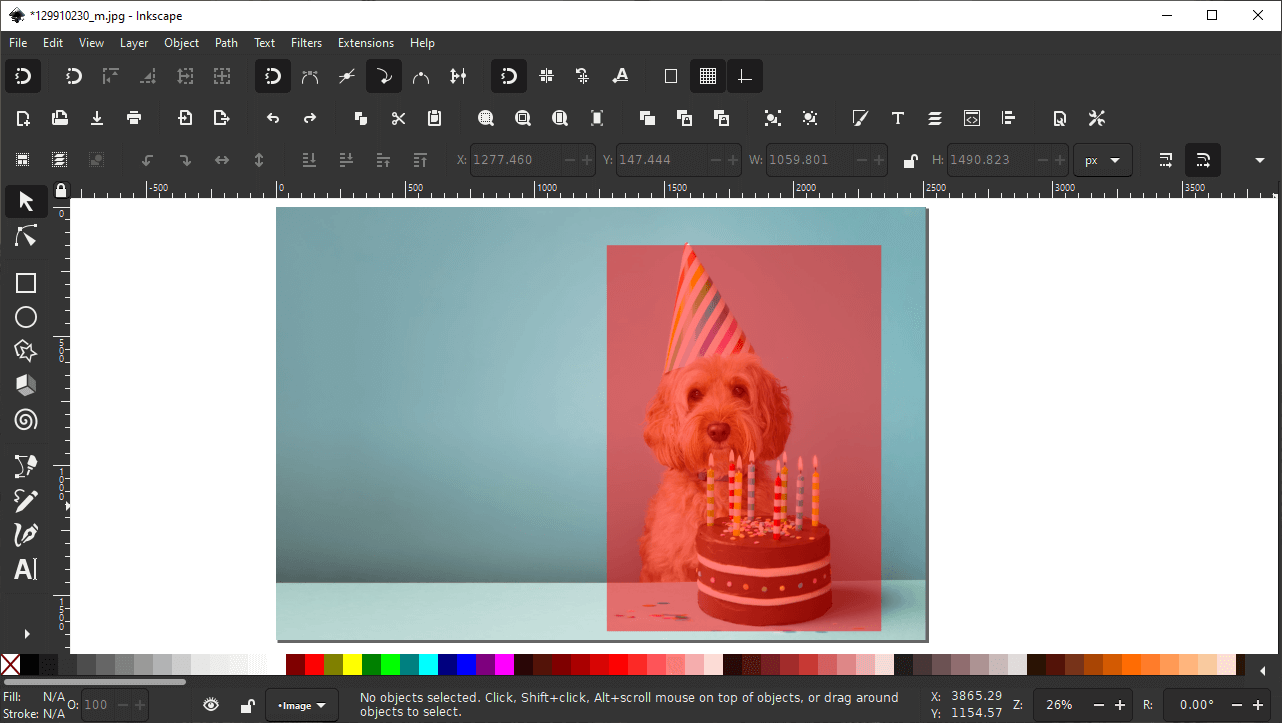
To create a clipping mask, select both the rectangle and the image. This can be done by Shift-clicking each of them, or by clicking and dragging a selection over both.
With both objects selected, navigate to: Object > Clip Set.
This should effectively crop your image:
How the image looks once the clipping mask has been applied.
The good thing about clipping masks is that they’re non-destructive. This means that if you’re unhappy with the crop, you can release it at any point by selecting it and navigating to: Object > Clip > Release.
This will bring you back to the previous state where you had your partially transparent rectangle positioned over your image. Simply make the needed adjustments to your rectangle and then repeat the clipping process again before proceeding to the next step.
Step 4: Resize Your Document
Now that you have effectively cropped your image, you’ve probably noticed the gaping void of empty space between your image and the page border. Let’s address that.
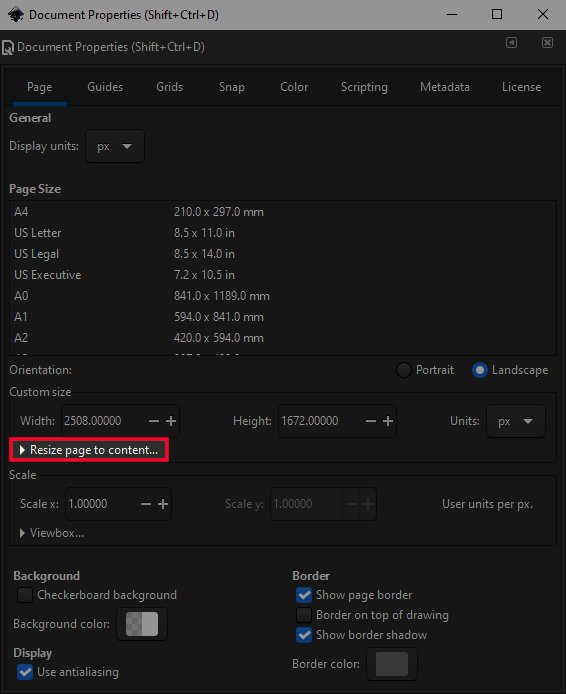
To resize your document to fit the newly-cropped image, open the Document Properties menu by navigating to File > Document Properties or by pressing Control + Shift + D on your keyboard.
Within the Document Properties menu, look towards the bottom half of the window where it reads “Resize page to content…”
The Document Properties menu can be used to resize your document to fit your cropped image.
Click on the little arrow next to the label to expand the menu, then look for the button that reads “Resize page to drawing or selection“.
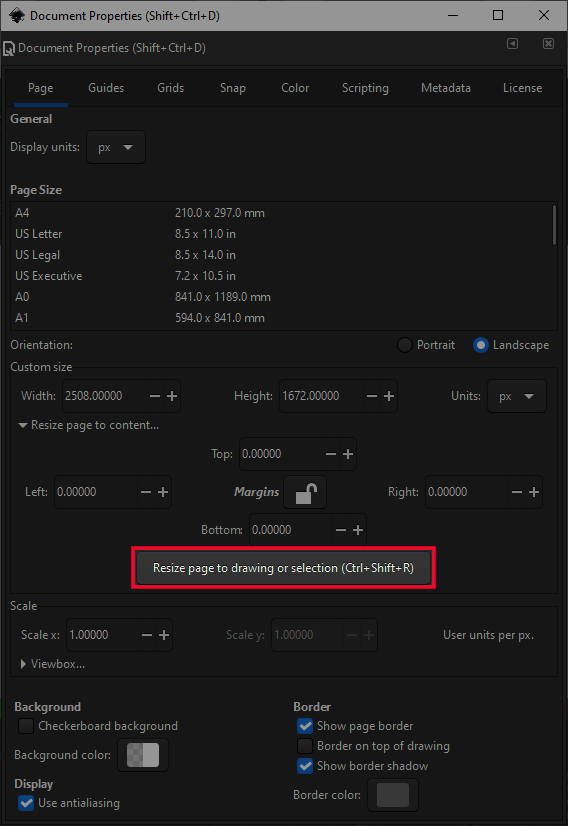
Click the Resize Page button to finalize.
Go ahead and click on that button, then close out of the Document Properties menu.
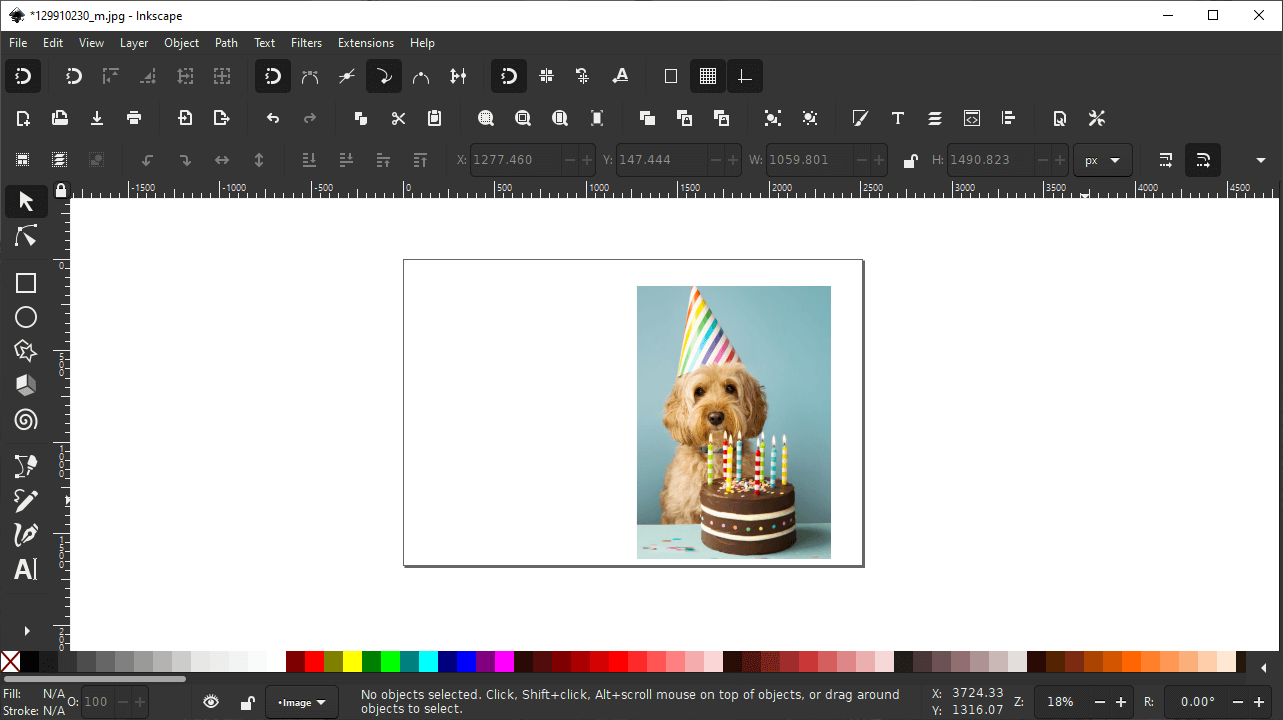
Your page document should now be resized to fit your cropped image:
The page border should now reflect the dimensions of your cropped image.
Alternatively, you can also select your image and simply press Control + Shift + R on your keyboard to bypass having to use the Document Properties menu altogether.
Step 5: Export Your Image
Using Inkscape to crop an image only makes sense if you have a useable image file to work with. This is where saving — or exporting in this context — comes into play.
For this lesson we will be exporting rather than saving, because Inkscape, being the vector graphics editor that it is, doesn’t quite allow you to save in rasterized formats.
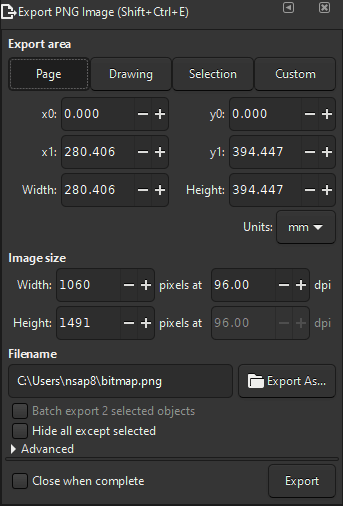
Open up the Export menu by navigating to File > Export PNG Image or by pressing Control + Shift + E on your keyboard. The menu should populate to the right of your screen:
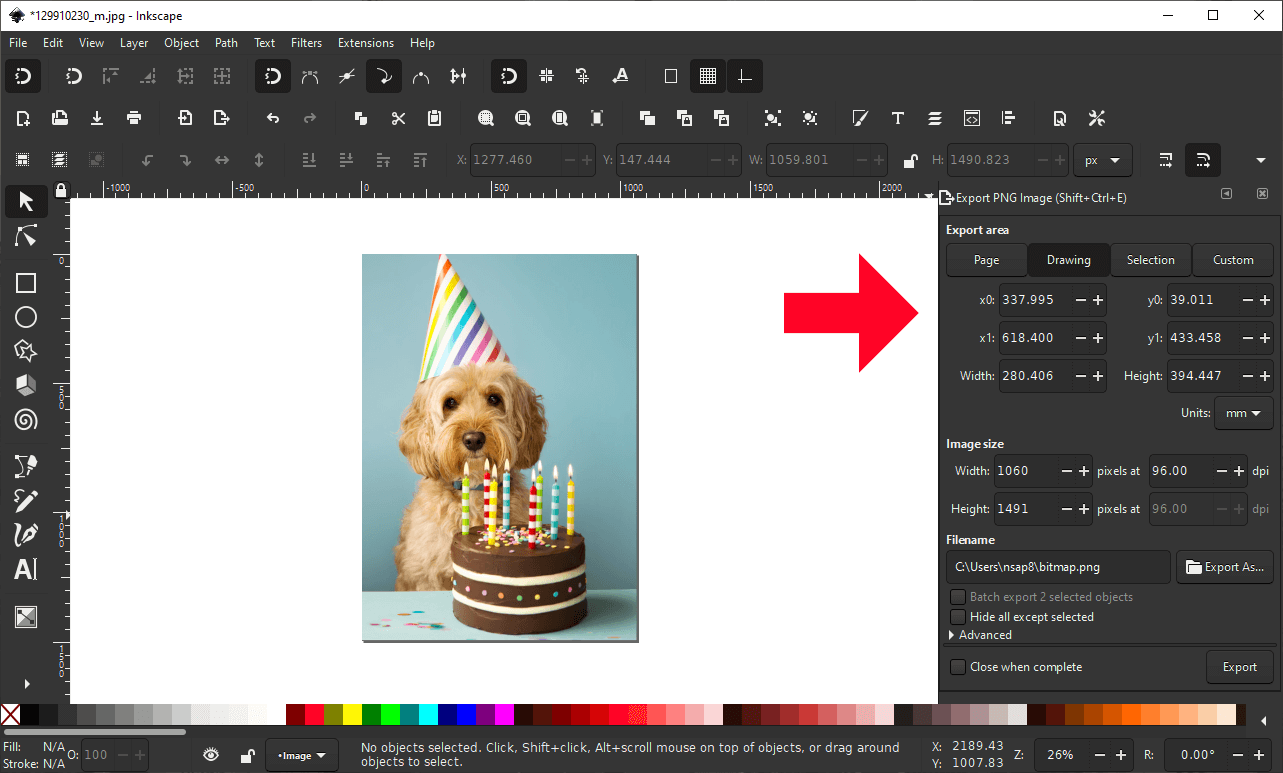
By default, the Export Menu will open up to the right of your page.
From the Export menu, choosing the following presets:
The width and height in my settings will differ from yours. This is normal. It just means that my image is a different size than yours.
The presets are as follows:
- Export area: Page
- x0, x1, y0, y1, width, height, and units: Leave the defaults
- DPI: 96 (this is important! It ensures that you image is exported at it’s normal size.)
- Export As: Use this to choose a location on your hard drive to export the image to, and to give it a name as well.
Once your presets are in place, click the Export button at the bottom of the menu to export your image.
Your newly-cropped image should now be accessible in the location where you saved it!
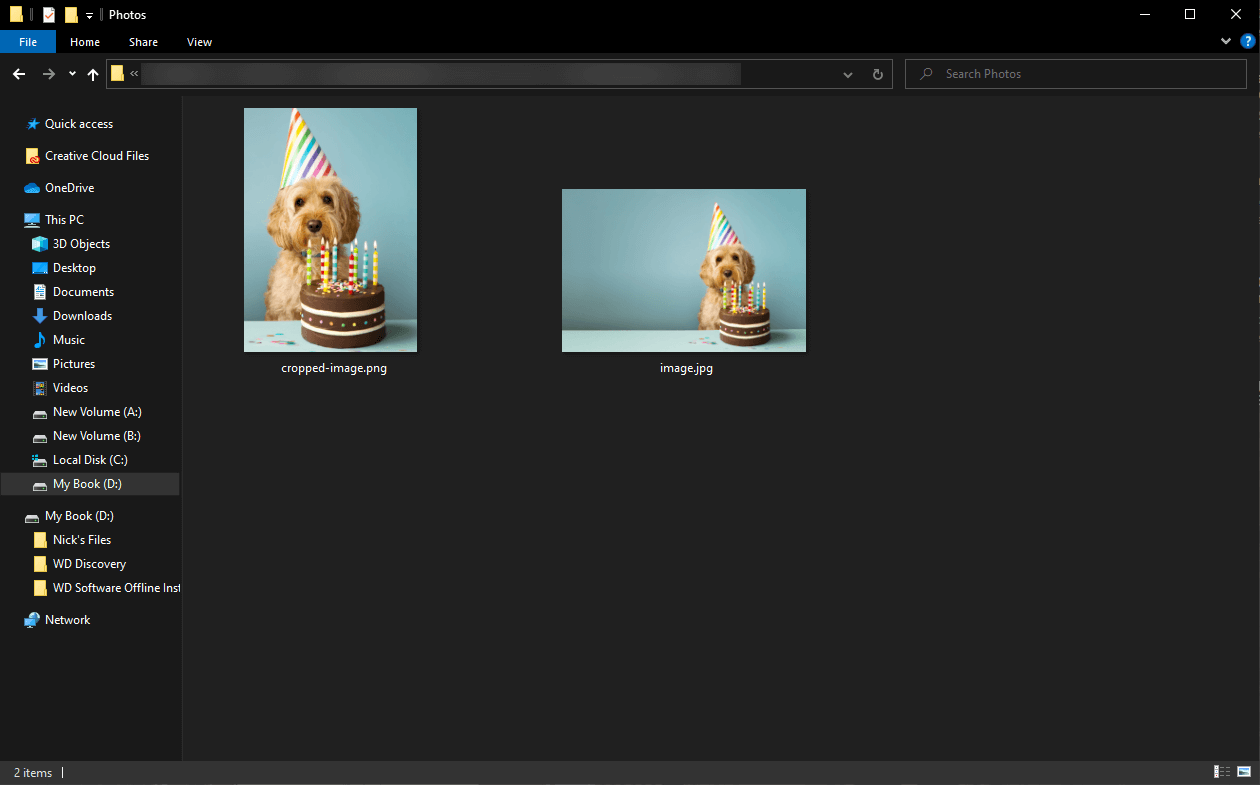
The exported cropped image, saved to its designated location.
If you’d like to save an editable copy of this document so you can go back and adjust your crop at any point in the future, simply navigate to File > Save As and choose Inkscape SVG as the file type. This is the native Inkscape format that will allow you to get back to the workspace you currently have opened.
What If I Want To Export A JPEG?
Unfortunately there is no way to export JPEG files with Inkscape. The only raster file format Inkscape will allow you to save/export to is PNG.
If you absolutely must have a JPEG file then it is recommended that you take your exported PNG file and open it with something like GIMP or Krita so you can export it as a JPEG from there. Or you can use an web-based converter of some type.
Conclusion
Using Inkscape to crop an image may not be the first tool that comes to mind — or even the best tool — but it’s certainly capable, and unlike other photo editing techniques you’d use Inkscape for, it’s not so cumbersome that it’s inefficient. Believe it or not, Inkscape is actually a great tool to use for cropping images. And compared to other vector applications — like Illustrator and Affinity Designer — it’s much easier. Resizing the artboards and then exporting is slightly more complicated in the aforementioned applications than it is in Inkscape.
If you have any questions of if any part of this lesson was unclear, simply leave a comment below. Thanks for visiting!
Learn To Master The SoftwareGain a complete understanding of your favorite design apps with my comprehensive collection of video courses. Each course grants access to our private community where you can ask questions and get help when needed.
|
||||||||||||||||||||||||||||||||


Exactly what I needed, thanks Nick, your videos are all great!
(I’m sure there’s a good reason why Inkscape doesn’t say “Crop, like the rest of the world, right? 🙂
Glad to help 👍
Please help, what does shift clicking mean? this is from step 3. I’m on a mac, and I have no idea what that means or how to do it. can you please help?
It means clicking while holding the Shift key
Thank you so much!! God Blesss
Thanks man, your tutorial works great. I tried one other tutorial and it left out too many steps. Or I’m too stupid. But thanks. 🙂
Thank you!
My Inkscape let me export in .jpg format – so it must have been included in an update! 🙂
Yup! I think it was added last year.
Great tutorial, thank you so much!
THANK YOU!!!!!!!!
All other tutorials provide too much detail or not enough detail for someone new to Inkscape. Perfect balance, thanks!! This worked out for me very quickly!
Glad to help!
Excelent tutorial