How To Create A Low Poly Portrait in Illustrator
How To Create A Low Poly Portrait in Illustrator https://logosbynick.com/wp-content/uploads/2020/06/illustrator-low-poly.png 800 470 Nick Saporito https://secure.gravatar.com/avatar/8e31bf392f0ba8850f29a1a2e833cdd020909bfd44613c7e222072c40e031c34?s=96&d=mm&r=gIn this tutorial I’ll be demonstrating how you can create a low poly portrait from any image using Adobe Illustrator. This is a neat little trick that you can use to create some cool vector designs. I’ve actually used this effect myself for my own profile pictures and avatars.
The following is a brief overview of the steps taken to create this low poly effect. For complete step-by-step instructions, please refer to the video tutorial at the top of the page.
Low Poly Portrait Effect
For this tutorial I’ll be using the following example photo that I grabbed from a stock photo site. You can use whatever photo you’d like though.

The first thing we’re going to do is create two separate layers — one for the photo, and one for the low poly effect. Make sure to lock the photo layer so that you don’t accidentally grab it while you’re creating the effect.
Now we’re going to grab the Pen Tool and manually draw a polygon over a segment of the subject.
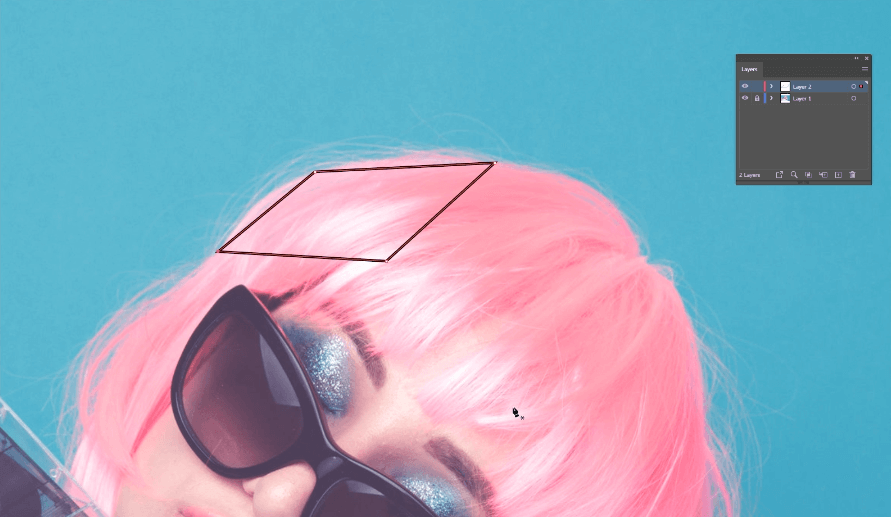
Simply repeat this process for the rest of the photo, making sure to create your polygons so that they somewhat follow the shape and contour of key features like eyebrows, eyes, and hair.
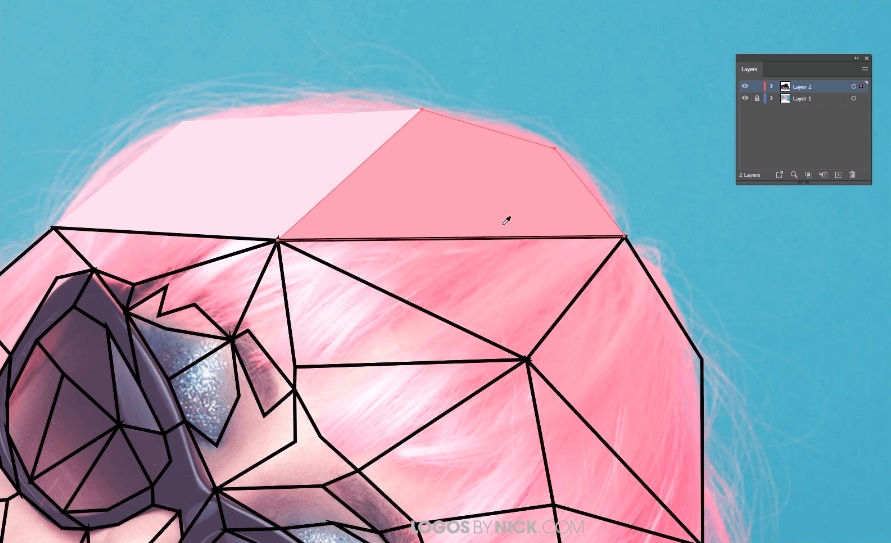
Here’s how my example photo looks once I’ve created my polygons…

Now we’re going to manually fill in each polygon with the Eyedropper Tool. To do so, select a polygon, then grab the Eyedropper and click on any segment within the polygon to grab a color sample of the subject image beneath it.
All you have to do now is repeat this process for the rest of the image and you’re done! Here’s how the finished design looks…
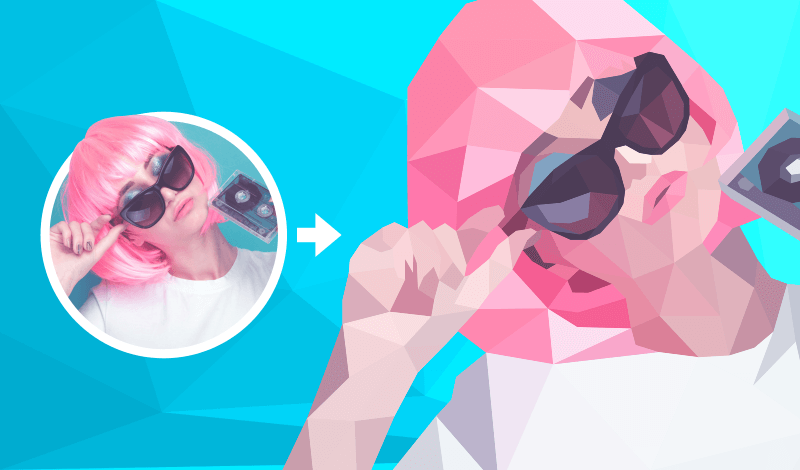
And that is how you can create a low poly effect using Adobe Illustrator! It can be tedious and time-consuming, but the result is worth the effort.
If you have any questions then please leave a comment below. As always, thanks for watching!
Learn To Master The SoftwareGain a complete understanding of your favorite design apps with my comprehensive collection of video courses. Each course grants access to our private community where you can ask questions and get help when needed.
|
||||||||||||||||||||||||||||||||


Nick, thank you for the clear step-by-step method for creating low poly designs. You make it look so easy! And I know it comes with practice. I do have a question: I want to create a low poly of a French bulldog and print it out to give as a birthday present to someone special. Howver, this bulldog is a very very dark gray, bordering on black. My question is this: What do you recommend I do when I begin to start coloring in the poly shapes, I can do to distinguish one from the other? I’m guessing picking a shade lighter? I want to be able to retain as much of his natural color as possible.
Thanks!
Hi Debbie, it would probably help to edit the photo first in a raster editor (like Photoshop or GIMP) so that you can adjust the color curves to add some contrast to the image. That would help distinguish some of the colors.