How To Gradient Fill In Affinity Designer | Linear, Elliptical, Radial & Conical
How To Gradient Fill In Affinity Designer | Linear, Elliptical, Radial & Conical https://logosbynick.com/wp-content/uploads/2021/12/affinity-designer-gradient-fill.png 800 470 Nick Saporito https://secure.gravatar.com/avatar/8e31bf392f0ba8850f29a1a2e833cdd020909bfd44613c7e222072c40e031c34?s=96&d=mm&r=gBeing able to apply gradients to your artwork is an important aspect of vector design, and Affinity Designer makes this process so much easier than rival applications. In this tutorial we’ll be going over how to gradient fill in Affinity Designer by using the Fill Tool to create various gradient types; including linear, elliptical, radial and conical gradients.
In short, the way to gradient fill in Affinity Designer is by using the Fill Tool (keyboard shortcut: G). Once selected, the tool options menu at the top of the screen will allow you to choose your gradient type, whether to apply it to the fill or the stroke, and it will allow you to edit all of the properties of your gradients as well. Let’s dig into the details!
How To Gradient Fill In Affinity Designer
The following video tutorial will walk you through the entire process, step-by-step:
Continue on for a written overview of this lesson.
Table of ContentsGradient TypesApply A Gradient Fill |
Gradient Types
Before we delve into applying a gradient fill in Affinity Designer, let’s first have a look at the four different types of gradients you can work with in Designer:
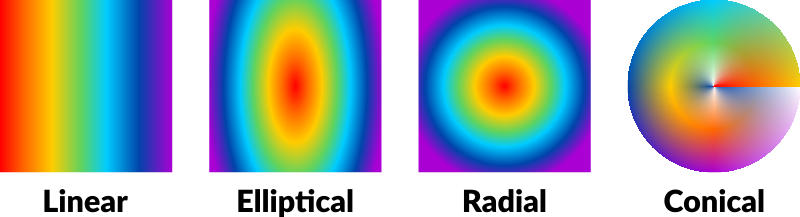
These are the four different types of gradients you can work with in Affinity Designer.
Linear
A linear gradient is any gradient that follows a straight path.
In the example diagram above, the linear gradient spans horizontally across the square. Colors are added along that horizontal path which will run vertically across the square.
Elliptical
Elliptical gradients are gradients that follow a round (or circular) path.
In the diagram above, the start point of the gradient is the red center point on the square, and the end point is the purple outer band at the edge of the square. Along that gradient several colors are added — all of which follow a circular path.
Radial
Much like elliptical gradients, radial gradients also follow a circular path. However, the main difference is that elliptical gradients can be distorted to follow an elongated (or “elliptical”) path, whereas the path that elliptical gradients follow has a locked aspect ratio and must be perfectly circular.
Conical
A conical gradient is a gradient format where several follow a circular path.
What About Mesh Gradients?
Unfortunately, Affinity Designer does not currently have the ability to work with meshes and mesh gradients.
Apply A Gradient Fill
Now that we’ve examined the different types of gradients you’ll be able to work with, let’s go over how you can apply a gradient fill in Affinity Designer.
Step 1: Select the object you want to fill
In order to apply a gradient fill in Affinity Designer you will first need an object to apply it to. For this demonstration I will be applying gradients to a circle that I’ve created:
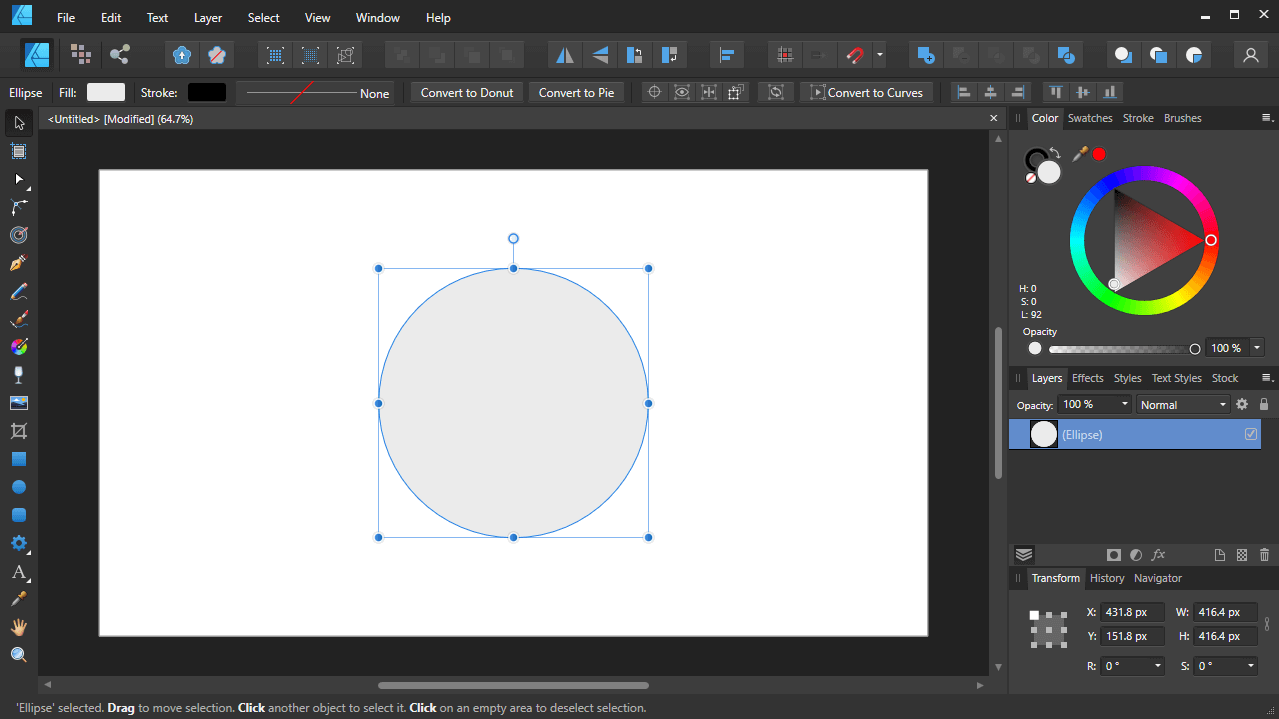
For this demonstration I will be applying a gradient to a circle.
You can apply a gradient fill to any object you’d like though, as long as it’s a vector path and not a rasterized image.
Click on the object you’d like to apply a gradient to in order to select it. You will see a blue bounding box around it once selected.
Step 2: Grab the Fill Tool and choose the gradient type
The way that gradient fills are applied in Affinity Designer is with the Fill Tool — a tool that allows you to fill objects will gradients, patterns, and solid colors.
The Fill Tool can be accessed in the toolbar on the left-hand side of your screen:
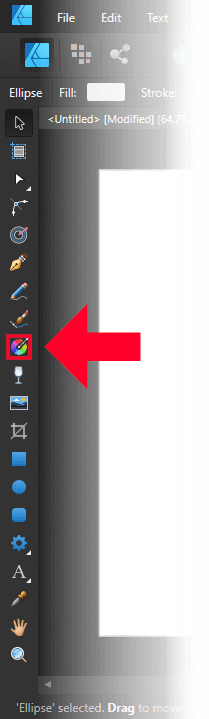
The Fill Tool is depicted as a rainbow colored disc/wheel.
Alternatively, you can use the keyboard shortcut (G) to access it.
Once selected, you should see the following options in the Tool Options menu towards the top of your screen:
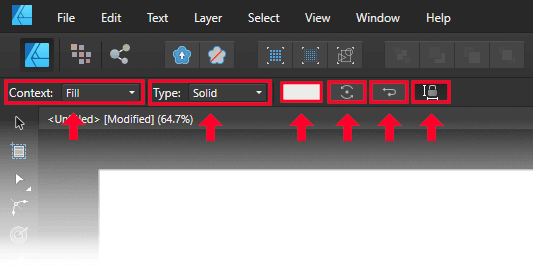
The tool options are described below.
The options, from left to right, are as follows:
- Context: This setting determines whether the gradient will be applied to the object’s fill or its stroke. For this demonstration I will be applying it to the fill.
- Type: The dropdown will allow you to choose the type of gradient you’d like to create. Click the menu to expand it and select the gradient of your preference.
- Gradient Options: This is a preview box that depicts the gradient that is currently applied. Clicking on it will open up the Gradient Options menu.
- Rotate Gradient: Clicking this button will cause your gradient to rotate 45 degrees counter-clockwise.
- Reverse Gradient: Clicking this button will swap the start point of the gradient with its end point, effectively reversing the gradient’s path.
- Maintain Fill Aspect Ratio: This setting is relevant to elliptical gradients. Enabling it will lock the proportions of the radial gradients you create. Disabling it will allow you to distort the gradient’s path so that it can follow an elliptical path.
Once you’ve chosen your gradient type, it will be assigned a default start and end color, and you will see on-canvas handles that allow you to edit it:
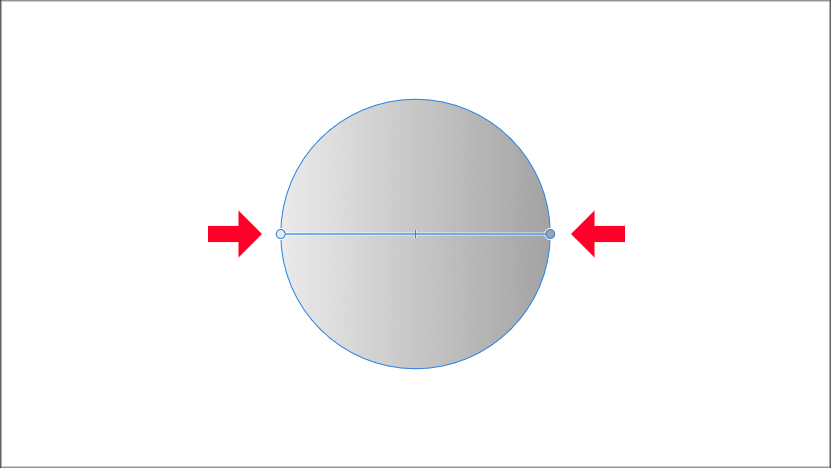
The on-canvas handles will allow you to edit the properties of your gradient further.
For this demonstration I have chosen a linear gradient. All of the other gradients can be edited in the same way.
Step 3: Edit your gradient using the menu options and on-canvas handles
Now that we’ve applied a gradient fill with Affinity Designer, let’s go over how you can edit the gradient.
Change The Gradients Colors
The change the colors of your gradient, simply click on one of the end points of the gradient (indicated as circular nodes that are filled with its current color) to select it and choose a new color from your Color menu at the top-right of your screen:
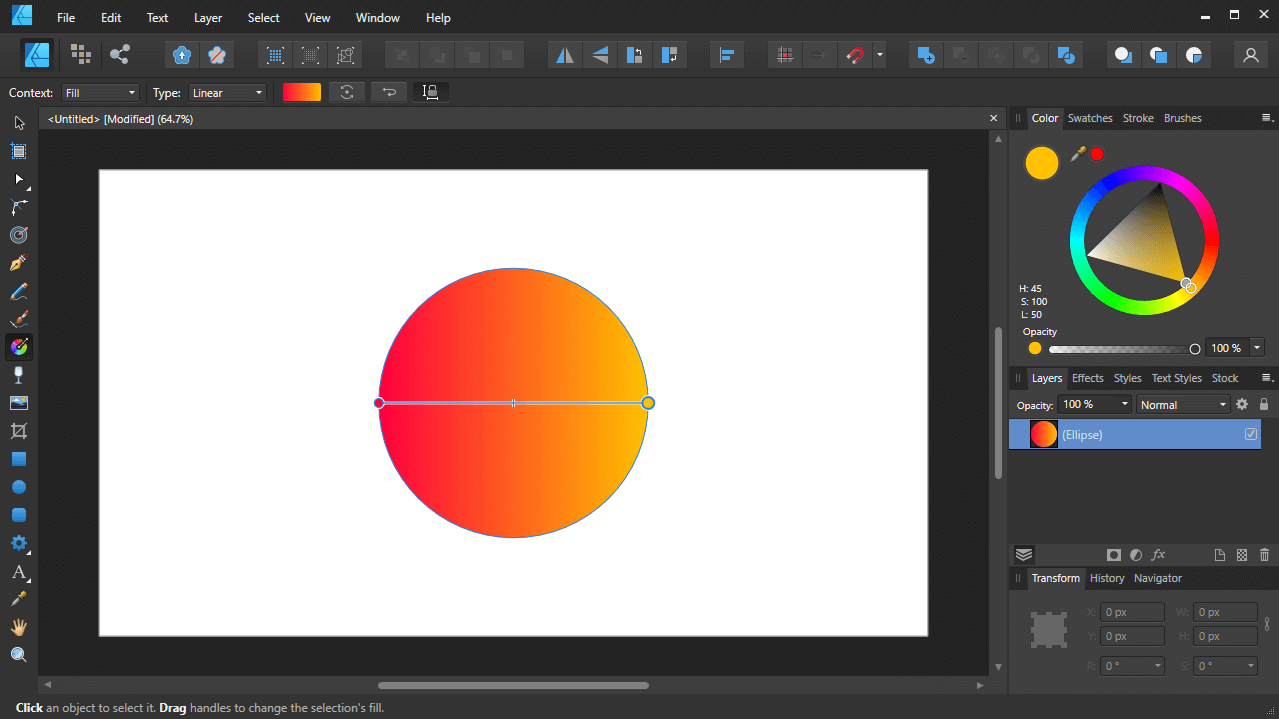
Clicking the handles to select them will allow you to change their color in the Color menu.
The thin line at the center of the gradient’s path represents the center point of the gradient. Moving it will change the gradient’s balance to favor one color over the other. The further in one direction you move it, the more intense the disparity will be:

Moving the center point of the gradient will change its balance between the colors.
Moving The Gradient’s Start and End Points
The change the location and orientation of your gradient, simply click and drag on either of the nodes to move them around:

Moving the gradient handles allows you to change the gradient’s location and direction.
Holding Shift while moving the handles will lock the gradient onto the vertical or horizontal axis and will allow you to rotate it in 45 degree increments.
Adding New Colors To The Gradient
If you’d like to add a new color to your gradient, all you have to do is hover your cursor over the gradient’s path until the cursor icon turns into a plus (+) sign. At this point you can simply click on the path to add a new node that will represent a color of your choosing:

Clicking on the gradient path allows you to add more colors.
If at any point you’d like to delete that added color, all you have to do is click on it to select it and press the Delete key on your keyboard.
The Gradient Options Menu
As previously mentioned when going over the tool options menu, clicking on the preview button that displays the colors of your gradient will open the Gradient Options menu:
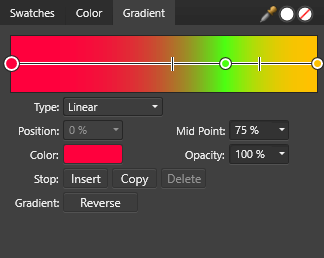
The Gradient Options menu also allows you to edit the properties of a gradient.
This menu allows you to edit the properties of your gradient, such as:
- Gradient type
- Position of the gradient
- The color of a chosen stop in the gradient
- You can insert new stops, copy them, and delete them
- Reverse the direction of the gradient
- Dictate the mid point
- Tweak the opacity of one of the colors in your gradient
- There is a dropper tool that will allow you to add colors to your gradient based on a sampled color from another object on your canvas
All of these properties can be altered using the on-canvas user interface, as we did in the tutorial. This menu simply provides another option for editing your gradients and can be useful if you need the mid point to be a specified numerical distance, or need a numerical opacity value for one of the color.
Conclusion
Creating a gradient fill in Affinity Designer, compared to other vector applications, is a refreshing change of pace. Unlike Adobe Illustrator, Designer makes it easy to edit and transform your gradient directly on the canvas. Illustrator allows you to do so as well, but the functionality is clunky and unintuitive. This is an area where its competitors — namely Affinity Designer and Inkscape — outshine them.
If you have any questions or need clarification on anything we’ve gone over in this lesson, simply leave a comment below.
Learn To Master The SoftwareGain a complete understanding of your favorite design apps with my comprehensive collection of video courses. Each course grants access to our private community where you can ask questions and get help when needed.
|
||||||||||||||||||||||||||||||||


