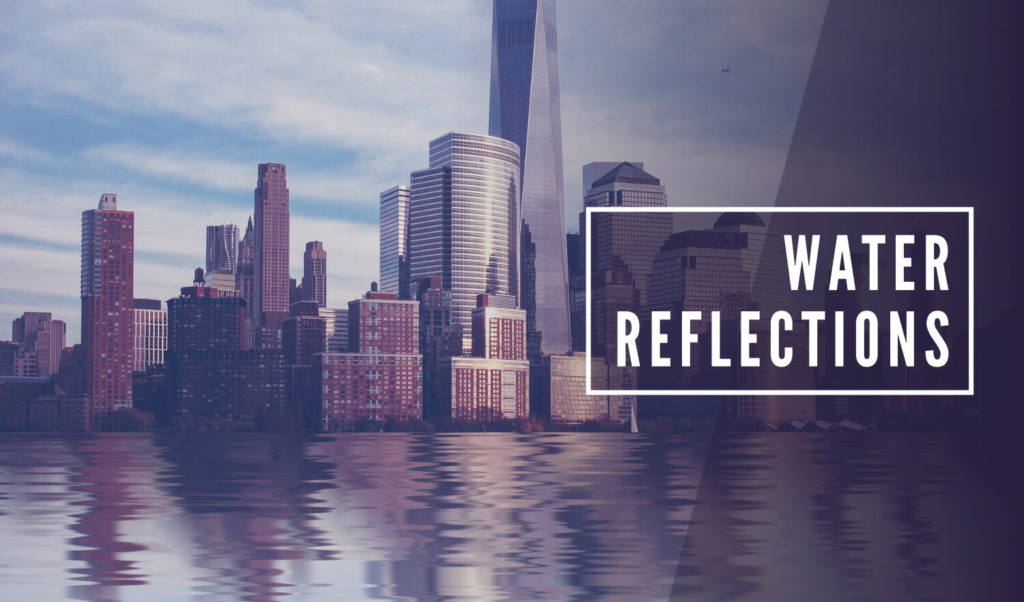
Create A Reflective Water Effect with GIMP
Create A Reflective Water Effect with GIMP https://logosbynick.com/wp-content/uploads/2018/08/gimp-water-reflection-tutorial-1024x602.jpg 1024 602 Nick Saporito https://secure.gravatar.com/avatar/8e31bf392f0ba8850f29a1a2e833cdd020909bfd44613c7e222072c40e031c34?s=96&d=mm&r=gIn today’s tutorial I’ll be demonstrating how you can take any image and make it appear as if it is reflected in water. The interesting part of this process is that we won’t be using any actual images of water – it’s just a reflection of the image itself with some design magic added!
The following is a brief overview of the steps taken to achieve this affect. Continue on to the end of the post in order to watch the video tutorial with complete step-by-step instructions and voice narration.
Reflection Effect with GIMP
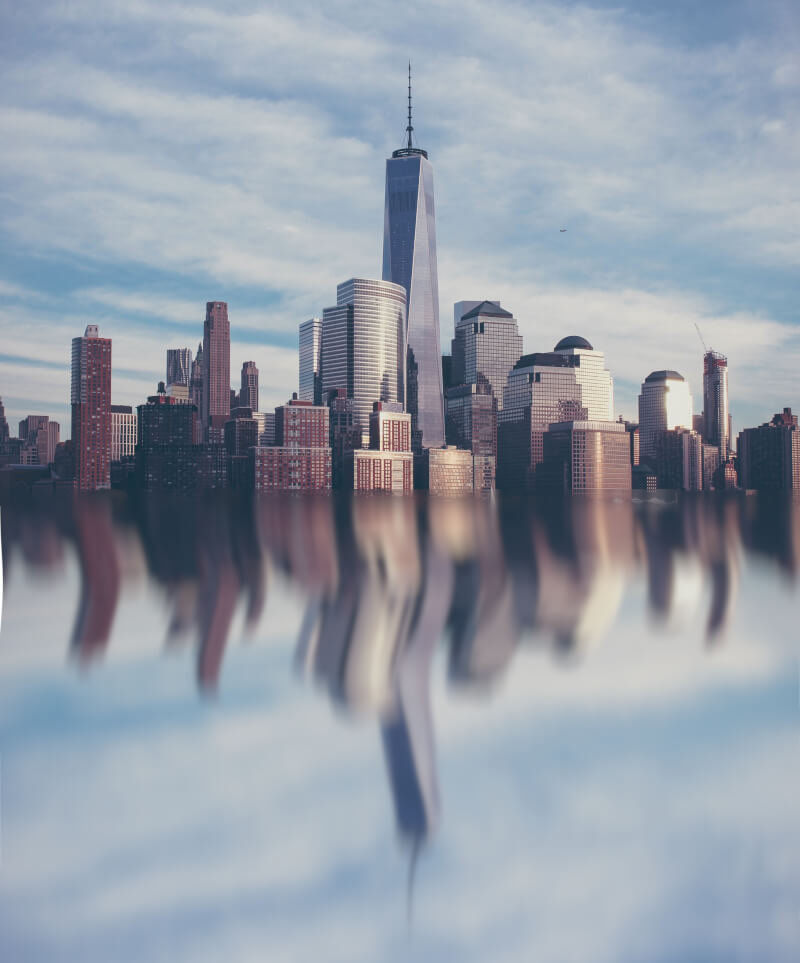
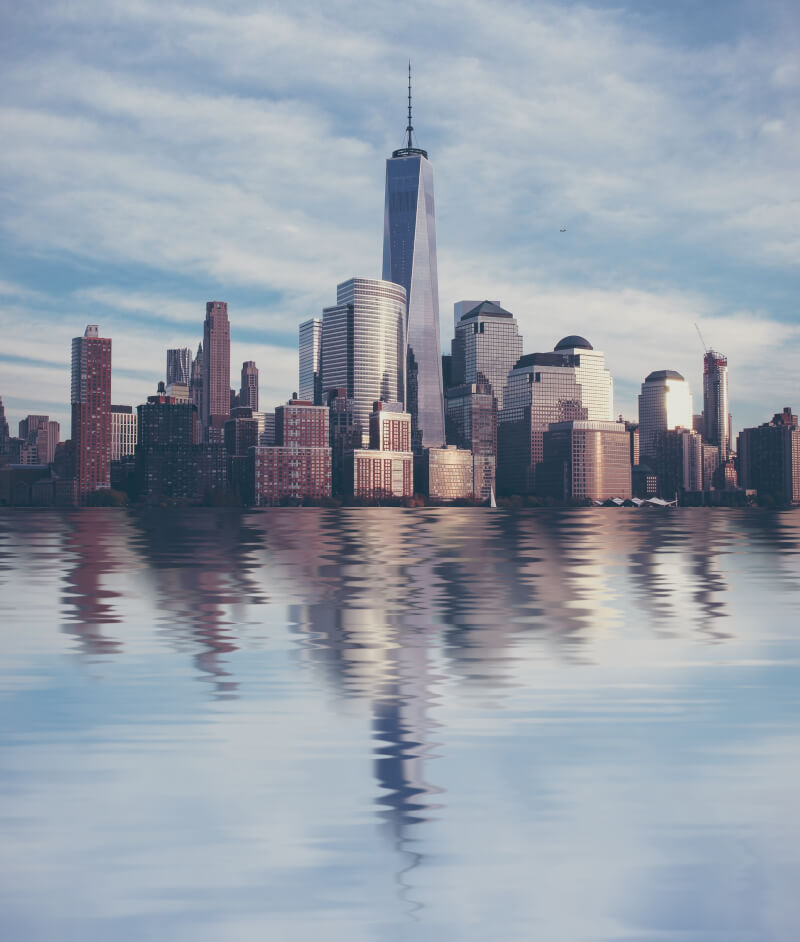
Go ahead and open up your image with GIMP. The example image I’ll be using is as follows…

Click the image to be taken to the download page
First, we’re going to increase the height of our canvas by roughly 2X, then create a duplicate layer of the image, flip it vertically, and align it to the bottom of the page.
Next, we’ll give the duplicated layer a slight Gaussian blur, then a modest vertical motion blur, then we’ll use the Warp tool to add some subtle distortions to the image. This will make it appear as if the water is in motion, distorting the reflected image, as it would be.
Now we’ll add a new layer in order to create the following texture that mimics rippling water. We’ll be doing this using HSV noise, Gaussian blurs, motion blurs, and color curves.
It is recommended that you watch the video tutorial (bottom of the page) in order to create this effect. Alternatively, you can simply copy and paste this image as a new layer in order to use it as-is, instead of having to recreate it.
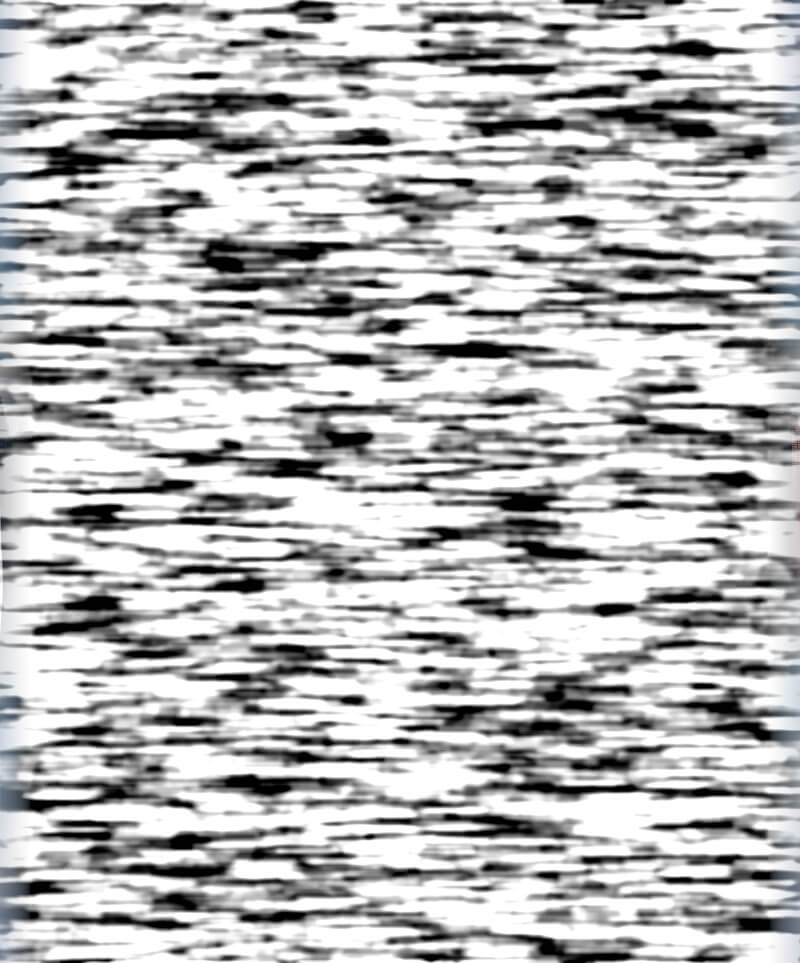
Once we’ve done that, we’re going to scale down the rippling water texture and alter its perspective to make it appear as if the ripples are small towards the bottom of the skyline and become larger as they get closer to the person taking the photo.
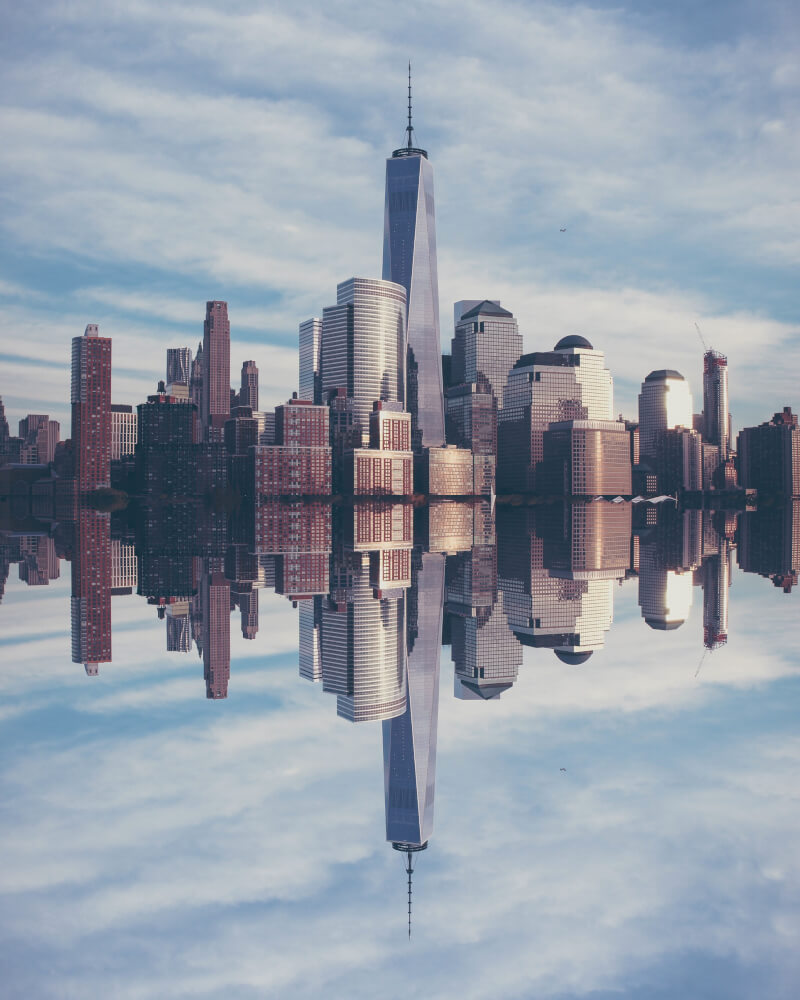
The texture will then by used as a displacement map for the reflection layer. The final result is as follows…
Video Tutorial
Watch the follow video tutorial for complete step-by-step instructions and voice narration. If you have any questions, comments or concerns, leave a comment below, and as always, thanks for watching!
Learn To Master The SoftwareGain a complete understanding of your favorite design apps with my comprehensive collection of video courses. Each course grants access to our private community where you can ask questions and get help when needed.
|
||||||||||||||||||||||||||||||||


Thank you for sharing your knowledge. I used this to create a “Happy Mother’s Day” image. I’ve shared it in Google Drive on the website for this comment.
Have a great day!
That’s great to hear, David! Thanks for sharing.
Great!!
Thank you very much!!
Erik Minnema
I have a question how to superimpose images on other images in the new version of gimp? 2.10.6, 2.10.8 ? all of the other videos i have seen are for lower versions and impossible to make
thank you for your time and hope to a quick reply
¡Qué gran tutorial!
¿Puedo usarlo para mi sitio sobre gimp?
Pondré sus respectivos créditos!
nice effect
Glad you liked it!
nice effect
Glad you liked it!