How To Add A White Outline Around A Transparent PNG
How To Add A White Outline Around A Transparent PNG https://logosbynick.com/wp-content/uploads/2019/04/add-white-outline-around-transparent-png-1024x602.jpg 1024 602 Nick Saporito https://secure.gravatar.com/avatar/8e31bf392f0ba8850f29a1a2e833cdd020909bfd44613c7e222072c40e031c34?s=96&d=mm&r=gToday I’ll be demonstrating how you can add a white outline around a transparent PNG using a simple and free piece of software called GIMP. GIMP is an open source alternative to Photoshop. It works for Windows, Mac and Linux. You can download GIMP here.
The following is just a brief overview of the steps taken to add a white outline around a transparent PNG with GIMP. If you’re new to the software — especially if you’re a first-time user — it is highly recommended that you watch the following video tutorial:
Continue on for the written instructions.
Outlining Your Transparent PNG with GIMP
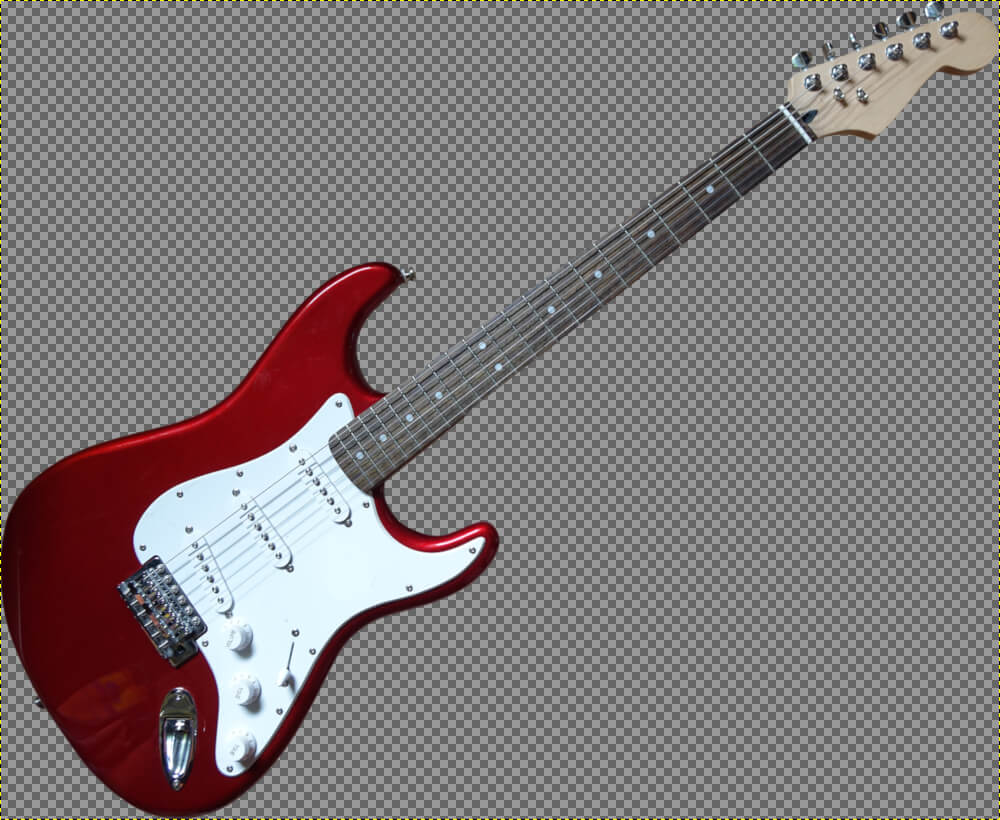
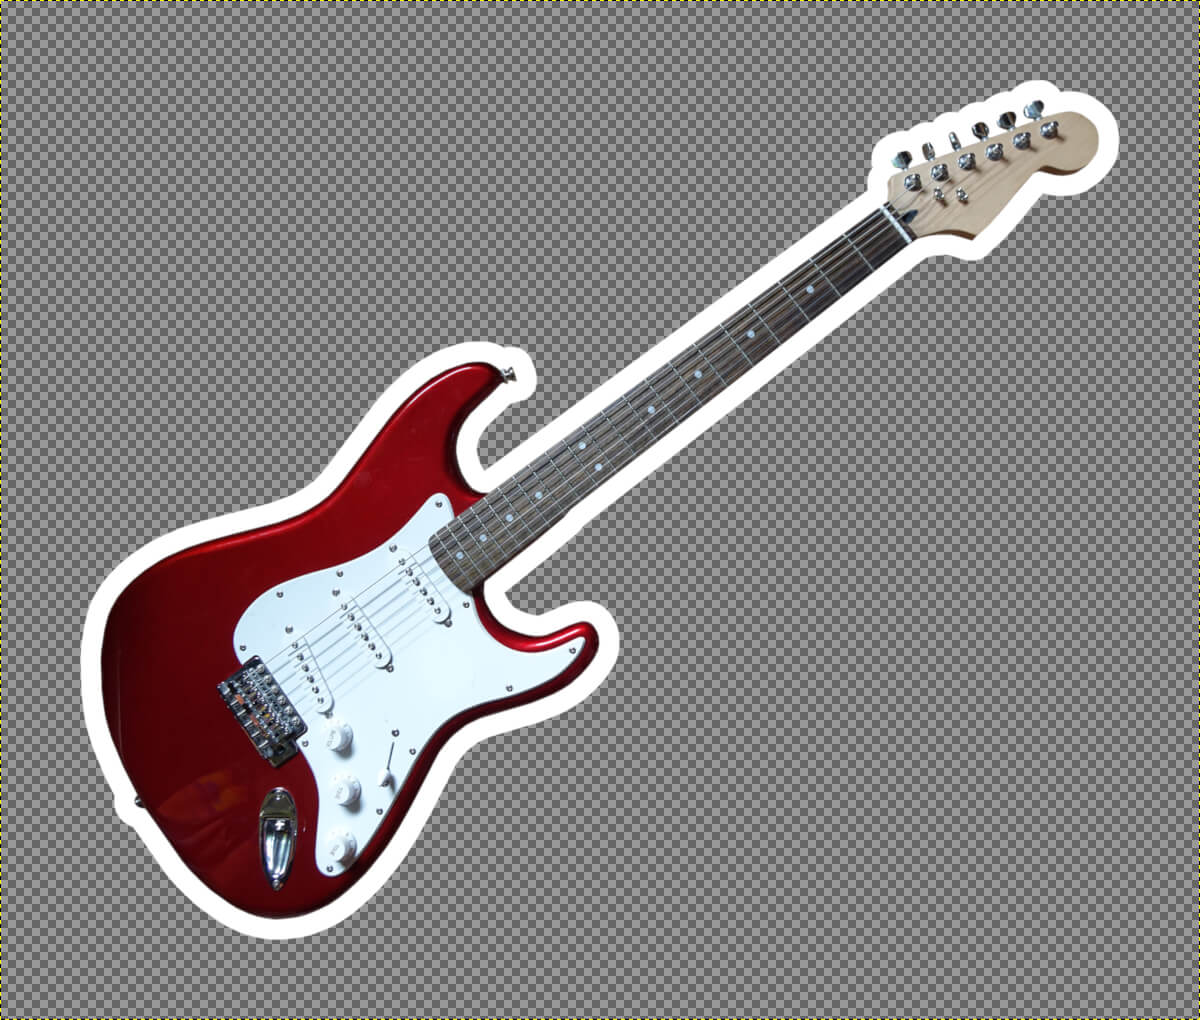
The first thing we need to do is open the PNG file with GIMP. Go to File > Open and locate your image. The transparent area will be represented with a checkerboard pattern as depicted below.
If the subject of your image runs all the way to the edges of the document like mine does, we’ll need to add some extra space around the edges of the document to accommodate a white outline. We’ll do that using the Canvas Size setting. Go to Image > Canvas Size.
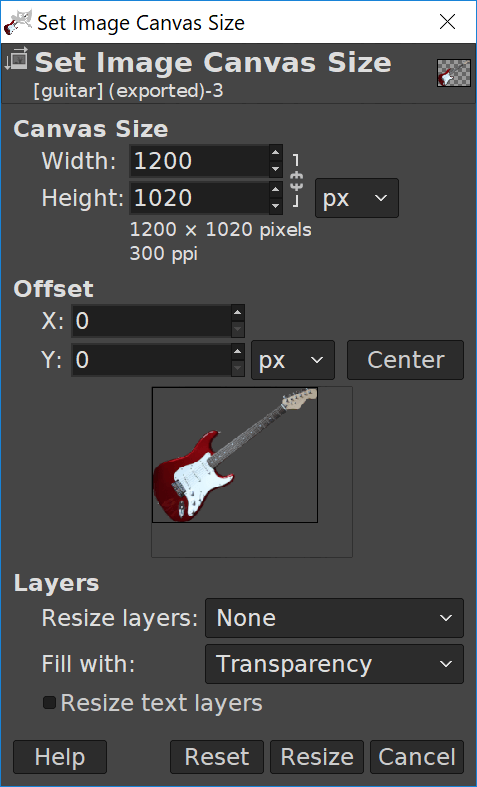
Add a few extra pixels to each dimension (width and height) in order to accommodate a white outline.
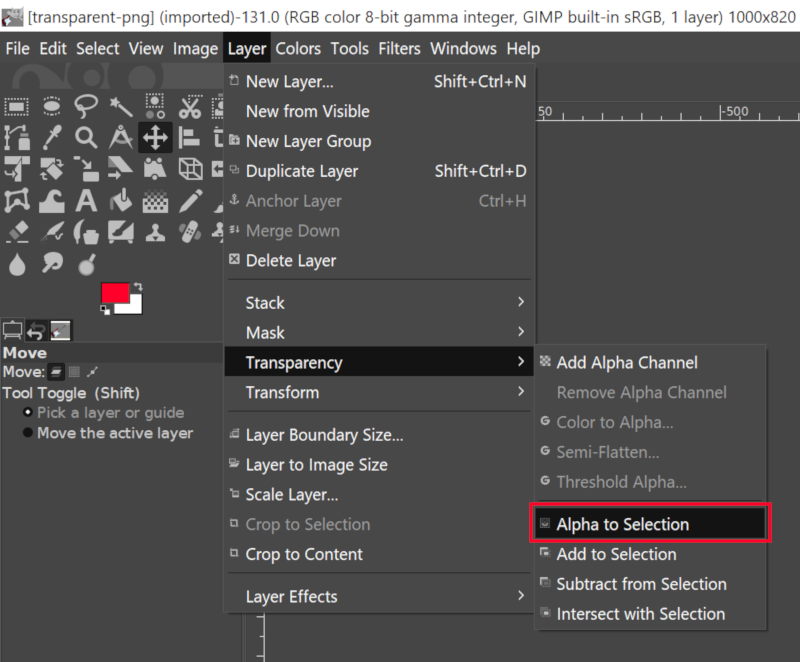
Next we’re going to create a selection around the subject of our PNG by going to Layer > Transparency > Alpha To Selection. This will create a dotted line going around your subject.
Now we need to increase the size of the selection by going to Select > Grow. Choose how many pixels you’d like to grow the selection by. This will determine the thickness of the white outline around your transparent PNG. For my example I used 20 pixels.
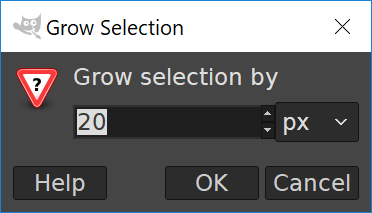
You will notice the thickness of your outline increase after applying
Now we’re going to create a new layer and move it below the current layer. Simply go to Layer > New Layer, name it “Outline”, then click and drag it beneath the current layer in the Layers panel to the bottom right of your screen.
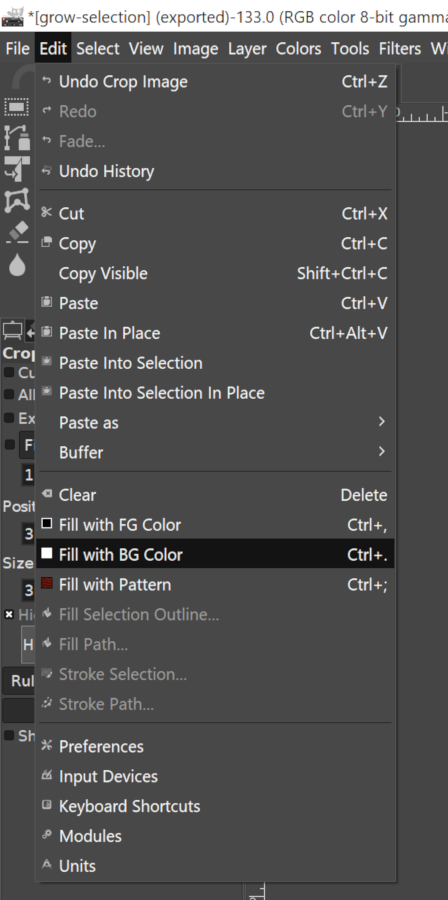
By default, your foreground color in GIMP should be set to black and your background color should be set to white, so all we have to do now is fill in the selection with white by going to Edit > Fill with BG color.
Now go to Select > None in order to remove the dotted outline from your screen.
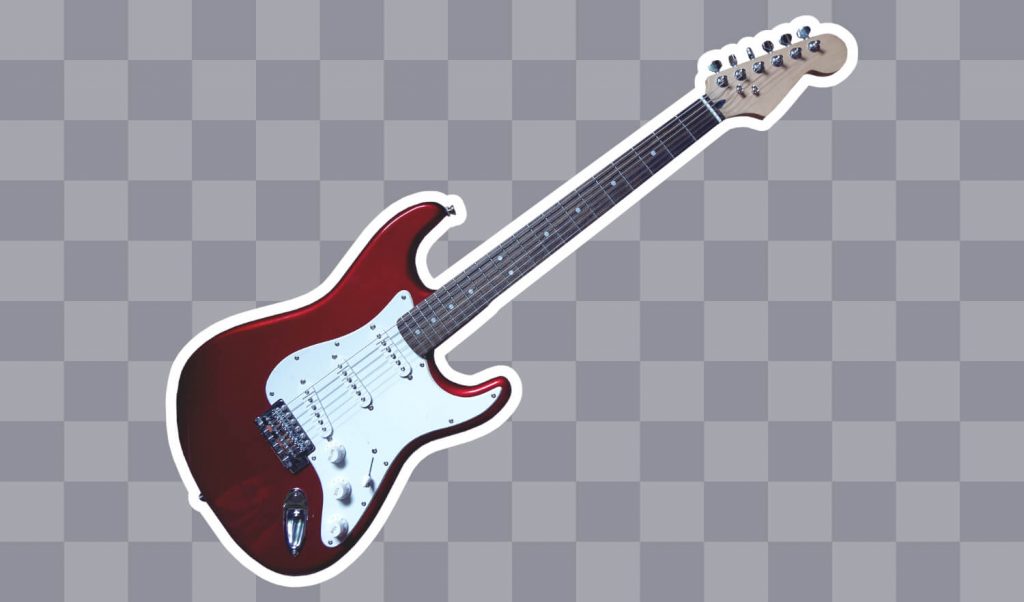
Once you’ve done that you are finished! You’re successfully used GIMP to add a white outline around a transparent PNG.
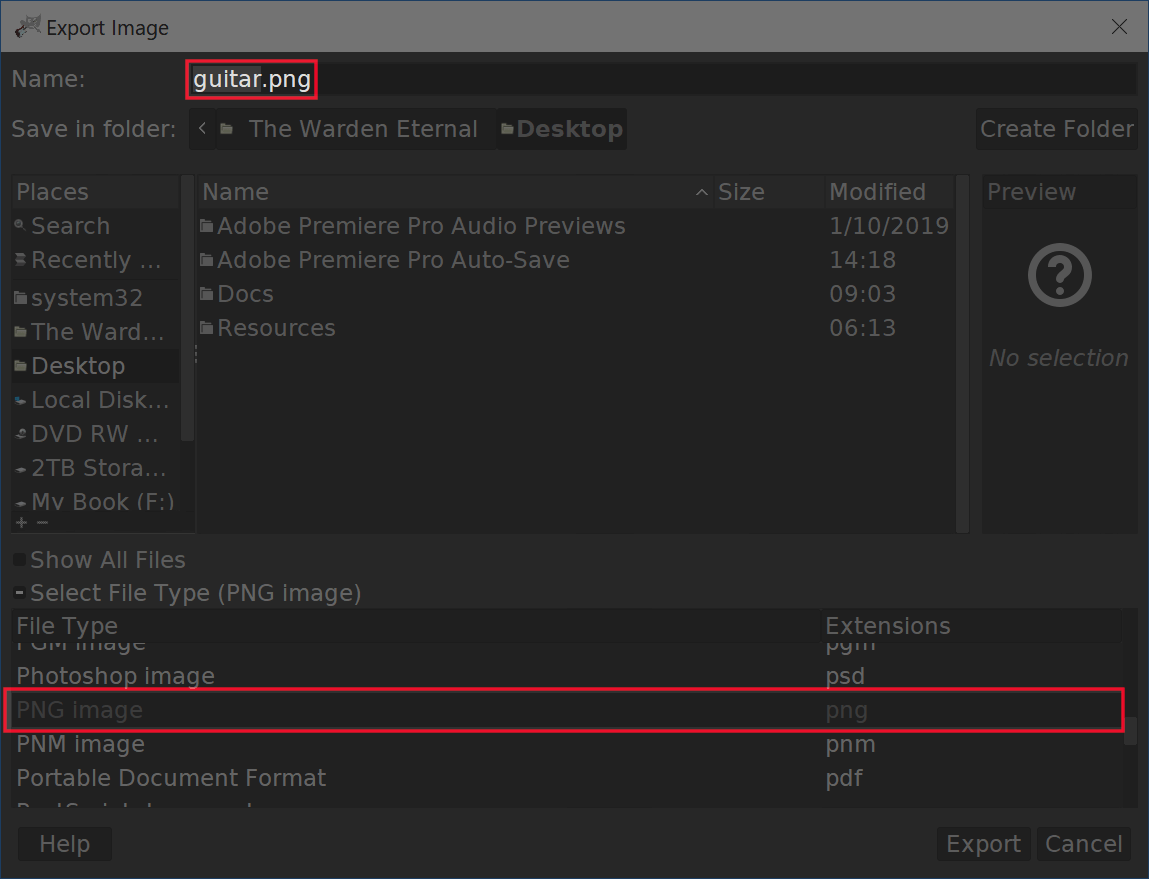
To save your work, simply go to File > Export As… and make sure you choose to export it as a .png file.
If you have any questions or run into any problems simply leave a comment below. And if you’d like to learn more about how GIMP works, be sure to check The GIMP Series — a collection of 60+ videos where I go over all of the major tools and features in GIMP and explain what they are and demonstrate how they work. Information is listed below.
Learn To Master The SoftwareGain a complete understanding of your favorite design apps with my comprehensive collection of video courses. Each course grants access to our private community where you can ask questions and get help when needed.
|
||||||||||||||||||||||||||||||||


You might also like


46 comments
-
-
Logos By Nick
Yes, GIMP has a feathered edges feature that you can use. I don’t have a tutorial in it personally but I’m sure there’s plenty out there if you search YouTube or Google for “gimp feather edges”
-
-
LW
This creates a “rounded” border around an image. How do I make a sharp one? One that has angles and corners?
-
Logos By Nick
You’d have to use a different application for that. Not possible with GIMP unfortunately.
-
-
Rose Doan
Once you have the outline, is there any way to adjust it? I want to move the outline further from the image in some areas and closer in other areas.
-
brad
Hi,
How do you add a black outline to a white png image? So like a reverse of this so instead of a white outline it’s black? Please help!
Thanks
-
-
-
Dom
Absolute legend! Saved me from hiring a graphics designer to do this for me.
I’ll recommend you to all my friends -
-
-
-
-
-
Anonymous
Is there any way to do this in Paint 3D or powerpoint or any other built-in microsoft software?
-
-
-
Nick
Add a photo to what, GIMP? Just right-click the photo file and go to “open with” and choose GIMP. Or open GIMP and go to File > Open and choose your file.
-
-
-
-
Joel
I couldn’t get it to work at all. I followed the instructions, but the whole background (not just the selection) turned white. Tried a couple times; now I’m giving up and going to try a different way.
-
-
Anonymous
I am having the same problem as Joel. White background, completely negates my transparent layer. The white “Outline” layer is below the main layer. Everything is just white. “edit > fill with BG color” doesn’t do anything. What gives??
-
Nick
Have you tried right-clicking the layer and selecting “add alpha channel”? If not then that would explain it. Let me know if I’m mistaken though and I’ll see what else it can be.
-
-
-
-
-
Giulia
Thank you so much!
It’s so easy to understand.
I will definitely watch more of your tutorials 🙂
-
Lisa
Thank you so much for this tutorial!! It works perfectly with a solid image like the guitar. However, what do you do if you need to add white space between elements of the png? For example, if you have a png of a sun and stars, and instead of outlining each star individually with white, you want the whole image to have a white outline, so that you can make a peel and stick decal? Help?! Thanks in advance!
-
Nick Saporito
Hi Lisa, I’m not sure. I’d have to see the example image to say for sure. Sorry I couldn’t help more than that.
-
-
Nikki Taylor
Hello this video was super helpful and I did what I needed and now I am wanting to alter the size of my layer and add a new one and GIMP is not letting me move the outline layer below my image layer.
-
Nick Saporito
You should be able to click and drag the layer beneath the other layer in the Layers menu. It’s not letting you do that?
-
-
-
Melissa Smith
Thank you for this – however, when I go to fill BG color with the outline layer selected, it is grayed out as an option. Any tips for why that may be?
-
-
Lolis
WOW! I have been looking for a program NOT Illustrator that can do that, Thanks a lot let me download the program and start practicing….
-
Lavinia
Hello! Thank you so much! is by far the most explicit video on this topic, which I found.
I feel as if I am learning a foreign language : ) … I would have some questions:
1. images with .jpg extension, can I outline that in your demonstration?
2. Is the UNDO button in this program?
3.how can i select another color, other than white?
4.Do you have a video demonstration on how to add an outline to a word?
Many thanks for your help and support!
Lavinia -
Dee Bowers
Is it possible to use outline without adding a layer? I have a design that I got done that I want to print on a shirt. I realized it would need an outline to make it stick out. I was told the png should not have layers. Is there anything I can do?
-
Nick Saporito
PNG files don’t have layers once they’re exported. It’s the source XCF/PSD file that you’re editing/creating that has layers.
-
-
-
FearNaBoinne
Is it possible to create a feathered (ie fading) outline that goes from 100 opacity to 0% opacity?