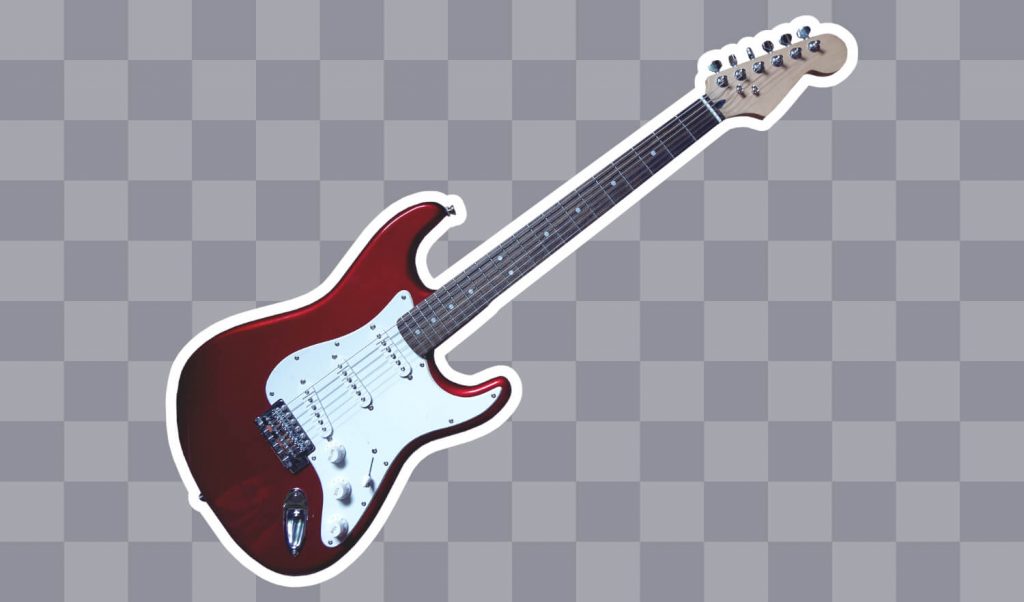
How To Add A White Outline Around A Transparent PNG
How To Add A White Outline Around A Transparent PNG https://logosbynick.com/wp-content/uploads/2019/04/add-white-outline-around-transparent-png-1024x602.jpg 1024 602 Nick Saporito https://secure.gravatar.com/avatar/8e31bf392f0ba8850f29a1a2e833cdd020909bfd44613c7e222072c40e031c34?s=96&d=mm&r=gToday I’ll be demonstrating how you can add a white outline around a transparent PNG using a simple and free piece of software called GIMP. GIMP is an open source alternative to Photoshop. It works for Windows, Mac and Linux. You can download GIMP here.
The following is just a brief overview of the steps taken to add a white outline around a transparent PNG with GIMP. If you’re new to the software — especially if you’re a first-time user — it is highly recommended that you watch the following video tutorial:
Continue on for the written instructions.
Outlining Your Transparent PNG with GIMP
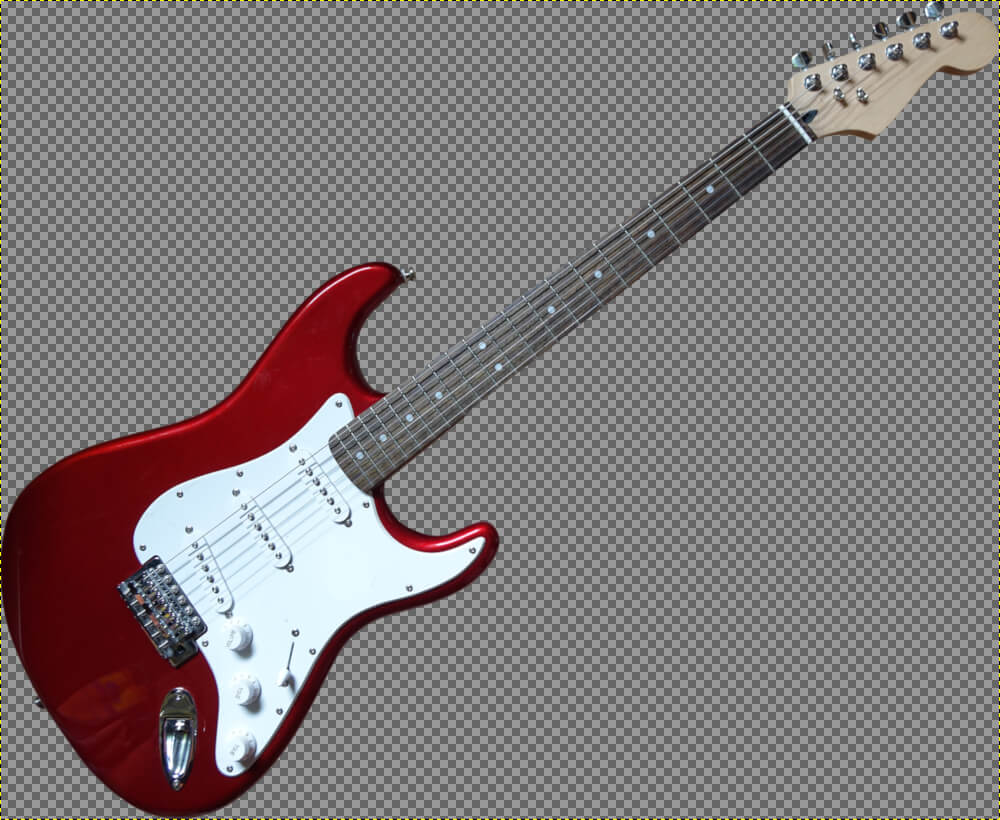
The first thing we need to do is open the PNG file with GIMP. Go to File > Open and locate your image. The transparent area will be represented with a checkerboard pattern as depicted below.
If the subject of your image runs all the way to the edges of the document like mine does, we’ll need to add some extra space around the edges of the document to accommodate a white outline. We’ll do that using the Canvas Size setting. Go to Image > Canvas Size.
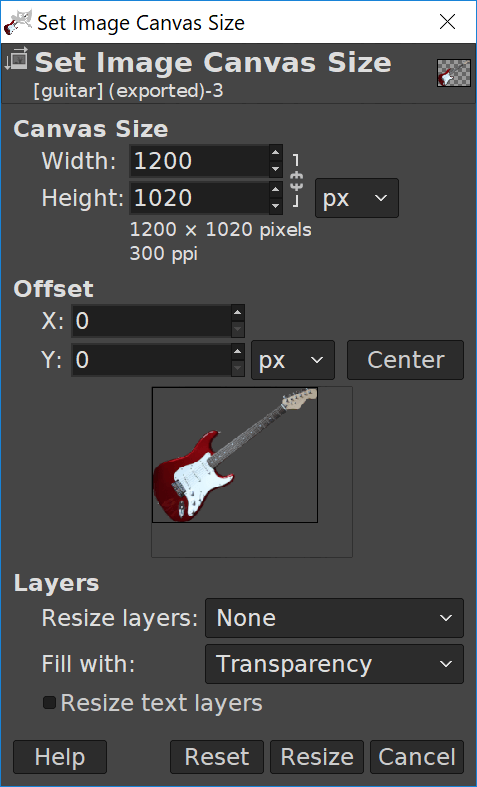
Add a few extra pixels to each dimension (width and height) in order to accommodate a white outline.
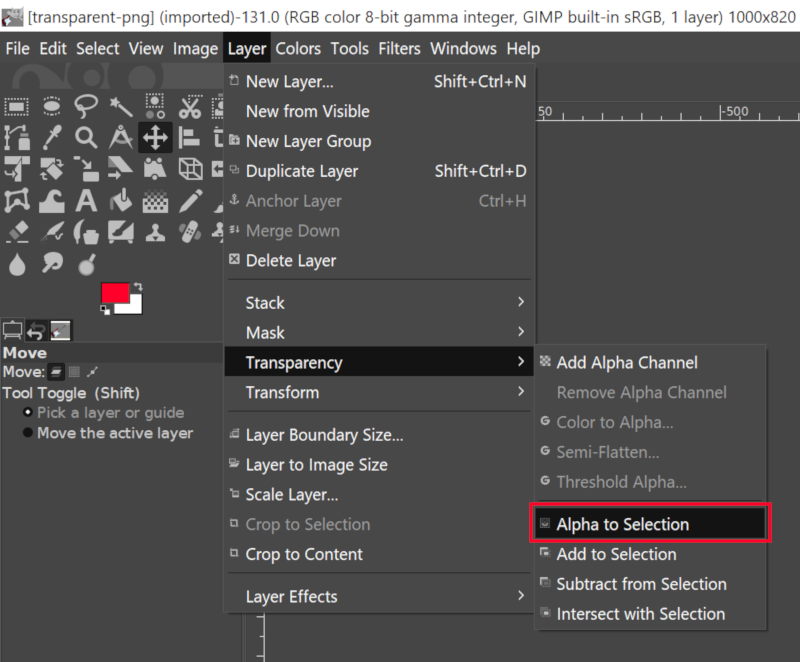
Next we’re going to create a selection around the subject of our PNG by going to Layer > Transparency > Alpha To Selection. This will create a dotted line going around your subject.
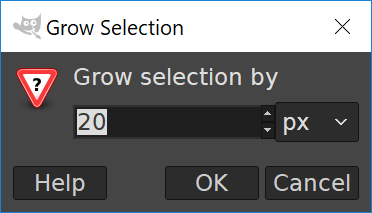
Now we need to increase the size of the selection by going to Select > Grow. Choose how many pixels you’d like to grow the selection by. This will determine the thickness of the white outline around your transparent PNG. For my example I used 20 pixels.
You will notice the thickness of your outline increase after applying
Now we’re going to create a new layer and move it below the current layer. Simply go to Layer > New Layer, name it “Outline”, then click and drag it beneath the current layer in the Layers panel to the bottom right of your screen.
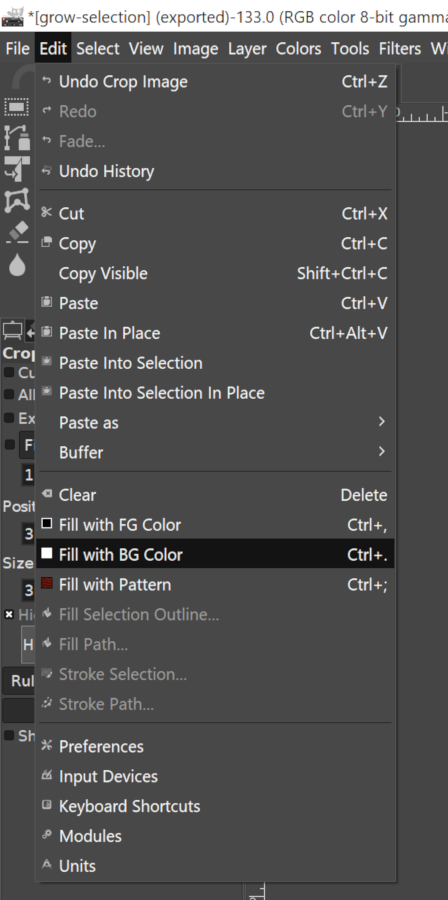
By default, your foreground color in GIMP should be set to black and your background color should be set to white, so all we have to do now is fill in the selection with white by going to Edit > Fill with BG color.
Now go to Select > None in order to remove the dotted outline from your screen.
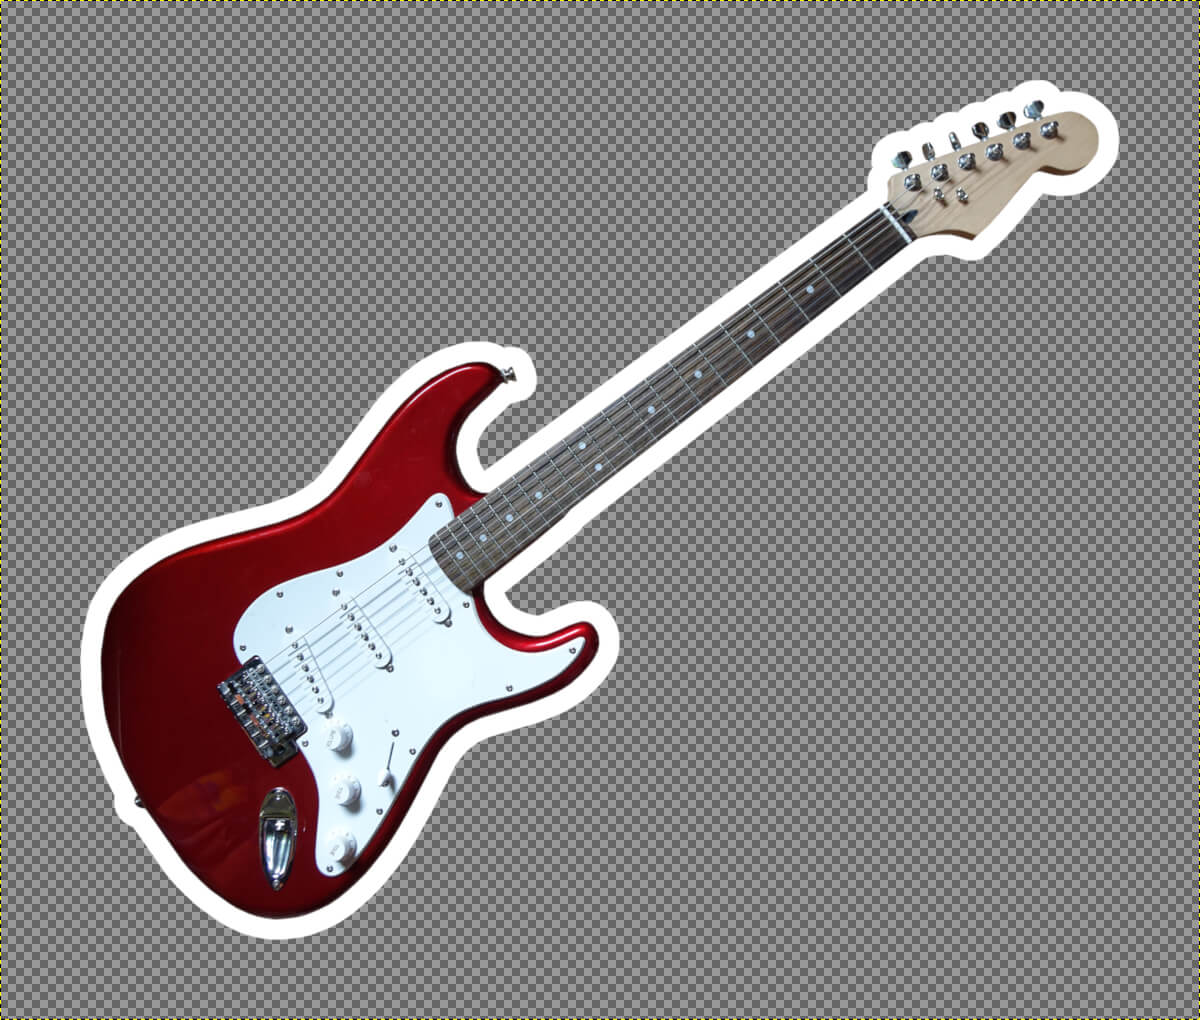
Once you’ve done that you are finished! You’re successfully used GIMP to add a white outline around a transparent PNG.
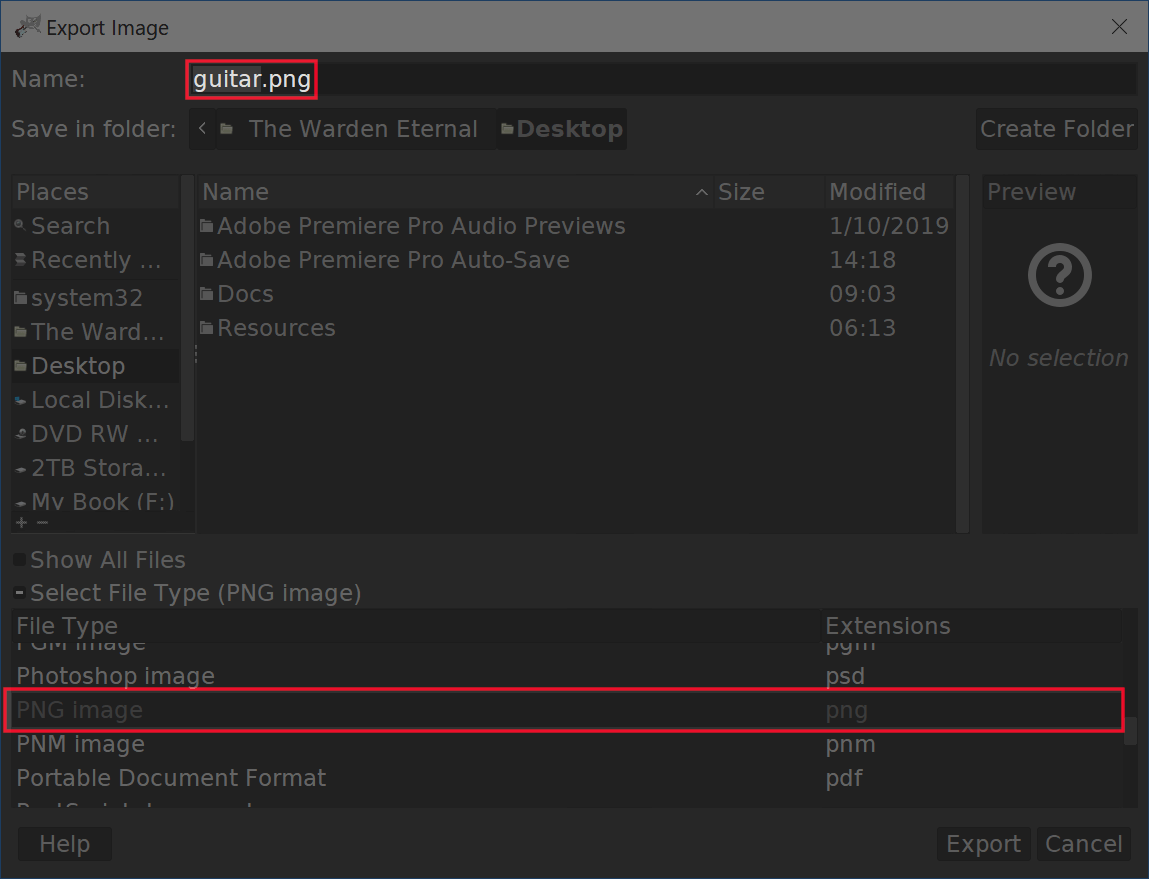
To save your work, simply go to File > Export As… and make sure you choose to export it as a .png file.
If you have any questions or run into any problems simply leave a comment below. And if you’d like to learn more about how GIMP works, be sure to check The GIMP Series — a collection of 60+ videos where I go over all of the major tools and features in GIMP and explain what they are and demonstrate how they work. Information is listed below.
Learn To Master The SoftwareGain a complete understanding of your favorite design apps with my comprehensive collection of video courses. Each course grants access to our private community where you can ask questions and get help when needed.
|
||||||||||||||||||||||||||||||||


Thank you
This was an awesome tutorial thank you! Worked a charm. In the select grow option, I just used 2px, kept it nice and tidy
I can’t thank you enough! I was working on a logo project for work and just couldn’t figure it out. I tried Adobe but I love Gimp; just hadn’t learned near enough yet! Thanks again.
Hii thank you for this tutorial… finding this for many days and finally came here… Thank you very much !
Happy to help!
Thank you for this detailed explanation. I’ve made a flow chart that I can reference if I ever forget.
But I’d be remiss if I did not express my undying gratitude to you for your in-depth explanation. Learning GIMP has been a bit hard for me. I use Vegas 16 for pretty much all my editing, but bordering .PNG’s was insanely time consuming. The difference in time & editing has been eye opening.
You have helped me immensely.
Thank you.
Hi Nick, thank you so much for this tutorial! I was able to successfully add a white background around a png of red lettering. However, when I follow the same steps to add a red outline to around white lettering (it’s the name of a band) everything turns red! Can you please help?
Hi Amanda, it sounds like the red outline layer needs to be positioned beneath the white text layer in the Layers menu.