
Envelope Distort In Illustrator | The Complete Guide
Envelope Distort In Illustrator | The Complete Guide https://logosbynick.com/wp-content/uploads/2022/07/envelope-distort-illustrator.png 800 470 Nick Saporito https://secure.gravatar.com/avatar/8e31bf392f0ba8850f29a1a2e833cdd020909bfd44613c7e222072c40e031c34?s=96&d=mm&r=gArguably the most powerful tool Adobe Illustrator has to offer is its Envelope Distort feature, which allows you warp and distort vector objects in any imaginable way. In this tutorial we’ll be going over how to use envelope distort in Illustrator, as well as all of the options and features it has to offer.
In a previous tutorial from a few years ago we went over how to make text fit the shape of other objects by using some of the features in the Envelope Distort tool. In this lesson, we’ll be exploring this tool inside out so that you can make good use of it moving forward.
How To Use Envelope Distort In Illustrator
The following video tutorial is an excerpt from my Illustrator course where I go over all of the settings, features, and options in the Envelope Distort tool:
Continue on for a written overview.
Table of ContentsCreating Envelope DistortionsWorking With Envelope Distortions |
Introduction To Envelope Distort
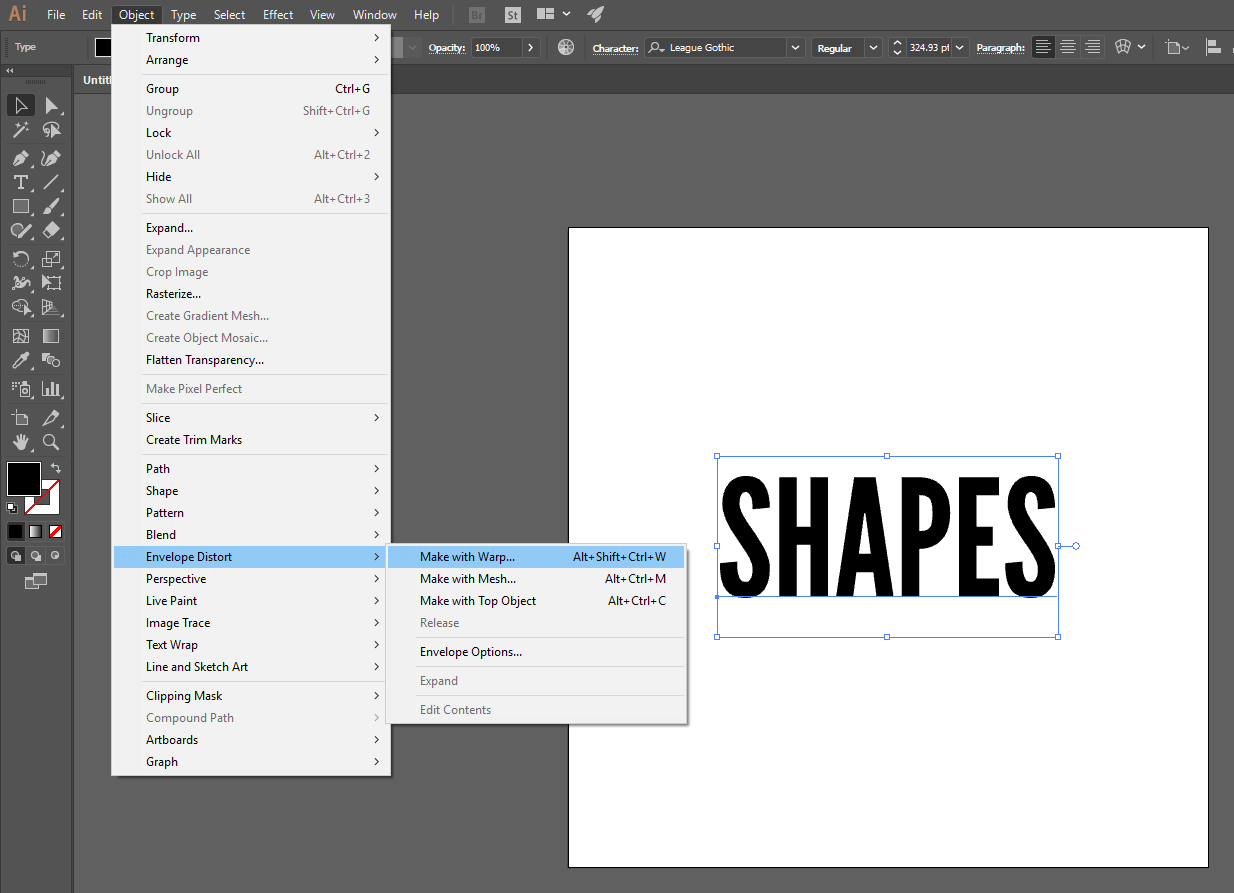
The Envelope Distort tool can be accessed by navigating to:
Object > Envelope Distort
Within that menu you will see a variety of options:
If they are all grayed out then do not worry, it just means that you don’t have any vector objects selected. In order to use this feature, you must have at least one object selected, and it must be a vector path (not an image, png, or jpeg.)
For this demonstration we will be applying the effect to some placeholder text that simply reads “shapes”. You can use whatever vector object you’d like, however. Whether it be a drawing, a logo, a shape, or even a group of objects!
Make With Warp
The simplest way to use envelope distort in Illustrator would be the Make With Warp option because it provides you with a variety of pre-made effects to try out.
To use it, select an object and navigate to:
Object > Envelope Distort > Make With Warp
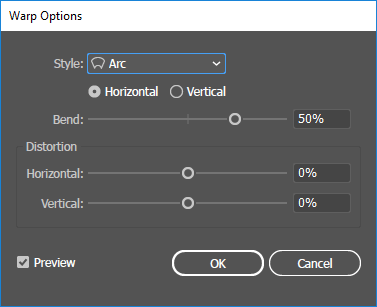
Once selected, the Warp Options menu will populate. Within that menu you should see a dropdown with some pre-made distortions to choose from, as well as a preview on your screen displaying how the selected object will look with that effect applied:
Let’s have a closer look at some of these menu options.
Style
Clicking the Style dropdown will provide you with a variety of pre-made distortions. The options are as follows:
- Arc
- Arc Lower
- Arc Upper
- Arch
- Bulge
- Shell Lower
- Shell Upper
- Flag
- Wave
- Fish
- Rise
- FishEye
- Inflate
- Squeeze
- Twist
Here’s a preview of how each of them distorts your object:
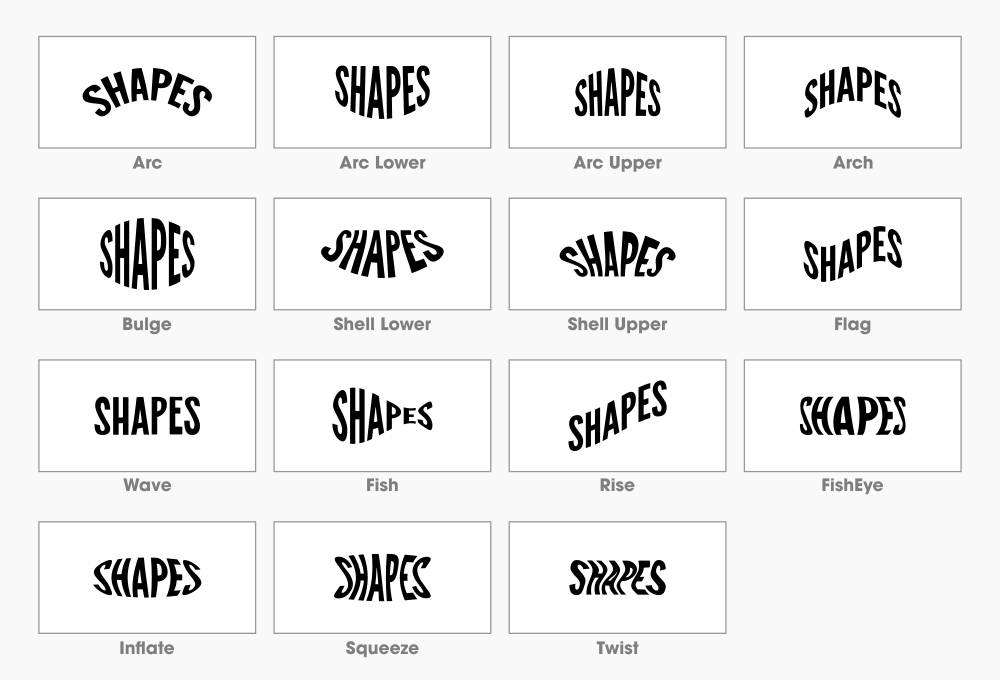
Click to enlarge
You can cycle through them to see how they would all look once applied to your object.
Bear in mind that, at this point, all you are seeing is a preview. Nothing is finalized yet, so do not think you’re making any permanent changes to your object by previewing some of these distortions.
Let’s go over some of the other tool settings in the Warp Options menu.
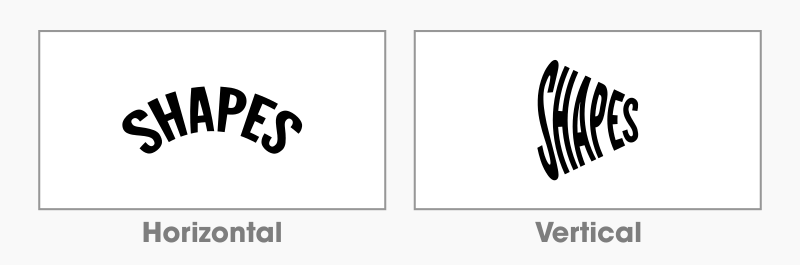
Horizontal & Vertical
Just beneath the Style dropdown you should see the Horizontal and Vertical options. You can use this setting to determine if you’d like the distortion to be applied the horizontal or vertical axis of the selected object:
Bend
The Bend slider controls the direction and intensity of the applied effect, and it works the same regardless of the applied style.
Move the slider left and right to adjust its bend:
Distortion
Finally, the Distortion section of the menu allows you to change the balance of the distortion, both on the vertical and horizontal axis.
Click and drag the sliders to adjust the distortion:
If at any point you’d like to reset these settings, just manually type 0% into each input field.
Once you are finished making your changes, you can press OK to apply them or Cancel to exit it out of the menu without applying the distortion.
Make With Mesh
Another way that you can use envelope distort in Illustrator is with meshes. A mesh is sort of like a grid that is placed over your object, and you can move the coordinates of that grid to distort your object in a more controlled and customized way.
To access it, navigate to:
Object > Envelope Distort > Make With Mesh
The Envelope Mesh menu should populate:
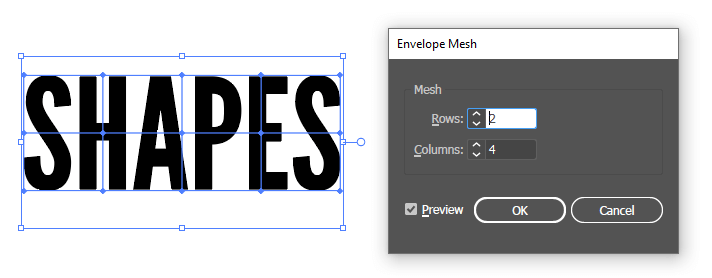
You will be prompted to choose the number of Rows and Columns for the mesh that will be applied to your object. You can increase and decrease them by clicking the arrows next to them.
The more rows and columns you have, the more access points you’ll be able to alter when distorting your object. This can be a good thing if you’re looking to make minor distortions to a localized area. However, using fewer rows and columns will make it so that the access points distort a greater area of the object.
With your desired inputs set, press the OK button to finalize, and then grab the Direct Selection Tool (keyboard shortcut: A) and click on one of the nodes in the mesh to select it. You can then drag it to distort your object:
What’s more, this effect can also be applied to grouped objects too!
Make With Top Object
Possibly the most powerful feature that the envelope distort tool has to offer in Illustrator is the Make With Top Object setting. This feature allows you to make one object take the shape of another object. In order for it to work, however, you must have 2 objects selected.
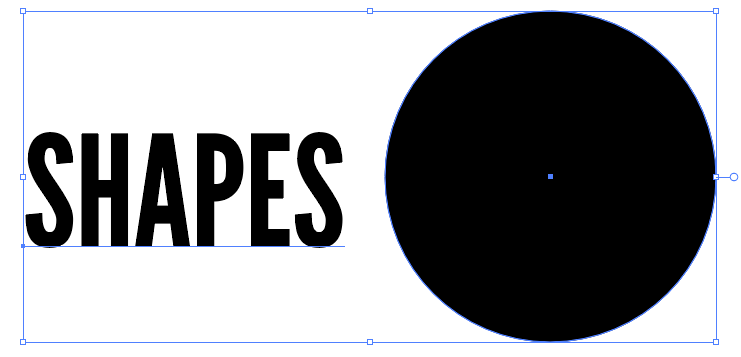
For this demonstration I will be making my text object fit the shape of a circle. So, I have used the Ellipse Tool (keyboard shortcut: L) to create a circle alongside my text:
To apply the distortion, first make sure that you have the shape you’d like your object to take positioned above the target object in the stacking order. You can ensure that this is the case by right-clicking the shape and navigating to:
Arrange > Bring To Front
Once that is arranged, select both objects and navigate to:
Object > Envelope Distort > Make With Top Object
This feature is simple in how it works. Instead of populating a menu, it just applies the distortion:
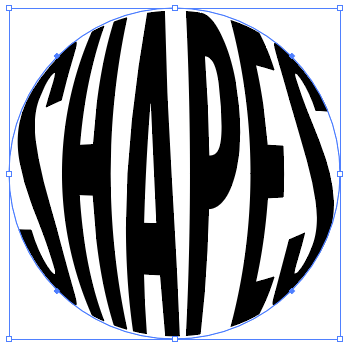
And this doesn’t just work with circles either. You can make virtually any object fit the shape of any other object (so long as they are vector paths and not rasterized imagery.)
As I’m sure you can imagine, this can be used to make all kinds of interesting word art and other transformations.
Editing The Contents Of The Effect
If you’d like to edit the contents of a distorted object after the transformation has already been applied then you are in luck as Illustrator makes this possible.
At any point you can edit the source object (and not the distortion effect applied to it) by navigating to:
Object > Envelope Distort > Edit Contents
This will treat the object as it were before the distortion was applied. Depending on the type of object use, you will be able to edit it in various ways.
In my example I am using a text object, so I can use this feature to edit the text contents retroactively:

This also includes fonts, styles, and colors. Not only that, but you can also edit the properties of shapes and other objects as well, whether it be moving nodes, scaling, rotating, or anything else.
Remove The Effect
Now that we’ve gone over all of the ways in which you can use envelope distort in Illustrator, let’s have a look at how these effects can be undone, in case you’d like to revert back to the object’s previous state.
One of the benefits of Illustrator’s envelope distort feature is that it’s completely non-destructive, meaning it can be undone at any time,
To remove the envelope distortion from your object, simply navigate to:
Object > Envelope Distort > Release
Once applied, the effect will be removed and the object released to its original state.
Finalize The Effect
If you are satisfied with your envelope distortion then you may want to finalize it so that your distorted object becomes a new object of its own and not just one with a non-destructive effect applied on top of it.
This is done by performing what is known as an Expand in Illustrator. Select the object and navigate to:
Object > Envelope Distort > Expand
Once applied, your distorted object will become an entirely new object of its own. The distortion will still be applied, but it won’t be recognized as an Envelope Distort effect as it was previously.
Conclusion
The envelope distort feature in Illustrator is one of the most powerful tools in existence if you’re a vector artist. Not only that, but it’s exclusive to Adobe. No other vector application has anything like it, which is a shame.
If you have any questions or need clarification on any of the steps taken in this lesson then simply leave a comment below.
Learn To Master The SoftwareGain a complete understanding of your favorite design apps with my comprehensive collection of video courses. Each course grants access to our private community where you can ask questions and get help when needed.
|
||||||||||||||||||||||||||||||||


Hey Nick,
Thanks for the write up. Just getting started in Ai and have been messing around with Envelope Distort. Do you know if I rotate a word that I’m trying to distort. Can I also rotate the mesh to be parallel with the top and bottom of the word?
Yes, you’ll just have to exit the envelope tool and go to the selection tool to make those transformations. Then you can go back to envelope tool and continue making the distortions.