Texture Fill In Affinity Designer | The Correct Workaround
Texture Fill In Affinity Designer | The Correct Workaround https://logosbynick.com/wp-content/uploads/2022/02/texture-fill-affinity-designer.png 800 470 Nick Saporito https://secure.gravatar.com/avatar/8e31bf392f0ba8850f29a1a2e833cdd020909bfd44613c7e222072c40e031c34?s=96&d=mm&r=gUsing textures as a fill property is a task that is handled differently according to the software you’re using, and Affinity Designer is not exception to this. In fact, Affinity Designer doesn’t handle texture filling at all, but thankfully there is a workaround. In this tutorial we’ll be going over how to texture fill in Affinity Designer using only a single click and drag of the mouse!
In short, this is no feature that allows you to texture fill in Affinity Designer. Instead, we must use the Stock tab to search for a texture image, import it onto the document, and then apply it as a clipping mask to the subject we’d like to fill it with.
This is a rather simple process. Let’s get to work!
Texture Fill In Affinity Designer
The following video tutorial will walk you through the entire process of applying texture fills in Affinity Designer:
Continue on for the written instructions.
Table of ContentsHow To Apply A Texture Fill
How To Remove A Texture Fill |
How To Apply A Texture Fill
Let’s first go over how to texture fill in Affinity Designer, then we’ll address removing the fill in case you’d like to do so.
Step 1: Identify the object you’d like to apply the texture fill to
In order to apply a texture fill we will first need a subject to apply it to.
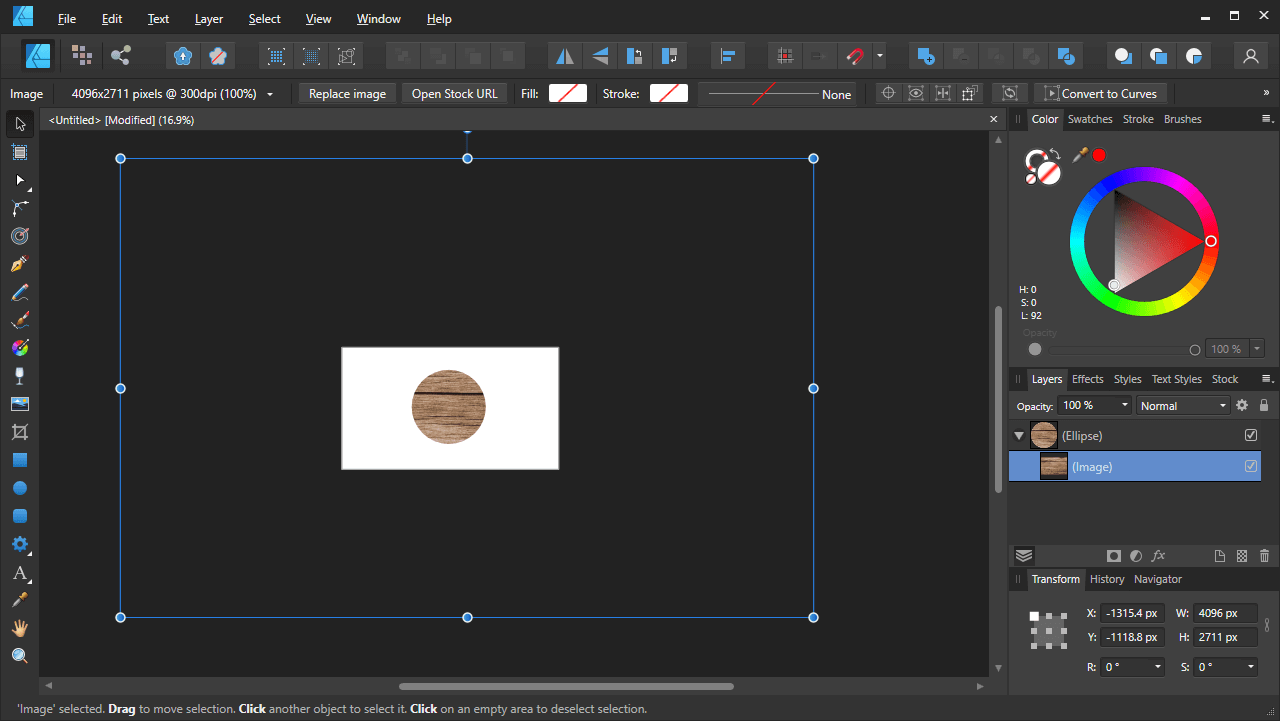
For this demonstration I will be applying a texture fill to the following example shape:
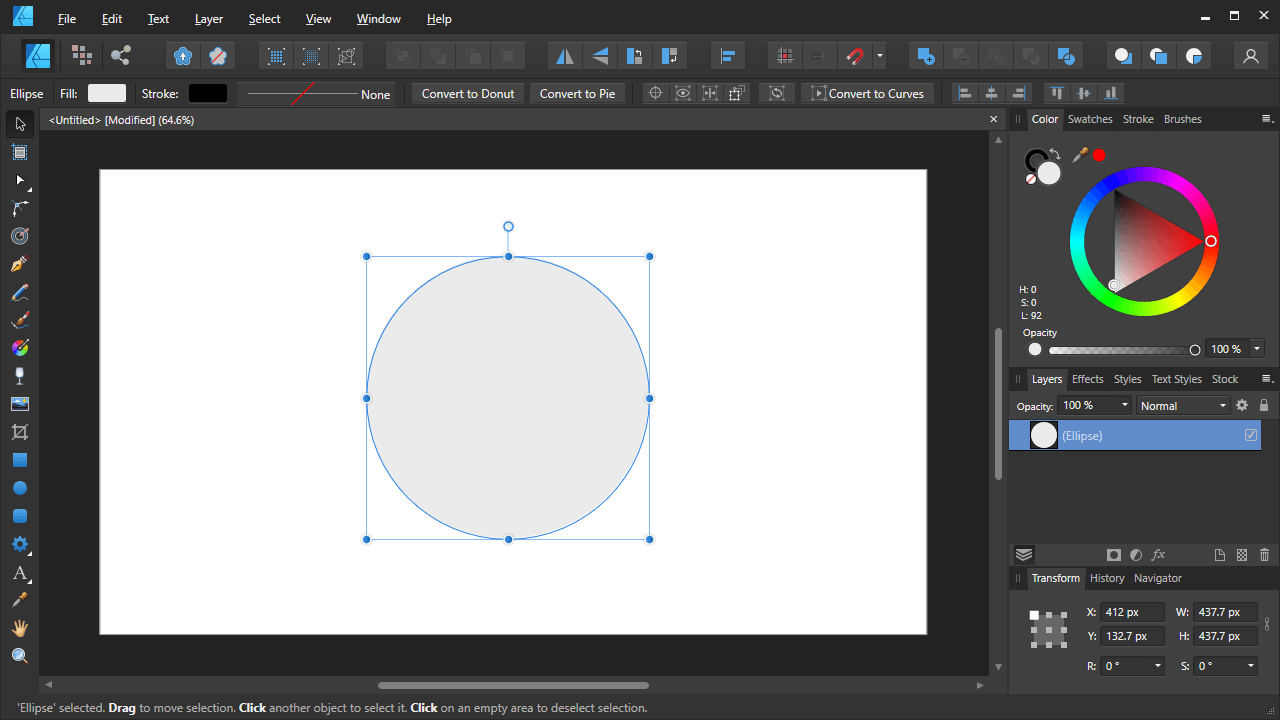
A texture fill will be applied to the example subject above.
This is just a circle, but you can use virtually any shape, image, or text object you’d like.
Step 2: Use the Stock tab to search for a texture
Now we are going to search for an image to use as the texture fill.
Navigate over to the Stock tab (located all the way to the right of the Layers menu tab) and choose your preferred stock photo site from the menu dropdown.
The sites to choose from are:
Both are free stock photo sites with countless images, textures, and various design elements to choose from. Either choice should be fine.
Use the search bar to type in “textures“, or if you are searching for a specific type of texture, add that in as well (eg. “wood textures“)
An index of images to choose from should populate:
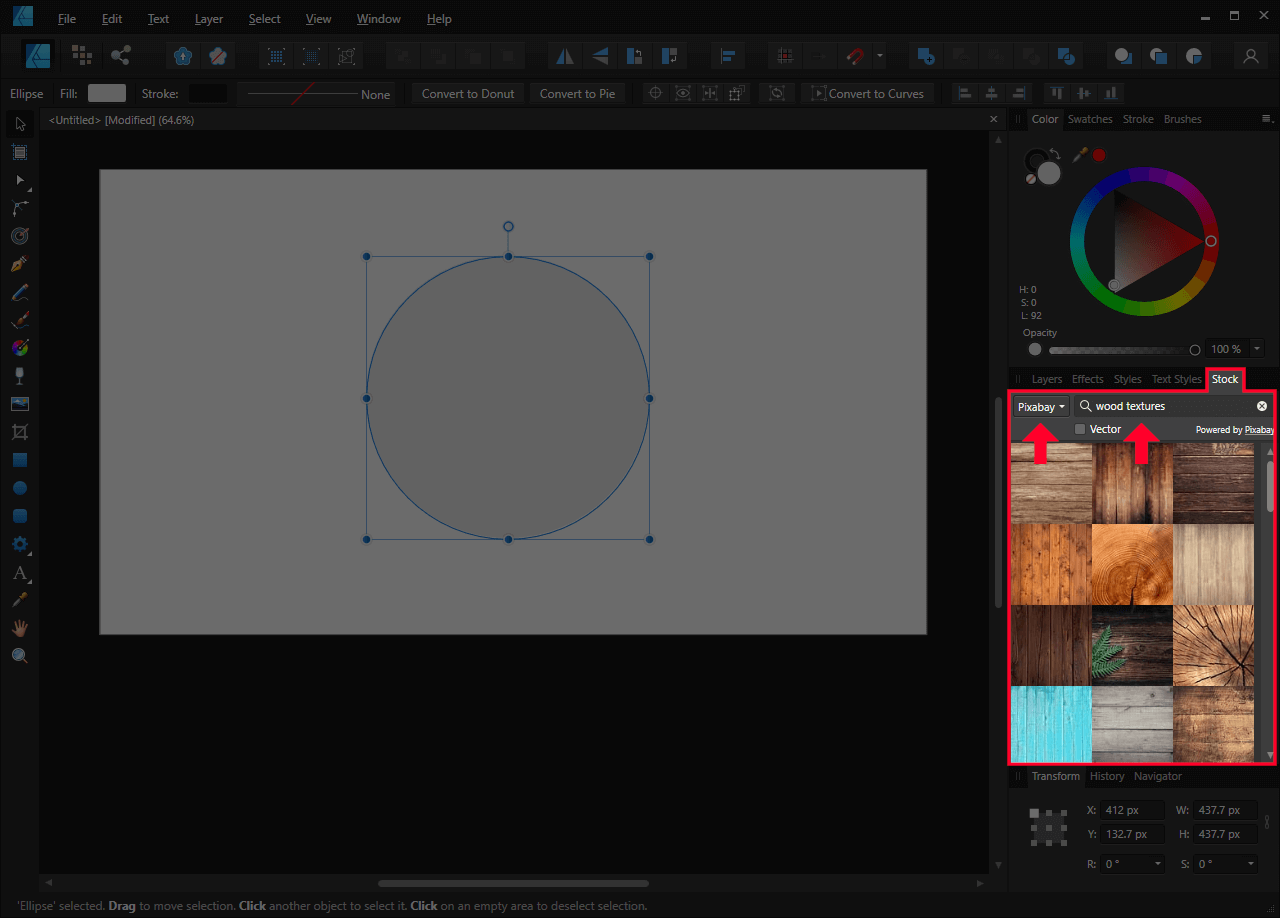
The Stock menu allows you to search free stock photo sites for texture images (click to enlarge.)
These are all user-generated images from the chosen stock photo site.
Step 3: Import the texture and apply it to the object as a clipping mask
Once you’ve found a suitable texture, you can import it by simply clicking and dragging it onto your canvas.
It should be fairly large once imported, and a small menu will populate indicating the user who contributed that image:
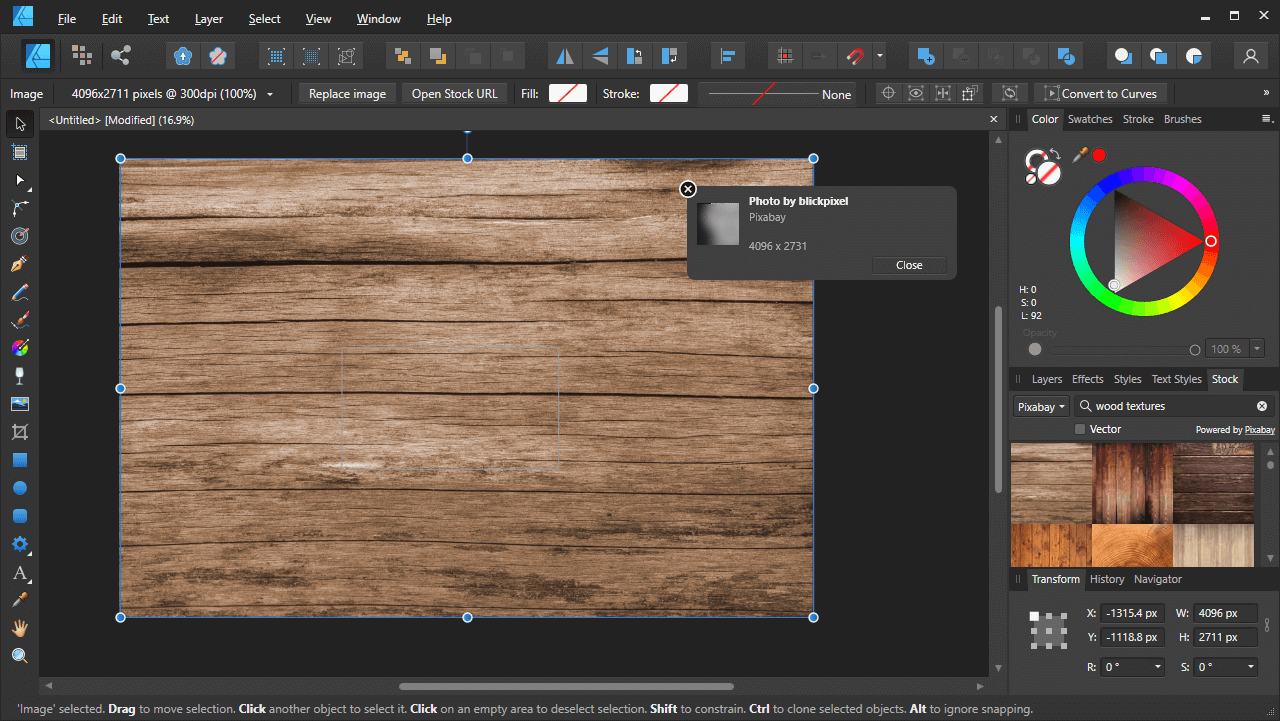
The texture image will be very large once imported. You will likely have to zoom out by a lot.
You can close out of that menu.
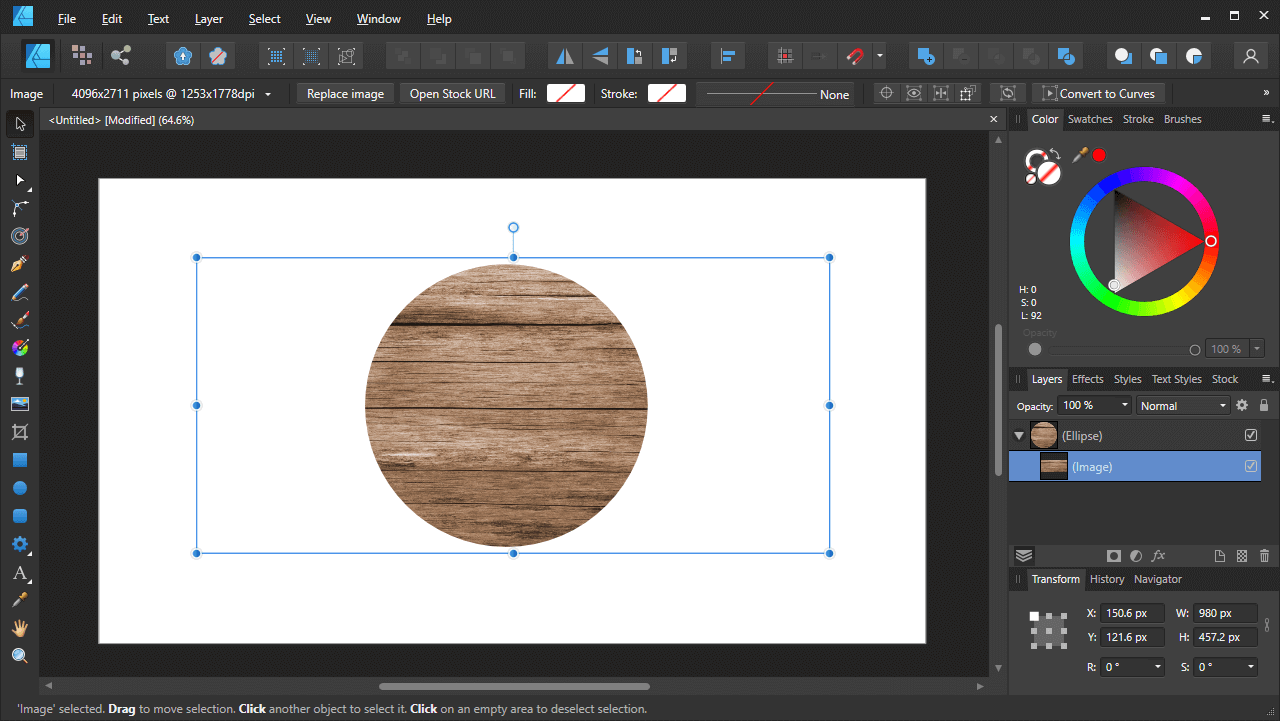
Once the texture is imported onto the document, you can apply it to an object as a fill by creating a clipping mask.
To do so, open the Layers tab and click and drag the texture layer on top of the subject layer. When done correctly, the texture image should be placed inside of the object:
Texture image once it is applied as a clipping mask.
Step 4: Use the Move Tool to transform the texture as needed
As previously mentioned, whenever you apply a texture fill in Affinity Designer using the Stock tab, the image will be really large once imported. In this step we will be adjusting the texture fill to accommodate the subject it is applied to.
Grab the Move Tool (keyboard shortcut: V) and use the transformation handles to adjust your texture fill as needed:
How the texture looks once scaled down to fit the object better.
Adjustments you can make include:
- Moving its position
- Scaling it up or down
- Rotating
- Shearing
- And more
If the transformations are being made to the entire subject and not just the texture fill, you may need to expand the object layer in the Layers tab so you can select the texture fill layer.
How To Remove A Texture Fill
Now that we’ve gone over how to apply a texture fill, let’s briefly go over how to remove a texture fill in Affinity Designer.
Step 1: Expand the object layer in the Layers menu
Navigate over to the Layers tab and locate the subject the texture is applied to.
Click the white arrow located next to the layer’s name in order to expand it:
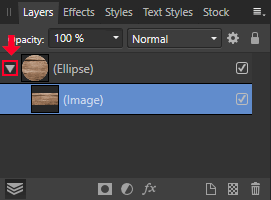
The expand layer arrow, outlined in red above.
The texture layer should then become visible.
Step 2: Pop the texture out of its clipping mask by clicking and dragging it
All of you have to do now in order to remove the texture fill is simply pop the texture layer out from the subject’s layer.
To do this, simply click and drag to layer elsewhere:
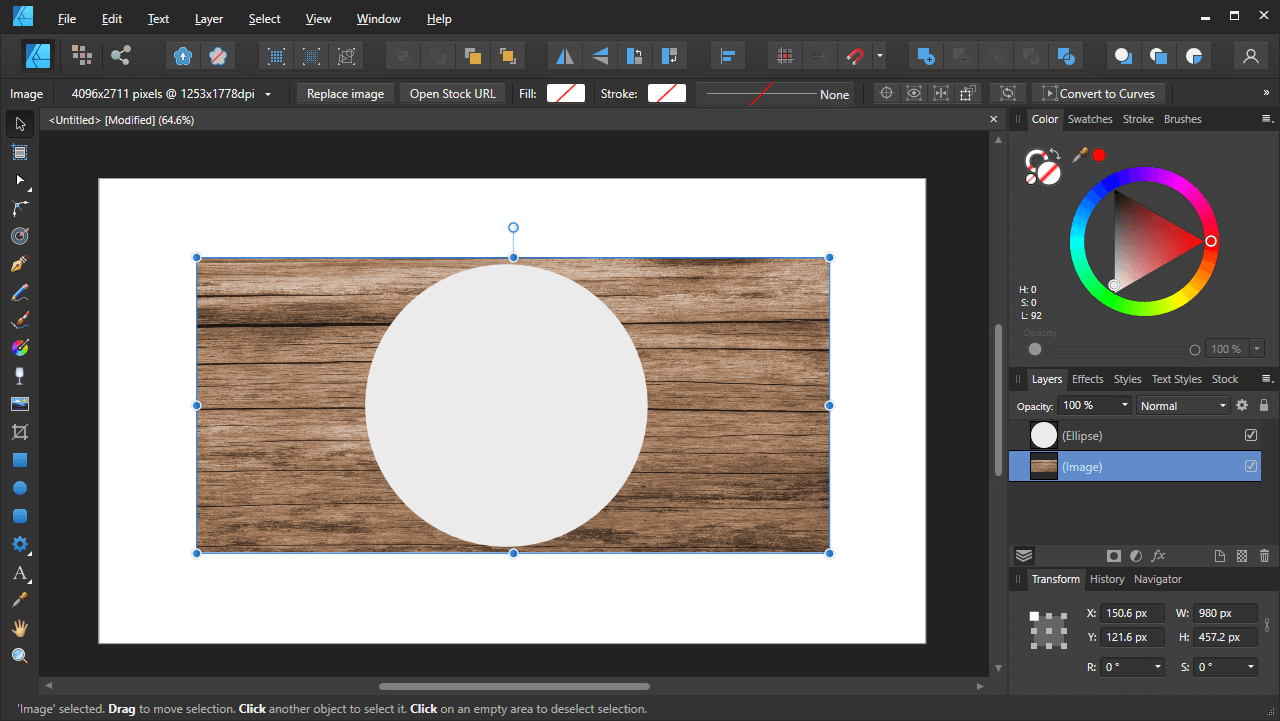
Removing the texture fill reverts the shape back to its original state.
Moving it up will place it above the subject and moving it down will place it beneath the subject.
Now you can either delete the texture or turn off its visibility in the Layers menu.
Conclusion
It wouldn’t be unreasonable to be taken aback by the fact that there is no designated tool or feature for creating a texture fill in Affinity Designer. However, as we’ve gone over in this lesson, such a feature doesn’t need to exist because it’s already possible with the existing tools!
This forward-thinking approach to keeping things simple and efficient is part of what makes Affinity Designer such a brilliant piece of software. And having an expansive library of user-generated textures to choose from surely beats whatever limited stock library that would’ve otherwise existed in Affinity Designer had they implemented this feature.
If you have any questions or need clarification on any of the steps taken in this lesson then simply leave a comment below.
Learn To Master The SoftwareGain a complete understanding of your favorite design apps with my comprehensive collection of video courses. Each course grants access to our private community where you can ask questions and get help when needed.
|
||||||||||||||||||||||||||||||||


You might also like


2 comments
-
-
John Honan
The latest version of AD has a texture fill feature. Select the curve, click the Fill tool (G) and on the context bar under ‘Type’ select ‘Bitmap’
Regards,
John.
John Sampson
The stock tab is revealed via the Window menu.