The Shape Builder In Illustrator | Here’s How It Works…
The Shape Builder In Illustrator | Here’s How It Works… https://logosbynick.com/wp-content/uploads/2022/02/shape-builder-tool-illustrator.png 800 470 Nick Saporito https://secure.gravatar.com/avatar/8e31bf392f0ba8850f29a1a2e833cdd020909bfd44613c7e222072c40e031c34?s=96&d=mm&r=gToday we’ll be having a look at [arguably] the most powerful tool you can use as a vector artist — the Shape Builder in Illustrator. In this tutorial we’ll be going over how to use this magical feature and why it’s useful. If you don’t know what the Shape Builder is or how to use it then you will be a better designer by the time you finish this tutorial.
In short, the Shape Builder in Illustrator is an alternative to using Boolean operations commonly found in the Pathfinder menu. These tools allow you to combine objects and create new shapes based on the intersecting areas of other shapes. You can read more about it in Adobe’s documentation.
The beauty of the Shape Builder Tool is that is that it makes this process so much more efficient. What’s more, this is an Illustrator-specific tool, meaning there is no similar alternative in other vector design applications.
How To Use The Shape Builder In Illustrator
The following video tutorial is a sample lesson from my Illustrator course where I demonstrate how to use the Shape Builder Tool:
Continue on for the written lesson.
Table of Contents |
What Is The Shape Builder Tool?
In Adobe Illustrator, the Shape Builder is a tool that allows you to create shapes based on the intersecting areas of two or more shapes you may have selected.
The tool can be accessed in the toolbar on the left-hand side of your screen:
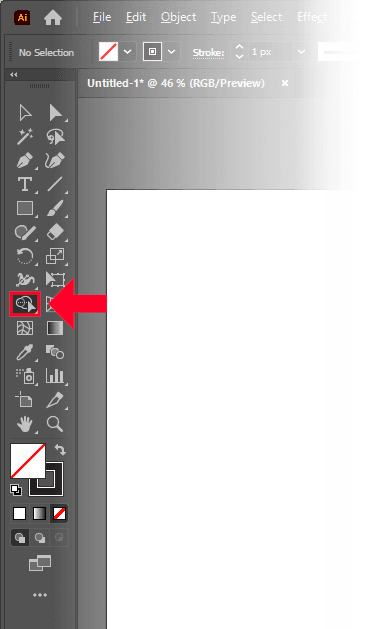
The Shape Builder is located in the toolbar, outlined in red above.
Alternatively, you can also access using the keyboard shortcut: Shift + M
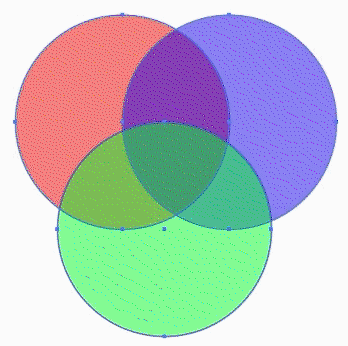
For this demonstration I have arranged a series of three overlapping circles:
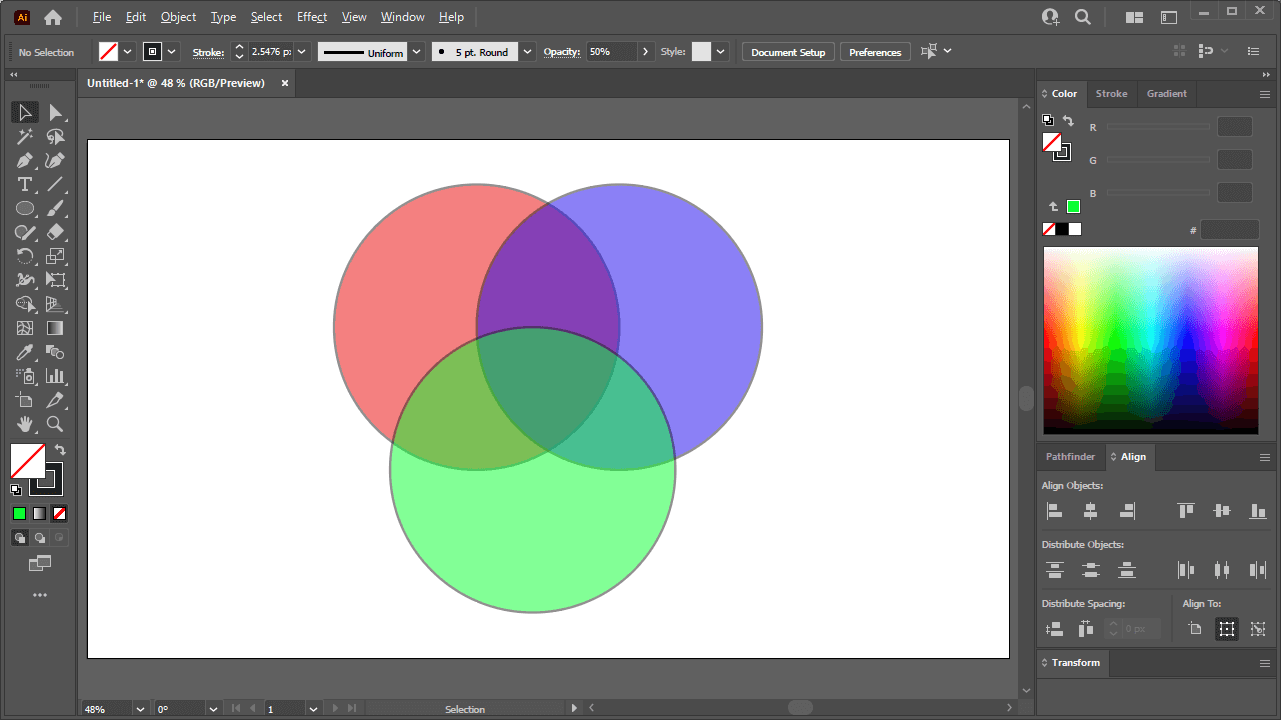
Take note of the intersecting areas between these circles.
As you can see, I have turned down the opacity of these circles so you can see exactly where these shapes intersect with each other.
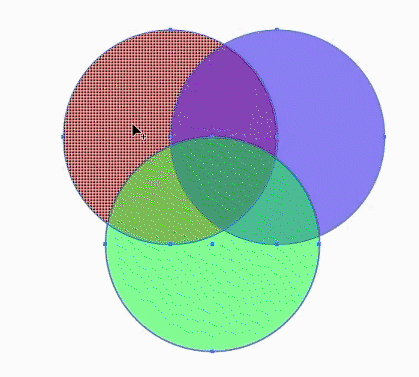
If you look at these circles with a creative eye, you can see that there are various shapes within them:
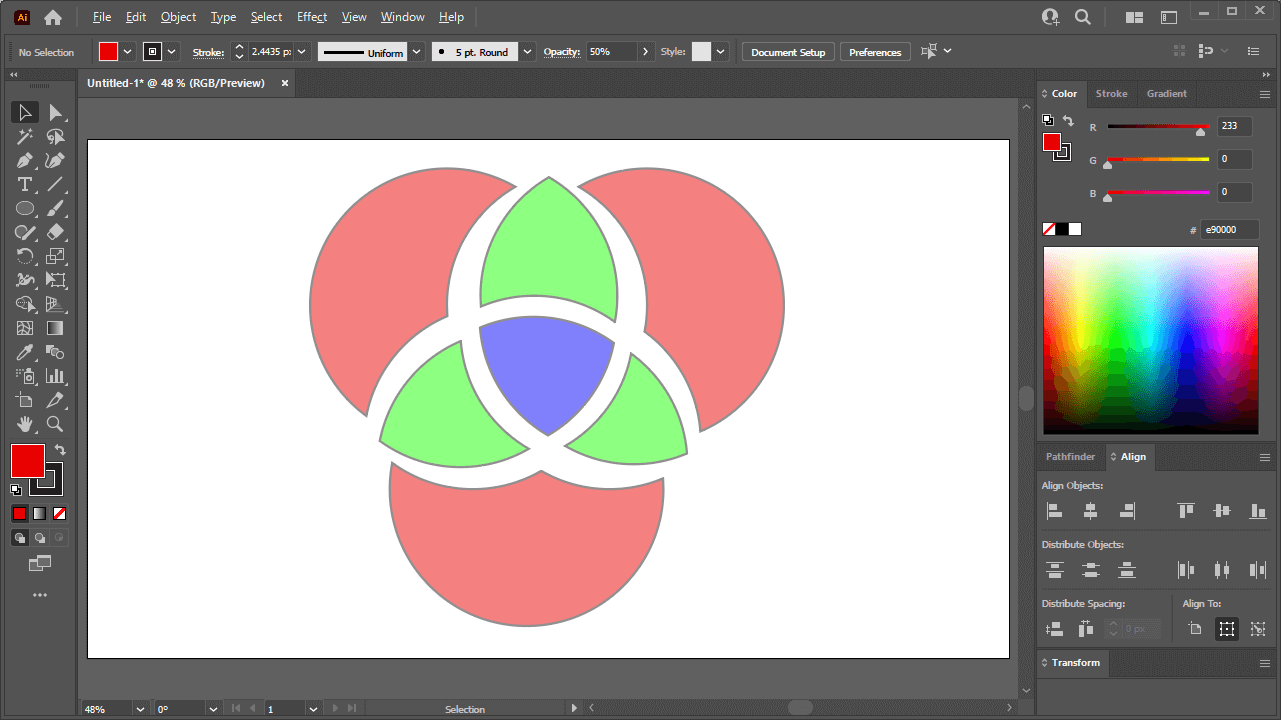
However, none of these are actual shapes that you can work with in Illustrator. This is because Illustrator still recognizes them as three overlapping circles and nothing more.
Let’s say you wanted create new shapes using the intersecting areas. Traditionally, this would be done by creating duplicate copies of the shapes and performing Boolean operations on them. Using this approach you can:
- Combine shapes together
- Subtract shapes from other shapes
- Create new shapes from the intersecting areas
- Created new shapes from the excluded areas
Although the Boolean operations found in the Pathfinder are a perfectly acceptable way of going about this, it’s not the most efficient way if you are an Illustrator user. This is where the Shape Builder Tool comes in handy as it allows you to do all of the above directly on the canvas, and in a less complicated way.
Using The Shape Builder In Illustrator
Let’s go over how to use the Shape Builder in Illustrator.
In order to use the Shape Builder, you must have at least 2 objects selected, so select a couple of objects and active the Shape Builder to get started.
Once selected, you should notice that the intersecting areas of the selected shapes highlight in gray when you hover your cursor over them, indicating what shapes can be made from these selected objects:

How To Combine Objects
By default, the Shape Builder will be in “add” mode, meaning you can combine shapes together. This will be indicated by the plus (+) sign on your cursor.
To combine two or more segments of the intersecting shapes together, simply click and drag to draw a line going through them:
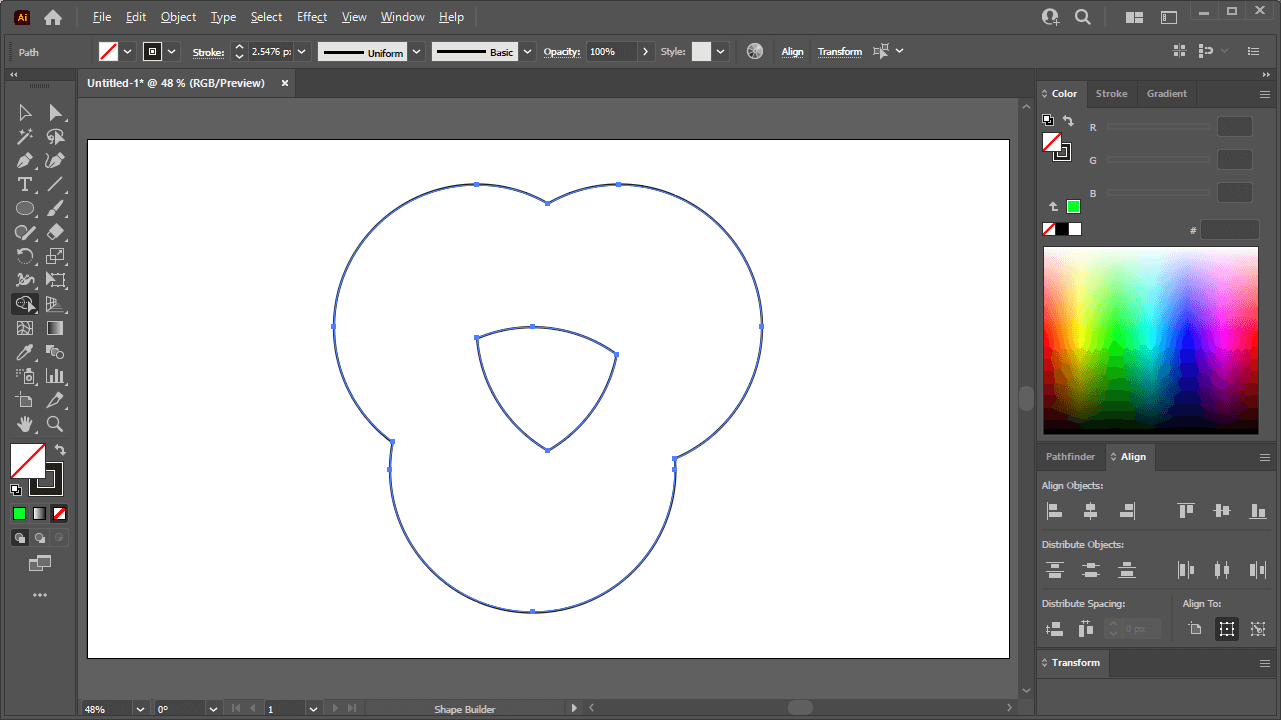
You can also click once on a segment to make it into its own shape that is separate from the rest of the selection.
Once you release the click, the changes will be applied and you will have successfully created a new shape using the intersecting areas of the other shapes.
How To Subtract Objects
The Shape Builder doesn’t just allow you to combine segments — it also allows you to subtract as well.
To enter subtract mode, simply hold Alt on your keyboard (Option if you’re a Mac user) while using it. You should notice that the cursor changes from a plus (+) sign to a minus (–) symbol.
You can now subtract segments from the selection by clicking on them or by drawing a line through them:
As is the case when in addition mode, simply release the click to apply and finalize your changes.
Transforming Strokes
Not only can you add and subtract intersecting shapes using the Shape Builder in Illustrator, but you can also do the same with strokes!
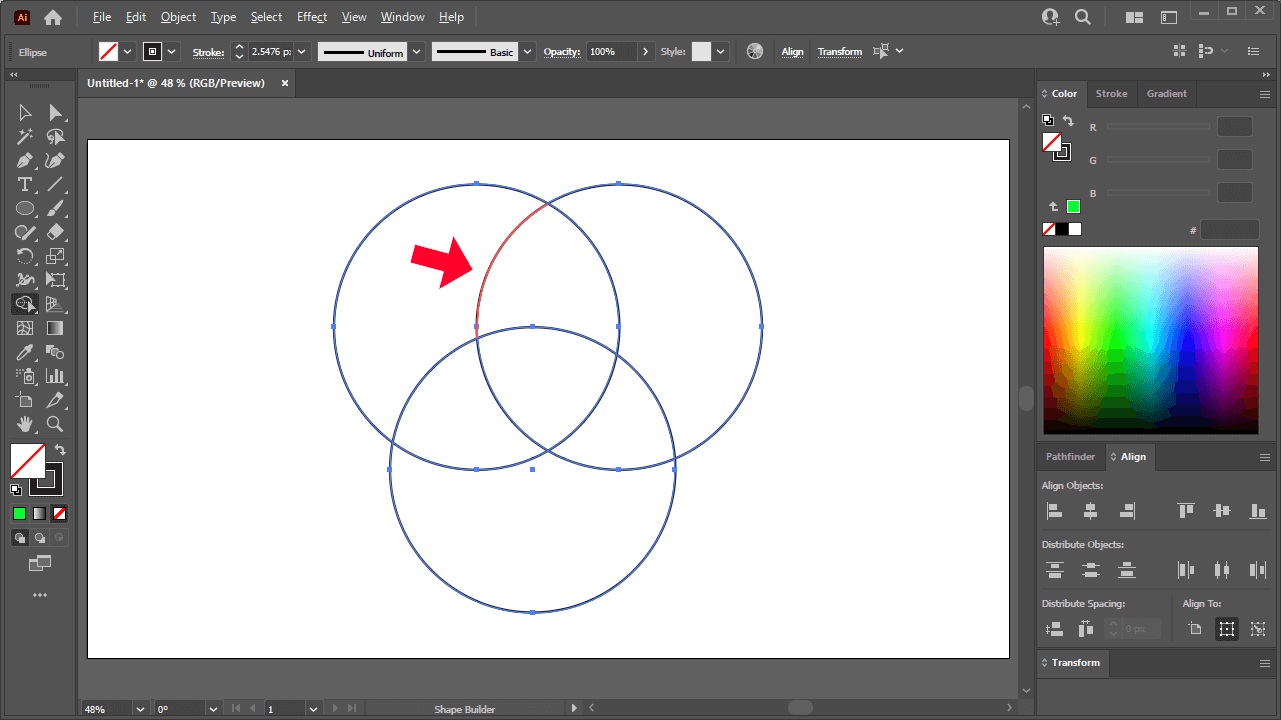
As previously explained, when you hover your cursor over a segment of your selection, you should see it highlight in gray. However, if you hover your cursor directly over a stroke (assuming you have on applied) then it should highlight in red:
You can then add, remove, and combine strokes the same way you would for the segments between the shapes:
Once you are finished using the Shape Builder you can grab the Selection Tool and deselect everything. All of the segments that you have created should now be usable as independent objects.
Conclusion
The Shape Builder in Illustrator is an important tool because it takes a traditional process in vector design and makes it quicker, easier, and therefore more efficient. As you could imagine, this tool can be used to create all kinds of neat patterns, monograms, and abstract shapes. It can also be used when working with complex designs with lots of intricacies, such as when designing icons, UI and logos.
No other vector design tool — including Inkscape and Affinity Designer — possess an equivalent feature, which is unfortunate. Hopefully this innovation gets incorporated elsewhere so that all designers can enjoy the benefits that it provides.
If you have any questions or need clarification on anything we’ve gone over in this lesson then simply leave a comment below.
Learn To Master The SoftwareGain a complete understanding of your favorite design apps with my comprehensive collection of video courses. Each course grants access to our private community where you can ask questions and get help when needed.
|
||||||||||||||||||||||||||||||||


