
Create A Perfect Circle With Affinity Designer For The iPad
Create A Perfect Circle With Affinity Designer For The iPad https://logosbynick.com/wp-content/uploads/2022/01/perfect-circle-affinity-designer-ipad.png 800 470 Nick Saporito Nick Saporito https://secure.gravatar.com/avatar/8e31bf392f0ba8850f29a1a2e833cdd020909bfd44613c7e222072c40e031c34?s=96&d=mm&r=g- Nick Saporito
- no comments
In this tutorial we’ll be going over a simple method for creating a perfect circle with Affinity Designer for the iPad. This is something that can be a bit perplexing at first — especially if you come from a background of desktop design software.
In traditional vector design applications, the way that you would draw a perfect circle is usually by using the Ellipse Tool to click and drag, and then holding Shift or Control (depending on the application) on the keyboard at the same time will lock the aspect ratio so that a perfectly round circle is drawn.
However, there is no standard keyboard on an iPad. The on-screen keyboard is meant for typing and serves no real purpose in a design environment like it does on a desktop. So, what is the great mystery then?
How To Draw A Perfect Circle with Affinity Designer For The iPad
The following video tutorial explains everything succinctly and within roughly 1 minute:
Continue on for the written instructions.
Draw with one hand, hold a tap with the other
The secret to drawing a perfect circle in a mobile environment, such as an iPad, is to use one to draw the circle and the other hand to hold a tap over the screen.
The graphic below depicts how this is done:
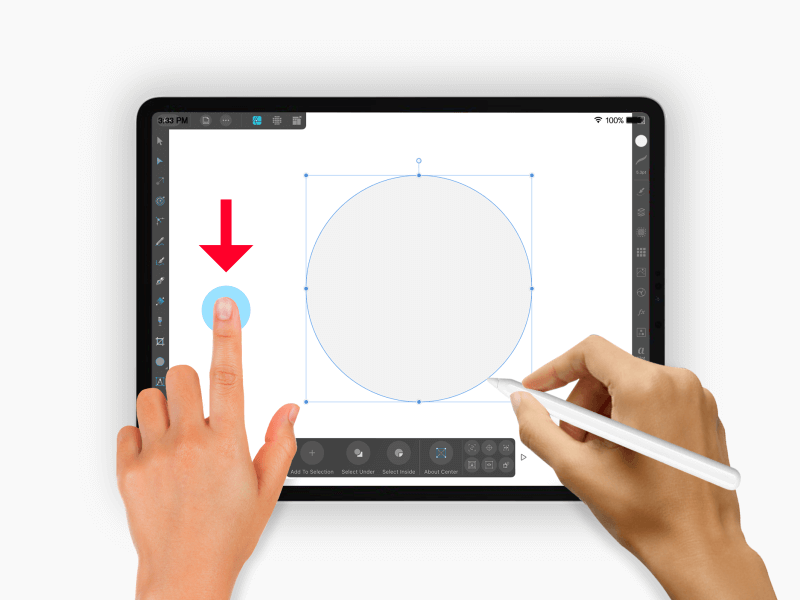
Drawing a perfect circle in a mobile environment requires that you draw it with one hand and use your other hand to hold a tap over the canvas.
In order to create circles we will first need to select the Ellipse Tool, which can be located in the bottom-left corner of your screen:
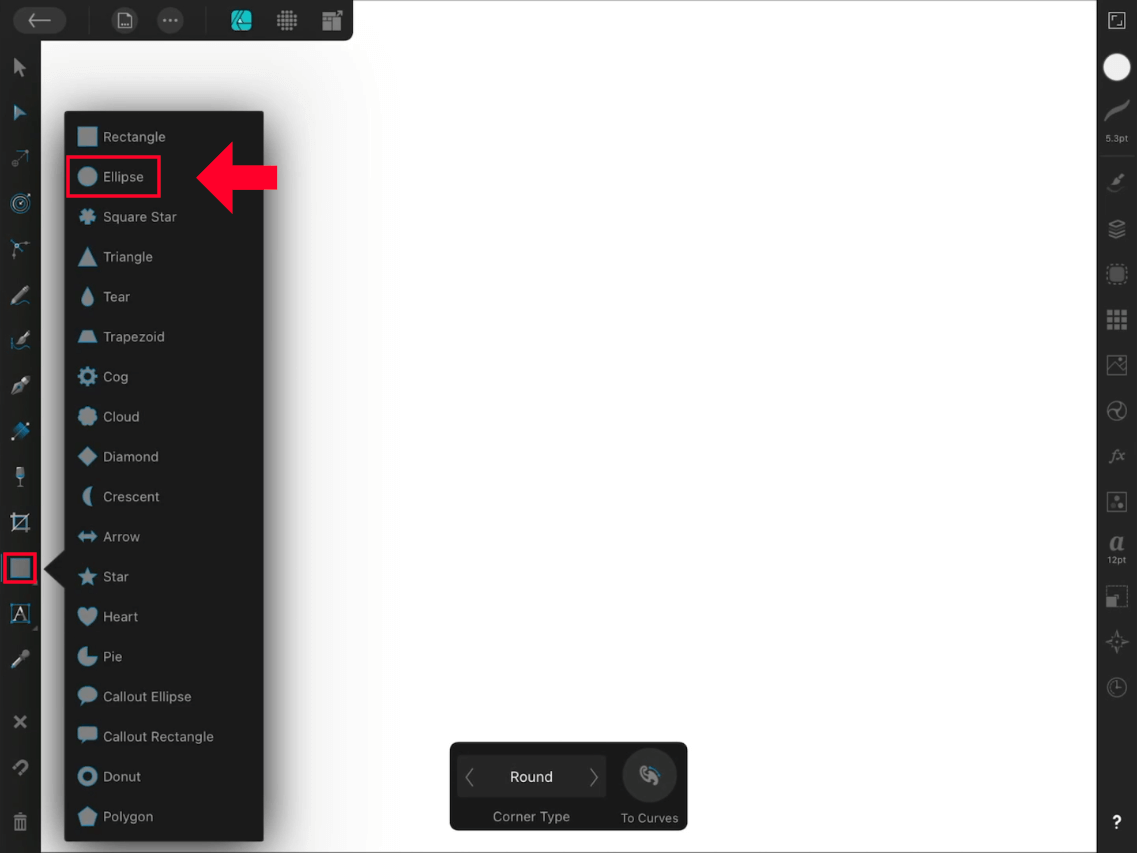
The Ellipse Tool is located in the shapes menu towards the bottom-left corner of the screen (click to enlarge.)
Step 1: Draw the circle with one hand
If you are using an Apple Pencil or some other stylus, tap and drag on the canvas to begin drawing your ellipse.
If you are not using a stylus then you can use your index finger.
Step 2: Hold a tap over the screen with your index finger on your other hand
While tapping and dragging, use your index finger on your other hand to hold a tap over the screen — preferably on an empty area of the canvas, as depicted above.
Holding a tap with your other index finger acts sort of like how the Shift or Control key works in a desktop environment — it locks the aspect ratio of what you’re drawing so that the width (W) and height (H) values scale simultaneously. The result is a perfectly round circle:
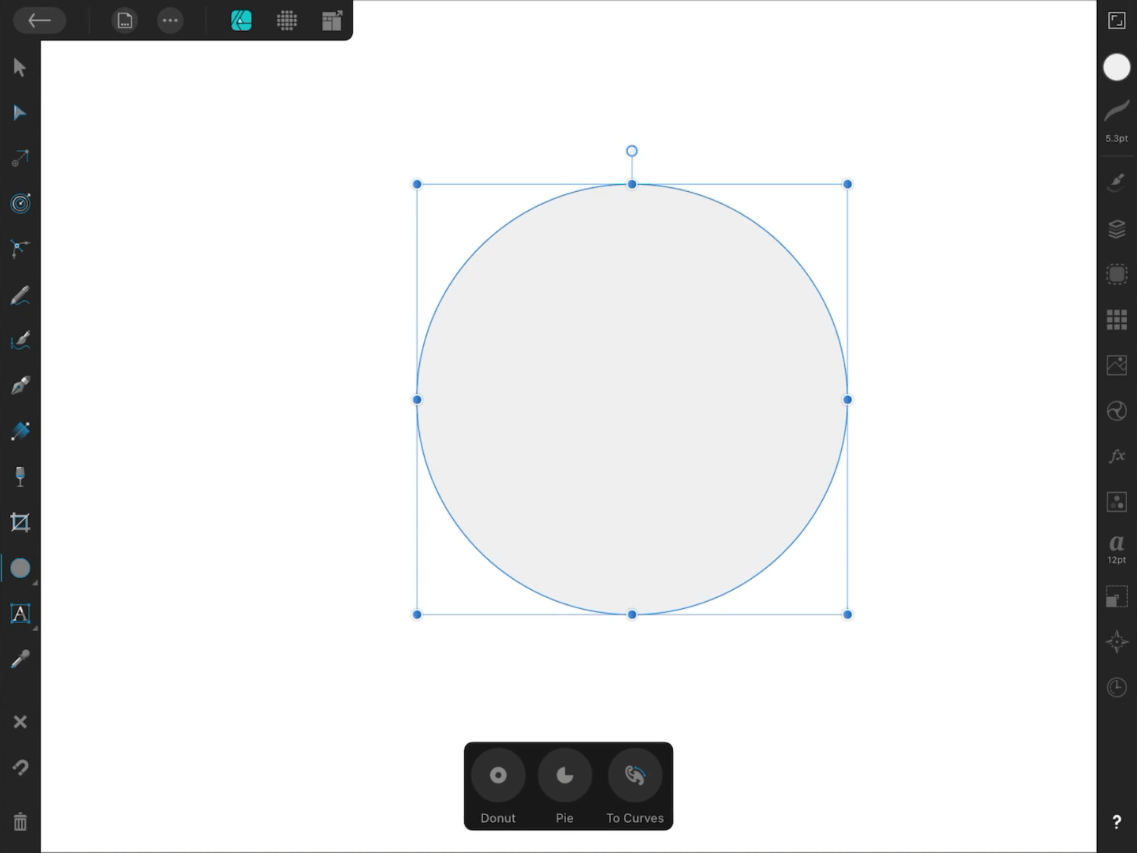
A perfectly round circle where the width and height are equal, drawn with Affinity Designer for the iPad.
This just doesn’t just work with circles, it works with virtually anything you draw or render with Affinity Designer. The same goes for other mobile design apps as well, such as Procreate. Drawing a perfectly round circle is done the same way — drawing with one hand and using the other to hold a tap.
Conclusion
Considering that the method used to create a perfect circle with Affinity Designer for the iPad is also the same method used in other apps, such as Procreate, it goes without saying that this knowledge will serve you elsewhere. This seems to be at the core of how mobile design applications function, and it just goes to show how different a world it is if you’re a traditional desktop-based designer.
If you have any questions or need clarification on anything we’ve gone over in this lesson then please leave a comment below.
Disclaimer: this website does not track you, serve ads, or contain affiliate links.
Learn To Master The SoftwareGain a complete understanding of your favorite design apps with my comprehensive collection of video courses. Each course grants access to our private community where you can ask questions and get help when needed.
|
||||||||||||||||||||||||||||||||
Nick Saporito
Hi, I'm Nick— a Philadelphia-based graphic designer with over 10 years of experience. Each year millions of users learn how to use design software to express their creativity using my tutorials here and on YouTube.
All stories by: Nick Saporito



Leave a Reply