Create An Opacity Mask with Inkscape | Partial Transparency for Groups
Create An Opacity Mask with Inkscape | Partial Transparency for Groups https://logosbynick.com/wp-content/uploads/2021/03/opacity-mask-inkscape-1.png 800 470 Nick Saporito https://secure.gravatar.com/avatar/8e31bf392f0ba8850f29a1a2e833cdd020909bfd44613c7e222072c40e031c34?s=96&d=mm&r=gIf you’re familiar with how gradients work in Inkscape then you probably already know that they can be used to give individual objects partial transparency where it transitions from opaque to transparent. However, this doesn’t work for groups of objects. In this instance we’ll need to use opacity masks. Creating an opacity mask with Inkscape will allow you to give groups of objects partial transparency in a gradient-like style, which is what I’ll be demonstrating in today’s tutorial.
Creating an opacity mask with Inkscape is simply a matter of placing a black and white object (like a rectangle) over your group of objects, and then applying it as a mask using the Mask feature. This is something that I’ve demonstrated how to do with Illustrator in the past. However, the process for doing so in Inkscape is quite different.
Opacity Masks
Opacity masks allow you to alter the transparency of an object in a more granular way.
Typically, adjusting the opacity of an object will do so in such a way that the effect is evenly applied to the entire object. What if you only want to make part of your object transparent though, and leave the rest of it opaque? Or what if you want to apply this gradual change in opacity to a group of objects in Inkscape? This is where opacity masks come into play.
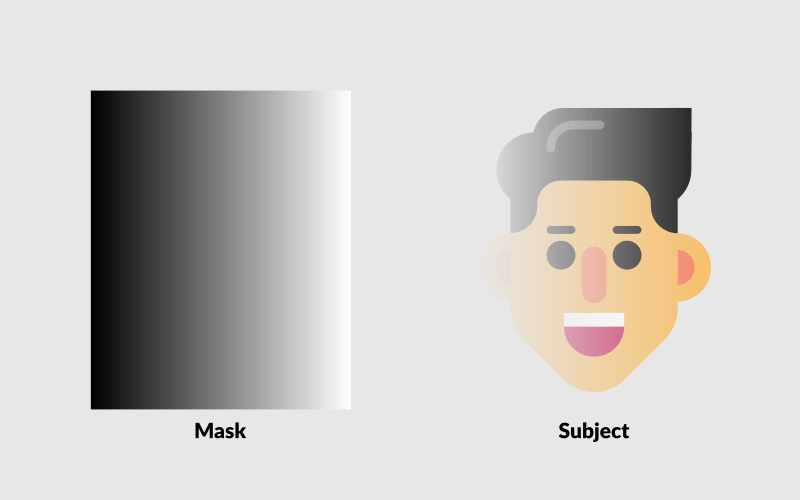
The way a mask works is that the black areas of the mask will become transparent once applied to your subject, whereas the white areas of the mask will remain opaque. Everything in-between (gray area) will become partially transparency based on how light or dark the shade is.

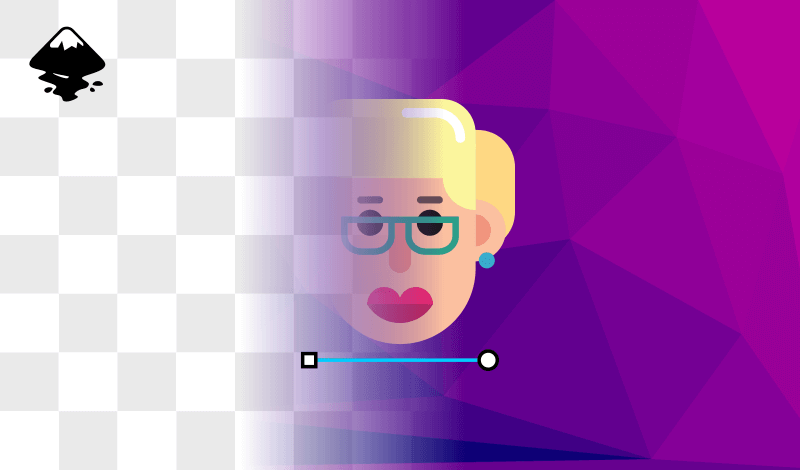
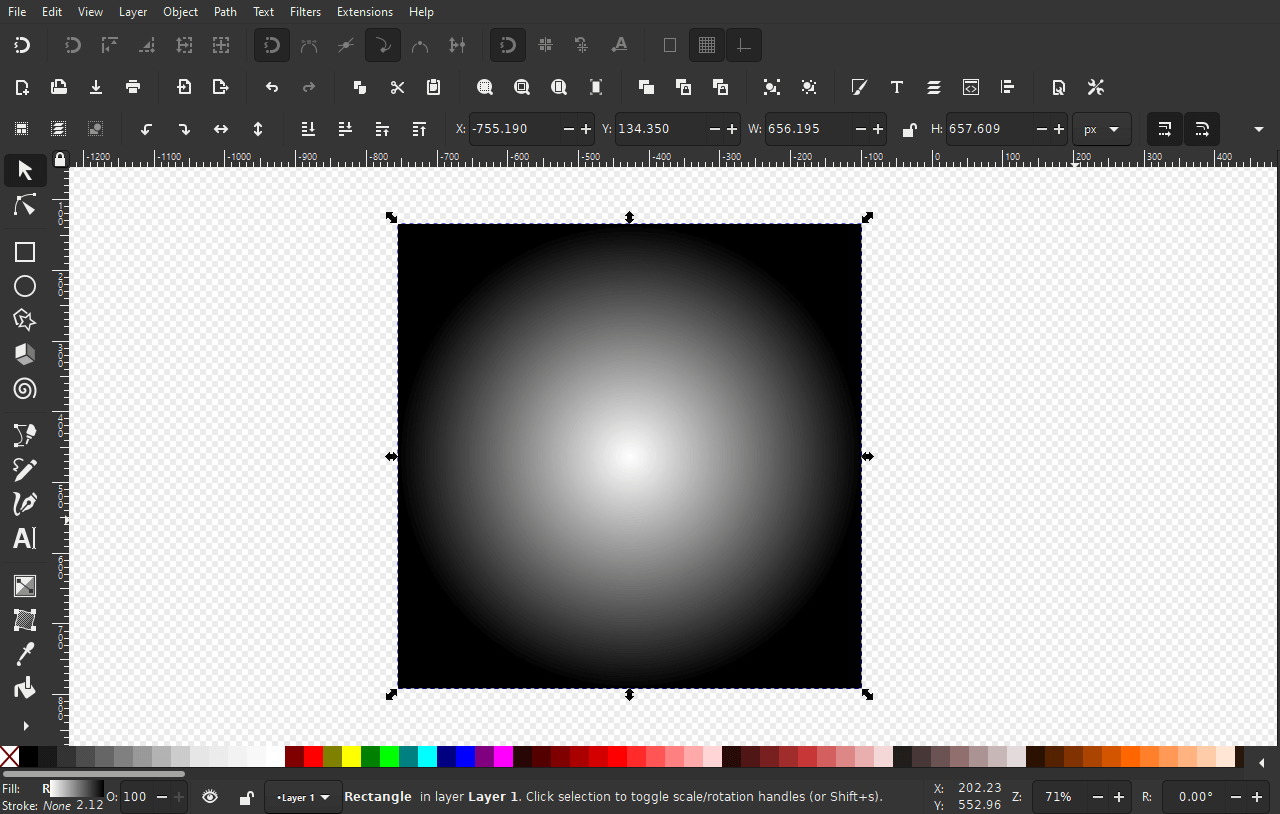
So, if you were to apply a mask to your subject, and the mask was simply a rectangle with a horizontal linear gradient from black to white; the left side of your subject would become transparent, then slowly transition to full opacity towards the white side of the rectangle:
Opacity masks are also known as layer masks in other applications.
Create Opacity Masks with Inkscape
The following video tutorial will walk you through the process of applying an opacity mask to your subject in Inkscape:
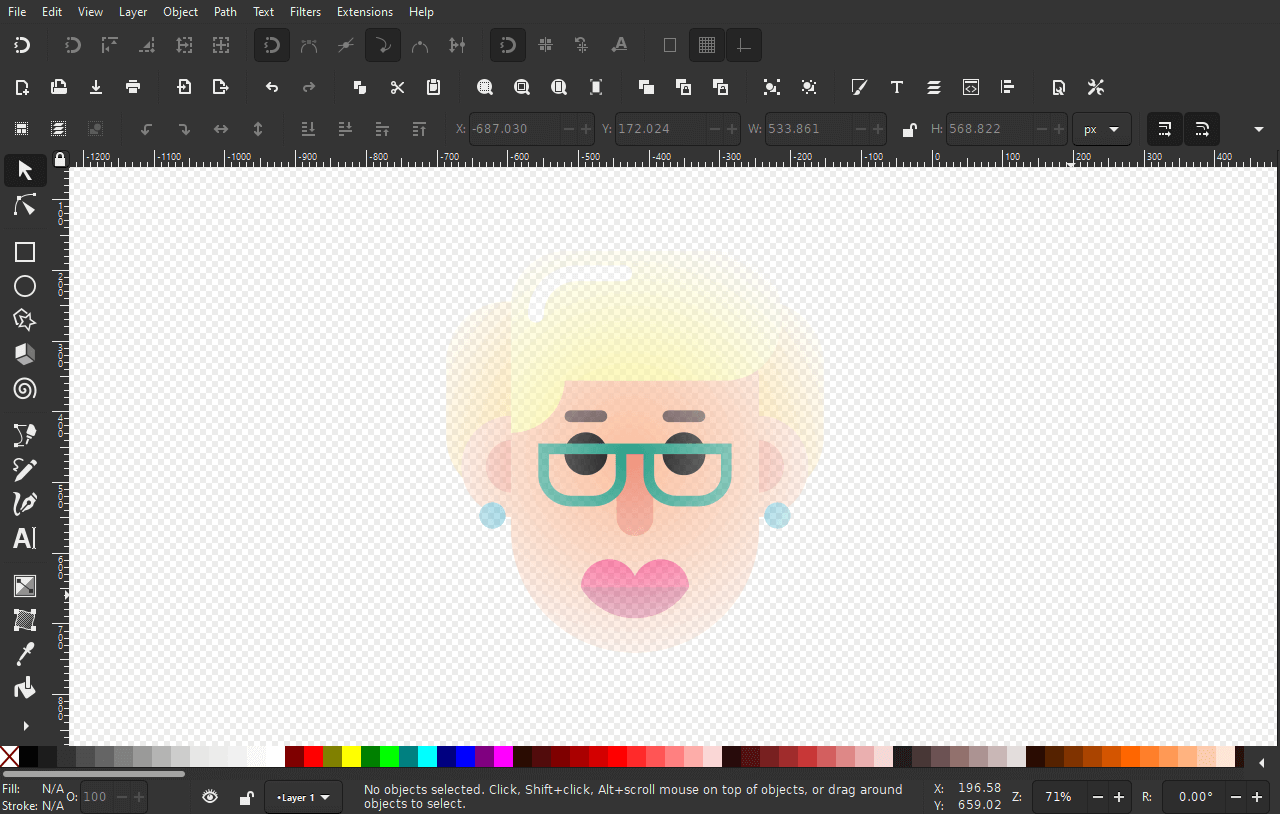
To create an opacity mask with Inkscape we first need an object to apply it to. For this demonstration I will be applying it to a series of objects that have been grouped together:

The opacity mask will be applied to this vector avatar.
It’s important to ensure that your objects are grouped together, otherwise the opacity mask will not work as intended.
Now we need to create the object that will be used as a mask. For this demonstration, I will be creating a rectangle with a linear gradient going from black to white. Position your mask over the subject and make sure that it covers it completely:
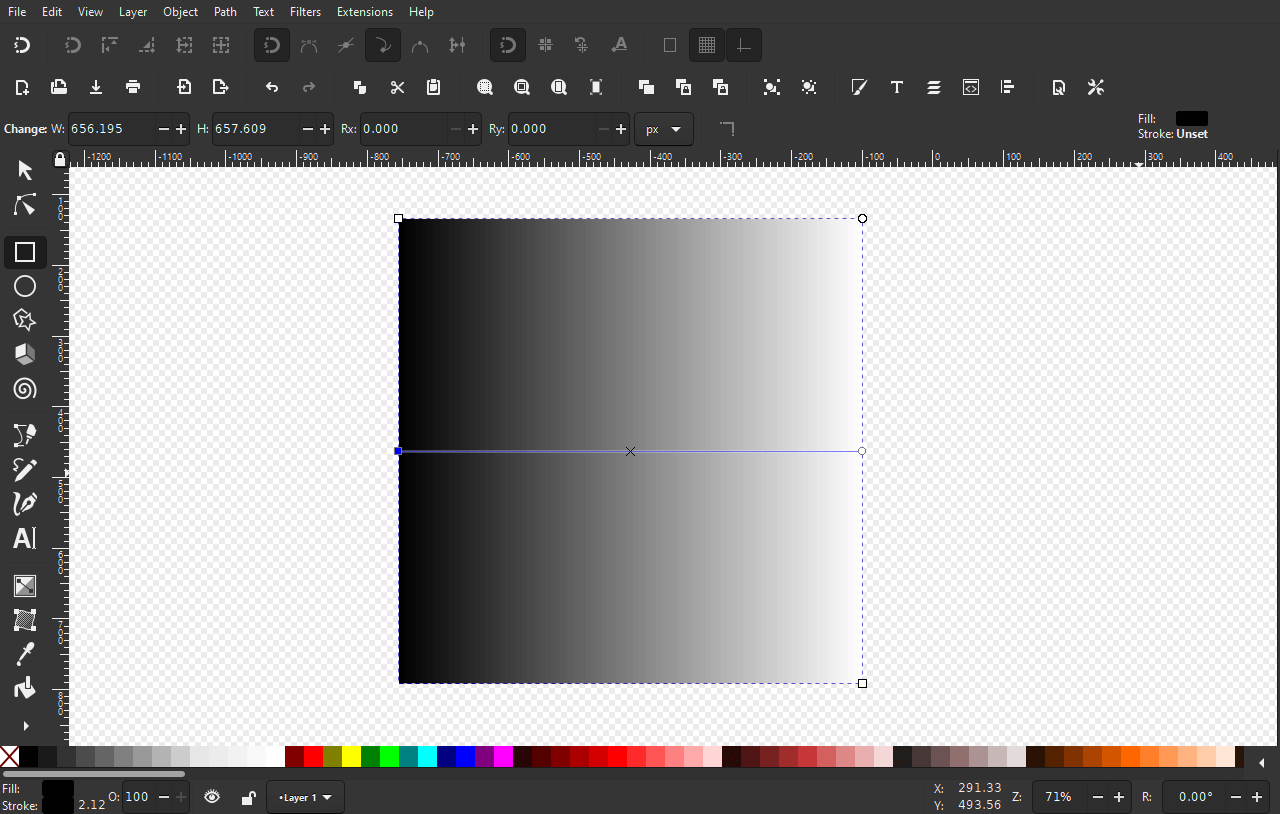
The mask is a rectangle with a linear gradient applied. It is positioned op top of the subject.
All you have to do now is select both the mask and the subject at the same time, then navigate Object > Mask > Set. This will apply the rectangle as an opacity mask with Inkscape:
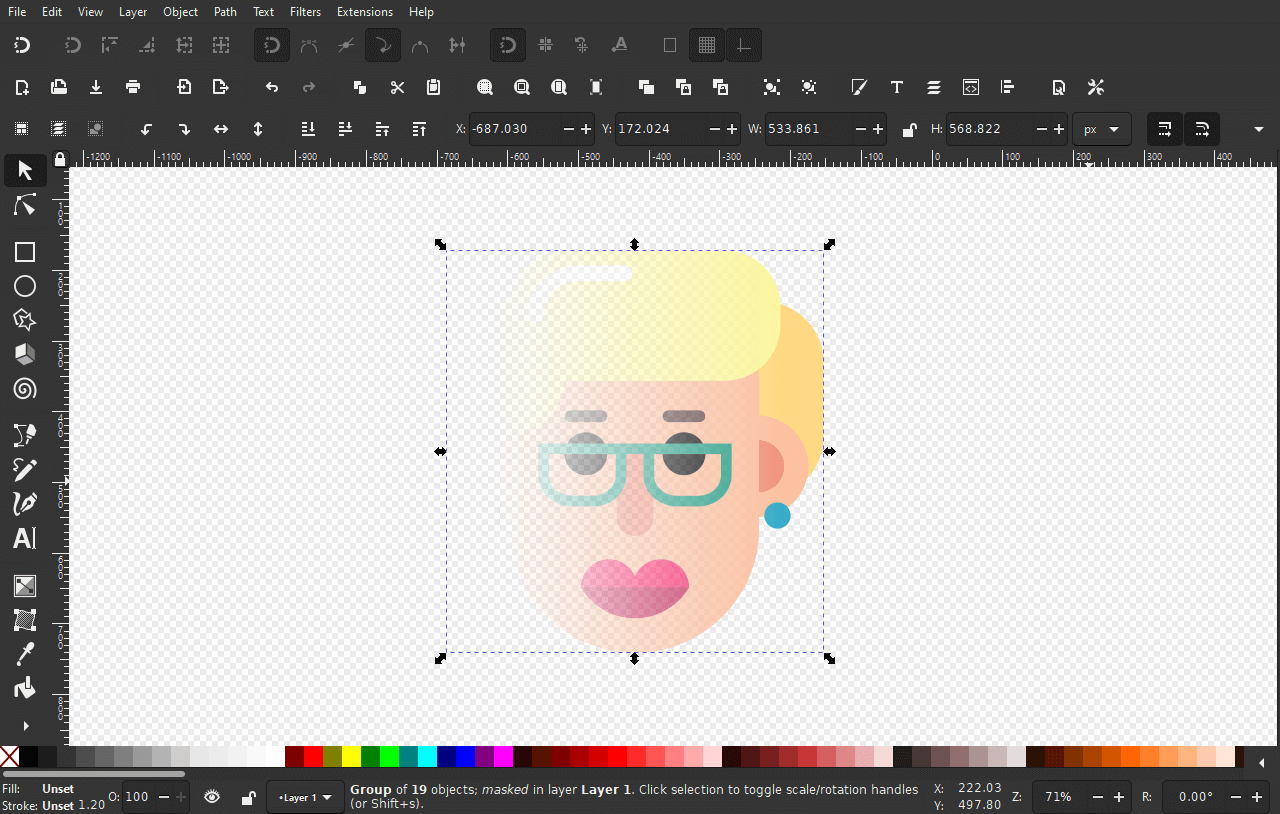
How the subject looks with the mask applied.
Removing And Adjusting The Opacity Mask
If at any point you’d like to adjust the transparency levels of your opacity mask, you first have to release it from the subject.
One of the benefits of masking is that it’s non-destructive. Or, in other words, it can easily be undone.
To remove the mask, select your subject and navigate to Object > Mask > Release. This will release the mask and bring you back to where you started:
Once the mask is released you can then adjust it. You can change the positions of the stops in the gradient, the type of gradient, or any other aspect you’d like changed.
For this demonstration, I will change the gradient to a radial gradient:
Opacity masks will work with any type of gradient, whether it be linear, radial, or mesh.
And here’s how it looks once applied to the subject as an opacity mask:
With the radial mask applied, the inside of the subject remains visible, whereas the outer edges transition into transparency.
Tip: reducing the opacity of your mask can help you visualize where it lines up with your subject. Just make sure to bring the opacity back up to 100% before applying it as a mask, otherwise your masked object will also have partial transparency once applied.
As you can see, the outer edges of the subject became transparent, whereas the insides remained opaque. And just so you know, you can apply your opacity mask to raster images as well:
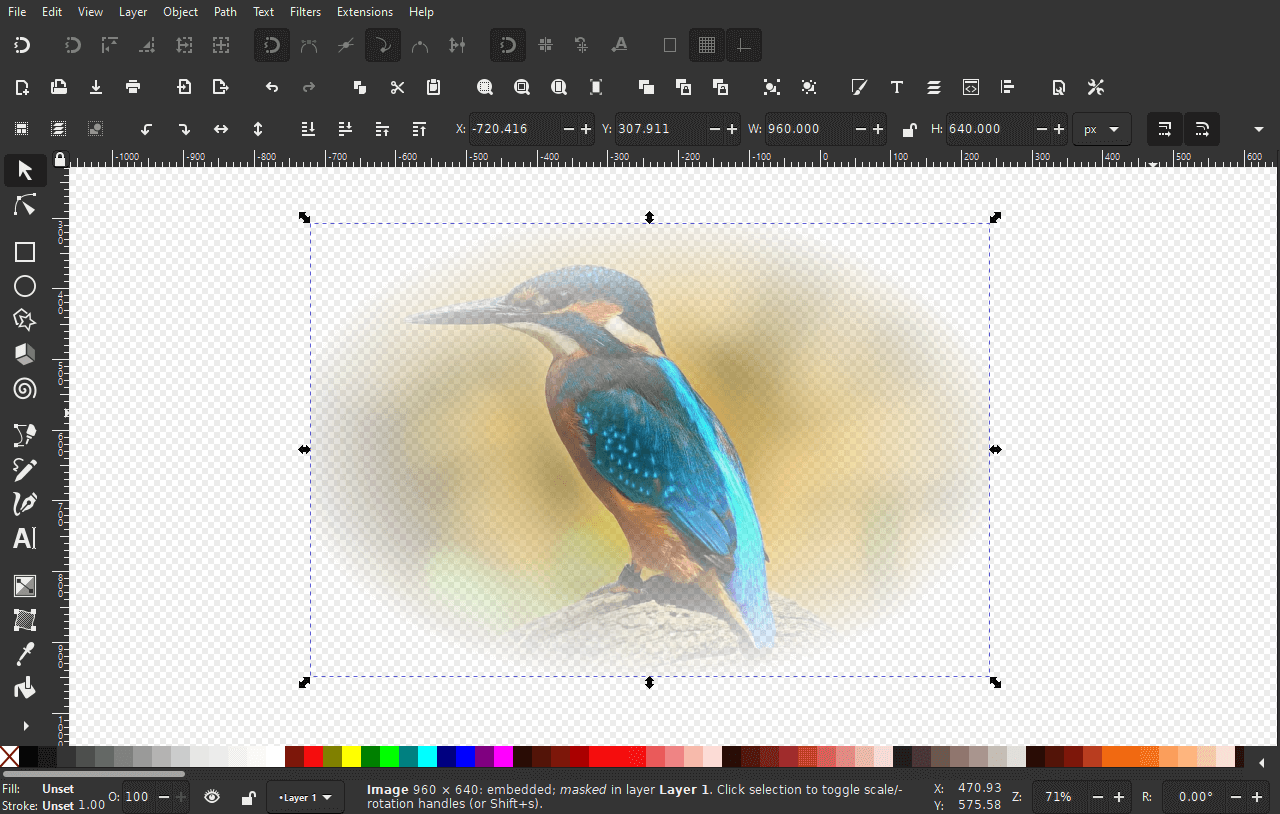
Masks can be applied to virtually anything in Inkscape, including raster images!
One final tip I’d like to mention before closing out this tutorial is that you can easily reverse your gradient in the Gradient Tool settings. Simply look for the little arrow icon that reads “reverse the direction of the gradient” when you hover your cursor over it:
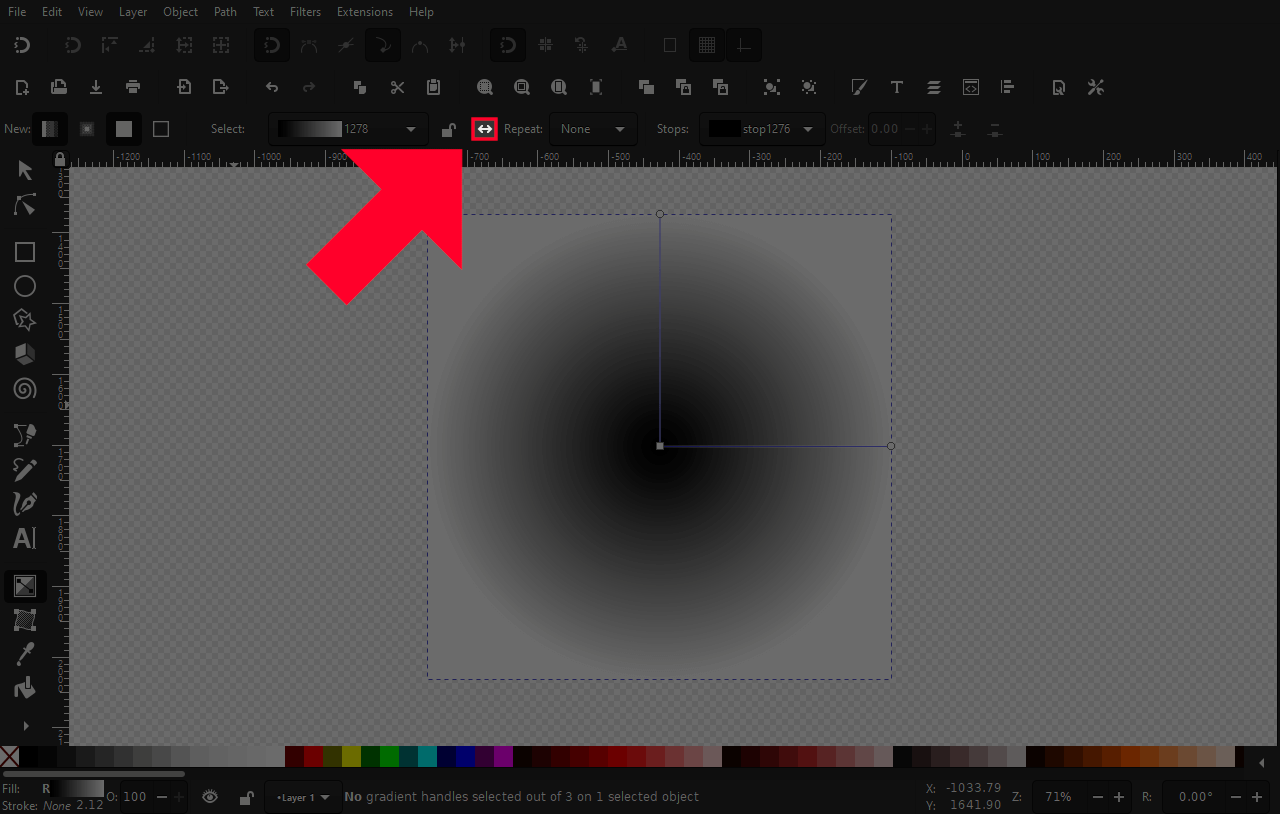
You can easily reverse the gradient using the tool settings.
This makes it easy to reverse the direction of your transparency gradient without having to manually move the stop around with the Gradient Tool.
Conclusion
Applying an opacity mask with Inkscape is a rather simple process that can be used to change the opacity of your designs in some pretty creative ways. I regularly use this feature myself to create partial transparency for images more than anything. It’s a great tool to have handy when designing things like headers, banners, flyers, or anything else where your design work includes a mix of vector and raster graphics. You can learn more about working with raster images in my Inkscape Master Class where I go over these things in more detail. I also demonstrate other ways of working with photos in Inkscape, like clipping paths.
One downside of using Inkscape for this type of task is the lack of control. When creating opacity masks in Illustrator, you can alter the mask directly on the canvas, after it’s already been applied:
![]()
This makes it easy to get your mask lined up exactly how you like it. In Inkscape, the process is a little more inefficient because you have to remove the mask first, adjust the black and white gradient (hoping that it lines up how you’ll like it,) and then apply it again. Let’s hope Inkscape makes this a little easier in the future.
Learn To Master The SoftwareGain a complete understanding of your favorite design apps with my comprehensive collection of video courses. Each course grants access to our private community where you can ask questions and get help when needed.
|
||||||||||||||||||||||||||||||||


You might also like


2 comments
-
-
Nick Saporito
If you’re using masks and clips then it won’t translate over to Illustrator. Illustrator handles those functions differently and doesn’t recognize Inkscape’s functionality.
-
Nraendra
Hello…. Please can you resolve this issue, i’m have been using inkscape for years, never faced this problem before, when i save a raster image with transparent background to EPS, and when i open eps in Ai the image has a background, the background is no longer transparent. may be it has something to do with masking or clipping, why is it happening ?? please help