
How To Create A Neon Text Effect with Affinity Designer
How To Create A Neon Text Effect with Affinity Designer https://logosbynick.com/wp-content/uploads/2021/08/neon-effect-affinity-designer.png 800 470 Nick Saporito https://secure.gravatar.com/avatar/8e31bf392f0ba8850f29a1a2e833cdd020909bfd44613c7e222072c40e031c34?s=96&d=mm&r=gOne of the many ways in which you can use Affinity Designer is to make interesting and unique typography designs. In this tutorial we’ll be going over how to design a neon text effect with Affinity Designer, step by step.
In short, this is accomplished by duplicating several copies of the text, applying various shades of whatever color you’d like used for the neon light, and then applying a series of Gaussian blurs to them.
Neon Text Effect with Affinity Designer
The following video tutorial will walk you through the entire process of creating this neon effect:
The following is simply a brief overview of the steps taken in this lesson. For complete step-by-step instructions, please refer to the video tutorial above.
Table of Contents |
Step 1: Generate some text on your canvas
To create neon text with Affinity Designer, the first step is to generate some text on the canvas:
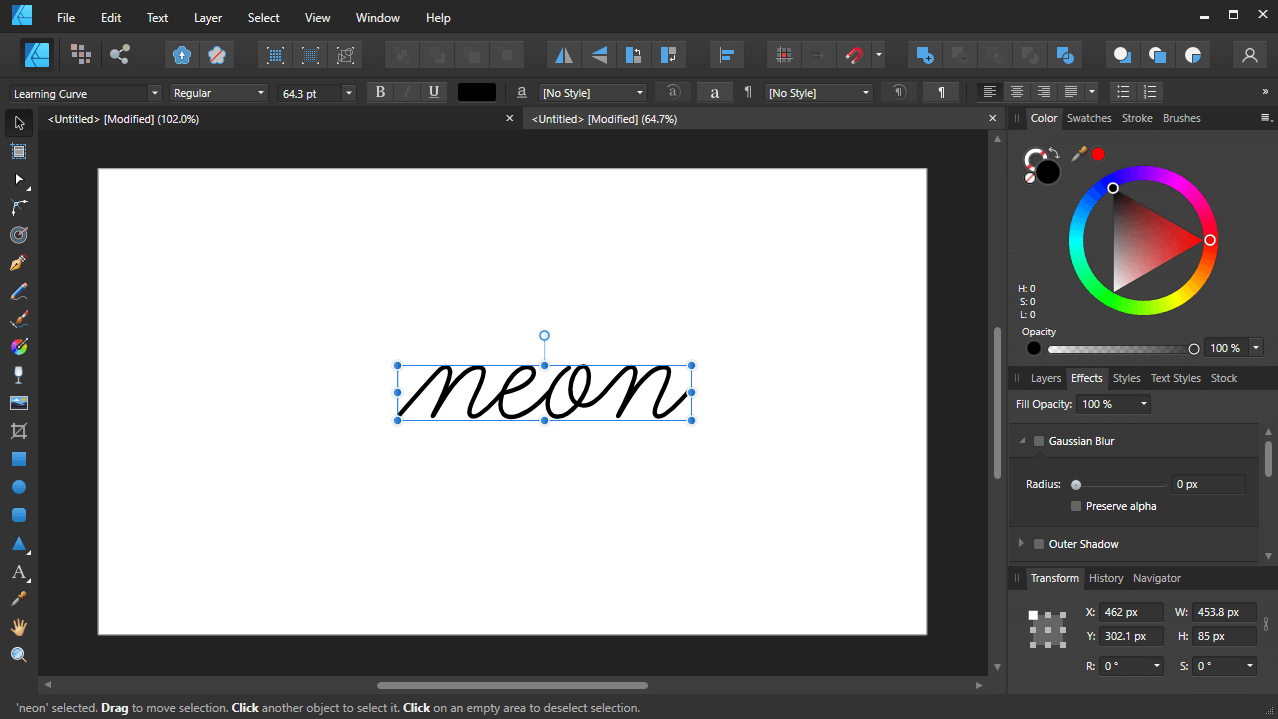
For this demonstration I will be using the Learning Curve font, which is suitable for this sort of design because it kind of looks like a neon sign.
Make sure to download and install the font from the link above.
Step 2: Create duplicate copies of the text and apply color to them
Now we are going to create duplicate copies of the text and apply color to them:
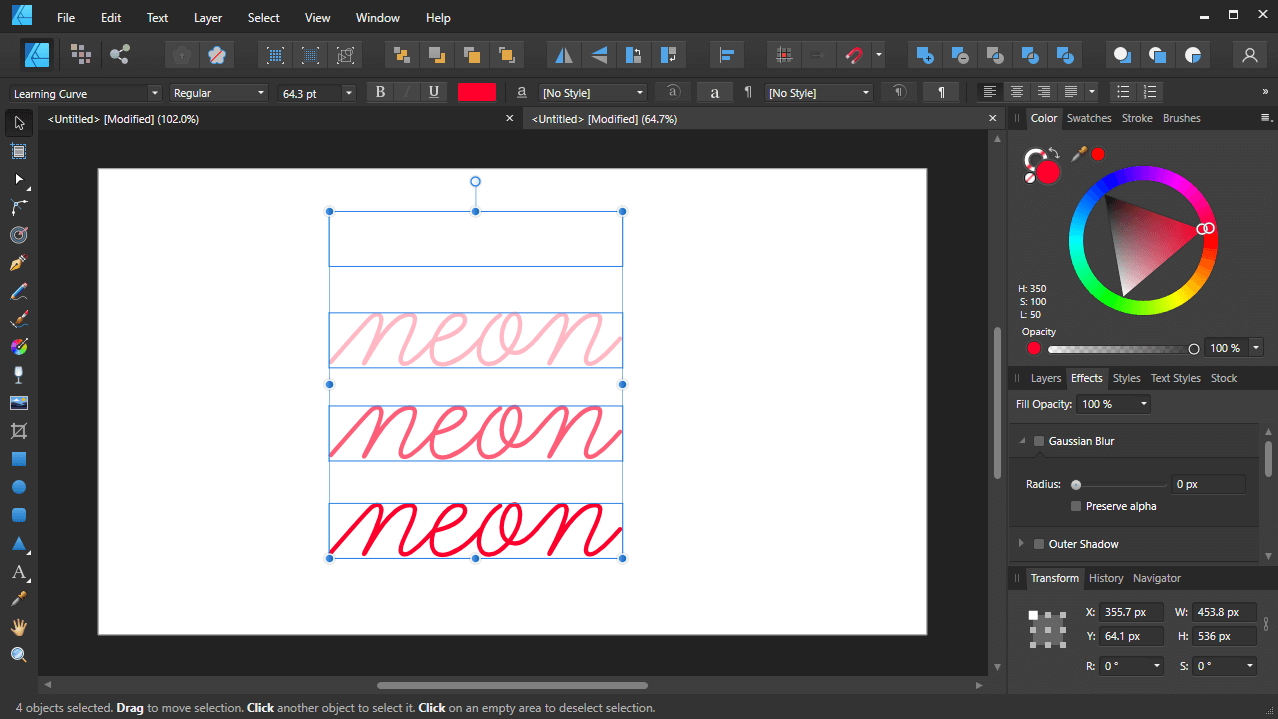
As you can see, there are 4 copies in total.
The bottom copy will contain the color you’d like your neon light to be, the next two up will have progressively lighter shades of the same color, and then the top copy will be white (although it may not be visible against your white artboard. That’s okay though!)
Step 3: Align the text copies and apply Gaussian blurs to each
Now we’re going to apply an offset to each text item using the new Contour Tool:

Once we’ve created a series of offsets for each text item, we’ll apply a Gaussian blur effect to each of them, except for the white copy on top.
The copy on the bottom will have the largest blur, then the next two copies up will have progressively smaller blurs:
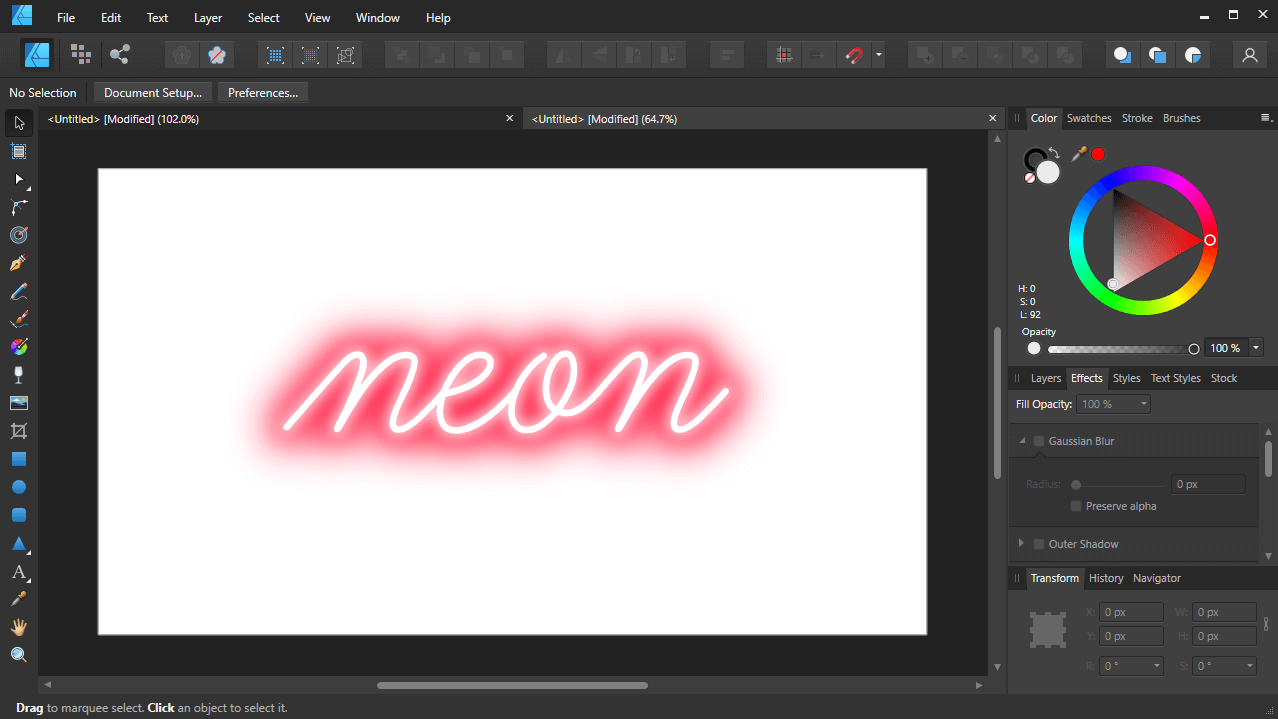
Once applied, you can then center all of the text items on the vertical and horizontal axis and center them up on your artboard as well.
Step 4: Add a background using a radial gradient
The final step in our journey to create a neon text effect with Affinity Designer is to apply a background. This is what will bring the design home and make it look like an actual neon light.
To do this, we’ll simply generate a rectangle the size of the canvas, then apply a radial gradient:
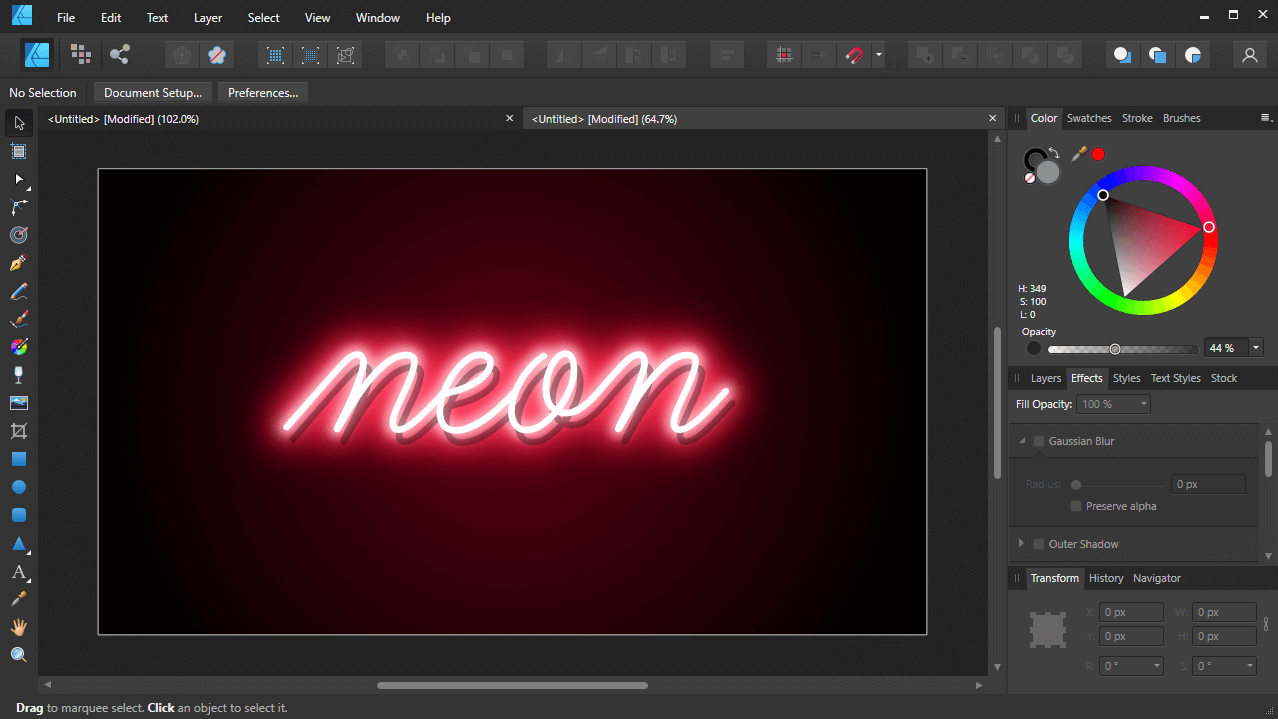
Once that’s completed, we’ll then create a duplicate copy of the white text, make it black, bring the opacity down and lower it beneath the white text layer so that it looks like somewhat of a shadow.
And with that we are finished!
Conclusion
Once completed, the neon text effect that you’ve created with Affinity Designer will be in vector format, meaning you can scale it infinitely. You can also go back to edit the colors any time you’d like, assuming you save it in Affinity’s propriety .AFDESIGN format.
If you have any questions or need clarification on any of the steps taken in this lesson, simply leave a comment below.
Learn To Master The SoftwareGain a complete understanding of your favorite design apps with my comprehensive collection of video courses. Each course grants access to our private community where you can ask questions and get help when needed.
|
||||||||||||||||||||||||||||||||


I like your post here and this looks very informative to me.