Inkscape: Pattern Along Path Without Deformation
Inkscape: Pattern Along Path Without Deformation https://logosbynick.com/wp-content/uploads/2022/07/pattern-along-path-without-distortion.png 800 470 Nick Saporito https://secure.gravatar.com/avatar/8e31bf392f0ba8850f29a1a2e833cdd020909bfd44613c7e222072c40e031c34?s=96&d=mm&r=gIn previous lessons we went over how to use Inkscape’s “Pattern Along Path” feature to take an object and repeat it along a path of your choosing. The downside of using this feature, however, is that it warps (or “deforms”) the object in such a way that it stretches along the path, and there’s no way to disable this feature. In this tutorial we’ll be going over a workaround that will allow you to repeat a pattern along a path without deforming it in Inkscape.
In short, the workaround for repeating a pattern along a path without deformation is to use the Markers feature instead. This feature allows you to designate a single object as a “marker” that will be repeated at every node/anchor point of the path it’s applied to, and without deforming it. Let’s explore this further.
Pattern Along A Path Without Deformation
The following video tutorial will walk you through the entire process of using Markers in Inkscape to repeat an object along a path:
Continue on for the written instructions.
Table of ContentsRepeat An Object Along A Path
Editing Markers And Paths Further |
Repeat An Object Along A Path
In this first part of the lesson we will go over how to apply markers to paths. Then, we will go over all of the ways in which you can edit them.
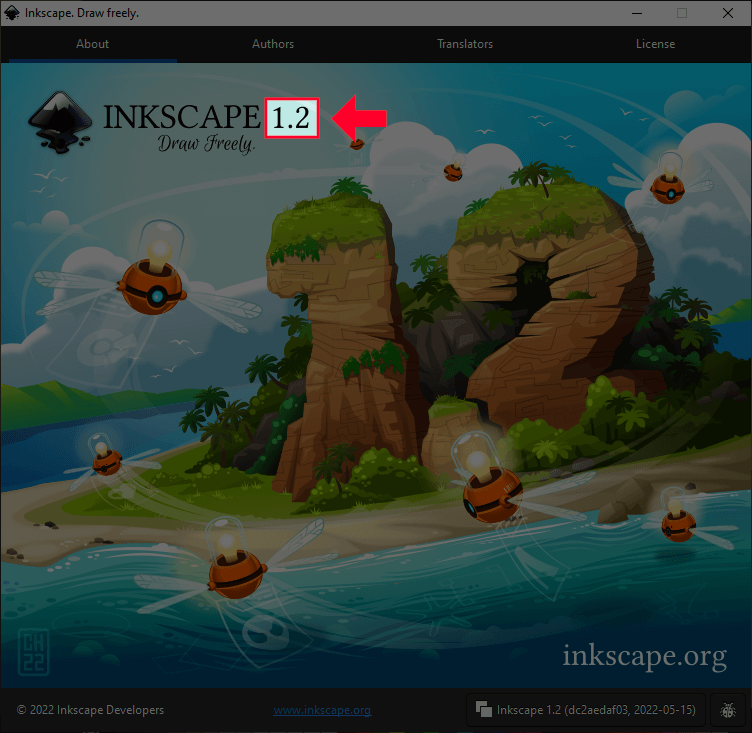
Step 1: Ensure that you’re using Inkscape version 1.2 or later
This first step in this lesson is to ensure that you’re using Inkscape version 1.2 or later, which was released in May of 2022. The reason why it is necessary to upgrade to this most recent version is because the markers feature in all other previous versions is dysfunctional for how we intended to use it in this lesson.
If you’re unsure which version you’re using, navigate to:
Help > About Inkscape
A window will populate indicating which version you’re using:
If you need to upgrade to the latest version of Inkscape you can do so here.
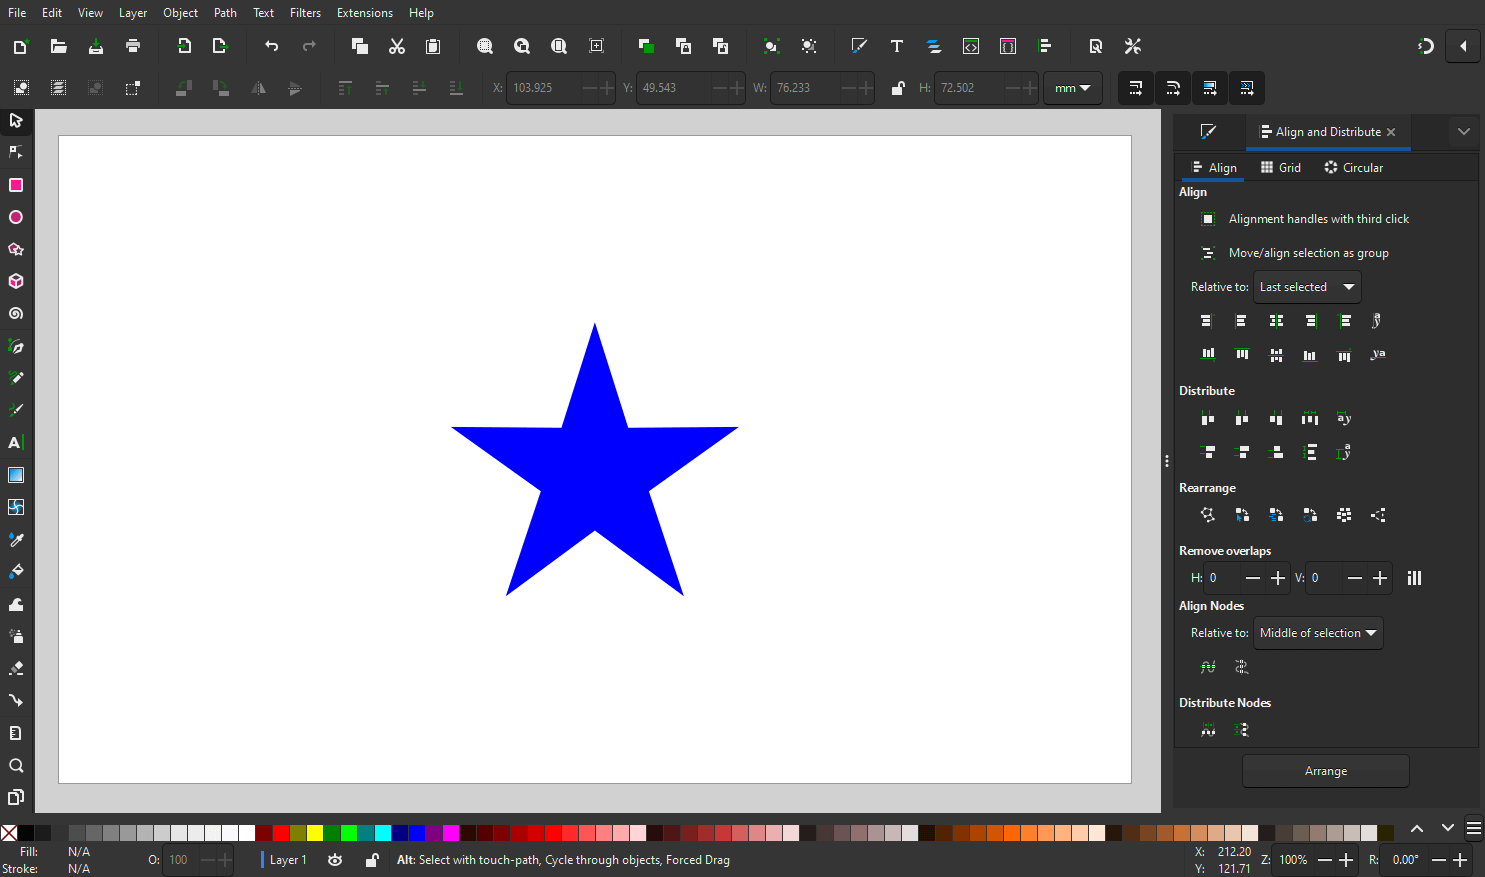
Step 2: Designate an object to be repeated and convert it to a Marker
Now it’s time to designate an object that you’d like to use to repeat along the path. The object can be anything you’d like (so long as it’s a vector and not a pixel-based image) including:
- Shapes
- Logos
- Icons
- Avatars
- Drawings
- Groups of objects
For this demonstration I will be using a simple star shape:
With the object selected, navigate to:
Object > Objects To Marker
The object will then disappear from your screen so it can be placed in the markers directory for use.
Important: if you want to preserve the object you’re using as a marker so you can work with it again later on, be sure to create a duplicate of the object and convert that to a marker instead of the original.
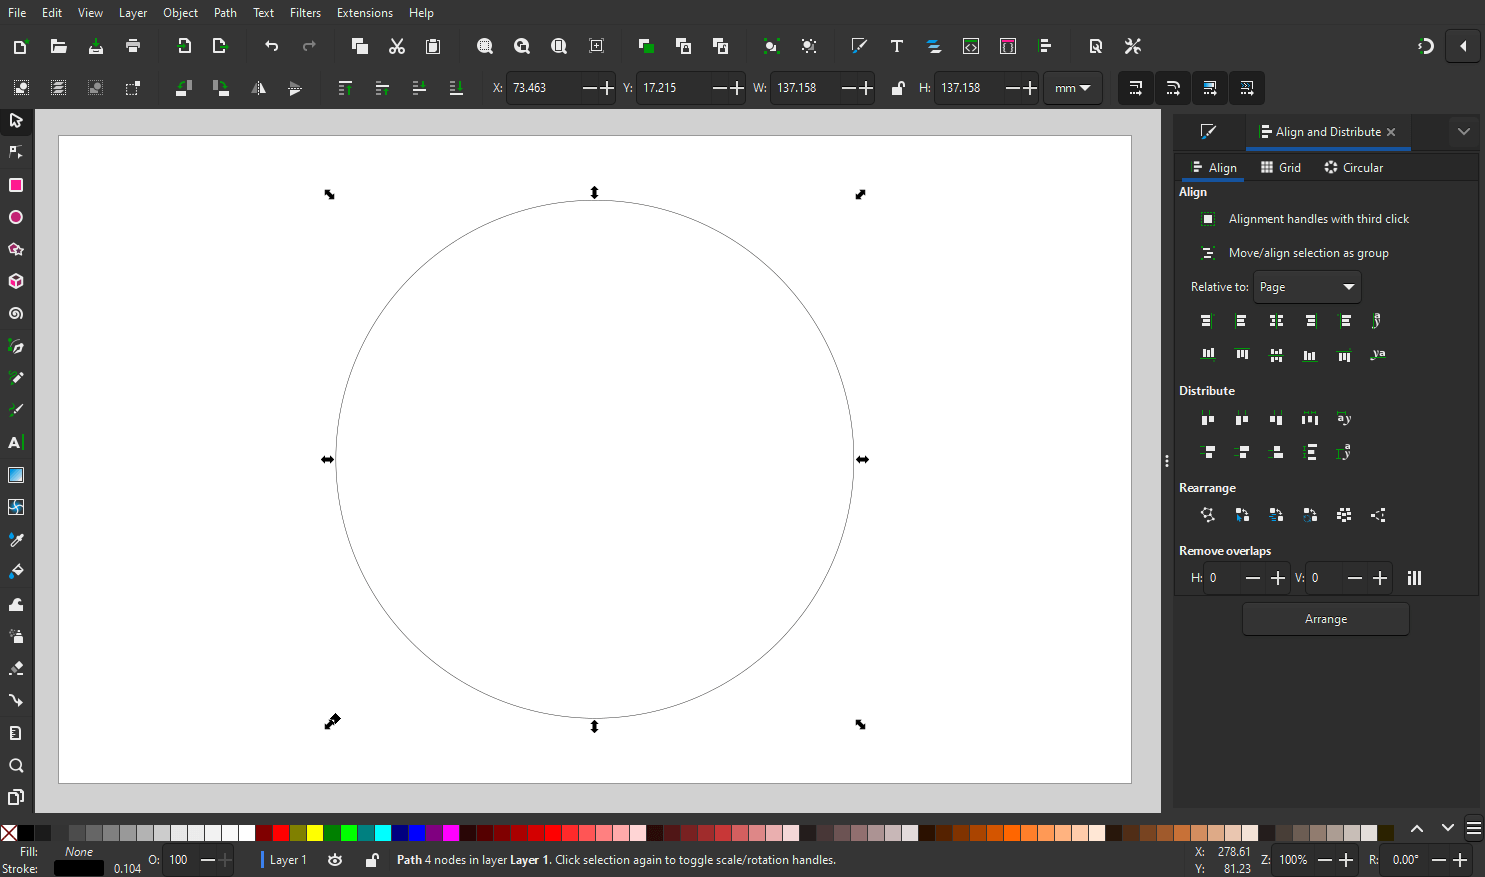
Step 3: Create a path for the object to be repeated along
Now that we’ve designated a marker, let’s create a path to apply the marker to.
The path can be virtually any vector path you’d like, including:
- A straight line
- A curved line
- A shape
- A custom drawn path
- And more
For this demonstration I will be applying the marker to a circle:
If you’re using a shape, be sure to convert it to a path by navigating to:
Path > Object to Path
You may also want to remove the fill and stroke, as the markers will be applied independently as their own element.
Step 4: Use the Fill & Stroke menu to apply the marker to the path
In order to apply the pattern along the path without deformation we will need to open the Fill & Stroke menu, which can be accessed using the keyboard shortcut (Control + Shift + F) or by navigating to:
Object > Fill & Stroke
In the Fill & Stroke menu, navigate to the Stroke Style tab and locate the three drop down menus labeled as Markers:
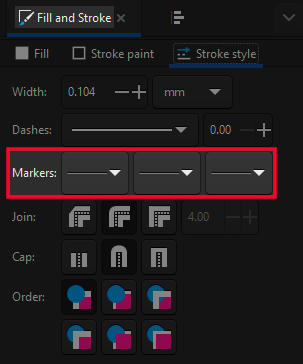
The first of the three menus represents the markers to be applied to the start of the path. The third menu, furthest to the right, represents the marker being applied to the end point of the path, and the menu in the middle represents all of the nodes between the start and end point.
Click each drop down and choose the marker you created from the popup menu.
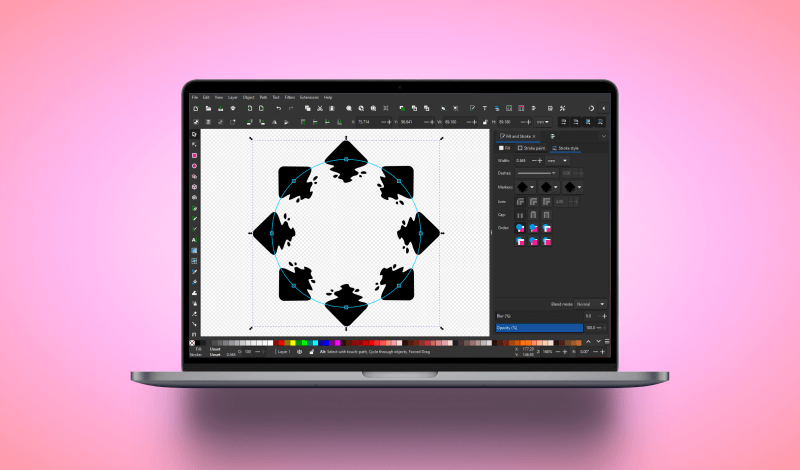
Once chosen, it will be placed at every point on the path where there is a node/anchor point:
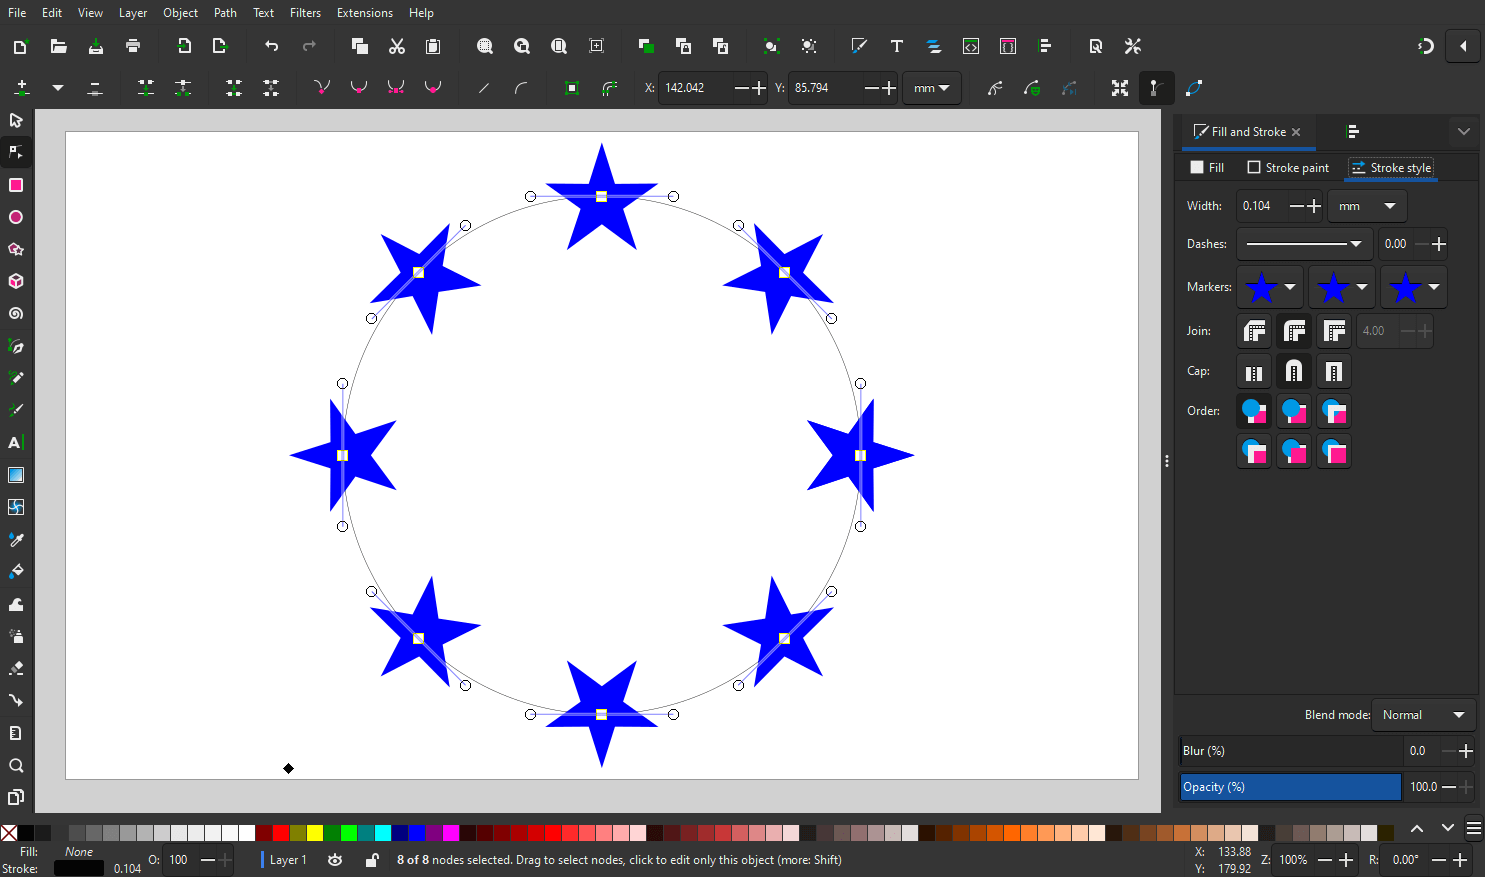
As you can see, there is no deformation of the objects following along the path, as is the case when using the Pattern Along Path effect.
Editing Markers And Paths Further
Now let’s have a look at how we can work with markers further so you can achieve the result you’re aiming for.
Add more objects to the path
The way markers work in Inkscape is that they’re applied to every node of a path. You can view the nodes of a path using the Edit Paths By Nodes Tool (keyboard shortcut: N)
To add more markers to the path, simply use this tool to add more nodes:

This tool can also be used to click and drag individual nodes to move the markers off the path (if you desire) and you can delete nodes as well, which will remove markers from the path.
Edit the objects on the canvas
One of the reasons why it is recommended that you use Inkscape version 1.2 or later to work with markers is because of the revamped markers menu. Within the Fill & Stroke menu you can click on one of the marker drop-downs to populate this menu. At the bottom-left corner you will see a button that says Edit On Canvas. Clicking this button will apply transformation handles to one of the markers:

The square handles can be used to scale the markers, and the circular handle can be used to rotate them. All transformations made will also be applied to every other marker on the path.
Scaling the path
One final consideration to keep in mind when working with markers along paths in Inkscape is that markers behave somewhat like strokes do when scaling the path they’re applied to.
With the Select Tool enabled, you should see four menu options in the top-right corner of the screen:
![]()
The menu furthest to the left dictates the behavior of the markers on the path when scaling the path. When enabled, the markers will scale alongside the path. If disabled, however, the markers will remain the same size regardless of how you scale the path they’re applied to.
Conclusion
It’s unfortunate that there’s no way to use Pattern Along Path without deformation. It would be really useful if the Inkscape team implemented some kind of setting that allows for this, but until then, markers make for a nice workaround.
If you have any questions or need clarification on any of the steps taken in this lesson, simply leave a comment below.
Learn To Master The SoftwareGain a complete understanding of your favorite design apps with my comprehensive collection of video courses. Each course grants access to our private community where you can ask questions and get help when needed.
|
||||||||||||||||||||||||||||||||


