Create Isometric Designs with Rounded Corners in Inkscape
Create Isometric Designs with Rounded Corners in Inkscape https://logosbynick.com/wp-content/uploads/2020/07/inkscape-isometric-designs.png 800 470 Nick Saporito https://secure.gravatar.com/avatar/8e31bf392f0ba8850f29a1a2e833cdd020909bfd44613c7e222072c40e031c34?s=96&d=mm&r=gIn this tutorial I’ll be demonstrating how to create vector isometric designs using Inkscape. This is a technique that I’ve taught in the past, but thanks to some of the new features in Inkscape version 1.0, it now makes it easier to give your isometric drawings rounded corners, as you’ll see in the tutorial.
The following is just a brief written overview of the steps taken to set up our document and isometric grid in Inkscape so that we can draw as we please. For complete step-by-step instructions, please watch the video tutorial at the top of the page.
Create Isometric Design with Inkscape
The first thing we have to do is set up our document.
Set Up an Isometric Grid in Inkscape
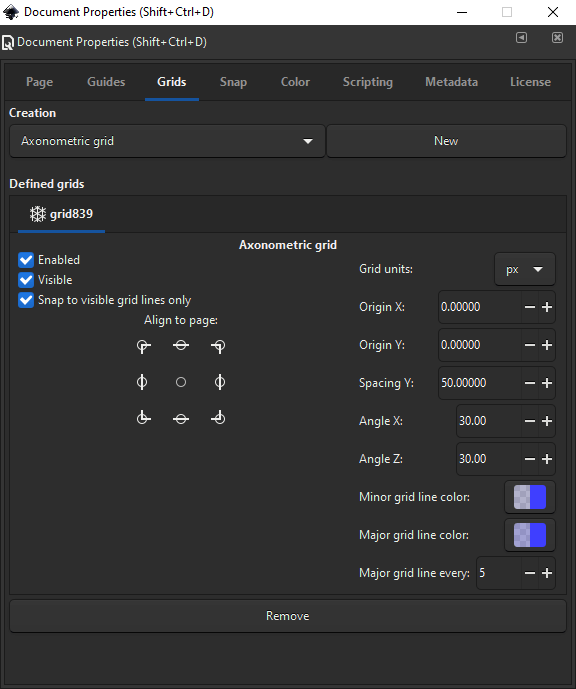
To set up an isometric grid in Inkscape, open the Document Properties menu (control + shift + d) and create an Axonometric grid from the Grids tab.
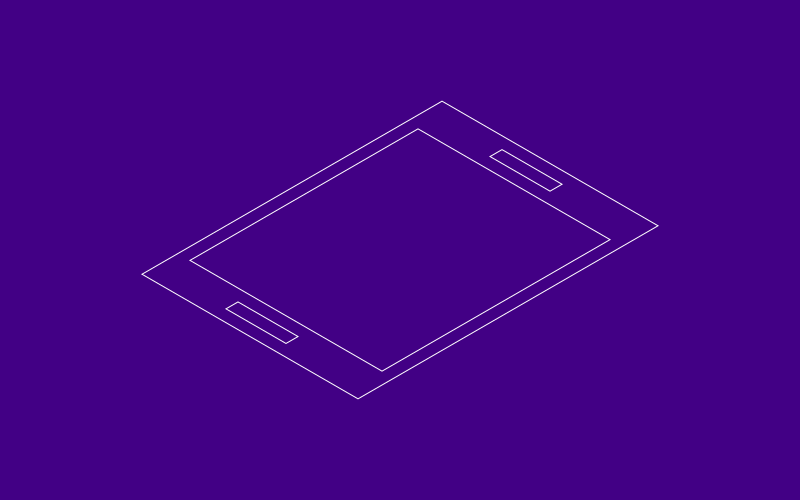
As you’ll see in the video, I set the spacing of the grid lines to 50 px. Here’s how your canvas should look with the isometric grid added…

Draw Your Design
Now you’re free to use the Bezier Pen to draw shapes and objects that follow the direction of the page grid lines.
For this tutorial I’ll be drawing a phone with some chat bubbles above it. I always like to draw the smallest objects first, then work outwards to the larger objects.
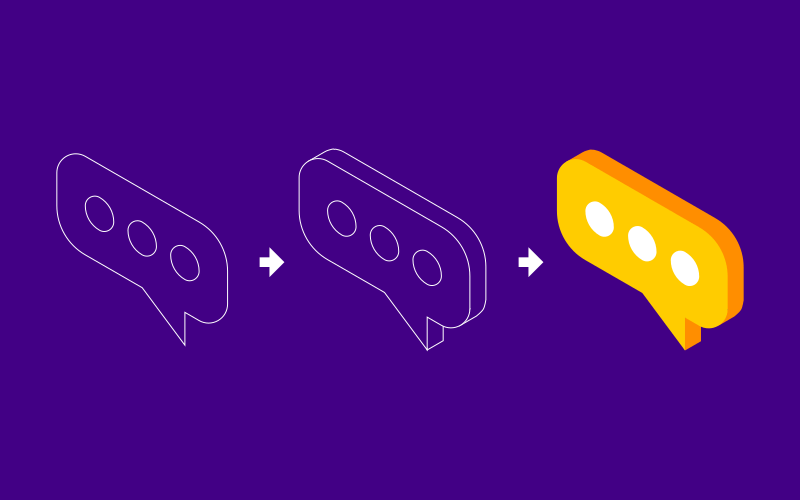
We’ll be drawing the design with sharp corners first, then rounding them later on.
Once the object is drawn, we can use the new Corners (Fillet/Chamfer) path effect from Inkscape version 1.0 to round the corners of our objects as needed.

Then we’ll use the Extrude extension to give our drawing some depth and the appearance that it is 3D.

Once we have the skeleton/wire frame of the design completed, we can now color it in and add a subtle drop shadow.

Then we can repeat the same technique to manually draw some speech bubbles…
Again, be sure to refer to the video at the top of the page for the full tutorial.
Finished Design
Here is how our isometric design with Inkscape looks once it’s finished…

That should do it for today;s tutorial! If you have any questions just leave a comment below. As always, thanks for watching!
Learn To Master The SoftwareGain a complete understanding of your favorite design apps with my comprehensive collection of video courses. Each course grants access to our private community where you can ask questions and get help when needed.
|
||||||||||||||||||||||||||||||||


Hi Nick
Is there a bundle price for both the Inkscape tutorial and Gimp tutorial, excluding the other two?
Thanks in advance
Not at the moment, sorry.
As a grad of Inkscape Master Class and having viewed the majority of your Inkscape videos, I think your material is the best bargain on the web. Thanks for everything you have done. This tutorial was particularly helpful.
Thank you Mike, glad you’ve found it valuable.
Hello Nick, I made a payment using Paypal for the logo design academy but my payment was not completed. It said hang on and that it will take up to 30 sec but it took more than 5 min.
Please help me.
Hi Faraj, sorry for the trouble! Have you tried again recently? If you still can’t get it to work just send me an email and I’ll get you registered manually.
Drawing isometric objects with Inkscape hasn’t been so easy earlier.
Thanks a lot for showing out the new features, and explaining them in such a simple way.