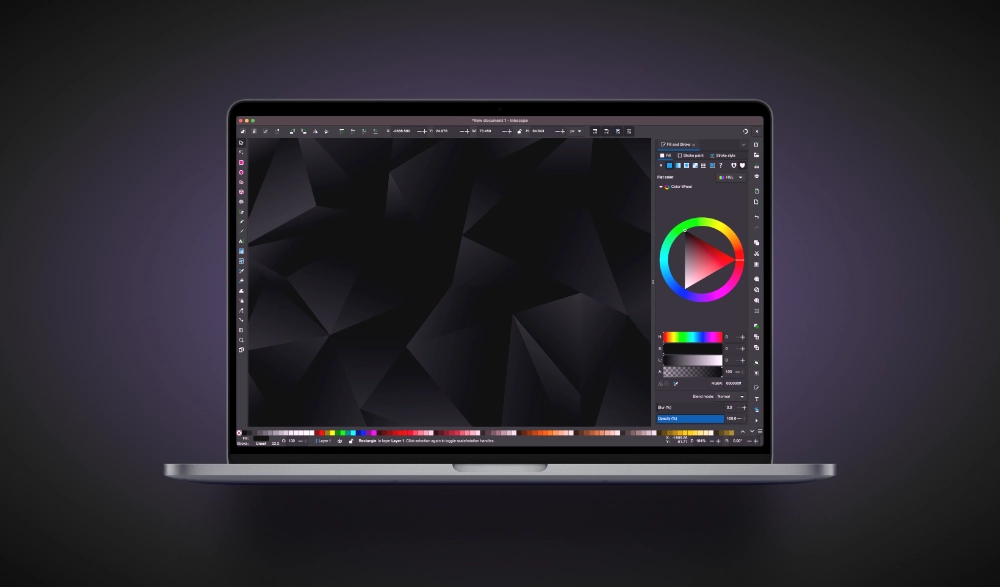
How To Apply A Dark Theme In Inkscape
How To Apply A Dark Theme In Inkscape https://logosbynick.com/wp-content/uploads/2023/03/inkscape-dark-thene-3.webp 1000 587 Nick Saporito https://secure.gravatar.com/avatar/8e31bf392f0ba8850f29a1a2e833cdd020909bfd44613c7e222072c40e031c34?s=96&d=mm&r=gIn this tutorial we’ll be going over how you can apply a dark theme in Inkscape. As we’ll be going over, this can be accomplished either in the welcome menu or in the Inkscape Preferences menu. This tutorial is updated for 2023 and is applicable to Windows, Mac and Linux users as of Inkscape version 1.2 and up.
If you’re unsure which version of Inkscape you are using, Windows and Linux users can navigate to:
Help > About Inkscape
If you’re a Mac user:
Inkscape > About Inkscape
An about screen will populate indicating which version is installed. If you are using an earlier version than 1.2 then you can upgrade to the latest version of Inkscape here.
Apply A Dark Theme In Inkscape
That said, there’s a couple of different ways to activate the dark theme in Inkscape. Let’s have a closer look.
Option 1: Use The Welcome Menu
When launching Inkscape for the first time, you should notice a Welcome menu that populates on the screen:
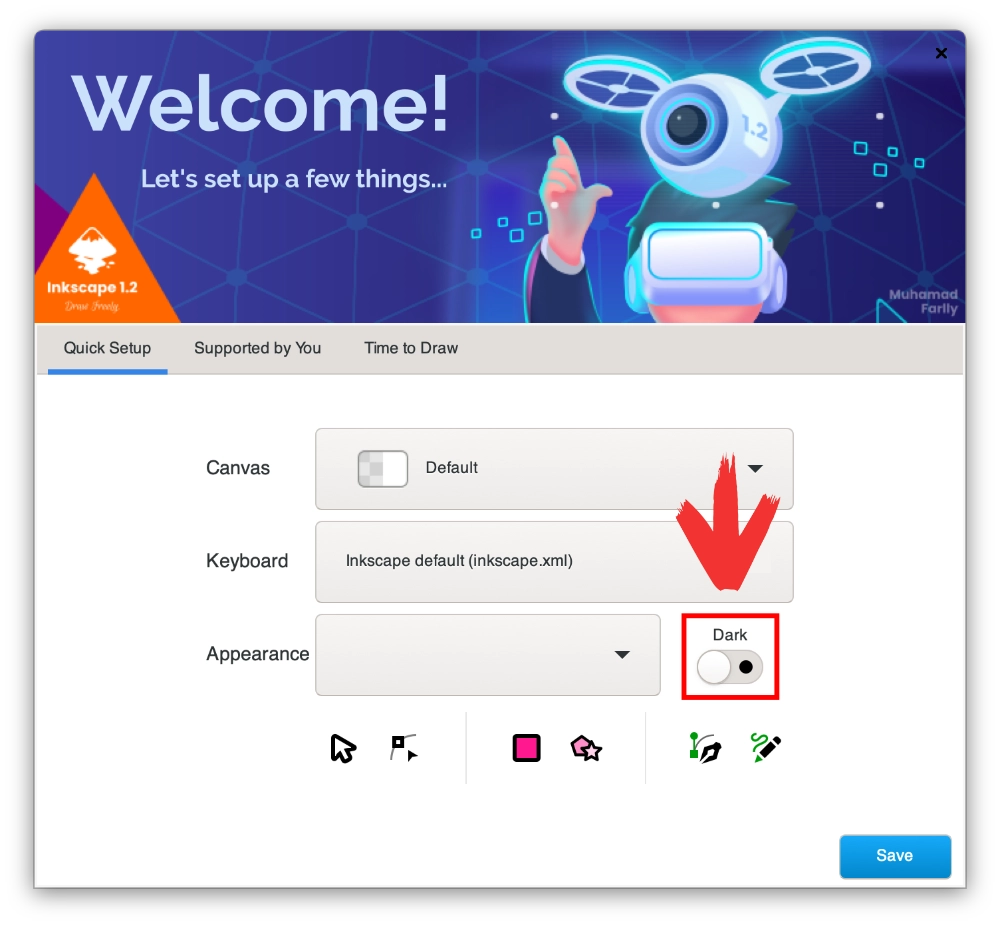
Click to enlarge.
Simply enable the switch labeled “Dark” towards the bottom-right of the menu, under the Quick Setup tab. Enabling this will launch Inkscape with a dark theme. Leaving it disabled will keep the standard light theme.
If you do not get a Welcome menu that populates when launching Inkscape then proceed to the next option.
Option 2: Use The Inkscape Preferences Menu
The most certain way to apply a dark theme in Inkscape is via the Inkscape Preferences menu. This is a menu that allows you to change many of the software’s settings at a granular level.
To access Inkscape Preferences, Windows and Linux users can navigate to:
Edit > Inkscape Preferences
Or you can use the keyboard shortcut: Control + Shift + P
Mac users can access it by navigating to:
Inkscape > Settings
Or the keyboard shortcut: Command + Shift + P
In the Inkscape Preferences menu, expand the Interface option from the list on the left-hand side of the menu and select Theming.
The menu should look something like this:
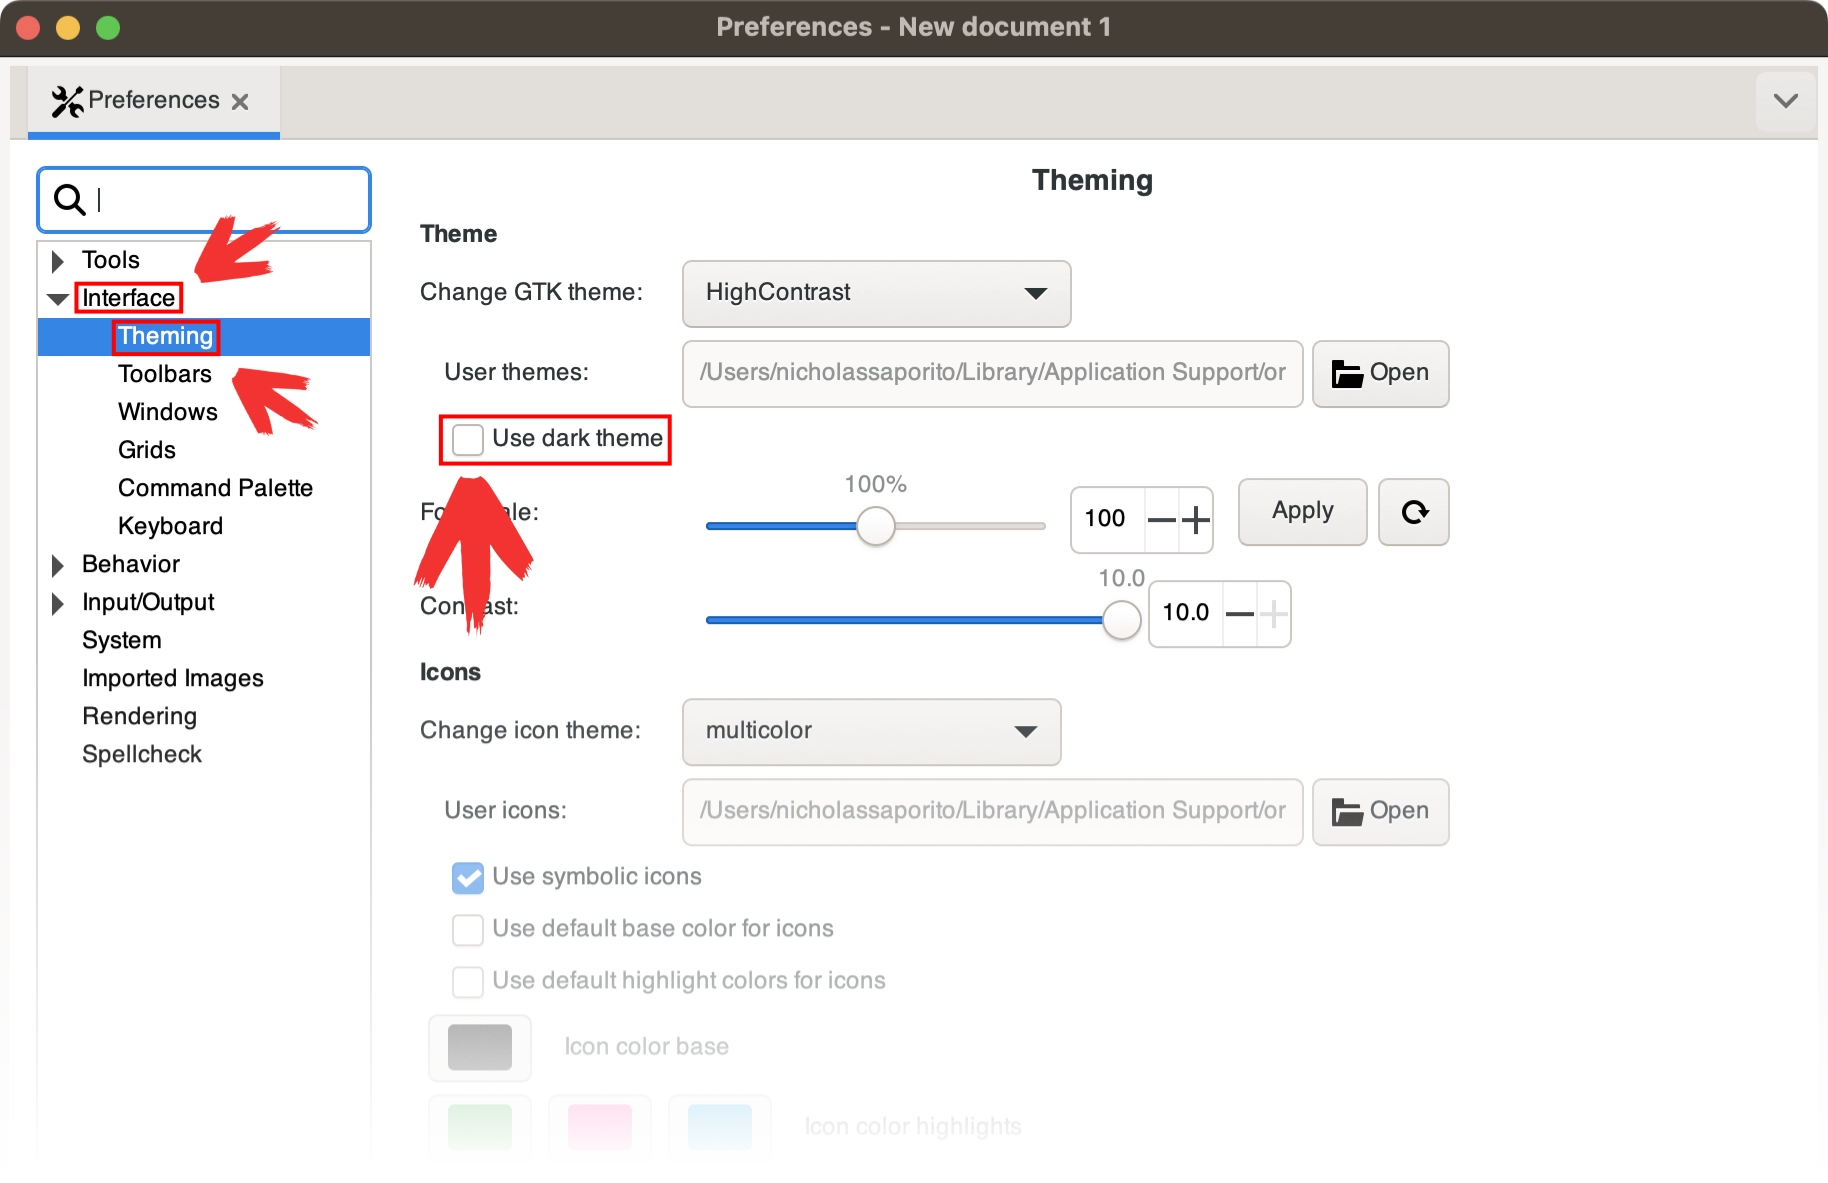
Click to enlarge.
All you have to do is check the box that says “Use dark theme” and the dark theme will be applied to the entire application immediately. Simply close out of the window once you are satisfied with the changes.
In Conclusion
In older versions of this tutorial we had to download package files and install them manually as Inkscape didn’t yet have a dark theme at the time. Thankfully, however, Inkscape has improved by leaps and bounds over the years. Simple features, like applying a dark theme, can be toggled on with a single click.
Learn To Master The SoftwareGain a complete understanding of your favorite design apps with my comprehensive collection of video courses. Each course grants access to our private community where you can ask questions and get help when needed.
|
||||||||||||||||||||||||||||||||


How do change if its dark to white
Hi Gary, you should be able to use the same method explained in this tutorial. Just choose one of the lighter themes instead of the dark theme.