Add Falling Snow to Any Image with GIMP
Add Falling Snow to Any Image with GIMP https://logosbynick.com/wp-content/uploads/2019/12/gimp-snow-effect-2.png 800 470 Nick Saporito https://secure.gravatar.com/avatar/8e31bf392f0ba8850f29a1a2e833cdd020909bfd44613c7e222072c40e031c34?s=96&d=mm&r=gIn this tutorial I’ll be demonstrating how to add falling snow to any image using GIMP. We’ll be generating the snow effect from scratch with the HSV noise filter.
The following is just a brief overview of the steps taken to achieve this effect. For complete step-by-step instructions please watch the video tutorial at the top of the page.
GIMP Snow Effect
For this tutorial I’ll be using the following example image. Click the image to download a full size copy, otherwise you can use any image you’d like.
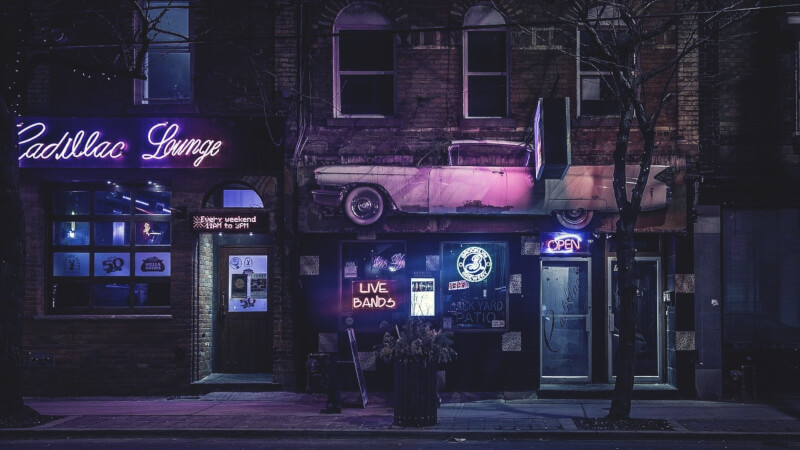
Click for full size image
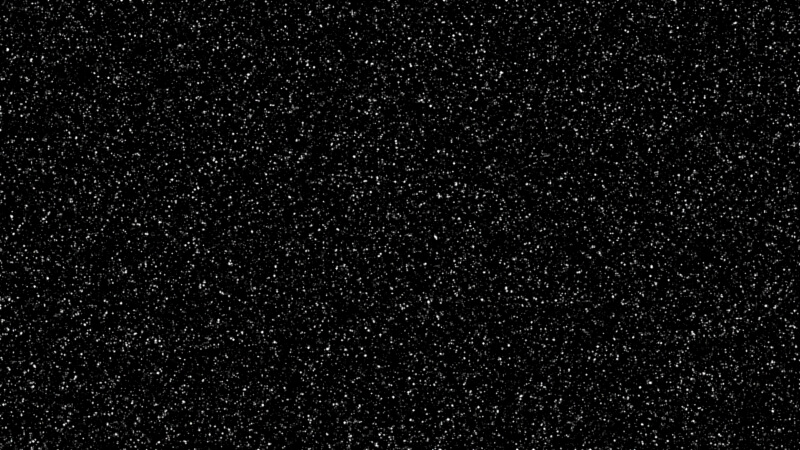
The first thing we’ll do is add a new layer on top of the image and fill it in with black.

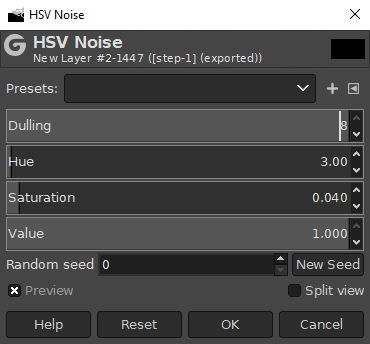
Next, navigate to Filters -> Noise -> HSV Noise to generate a static-like pattern on the layer. Match your presets to the following…
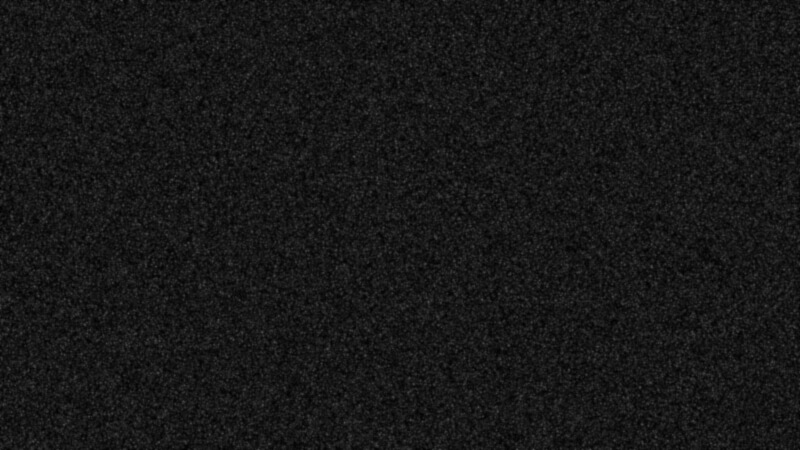
It should look something like this…

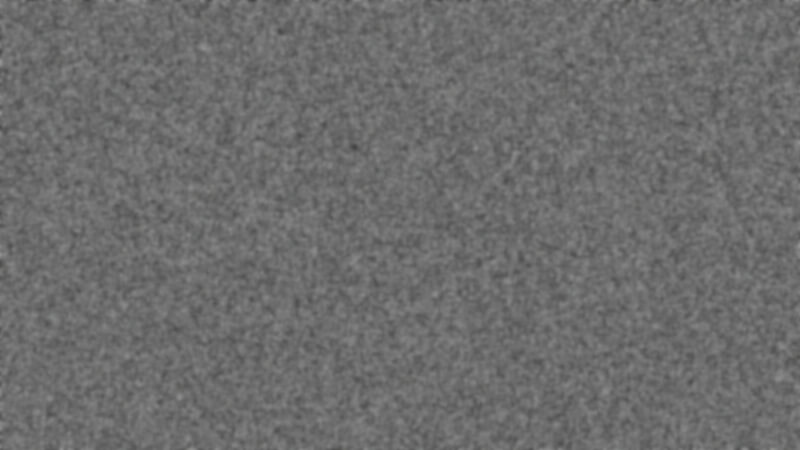
Now we’re going to give this a very subtle blur. Navigate to Filters -> Blue -> Gaussian Blur and give it a 1 pt blur. The pattern should now appear to be slightly out of focus.
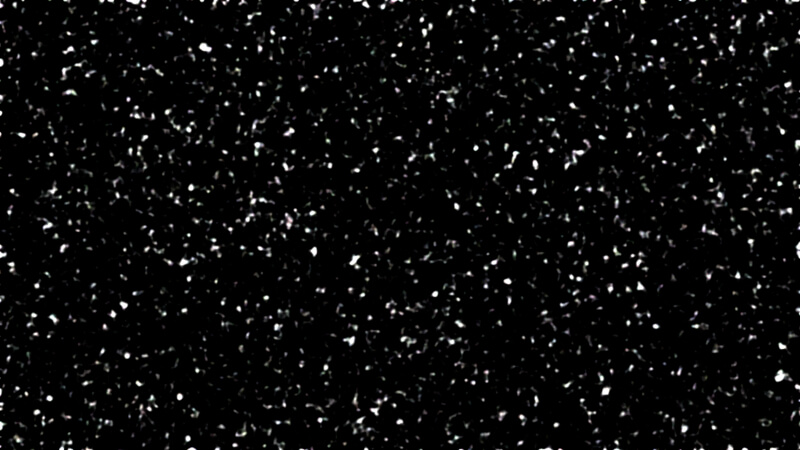
This is where the magic happens. Go to Colors -> Levels to open up the levels menu, and manually adjust the level points to match the following presets…
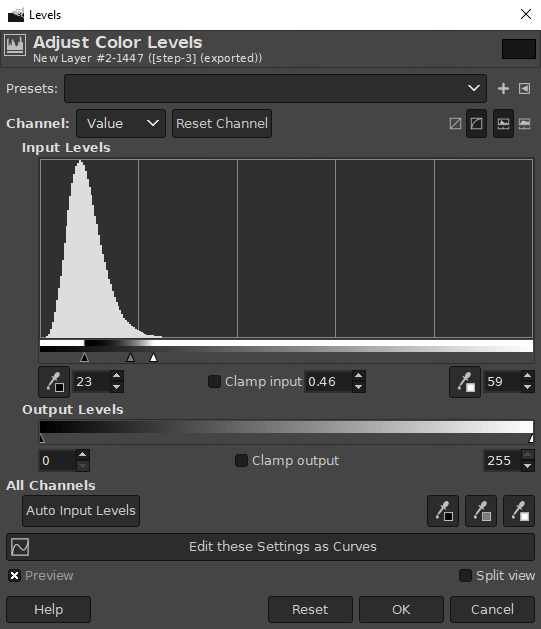
Note the position of the arrows on the graph
You will likely have to manually adjust them. The goal is to make your image appear like snow falling on a black backdrop…
All you have to do now is set the layer mode to Screen so that the image can show through where the black areas are…

You may have to adjust the opacity of the snow layer based on how subtle you want it to look.
To really bring this effect home we’re now going to repeat the process again on a new layer, only this time we’ll set the Dulling of the HSV noise to 1 and use a Gaussian blur of 3.
Now go ahead and manually adjust the color levels so that you end up with larger snowflakes…
Finally, set the blend mode to Screen. The point of doing this was to add a layered look to the image where it appears as if there’s a higher density of small snowflakes further away and larger snowflakes closer to the camera.
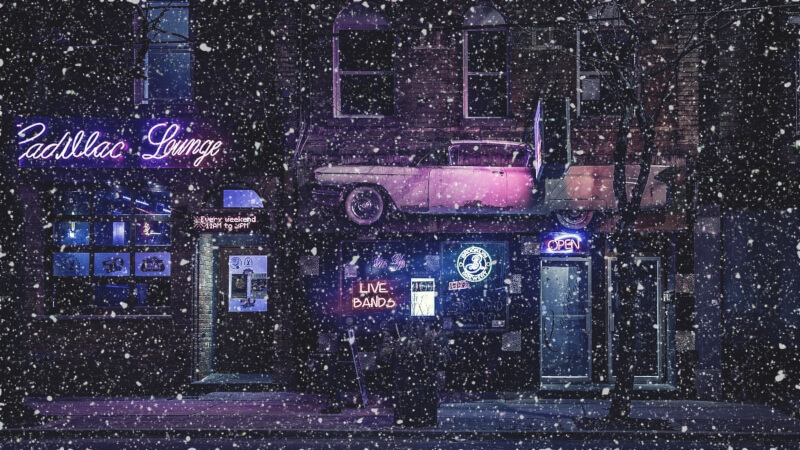
And with that we are finished! That is how you can add the appearance of falling snow to any image with GIMP. If you have any questions just leave a comment below. As always, thanks for watching!
Learn To Master The SoftwareGain a complete understanding of your favorite design apps with my comprehensive collection of video courses. Each course grants access to our private community where you can ask questions and get help when needed.
|
||||||||||||||||||||||||||||||||


You might also like


5 comments
-
-
Waymond
How can I add the snow to a specific part of a image? For example, how could I have it snow under the Caddilac Lounge sign only?
-
-
Ginger Blythin
I loved seeing the Cadillac Lounge in this tutorial! They closed a few months ago, but before that were my clients. This cherished live music venue was located in Toronto, on Queen Street West in Parkdale.
-
Nick Saporito
Interesting, I had no idea! I just used this image because I found it on Pixabay and thought it looked cool.
-
John
Hi Nick, I have tried this numerous times but my snowflakes come out RED! Can’t see what I am doing wrong.