How To Create Grime Art with GIMP
How To Create Grime Art with GIMP https://logosbynick.com/wp-content/uploads/2019/10/gimp-grime-art-tutorial-1024x602.jpg 1024 602 Nick Saporito https://secure.gravatar.com/avatar/8e31bf392f0ba8850f29a1a2e833cdd020909bfd44613c7e222072c40e031c34?s=96&d=mm&r=gIn this tutorial I’ll be demonstrating how you can use GIMP to create grime art portraits. Grime art is a trendy form of digital art in which you paint freehand effects on top of a portrait. You can read more about it here.
The following is just a brief overview of the steps taken to achieve this effect. Please watch the video tutorial at the top of the page for complete step-by-step instructions.
GIMP Grime Art Tutorial
To get start we will need to open a photograph with GIMP. For this tutorial I will be using a stock photo that I purchased from 123rf, but you can use any other photo you’d like.

Credit: 123rf
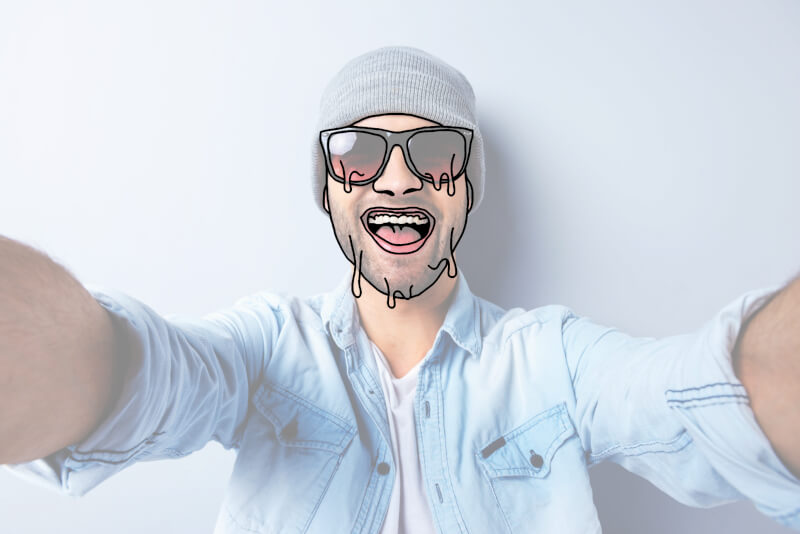
The first thing we’re going to do is create a blank new layer on top of the subject layer and use a solid black brush to manually draw some drip lines rolling off of the subject.

Now we will use that same brush to draw some border lines going around the subject’s face. Make sure that the lines do not cross through the drips that were previously drawn. You may want to bring down the opacity of the subject layer so that you can see the lines that you’re drawing a little better.
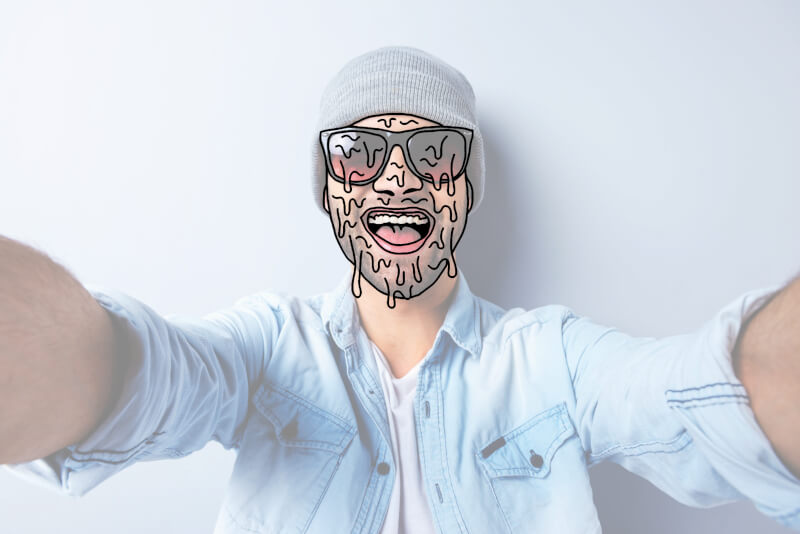
Once the border lines are complete we can now go through the rest of the subject’s face and draw some more rolling drips.
Now create a new layer beneath the border layer and use a different color brush to color in the face. I’ve found that high contrast neon colors seem to work best for the grime art style. For this tutorial I’m using a high contrast pink, but you can use whatever color you’d like.

Continue coloring in the rest of the facial features with another color. You’ll probably need to use a third color as I did below — a dark shade of the second color worked well for this example.

This is where the design really begins to pop. Select a slightly dark shade of the original color (pink in my case) and use it to manually draw in some shadows around the edges of the face and underneath the drips.

Now we can grab a lighter shade of that original color and draw in some highlights around the opposing areas.

Finally, grab a white brush and paint in some very subtle highlights at the peaks of the lighter shade highlights you just drew. This will make for a nice finishing touch.
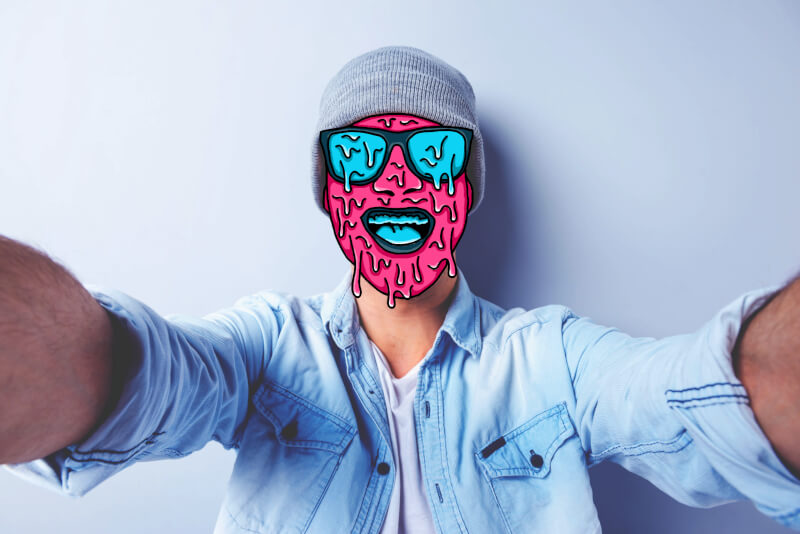
Now you can bring the subject layer’s opacity back to up 100%, and with that our grime art is finished!
If you have any questions simply leave a comment below. As always, thanks for watching!
Learn To Master The SoftwareGain a complete understanding of your favorite design apps with my comprehensive collection of video courses. Each course grants access to our private community where you can ask questions and get help when needed.
|
||||||||||||||||||||||||||||||||


