

How To Flow Text Around An Object with Inkscape
How To Flow Text Around An Object with Inkscape https://logosbynick.com/wp-content/uploads/2019/09/inkscape-flow-text-around-shapes-1024x602.jpg 1024 602 Nick Saporito https://secure.gravatar.com/avatar/8e31bf392f0ba8850f29a1a2e833cdd020909bfd44613c7e222072c40e031c34?s=96&d=mm&r=gIn this tutorial I’ll be demonstrating how to make your text flow around objects in Inkscape without having to manually add spaces and line breaks. We’ll be using the Flow Into Frame feature, which will leave us with completely editable text that wraps nicely around any objects of your choosing.
The following is just a brief overview of the steps taken to achieve this effect. Please watch the video tutorial at the top of the page for complete step-by-step instructions.
Flow Text Around An Object
For this tutorial I’ll be using the following example image…

The goal is to make the text occupy all of the colored area without it overlapping with the headphones. To accomplish this we are going to manually create a vector tracing of whatever object(s) we’d like the text to avoid.
Grab the Bezier Pen and manually create a green tracing of the object(s) you’d like the text to avoid. It doesn’t have to be green, I just chose green because it contrasts with the image so that I could see it better.

It doesn’t have to be an exact tracing. A rough outline will work.
Now we’re going to create a blue rectangle over the entire image. This area represents where the text will be, so we’ll be subtracting the green area from it shortly.

Before we subtract the green area, we’ll use the Dynamic Offset feature to give the subject some padding. This is because we don’t want the text to run all the way to the edge of the subject; we’d like there to be a little bit of space.

Now we can subtract the green area by selecting both the blue and green objects and performing Path > Difference. Then take the remaining shape and perform Path > Simplify to ensure that the object isn’t too complex for the text function to work.
Once you’ve done that, go ahead and generate some text using the Text tool. Then, select both the text object and the blue shape and go to Text > Flow Into Frame. This will flow the text into the blue object.
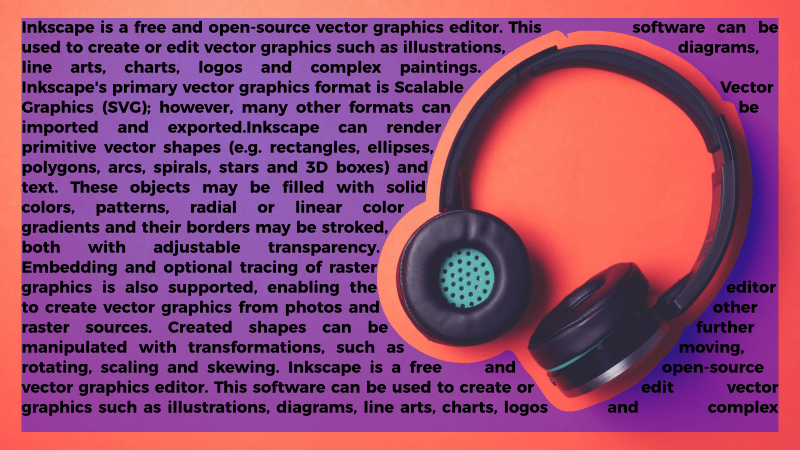
Credit: https://en.wikipedia.org/wiki/Inkscape
Now you can go ahead and edit the text however you’d like. You can change the font, color, justification, line spacing, kerning, or anything else that you would normally edit on a text object. For this example I simply copy and pasted an excerpt from the Inkscape Wikipedia Page.
Once you’re finished, grab the blue object and remove its fill color so that it’s no longer visible. Make sure not to delete it. If you delete it then the text will be removed from the frame.
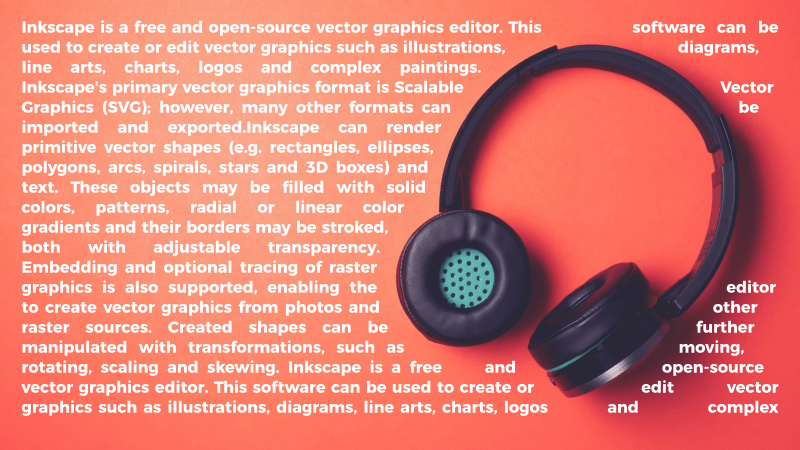
And with that we are finished! That is how you can flow text around an object with Inkscape. If you have any questions just leave a comment below, and as always, thanks for watching!
Learn To Master The SoftwareGain a complete understanding of your favorite design apps with my comprehensive collection of video courses. Each course grants access to our private community where you can ask questions and get help when needed.
|
||||||||||||||||||||||||||||||||

 81 Videos
 11 Modules



You might also like



11 comments
-
-
Nick Saporito
You may have to convert the text to a path before saving the file and opening it up elsewhere.
-
-
Catherine Schwartz
I am trying to do something similar but with only one word (a name). I want that word to repeat and be different sizes throughout the object. I’ve been watching your videos and playing with Inkscape for hours, but I just can’t figure it out. I have an image of what I’m trying to do? Can you help me? At least tell me if it’s possible or not and what function(s) I need to do and I can figure it out from there?
I greatly appreciate all your tutorials! I’ve learned soooo much in these short hours!!
-
Nick Saporito
Hi Catherine, sounds like what you’re doing would require you to manually alter the sizes of each word. I don’t know of a feature that will do that for you.
-
-
-
Lelah Marie
Your video tutorials are excellent! And you teach it all for free! Thanks so much for providing a way to learn how to utilize this amazing tool.
-
Rizal Muhammad Zakki
All your tutorials are easy to learn even for beginners like me.
You makes me fall in love to Inkscape. -
Kenechukwu Egwuchukwu
I have watched and followed most of your videos on design with Inkscape onYouTube and it has really help improve my design skills over a period of 3month, thanks for all the tutorial videos, you’ve made me fall in love with Inkscape
-
-
Jeff Heinze
I sure enjoy the tutorials. I am about as much of a novice as there is so these are very helpful for someone like me. Thank you for sharing your vast knowledge on this program. Jeff
-


Kristin
Tutorial was great and easy. Exactly what I was looking for. However when I save it, the text doesn’t appear so I am sure I have done something wrong. I am trying to make a svg/png that I can use for sublimation and vinyl. What methods are needed to save this so that the text actually appears on the save files…