How To Duplicate In Procreate | Layers, Objects, and Selections
How To Duplicate In Procreate | Layers, Objects, and Selections https://logosbynick.com/wp-content/uploads/2021/10/duplicate-procreate.png 800 470 Nick Saporito https://secure.gravatar.com/avatar/8e31bf392f0ba8850f29a1a2e833cdd020909bfd44613c7e222072c40e031c34?s=96&d=mm&r=gDuplicating elements of your design work is one of the most common functions you’ll likely need when using a design app such as Procreate for the iPad. In this tutorial we’ll be going over all of the ways you can duplicate in Procreate, including layers, objects, and selections.
In short, the way that you can duplicate most objects in Procreate is by opening the Layers menu, sliding the layer you want to duplicate to the left, and selecting the Duplicate button. This works for layers as well as text objects. However, if you want to duplicate individual elements of a layer, and not the entire layer, you’ll have to use the Selection Tool to create a selection around your object and then use the copy & paste function.
Let’s dig in!
How To Duplicate In Procreate
The following video tutorial will walk you through the entire process of duplicating layers, objects, and localized selections in Procreate:
Continue on for the written instructions.
Table of ContentsHow To Duplicate Layers
How To Duplicate Selections
|
How To Duplicate Layers
In this first part of the lesson we’ll be going over how to duplicate in Procreate at the most fundamental level — layers. This includes text objects as well, since they exist on their own layers.
Step 1: Open the Layers menu
To duplicate a layer in Procreate, open your Layers menu, located in the top-right corner of your screen:
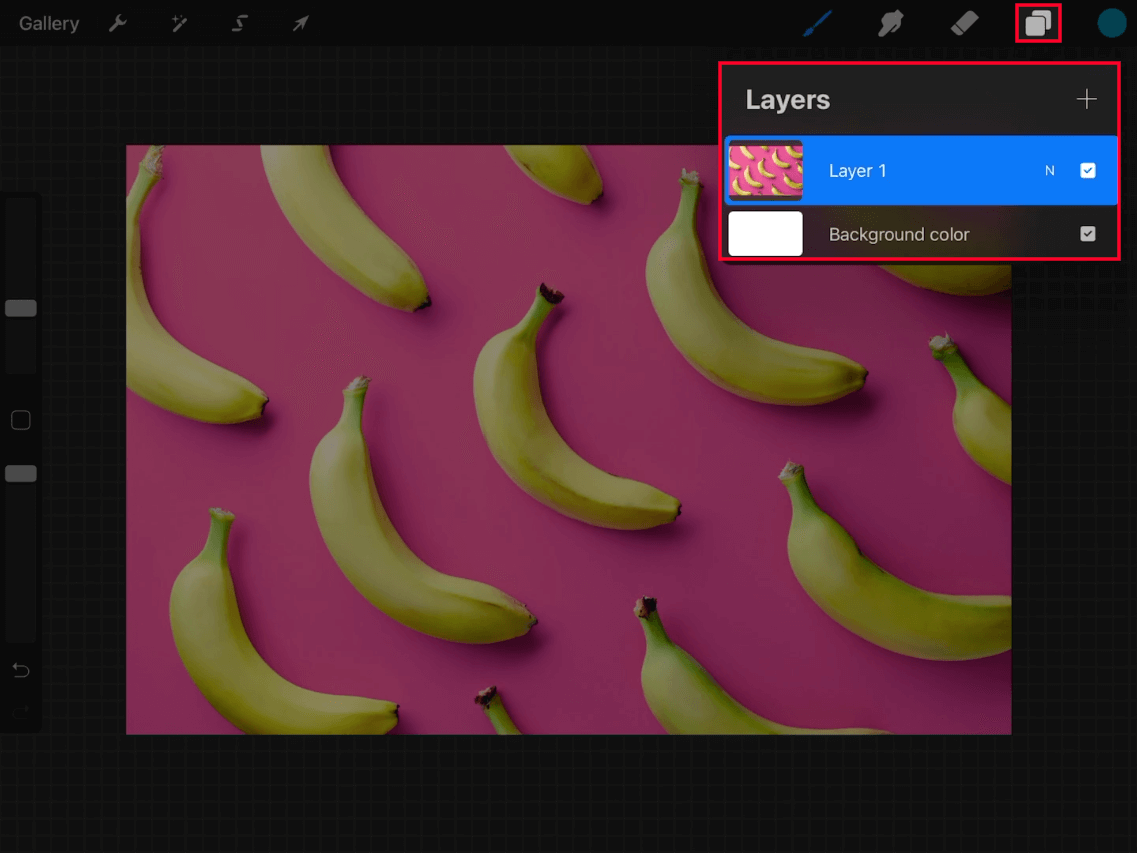
Open the Layers Menu, located in the top-right corner of the screen.
Make sure you have the layer selected that you’d like to duplicate. The layer will be highlighted in blue when selected.
Step 2: Slide the layer you’d like to duplicate to the left
With your layer selected, use your finger/pencil to slide the layer you’d like duplicated to the left.
This will revel a handful of operations that you can perform on this particular layer:

Sliding your layer to the left will reveal the Duplicate button.
One of those options is the Duplicate button.
Step 3: Select the “Duplicate” option from the menu
All you have to do to duplicate your layer is simply tap the Duplicate button. This will create a copy of the selected layer:
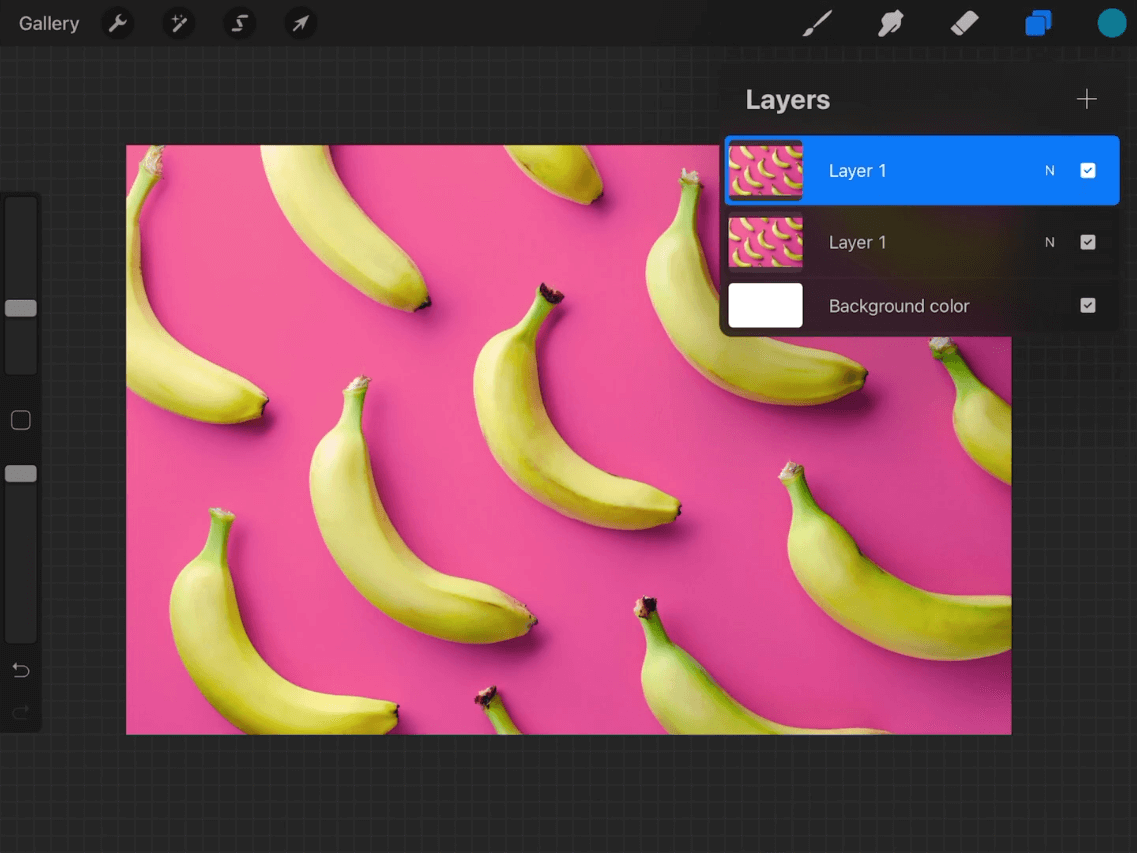
A duplicate layer will be added to the top of the layer order.
The duplicate copy of the layer will be positioned above the original and will be given the same name as well. It is essentially an exact copy.
And that is how you can quickly duplicate in Procreate! Once again, this applies to layers and text items. If you’d like to duplicate a specific area of your layer, as opposed to the entire layer, then continue on to the second part of the lesson.
How To Duplicate Selections
| To duplicate an object in Procreate, grab the Selections Tool and create a selection around the area you’d like to duplicate. Then, open the Actions menu and select Copy, and then select Paste. Your selection will then be duplicated to a new layer. |
Now that we’ve gone over how to duplicate layers in Procreate, let’s have a look at duplicating isolated portions of a layer.
Step 1: Grab a Selection Tool of your choice
First, make sure that you have the proper layer activated for the object you’d like to duplicate. This process will not work otherwise.
Open the Selections menu:
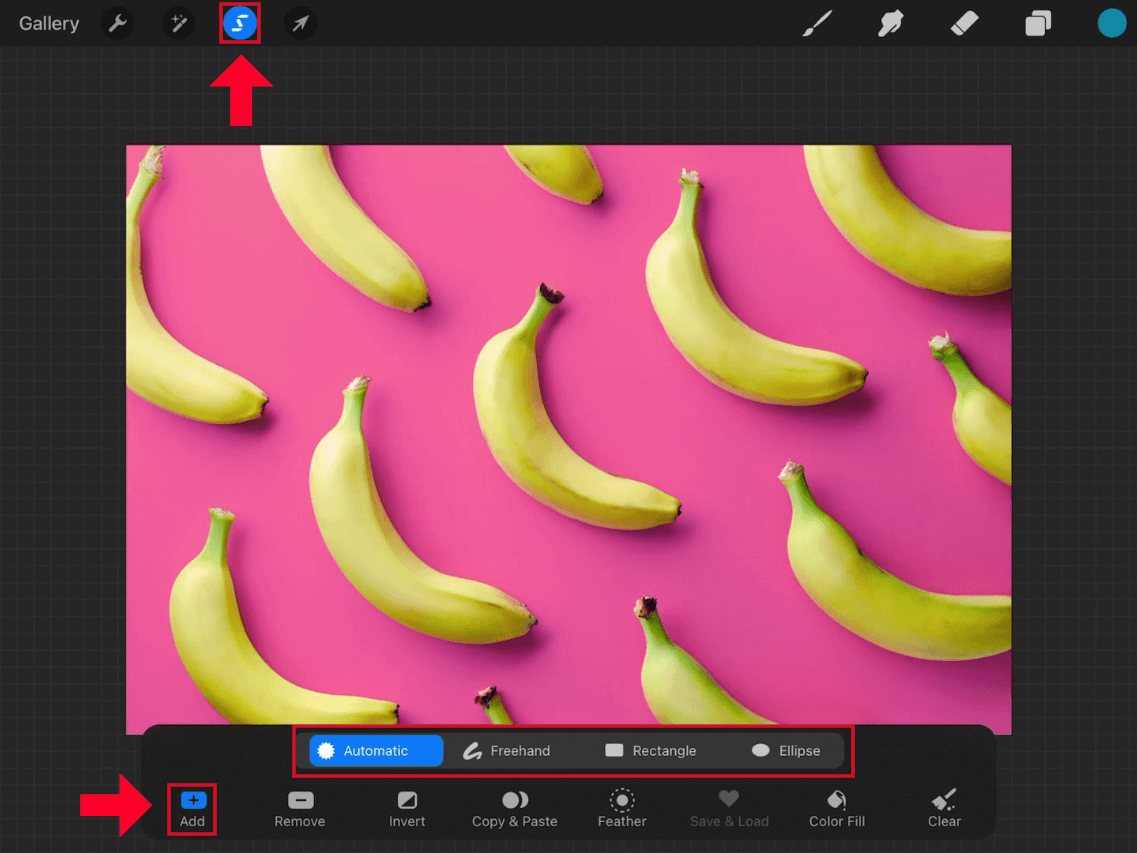
Open the Selections Menu, choose the Add options, then choose your preferred selection method.
Within the Selections menu you will see a variety of options towards the bottom of the screen. Make sure you have Add enabled, and then choose a selection method of your preference. The selection methods are as follows:
- Automatic: uses an algorithm to create an automated selection around an area that you swipe over with your finger
- Freehand: allows you to manually draw a selection around your object
- Rectangle: creates a square/rectangular selection around your object by swiping with your finger
- Ellipse: creates a round/circular/ellipse selection around your object by swiping with your finger
For this demonstration I will be using the Freehand option to manually draw a selection around one of the bananas in my example photo.
Step 2: Create a selection around your subject
With your chosen selection method, go ahead and create a selection around your object:
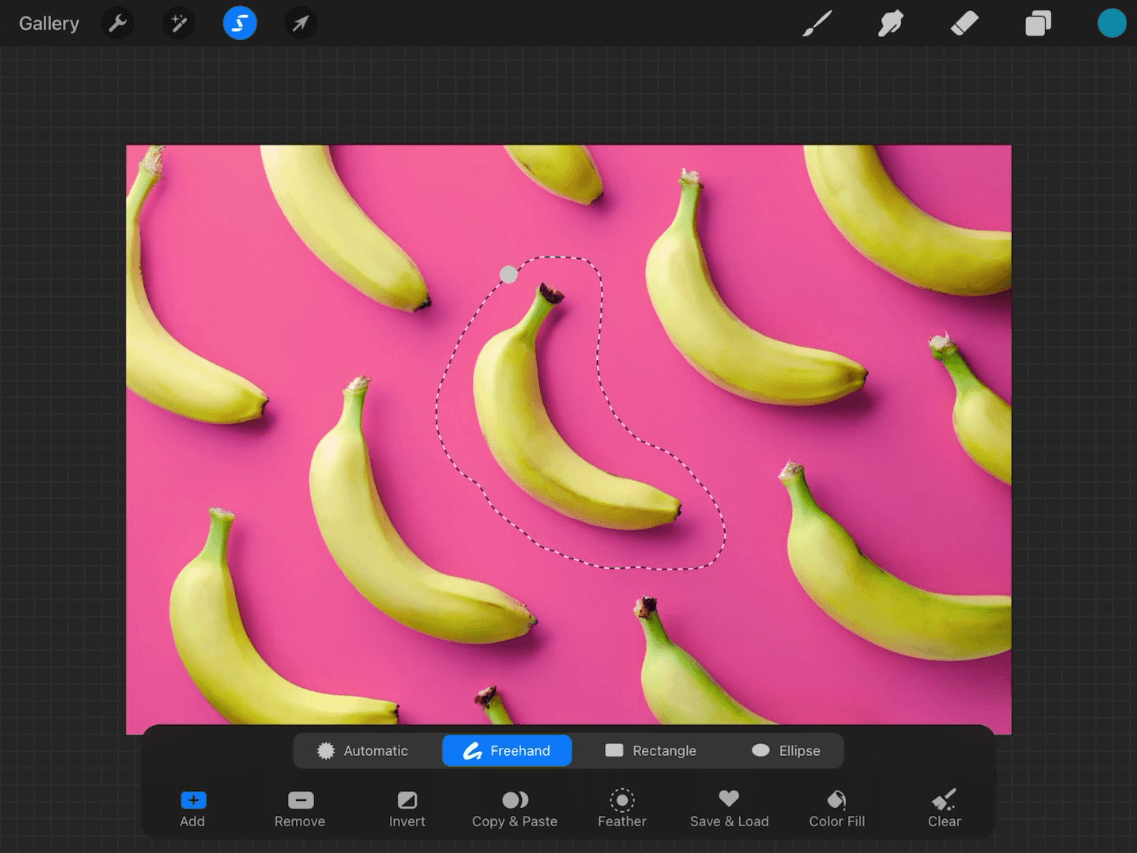
For this demonstration I have created a freehand selection around the subject.
You will know the selection is complete when you see a dotted line going around it, as is the case in my screenshot above.
Step 3: Copy & paste the selection
All you have to do now to duplicate that selection is open the Actions menu by tapping on the wrench icon in the top-left corner of the screen and selecting the Add menu:
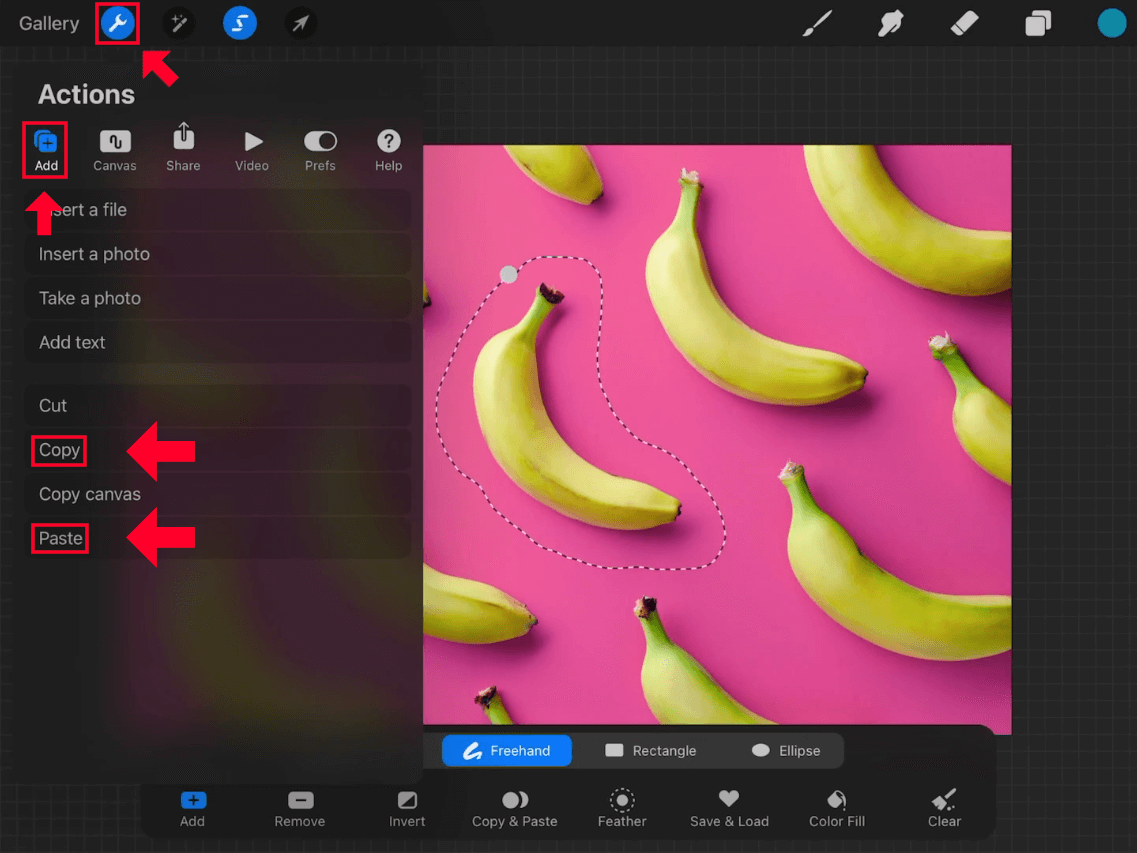
Use the Actions menu to access the copy and paste functions.
Within the Add menu, tap on Copy to copy the selection, then tap Paste to paste the selection.
Your object will then be duplicated to its own dedicated layer:
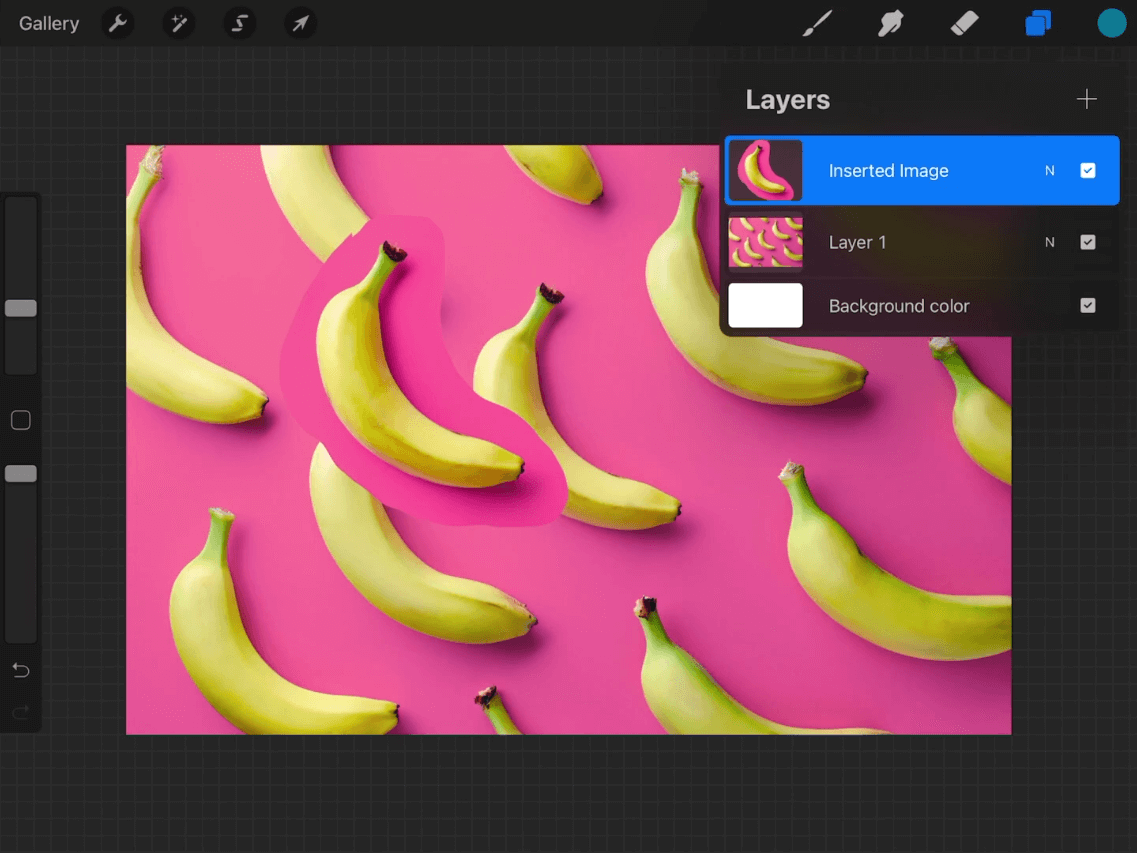
The duplicated selection will be pasted as its own new layer.
And that’s how you can duplicate in Procreate when working with objects and localized selections rather than layers.
Conclusion
Knowing how to duplicate in Procreate is simply a matter executed a few taps. The trickiest part is knowing how to access the duplicate option in the Layers menu, which is somewhat hidden. Sliding the layer to the left isn’t necessarily an intuitive action, so new users do tend to get tripped up here.
If you have any questions or need clarification on any of the steps taken in this lesson, simply leave a comment below.
Learn To Master The SoftwareGain a complete understanding of your favorite design apps with my comprehensive collection of video courses. Each course grants access to our private community where you can ask questions and get help when needed.
|
||||||||||||||||||||||||||||||||


You might also like


2 comments
-
-
Logos By Nick
Did you use the Select tool to move the pasted object? Feel free to clarify if I misunderstood.
-
Rosie0
I’ve used the freehand selection, with add selected, then wrench>copy>paste but instead of an item I can move, I have the same object I can only resize and not duplicate to a new area of my picture… what am I doing wrong?