How To Create Drop Shadows with Affinity Designer
How To Create Drop Shadows with Affinity Designer https://logosbynick.com/wp-content/uploads/2021/02/add-a-shadow-to-text-in-affinity-designer.png 800 470 Nick Saporito https://secure.gravatar.com/avatar/8e31bf392f0ba8850f29a1a2e833cdd020909bfd44613c7e222072c40e031c34?s=96&d=mm&r=gOne of the most basic functions of a graphic design application is having the ability to add shadows behind objects, and lucky for us, Affinity Designer has an excellent feature for such built right in. In this tutorial I’ll be demonstrating how you can create drop shadows with Affinity Designer so you can make things like shadow text and the like, and the process is so simple that this would make for an excellent beginner tutorial for any newbies or first-time users.
Knowing how to create drop shadows with Affinity Designer is simply a matter of applying one of the built-in filter effects, and then tweaking the settings to your liking. Fortunately Affinity’s user interface makes for a very intuitive experience, but the downside is that this feature is Affinity-specific, meaning you won’t be able to work cross-platform with any drop shadows you’ve created.
If you only need editable copies of your design for Affinity Designer though then this tutorial is for you! Within no time you’ll be making your designs jump off the page with realistic drop shadows!
Create Drop Shadows with Affinity Designer
| To create drop shadows with Affinity Designer, select the object you’d like to apply it to and navigate to the Effects tab. Enable the Outer Shadow effect from the list and then adjust the settings to your liking. |
Watch the following video tutorial to learn how to apply drop shadows:
This lesson isn’t so complicated that you need to watch the video to follow along though, so continue on if you’d rather follow the written instructions.
Step 1: Identify Your Subject
In order to create drop shadows with Affinity Designer we first need an object to apply the shadow to. This object can be virtually anything. It can be a shape, a logo, a group of objects, or even a rasterized PNG.
For this demonstration I will be creating shadow text by applying the drop shadow to a text object:
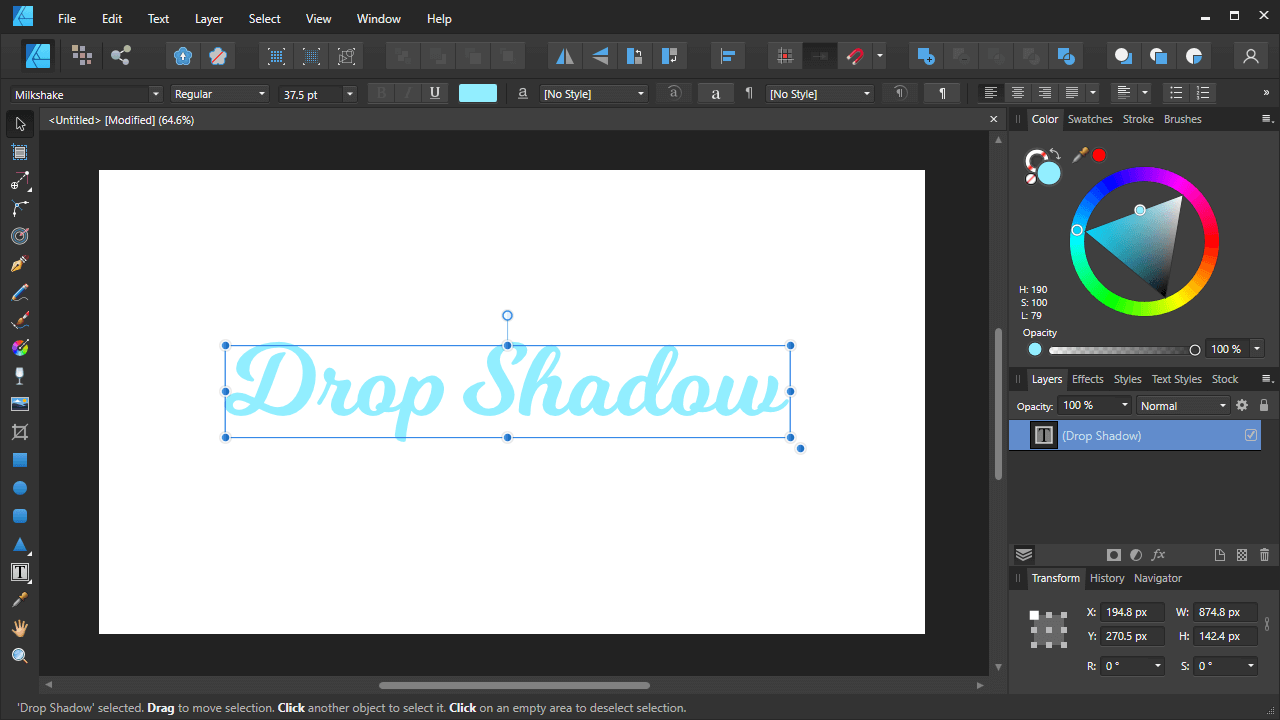
For this demonstration I will be creating some shadow text.
It is recommended that you make your object any color other than black. Drop shadows tend to be not very visible when applied to black objects, and the same goes for any darker shadow in general. For my example I’m using a lighter shade of blue.
Once you’ve identified your subject, make sure to click on it so you have it selected.
Step 2: Apply The Outer Shadow Effect
With your object selected, navigate to the Effects tab. It’s located on the right-hand side of your screen where the Layers menu is by default.
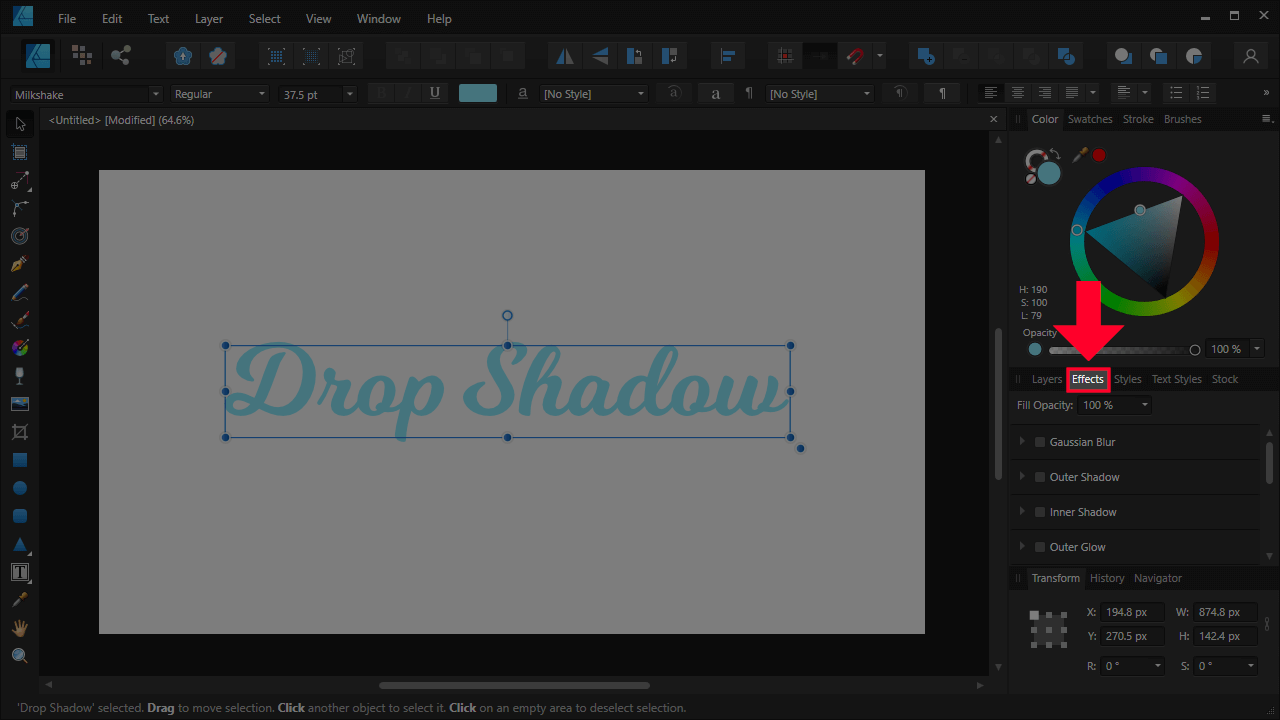
Open the Effects tab, located in the middle of your screen on the right-hand side.
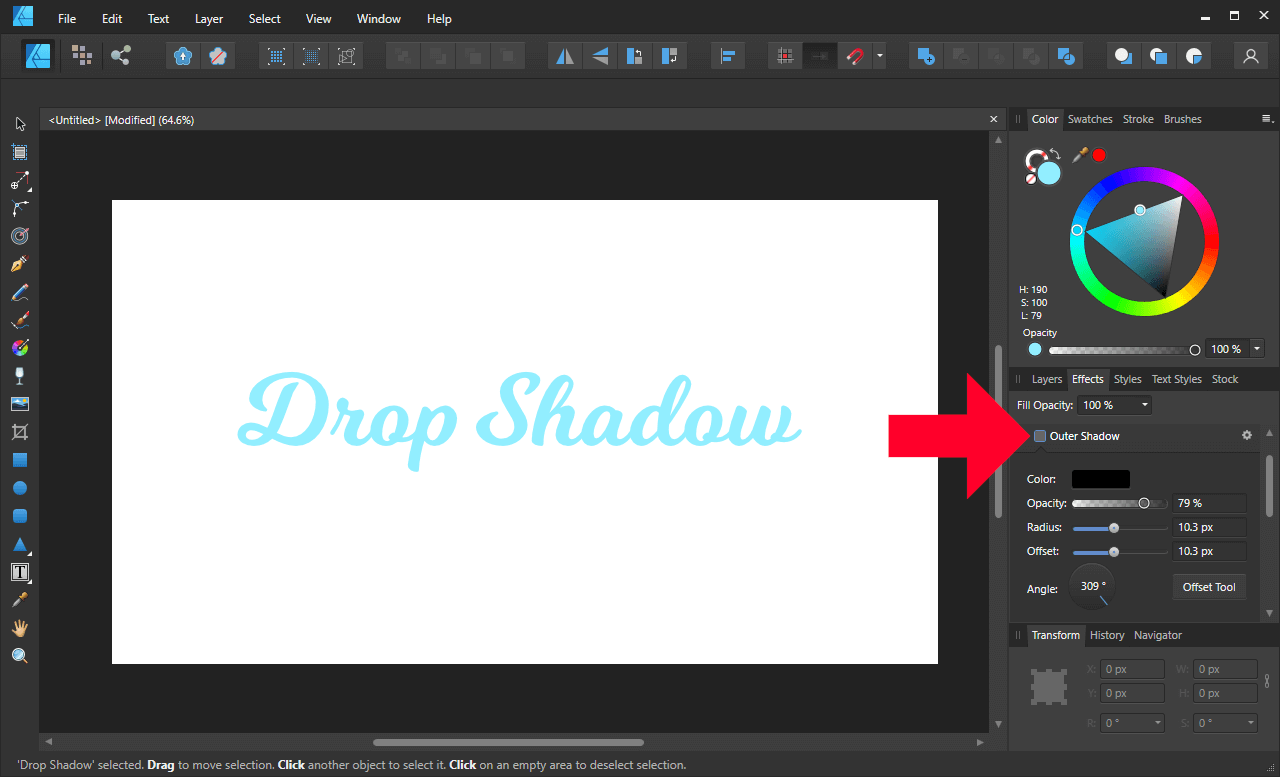
In the list of effects, locate the Outer Shadow effect and tick the box next to it to enable it. A collapsible menu should expand:
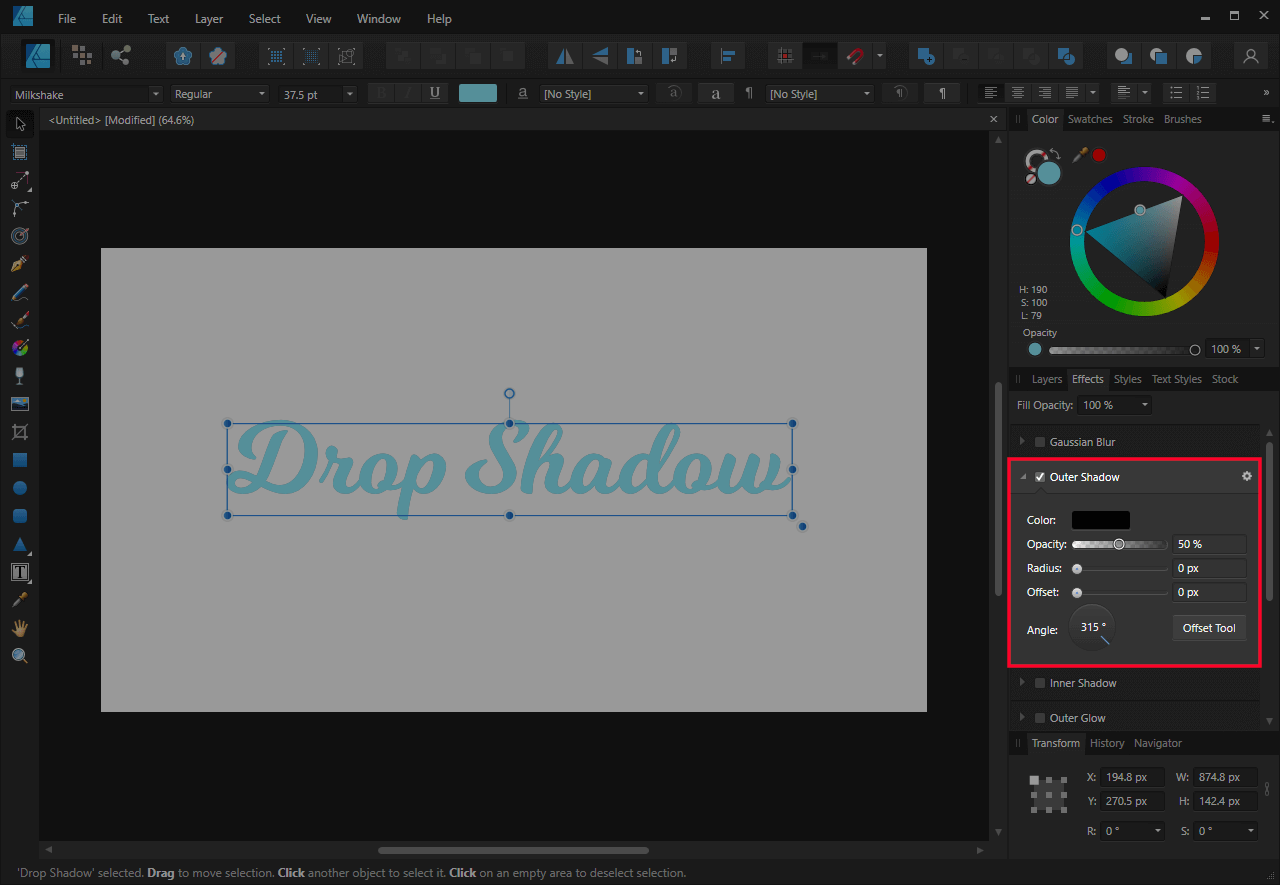
The effects settings will allow you to change the appearance of your drop shadow.
Although it’s not visible on your screen yet, a outer shadow (or drop shadow) has been applied to your object. The reason you can’t see it yet is because it is centered directly beneath the object. The shadow will become visible in the next step when we tweak the settings.
Step 3: Adjust The Settings To Your Liking
Once you have your outer shadow applied, move the Offset slider to the right to make the shadow come out from behind the subject:

The Offset dictates the position of the drop shadow.
You can use the Angle wheel to determine the angle of your drop shadow. Moving the wheel will change the angle in 45 degree increments, but you can you can hold Shift on your keyboard if you’d like to remove that constriction.

The Angle dictates the direction of your drop shadow.
You can also use the Offset Tool to manually place your shadow wherever you’d like it:

With the Offset Tool you can manually place your drop shadow wherever you’d like.
The Color preset at the top allows you to set the color of your drop shadow:
You can change the color of your shadow using the color bar at the top of the menu.
The Opacity slider allows you to determine the transparency of your drop shadow:

The Opacity slider dictates the transparency level of your shadow.
Finally, the Radius slider allows you to blur the shadow so that it has a softer appearance. This is especially useful if you want to create drop shadows with Affinity Designer that have a realistic look.
The Radius slider can be used to blur your shadow, giving it a softer look.
Once you are finished adjusting your drop shadow to your liking you can simply navigate back to the Layers menu and continue on with your designing! You have successfully applied a drop shadow to your subject.
How To Remove A Drop Shadow
One of the benefits of using Affinity Designer for this sort of task is that you can easily disable your drop shadow at any point, and without losing it permanently.
To remove your drop shadow, simply untick the Outer Shadow box in the Effects menu:
You can remove the drop shadow at any point by unticking the box next to the Outer Shadow effect.
You drop shadow should now be gone.
Want to apply the same drop shadow again later on? You’re in luck. All you have to do is navigate over to the Effects menu and tick the box again. Your drop shadow will return with the same presets you left it with:

Ticking the box again will reapply the shadow with all of the previous settings in place.
Conclusion
As you can clearly see, it’s incredible easy to create drop shadows with Affinity Designer, thanks in no small part to the built-in Effects menu.
Although this is a rather standard feature in graphic design applications — both raster and vector — I really like the way in functions in Affinity Designer. The sliders feel more intuitive and allow you to “eyeball” the desired look without having to manually punch in numbers and then toggling the preview on and off.
One of the downsides of using the Outer Shadow feature is that it is Affinity-specific. This means that if you try to work on your design later on in another application, like Inkscape or Illustrator, the drop shadow will not register. If you need your drop shadow to have cross platform compatibility then it would probably be wiser to use more of an Inkscape approach to creating shadows and simply place a blurred copy of the object beneath the original.
If you have any questions simply leave a comment below. As always, thanks for visiting!
Learn To Master The SoftwareGain a complete understanding of your favorite design apps with my comprehensive collection of video courses. Each course grants access to our private community where you can ask questions and get help when needed.
|
||||||||||||||||||||||||||||||||


There is no EFFECTS panel (anymore)?!
It’s there, they just changed the name of it. It’s called “QuickFX” now.
This was really helpful, saved me loads of time and straight to the point. Thank you so much 🙂