How To Create Arrows In Inkscape Without Having To Design Them
How To Create Arrows In Inkscape Without Having To Design Them https://logosbynick.com/wp-content/uploads/2021/08/inkscape-arrows.png 800 470 Nick Saporito https://secure.gravatar.com/avatar/8e31bf392f0ba8850f29a1a2e833cdd020909bfd44613c7e222072c40e031c34?s=96&d=mm&r=gAs demonstrated on this site many times in the past, there’s no shortage of ways in which you can utilize Inkscape for graphic design. One such way would be creating diagrams and infographics, in which case you’ll probably need to generate arrows to help illustrate your message better. In this tutorial we’ll be going over how to create arrows in Inkscape without actually having to design them! Instead, we’ll be generating them from paths.
You may be under the impression that arrows are something that need to be designed manually. However, thanks to some of Inkscape’s built-in features, creating arrows is simply a matter of drawing a path and then using the Fill & Stroke menu to apply a marker to the end of the path. The marker that we apply will serve as the head of the arrow.
Create Arrows In Inkscape
The following video tutorial will walk you through the entire process of generating quick and easy arrows with Inkscape:
Continue on for the written instructions
Table of Contents |
Step 1: Use the Bezier Pen to draw a path that you’d like your arrow to follow
To create an arrow in Inkscape, the first step is the grab the Bezier Pen (keyboard shortcut: B) and create a path on your canvas.
You can create your path by clicking once on the canvas, and then dragging the line in the direction that you’d like your arrow to go. Then, click again a second time to determine where you’d like the end point of your arrow to be and press Enter to complete the path:

Use the Bezier Pen to draw a path for your arrow.
If you’d like to make your arrow follow a curve then feel free to curve the path while you’re drawing it. If you don’t know how to do that then do not worry, we will be addressing this in a later step.
Step 2: Apply a marker to the end of the path to be used as the arrow head
Now we will turn this path into an arrow.
To do this, we must open the Fill & Stroke menu by navigating to:
Object > Fill and Stroke
Alternatively, you can press Control + Shift + F on your keyboard to open the menu.
Within the Fill & Stroke menu, navigate to the Stroke Style tab:
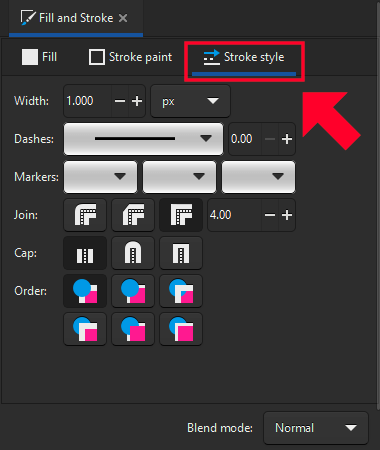
Navigate to the Stroke Style tab.
You will see an option in the Stroke Style tab labeled as Markers, which consists of three input fields:
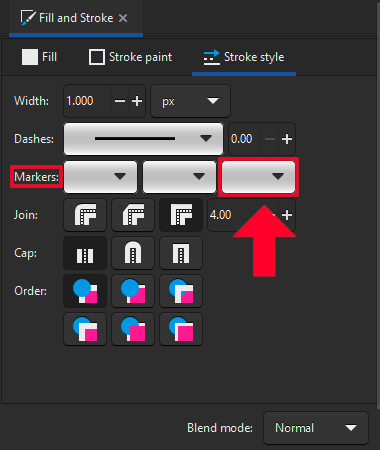
We’ll be applying a marker to the stroke for use as the arrowhead.
The input field on the left allows you to place a marker at the beginning of the path, the middle input field allows you to place markers at all of the individual nodes in the path, and the input field furthest to the right will place markers at the end of the path.
Markers are what we’ll be using to create the head of the arrow, and the head of the arrow will be at the end of the path.
Using the dropdown menu furthest to the right, select one of the arrowhead designs from the list:
The input field furthest to the right will be where the arrowhead is placed.
This will effectively turn your path into an arrow:
After the marker is applied, your path will become an arrow.
Step 3: Change the color, size and style of your arrow
When you create arrows in Inkscape they will be black at first because that’s the default color used to create new strokes.
You can change the color of your arrow by navigating to the Stroke Paint tab in the Fill & Stroke menu and applying whatever color you’d like:
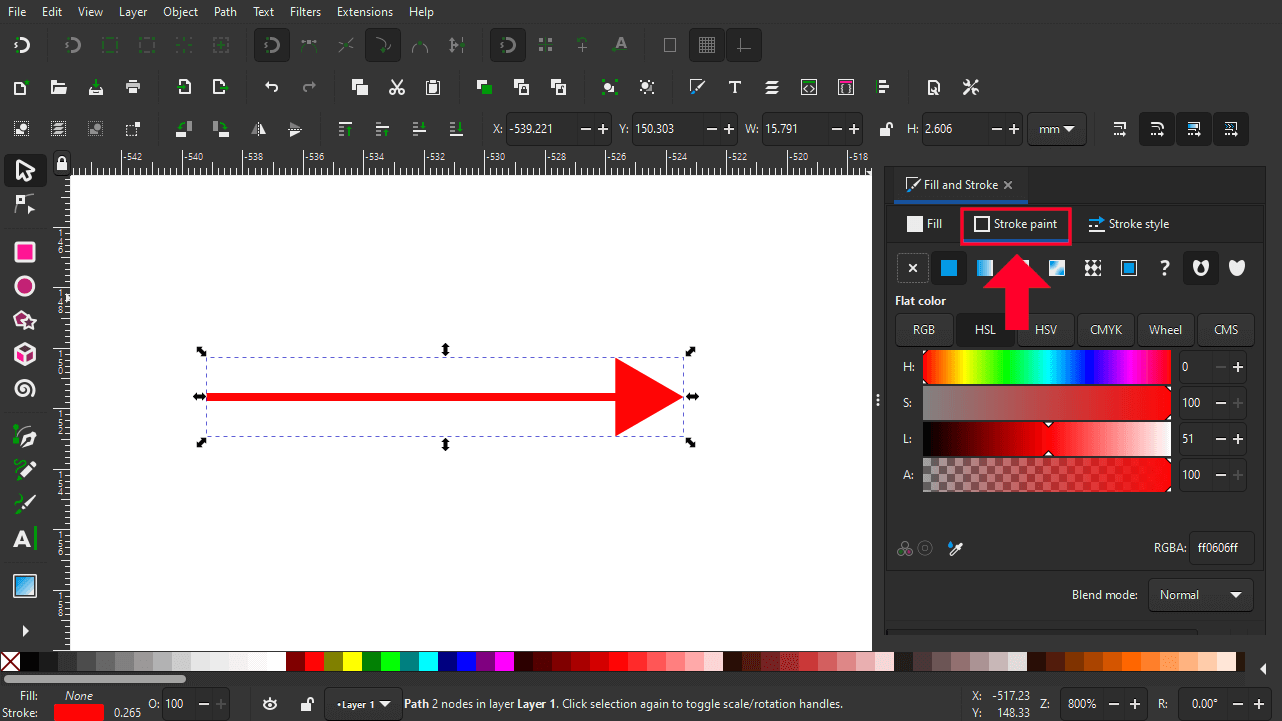
The Stroke Paint tab allows you to change the color of your arrow.
Alternatively, you can hold Shift on your keyboard and click on any of the colors in the color palette at the bottom of your screen to change the arrow color as well.
If you’d like to change the size of your arrow, you can do so by simply increasing the stroke Width, which is located in the Stroke Style tab:
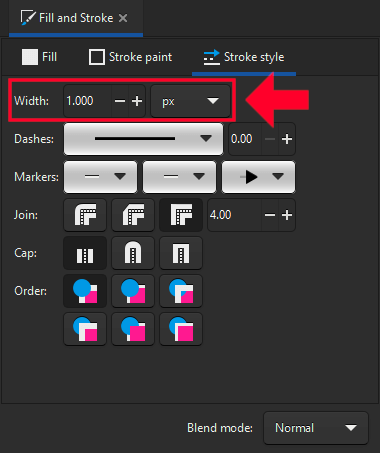
The stroke Width field will allow you to increase or decrease the size of your arrow.
Increasing the width will make the arrow and its tail larger. Decreasing it will make them smaller:
![]()
Step 4: Reposition the arrow as needed
Now that we’ve gone over how to create arrows in Inkscape, let’s go over how to transform them a bit.
Once you’ve made your arrow the size, color and style you’d like it to be, you can bend your arrow and change its position using the Edit Paths By Nodes tool (keyboard shortcut: N) You can learn more about how this tool works in this lesson.
With the Nodes tool selected, simply click and drag on one of the nodes to move its position:
![]()
You can make the arrow follow a curved path by clicking and dragging the line to bend it:
![]()
And, of course, you can move and transform the entire arrow using the Select Tool, the same as you would for any other object.
Conclusion
In short, if you know how to create paths in Inkscape then you already know how to make arrows in Inkscape. The only difference is that a marker is applied to the end of the path.
This feature is super convenient for anyone who just needs to generate quick arrows and doesn’t want to draw them manually. The downside, though, is that you have little control over the size of the path relative to the arrowhead.
If you’d like to make the path thicker without increasing the size of the arrowhead then you’ll have to use a workaround that I went over in the video tutorial above. The workaround is that we’ll duplicate the arrow, remove the marker, and then increase the stroke width. However, you won’t be able to reposition and bend the arrow once this is done, so make sure you have the arrow placed exactly where you want it to be beforehand.
If you have any questions or need clarification on any of the steps taken in this lesson, simply leave a comment below.
Learn To Master The SoftwareGain a complete understanding of your favorite design apps with my comprehensive collection of video courses. Each course grants access to our private community where you can ask questions and get help when needed.
|
||||||||||||||||||||||||||||||||


Nick, this helped a lot. Thank you.
However, there is now a toggle in the marker dropdown menu that lets you change the size of the arrow independently from the stroke width.
Hi Nick, thanks for the tutorial!
When I click on the arrow with the node tool, to bend it, it leaves a fill (like a solid hill / valley) instead of just arching the line.
It sounds like you have a fill color applied. With the object selected, just click the red X in the color palette to the bottom-left of your screen to remove it. If the object becomes invisible after doing that then it means it doesn’t have a stroke color applied, in which case you can hold the Shift key and click on any one of the colors to apply one.
When I attempt the rotation, the arrow appears to act as a 3D illustration and becomes skewed.
Are you sure you’re using the rotation handles? It sounds like you grabbed the shear handles instead.
Love it. Thanks
I’m new to Inkscape, and compared to Illustrator, there is a serious lack of good tutorials, making it hard to switch over.
This tutorial is excellent, and is literally the best “how to” I’ve seen written for Inkscape—thanks for posting it!
Thank you for the feedback, John!
Just a very easy explanation about this item.
Thanks a lot
Glad I could help!