How To Change Eye Colors with GIMP
How To Change Eye Colors with GIMP https://logosbynick.com/wp-content/uploads/2018/11/gimp-change-eye-color-1024x602.jpg 1024 602 Nick Saporito https://secure.gravatar.com/avatar/8e31bf392f0ba8850f29a1a2e833cdd020909bfd44613c7e222072c40e031c34?s=96&d=mm&r=gIn today’s tutorial I’ll be demonstrating how you can change the color of your subject’s eyes using GIMP. This is a rather simple tutorial that would be ideal for beginners and/or first-time users of GIMP.
The following is just a brief outline of how we’ll achieve this effect. For complete step-by-step instructions, watch the following video tutorial:
Changing Eye Colors in GIMP
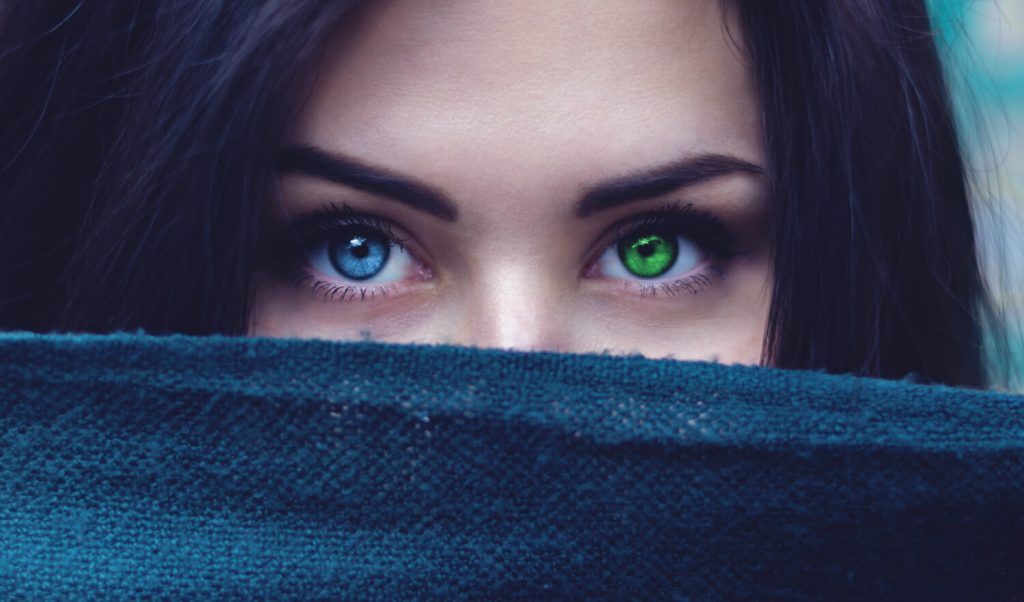
The example image I’ll be using is below. If you’d like to follow along with what I’m doing, simply click the image to download a copy of it.
Click to download
The first thing we’ll do is create a duplicate of the layer and completely remove the saturation to make the image gray scale.
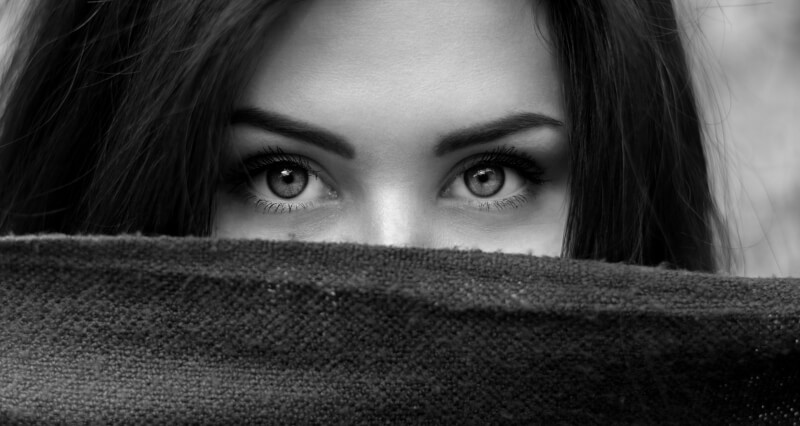
Next, we’ll add a black layer mask and use a soft white brush to color in the eyes, making them grayscale.

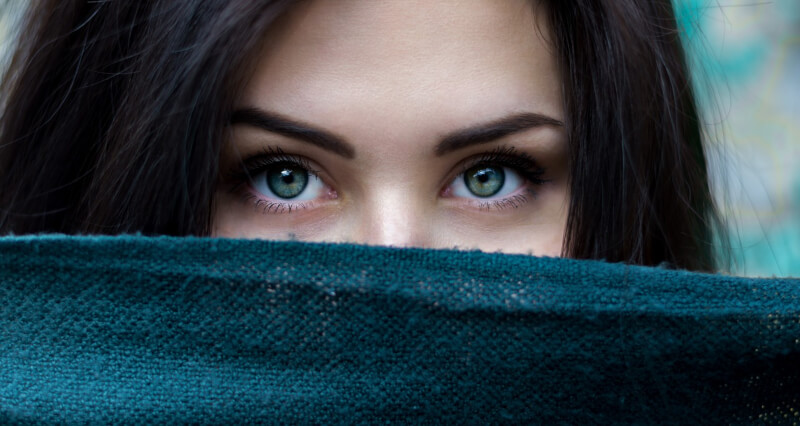
Now we’ll use the Colorize feature to add color. Go to Colors > Colorize to bring up that menu.
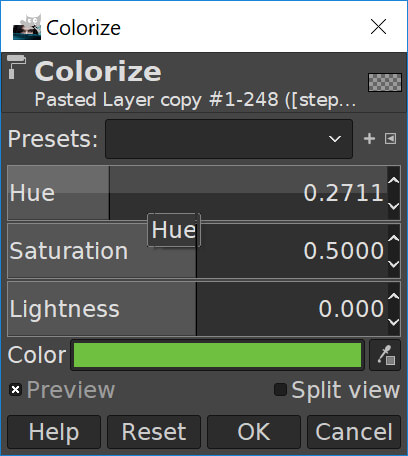
The colorize menu in GIMP
In the Colorize menu, slide the Hue left and right to cycle through all the different color options. You will notice your subject’s eye color changing as you do so, so long as you have “Preview” checked. Simply choose your desired color and click OK.
If you don’t like any of the color choices, you can click on the color stripe in the Colorize menu (depicted above as a green stripe) and it will allow you to choose a specific RGB or HEX value.

Once you’ve applied your color, make sure to zoom in around the iris to make sure that none of the color is bleeding through into the pupil. If it is, use the Eraser tool (with a soft brush) to remove the unwanted bleed.
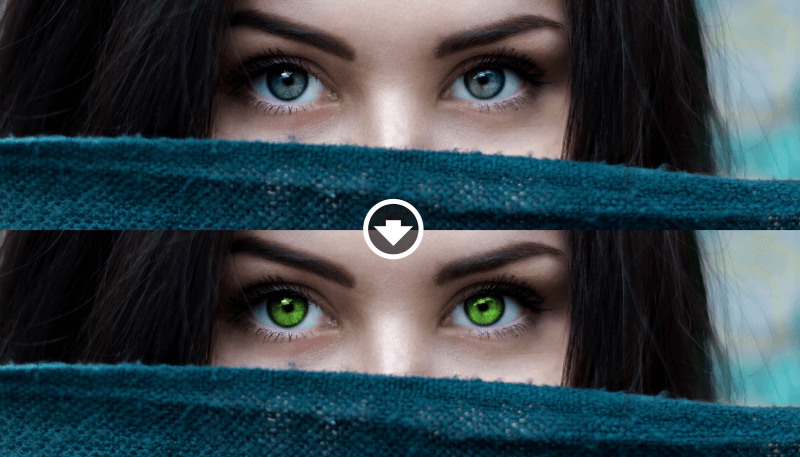
Before and after
And that’s how you can go about changing eye colors with GIMP! If you have any questions or need clarification about anything just leave a comment below. As always, thanks for watching!
Learn To Master The SoftwareGain a complete understanding of your favorite design apps with my comprehensive collection of video courses. Each course grants access to our private community where you can ask questions and get help when needed.
|
||||||||||||||||||||||||||||||||


Thank you so much for this tutorial!!! I watched the video and paused at each step since I am not super proficient in GIMP – even though I’ve had different versions of the program for longer than I care to admit! LOL It worked perfectly to correct the eye color in an old photo that I wanted to use for a family member’s memorial service. I also like how you provide the photo you’re working on in case we want to work on the example ourselves. P.S. Bonus points for the intro and outro music – Glenn Miller’s “In The Mood” is one of my favorites!! 😀
It’s a timeless classic 🕺
I got lost at ‘black layer mask’ ?
Go to Layer then Mask then add layer mask then select black (transparent) and press ok.
Ha! Transparent…the colored pencils are not completely OPAQUE, which is the problem. Sheesh…
Hey Nick, this is AMAZING! I did not know how to do that, so thanks!! Now I will have to watch all the GIMP tutorials!
Quick question (hope there is a quick answer). I have artwork I did using graph paper, because I am learning a new style (manga), and I needed the squares for proportions. I happened to make a decent drawing, and I want to share it, but the lines are painful to look at. Is there an easy way to eliminate them with GIMP? They are the typical blue lines, like notebook paper, and I can identify them easily, but there is colored pencil over them, and it is not totally transparent. If you have something already, point me to it, please!