How To Batch Export Multiple Files with Affinity Designer
How To Batch Export Multiple Files with Affinity Designer https://logosbynick.com/wp-content/uploads/2020/06/batch-export-affinity.png 800 470 Nick Saporito https://secure.gravatar.com/avatar/8e31bf392f0ba8850f29a1a2e833cdd020909bfd44613c7e222072c40e031c34?s=96&d=mm&r=gIn this tutorial I’ll be demonstrating how to batch export multiple files at once, in a variety of different formats, using Affinity Designer’s Batch Persona.
This is a feature Illustrator has that I’ve always enjoyed using, and it’s great for when you’re finalizing a logo design and need to generate a variety of different formats and color variations. Normally, you would have to save/export each of those files one-by-one, but a batch export feature allows you to get it all done in one shot.
How To Batch Export with Affinity Designer
The following is a brief overview of the steps taken to batch export files with Affinity Designer. For complete step-by-step instructions, please refer to the video tutorial below:
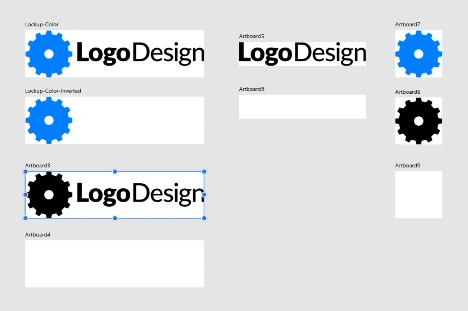
For this demonstration, I’ll be using the following logo design example…
![]()
This logo design breaks down into 3 different formats…
- Full lockup (icon + name)
- Wordmark (just the name)
- Iconic mark (just the icon)
There’s also color variations for each of the 3, so that the designs can be used on light backgrounds, dark background, and monotone black & white.
We’ll need to export a variety of formats for each and every one of these. You can check out my post on preparing logo files for clients if you’d like to learn more about why we generate these variations and which formats are best to use.
The process breaks down as follows…
- Step 1: Create artboards for each item you’d like to export
- Step 2: Name your artboards
- Step 3: Choose the file types you’d like to export
- Step 4: Export your files to your chosen location
Step 1: Create Artboards
The first thing we’ll do is grab the Artboards tool in Affinity and use it to manually create artboards for each of the items we’d like to export.
Simply grab the Artboards tool, click on one of the objects (make sure that each logo variation is grouped together,) then select Selection from the drop down menu in the tools settings.
All you have to do now is press the Insert Artboard button and an artboard will be inserted around your object. Go ahead and repeat this process for each object you’d like to export.
Artboards are like individual documents that you can create within a single document. Each artboard will be exported separately as its own document.
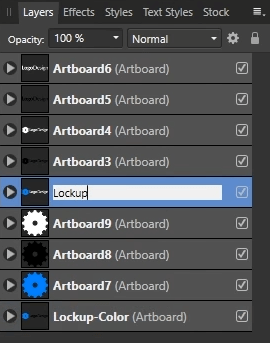
Step 2: Name Your Artboards
The name of your artboard will determine the name of the file that is exported, so you’ll want to change the name of each artboard accordingly.
To do so, navigate to the Layers menu in Affinity Designer. You can simply change the name of each artboard there. Just double-click the name/label and you will be prompted to change the text.
Step 3: Select File Types
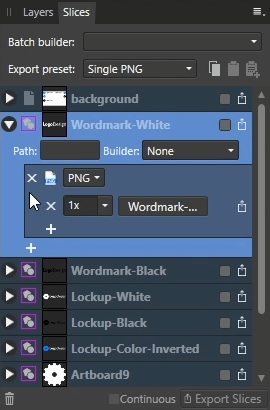
Now it’s time to navigate to Affinity’s Batch Export Persona. Once you’re there, look for the Layers menu and click on the Slices tab. This is where you will choose the file types to be exported along with the export location.
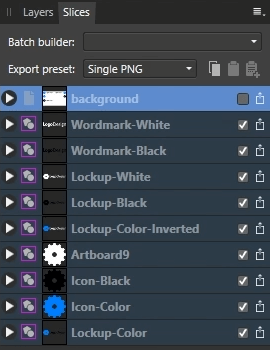
Choose a layer and expand it. You’ll be prompted to add or remove whatever file types you’d like to be exported by simply clicking the plus icon.
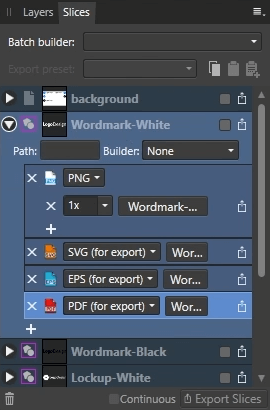
For this demonstration, I’ll be exporting the following file types…
- PNG
- EPS
- SVG
You can export whatever formats you’d like though. Here’s how the menu looks once you’ve chosen your file types…
Once finished, this will only be applied to the single object/layer that you have selected. You’ll want to export these file types for every other object as well, but manually adding them in would be tedious and time consuming. Thankfully Affinity Designer allows us to copy these presets and paste them into every other layer.
Simply click the button that says “Copy export format to clipboard” at the top of the menu, then click on the next layer and click the button next to it that says “Replace export format from clipboard.” Go through and do this for each object/layer.
Step 4: Export Your Files
Once you have your file types ready to go, all you have to do now is check the boxes of whatever objects you’d like to export. You may want to export certain groupings of objects into different folders, so only select the objects you’d like to export to your first folder. Otherwise if you want to put everything in one folder then you can just export everything all at once.
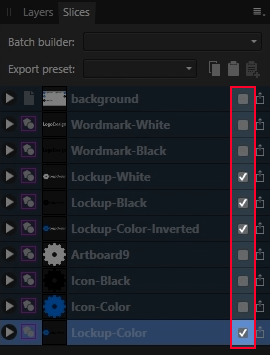
Once you’re ready, click the Export Slices button at the bottom of the menu. You’ll be prompted to choose an export folder.
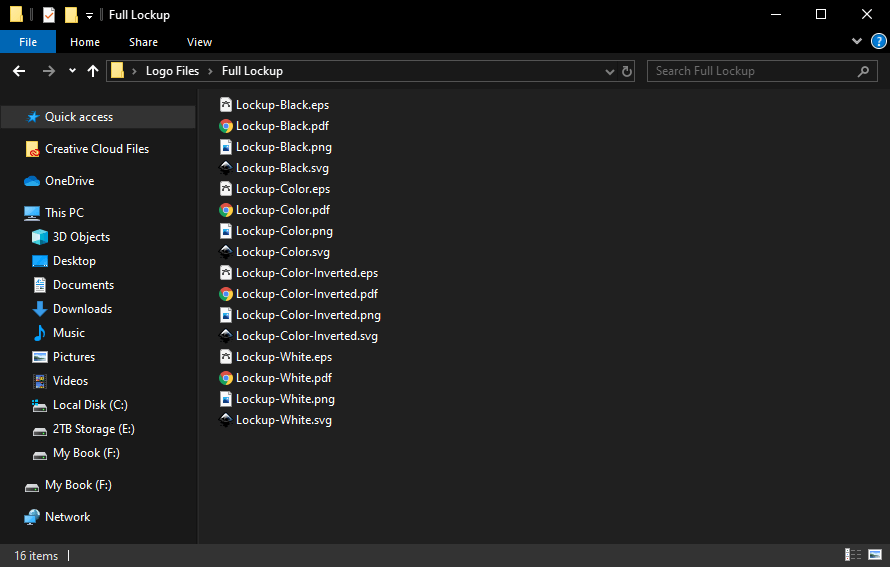
And with that we are finished! That’s how you can batch export multiple files with Affinity Designer. If you want, you can now save this document in its native format (.afdesign) as a master file in case you’d like to work on it again in the future.
If you have any questions just leave a comment below. As always, thanks for watching!
Learn To Master The SoftwareGain a complete understanding of your favorite design apps with my comprehensive collection of video courses. Each course grants access to our private community where you can ask questions and get help when needed.
|
||||||||||||||||||||||||||||||||


You might also like


5 comments
-
-
-
-
Joshua
Awesome tutorial.
I have a question that will help me in making the decision of either taking the Masterclass class or taking your class on Afinity.
I want to start making images files like the ones that can be sold for use in tshirts (SVG, PNG, DXF etc.) But I don’t know if this Afinity Designer is the way to go or the Gimp using your Gimp Masterclass the way to go.
Please advise.
-
Nick Saporito
Hi Joshua, Inkscape and Affinity would both be great for creating t shirt designs because they would allow you to create scalable vector graphics. This can be done in GIMP as well, but it wouldn’t be the best tool to use for this particular job.
-
Anonymous
Great tutorial. Thank you very much!