
How To Edit A PDF In Inkscape
How To Edit A PDF In Inkscape https://logosbynick.com/wp-content/uploads/2022/02/inkscape-edit-pdf.png 800 470 Nick Saporito https://secure.gravatar.com/avatar/8e31bf392f0ba8850f29a1a2e833cdd020909bfd44613c7e222072c40e031c34?s=96&d=mm&r=gAs demonstrated many times in previous lessons, there’s no shortage of ways in which you can use Inkscape. It’s not just a tool for editing vectors. Inkscape also allows you to make common edits to photos and even alter PDF documents if needed. In this tutorial we will be going over a workflow that allows you to edit a PDF in Inkscape so that you can change text and other elements if you so desire.
Before getting started it should be noted that Inkscape is probably not the best tool for editing PDF documents. There are a few limitations that are damning — some of which we’ll be going over shortly. Something like Scribus — also a free and Open Source application — would be better suited for this task.
That said, if Inkscape is all you have at your disposal then do not worry. You can absolutely edit a PDF in Inkscape. Let’s go over how this works.
Edit A PDF In Inkscape
The following video tutorial will walk you through the entire process for editing a PDF document in Inkscape:
If you’d like to try this out for yourself then you can download the sample PDF document used in this tutorial here.
Continue on for a step-by-step rundown in written format.
Table of Contents
|
Step 1: Open your PDF document with Inkscape
The first step in our quest to edit a PDF in Inkscape is to open the file in question with Inkscape. This can be done a variety of ways.
For one, you can right-click the file and navigate to Open with and choose Inkscape if it’s available as an option. If not then you’ll have to launch Inkscape and open the file from within the application.
There’s two ways in which you can open a PDF in Inkscape. You can navigate to:
File > Open
And then locate the PDF document on your hard drive. Or you can simply use the keyboard shortcut to open a file, which is Control + O.
Step 2: Choose your desired import settings
Once you’ve located your PDF document and opened it, you should see the PDF Import Settings menu populate:
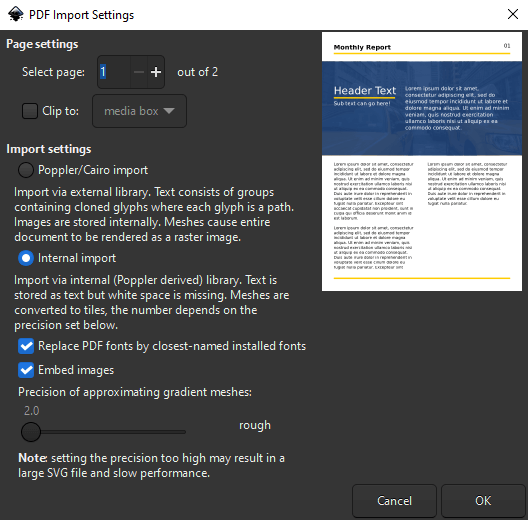
The PDF Import Settings menu in Inkscape.
Let’s go over what some of these settings do.
Page Settings
At the top of the menu you should see the Select page field. This allows you to choose which page of your PDF document you’d like to edit, assuming you’re editing a multi-page document.
My example document has 2 pages, therefore Inkscape is asking me which of the 2 pages I’d like to open. Input the numerical value of the page you’d like to edit.
Unfortunately, whenever you edit a PDF in Inkscape you can only edit a single page at a time. This means that if you need to edit multiple pages then you’ll have to open each of them in separate documents.
This is one of the reasons why Inkscape isn’t the ideal software to use for editing PDFs. This limitation can be very troublesome if you need to edit multiple pages of a book or guide, for example.
If your PDF document only has a single page then you can disregard this.
Import Settings
Under the Import Settings section of the import menu you will see two options to choose from:
- Poppler/Cairo import
- Internal import
Each of these serve different purposes. You can read the description in the menu for a technical description. However, the default is Internal import, so for this demonstration we will be leaving that as is.
Replace PDF fonts by closest-named installed fonts
This settings is relevant if your PDF document contains text.
If the text being use in the document was generated with a font that you do not have installed on your system then enabling this setting will make it so that Inkscape chooses the next closest font on your system to use as the default.
Leaving this setting disabled can produce a broken link if the document contains a font that you don’t have installed.
Embed Images
This setting, when enabled, will make it so that any images used in your PDF document will be saved internally, within the document, rather than linked to an outside source.
Leaving this setting checked will produce larger file sizes, but is generally a safer approach because the document will not rely on outside links to display imagery.
Precision of approximating gradient meshes
This setting has to do with mesh gradients.
It’s pretty rare that a PDF document contains a mesh gradient, but if it does then Inkscape will need to know how to interpret that data.
As the menu indicates, a lower value will render a less precise gradient, but produce a smaller file size. A higher value, on the other hand, will render the mesh with more precision, but produce a larger file size.
If you’re unsure what this is then you can read about Inkscape gradients here.
Once you have chosen your import settings, press the OK button to open your PDF with Inkscape.
Step 3: Edit your PDF in Inkscape
Here’s how page 1 of the sample PDF document (linked above) looks once opened in Inkscape:
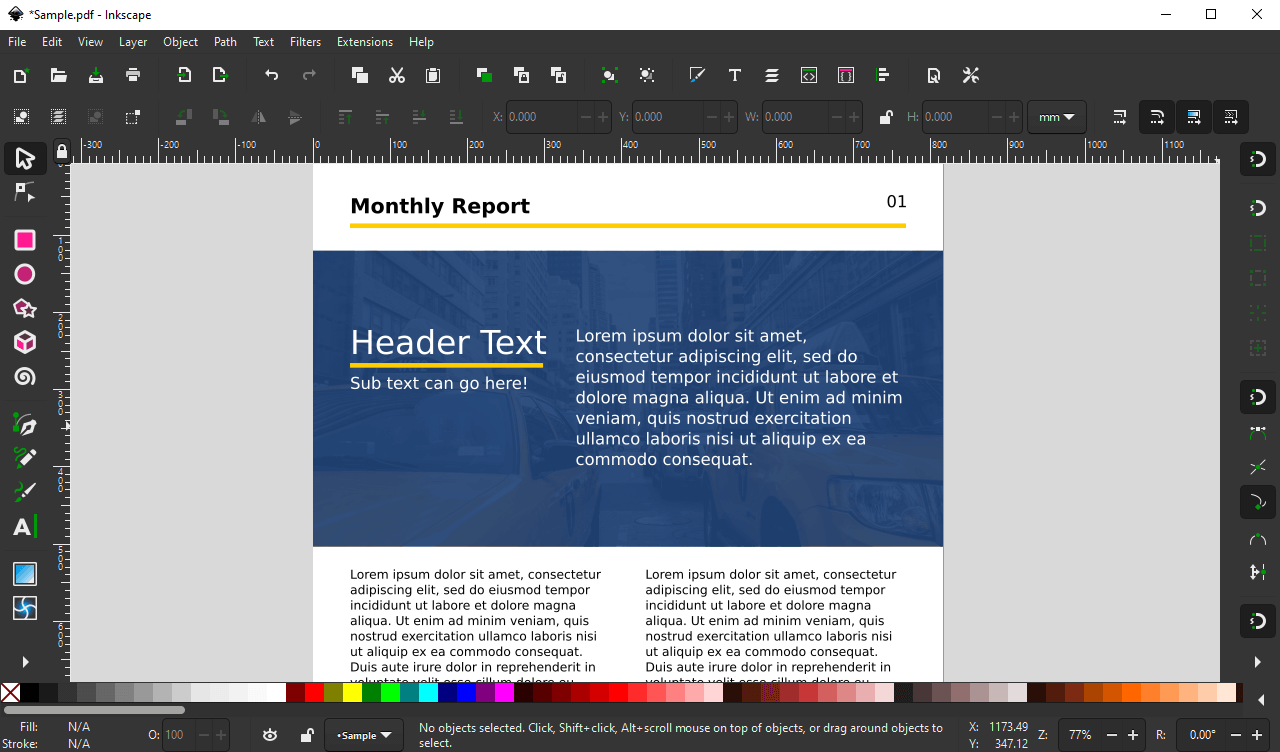
The sample PDF document, opened with Inkscape.
Much like any vector design, all of the elements of this PDF document should be editable. However, you may need to ungroup them first by selecting everything and pressing Control + Shift + G on your keyboard. You may have to do this several times if your objects are grouped several layers deep.
You can edit a PDF in Inkscape the same way you would edit any other design:
- Changing text, contents, fonts and styles
- Rearranging elements
- Adding/removing elements
- Changing colors
- Adding watermarks
- Etc.
Refer to the video tutorial above for a working demonstration of how I edited this sample PDF.
Step 4: Save your changes
Once you are finished editing your PDF in Inkscape you can save it by navigating to:
File > Save As
When prompted to choose a file type, make sure to choose PDF from the dropdown. You will then be prompted with the Portable Document Format menu:
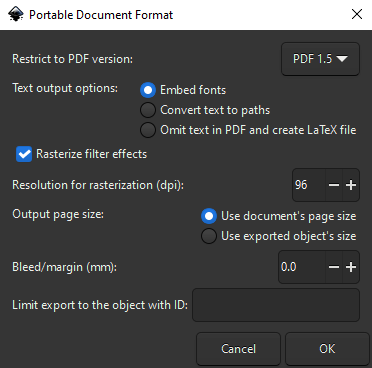
The Portable Document Format menu that populates when saving a PDF with Inkscape.
For this demonstration we are just going to leave the default settings as they are, which should be suitable for you as well most of the time. However, feel free to tweak these settings if need be.
Once you are finished press the OK button and your PDF document should be ready for use!
What About Savings Multi Page PDFs?
If you’re wondering how you can save multi page PDFs in Inkscape then unfortunately this is not possible. This is because of the nature of the SVG environment that Inkscape functions in — a format that (apparently) doesn’t lend itself well to multi-page documents.
There are workarounds, though. As I went over in this tutorial, you can save multi page documents using free third-party apps and web-based services.
Conclusion
Using Inkscape to edit a PDF may not be ideal, but it is certainly possible. If you just need to make a few simple edits to a single page document then you shouldn’t have too much of a problem. However, if you need to make edits to multiple pages of a PDF document then you would most likely be better served using an application that is built for this, such as Scribus or InDesign.
If you have any questions about anything we’ve gone over in this tutorial or need clarification on anything then simply leave a comment below.
Learn To Master The SoftwareGain a complete understanding of your favorite design apps with my comprehensive collection of video courses. Each course grants access to our private community where you can ask questions and get help when needed.
|
||||||||||||||||||||||||||||||||


