The Definitive Guide To Working With Gradients In Inkscape
The Definitive Guide To Working With Gradients In Inkscape https://logosbynick.com/wp-content/uploads/2021/10/header2-1024x640.png 1024 640 Nick Saporito https://secure.gravatar.com/avatar/8e31bf392f0ba8850f29a1a2e833cdd020909bfd44613c7e222072c40e031c34?s=96&d=mm&r=gGradients are transitions between various colors, and they’re an essential part of graphic design and digital art in general. In this tutorial we’ll be going over everything you need to know to make gradients in Inkscape; including linear, radial, mesh, and conical gradients.
In short, there’s two different tools we’ll be working with to make gradients in Inkscape — the Gradients Tool and the Mesh Tool. We’ll also be using the Fill & Stroke menu to edit the gradients further and apply color.
Types Of Gradients
In Inkscape there are four different types of gradients you can work with:
- Linear gradients: these are transitions between colors that follow a straight (or “linear”) path.
- Radial gradients: these gradients force the colors to follow a circular path.
- Mesh gradients: mesh gradients are when the colors are applied to a grid.
- Conical gradients: a gradient type where colors follow a partially circular path.
Here’s a depiction of the four different types of gradients to better illustrator how they work:
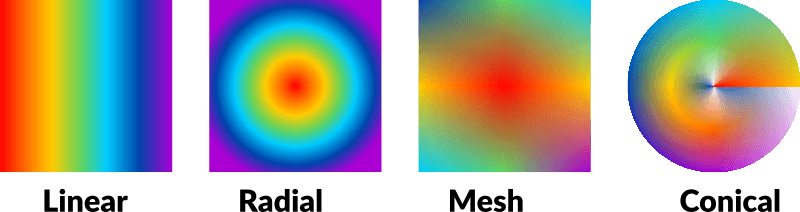
The four different types of gradients you can make in Inkscape.
In this lesson we’ll be going over how to work with each of the four in Inkscape.
Creating Gradients In Inkscape
The following video tutorial will walk you through the process of working with linear and radial gradients in Inkscape:
Continue on for a brief written overview of the lesson.
Table of Contents |
Linear Gradients
In this first part of the lesson we will be going over how to make linear gradients in Inkscape. These are the most common types of gradients you’ll likely be working with.
To make a linear gradient, select the object you’d like to apply it to and open the Fill & Stroke menu by pressing Control + Shift + F on your keyboard, or by navigating to:
Object > Fill & Stroke
The Fill & Stroke menu should populate as a dockable menu on the right-hand side of your screen.
Select the Fill tab towards the top of the menu, and look for the button that reads “Linear Gradient” if you hover your cursor over it:
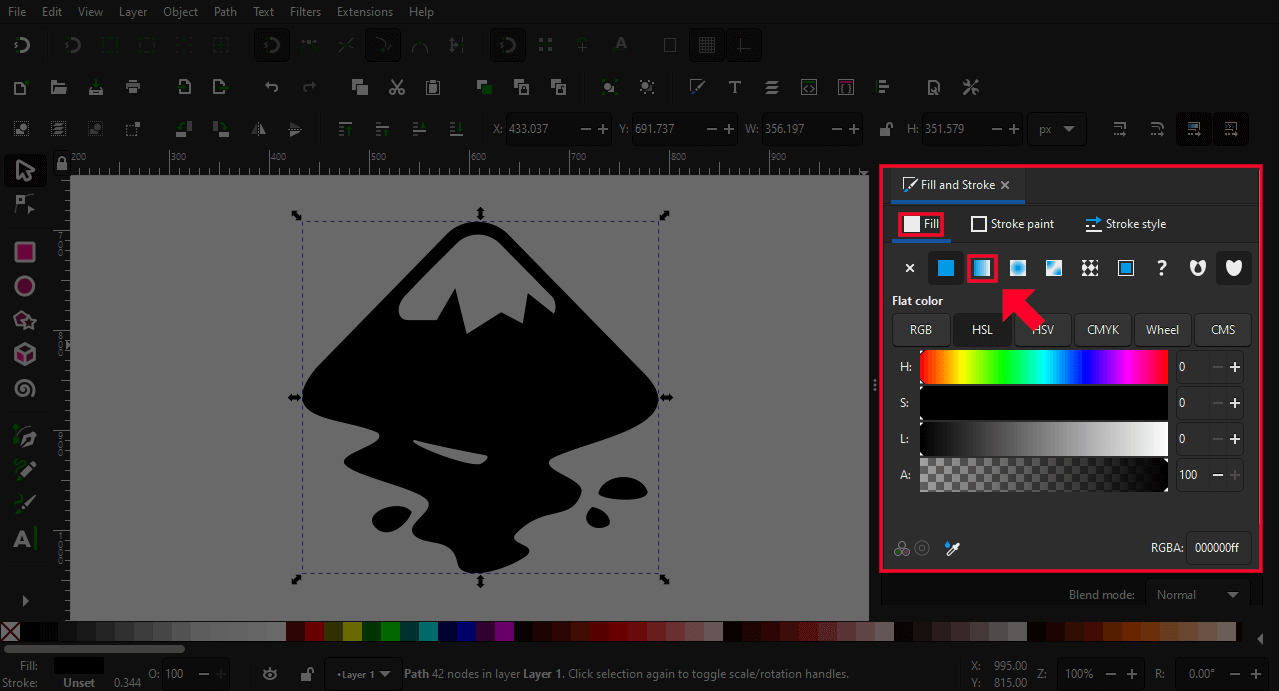
The location of the linear gradient option is outlined in red above.
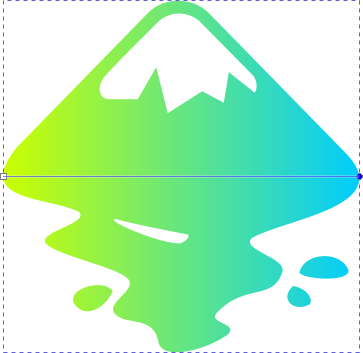
Clicking on that button will turn your object into a gradient fill where the left side of the gradient is the original color and the right side is transparent. Everything in-between is a transition between those two fills:

The gradient will have the original color on the left and transparency on the right.
Now let’s edit this gradient further by grabbing the Gradient Tool from the toolbox on the left-hand side of your screen, or by pressing G on your keyboard.
With the Gradient Tool, click on either of the nodes on the left and right sides of the gradient path to select it. Once selected, you can change its color as you would any other object. Then, you can select the other node and change its color as well:
The Gradients Tool will let you change the colors of the gradient.
If you’d like to add more colors to your gradient, you can double-click the path with the Gradient Tool to add a new node and change its color the same as you did previously:

A third color has been added to the gradient by double-clicking the path to add a new node.
Finally, you can use the Gradient Tool to click and drag the end nodes around the canvas to move your gradient:
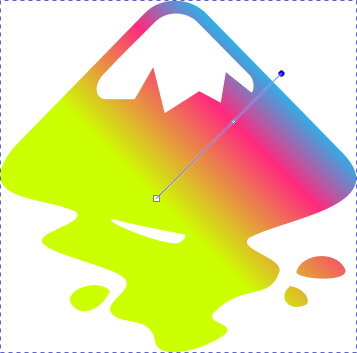
The gradient position on the canvas can be changed by simply clicking and dragging the endpoint nodes.
You can also slide the nodes between the end nodes back and forth to change the positions of the colors in the gradient.
Radial Gradients
Let’s go over the second-most common type of gradient you’ll be working with — radial.
Radial gradients function in Inkscape the same way that linear gradient do. The only difference is that the colors follow a circular path instead of a straight path.
To make radial gradients in Inkscape, follow the same process for creating linear gradients:
- Select your object and open the Fill & Stroke menu
- Select the Fill tab and click on the button that reads “Radial Gradient” when you hover your cursor over it
- Grab the Gradients Tool and click on each node of the gradient to change its color individually
The option for radial gradients is located just to the right of the linear gradient option:

The radial gradient option is located right next to the linear option.
Your radial gradient will follow a circular path. The node in the center represents the first color in the gradient, and the two nodes on the outer edges both represent the last color in the gradient:
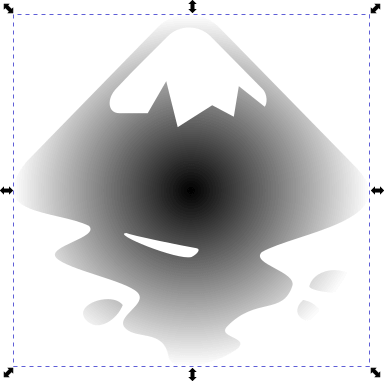
The start of the radial gradient will be the original color, in the center; and the outer color will be the second fill point.
Although they make look like separate nodes, they’re both linked and perform the same functions.
Using the Gradient Tool, as we did for our linear gradient, will allow you to do the following:
- Add more colors to the gradient by double-clicking the path
- Move the position of the gradient on the canvas by clicking and dragging the center node
- Change the radius of the gradient by clicking and dragging one of the nodes on the outer edges
Mesh Gradients
Unlike linear and radial gradients, the colors of a mesh gradient are placed on a grid rather than a path. Watch the tutorial video below to learn about mesh and conical gradients:
Having the ability to create mesh gradients is a relatively new feature in Inkscape, and it doesn’t quite follow the same processes we previously used.
To make a mesh gradient in Inkscape, select your object and grab the Meshes Tool from the toolbox:
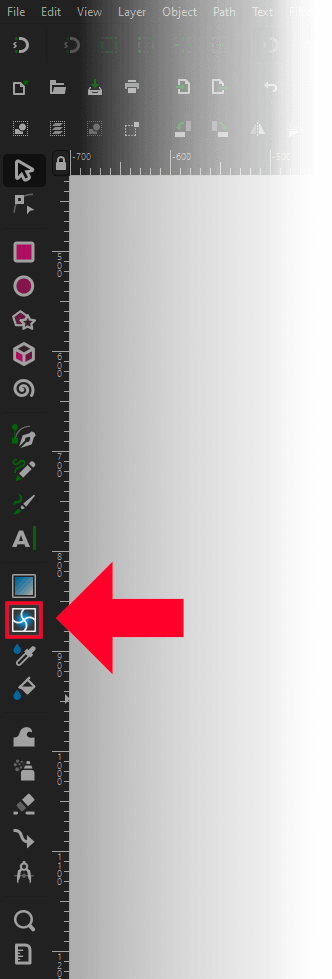
The Meshes Tool is located just beneath the Gradient Tool in the toolbox.
In the tool settings menu bar at the top of your screen you will see some options for the mesh gradient you’re about to create. We need to apply these options before creating the gradient. They are as follows:
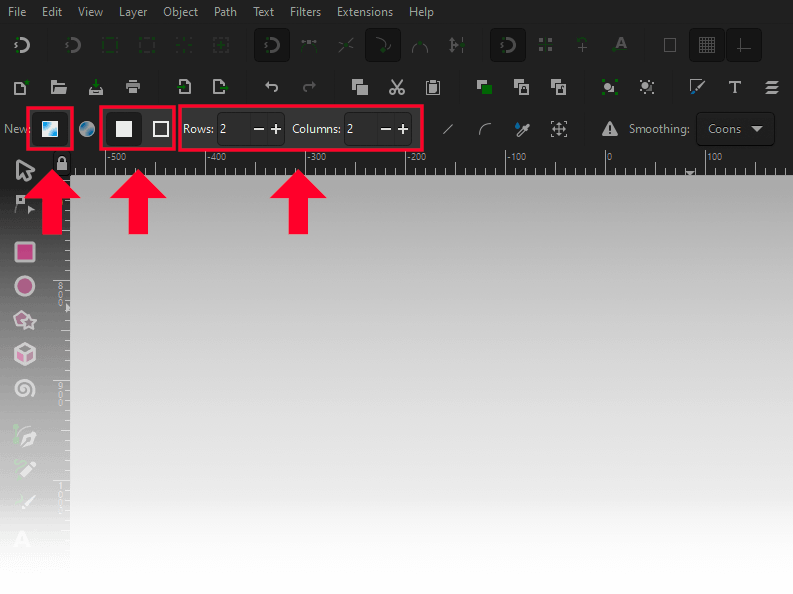
The mesh settings are located in the tool options menu towards the top of the screen.
- Select the Mesh box to make a mesh gradient instead of a conical gradient
- Select the Fill box to apply the gradient to the object’s fill and not its stroke
- Rows and Columns dictates how big the grid for your gradient will be
For this demonstration we will be using 2 rows and 2 columns, which should generate four boxes within our grid. If you want to use a larger grid with more colors then you will need more rows and columns.
Once your tool options are set, click and drag across your object with the Meshes Tool to apply your gradient:
You can now click on each of the nodes in the grid individually to change the gradient colors:
The colors of a mesh gradient follow a square grid.
You can also click and drag any of the nodes in the grid to change its position in the gradient.
Conical Gradients
Much like radial gradients, conical gradients follow a circular path. The primary difference though is that the path they follow is partial, meaning you can have multiple different colors following the same circular path; unlike radial gradients, which force each path to only have one color.
The process for creating conical gradients in Inkscape is similar to the steps we followed for making mesh gradients:
- Select your object and grab the Meshes Tool
- In the tool settings menu towards the top of your screen, select the Conical option rather than the Mesh option
- Determine how many Rows and Columns you’d like your circular/conical grid to have
For this demonstration I will be creating a conical gradient with 3 rows and 3 columns.
With your options set, click and drag across your object to create a conical gradient:

As we did in previous steps, you can simply click on any of the nodes in the conical grid to select it and change its color:

You can also move the nodes individually by clicking and dragging them across your canvas.
And that should do it for this lesson. If you have any questions or need clarification on any of the steps taken in this lesson, simply leave a comment below.
Learn To Master The SoftwareGain a complete understanding of your favorite design apps with my comprehensive collection of video courses. Each course grants access to our private community where you can ask questions and get help when needed.
|
||||||||||||||||||||||||||||||||


You might also like


8 comments
-
-
Nick Saporito
Hi Thomas, that hard transition represents where the start and end point of the gradient is. That’s why it’s like that. So to get the same effect you’ll have to apply the colors at those locations.
-
Thomas
Thank you very much for your hint. The small arrows are almost invisible. I have now experimented a little and it works wonderfully.
-
-
-
-
Orin
Absolutely Awesome
each Gradient explained perfectly.
I did not know I could add nodes by double-clicking
This opens up more possiblilities -
-
Ali Mohamedali
Solid video Nick! Exactly what i was trying to figure out the other day and i was thinking i’ll have to search for one of your videos to learn that and then i got the email, it was magical! Thanks again for your great tutorials!
-
Thomas§
Hi Nick, thanks for the instructions on the color gradients. I have one question. How do you make the sharp color transition with the conical gradients that I saw in your examples? I haven’t been able to figure it out yet, the colors always blur for me.