How To Move Part Of An Image In Affinity Designer
How To Move Part Of An Image In Affinity Designer https://logosbynick.com/wp-content/uploads/2023/06/move-part-of-an-image.webp 1000 587 Nick Saporito https://secure.gravatar.com/avatar/8e31bf392f0ba8850f29a1a2e833cdd020909bfd44613c7e222072c40e031c34?s=96&d=mm&r=gWhen working with photos in Affinity Designer you may find yourself needing to move part of an image for any number of reasons. Thankfully there is the Pixel Persona, which provides tools that let you create selections over areas of an image. In this tutorial we’ll be going over how to use those selections to move part of your image.
In short, the quickest way to move part of an image is by creating selections and using the Cut and Paste prompts, which will place your selection on a separate layer. Let’s have a closer look.
Move Part Of An Image
The following video tutorial will walk you through the entire process step-by-step:
Continue on for the written tutorial.
Table of Contents |
Step 1: Ensure that the layer isn’t locked and Rasterize it
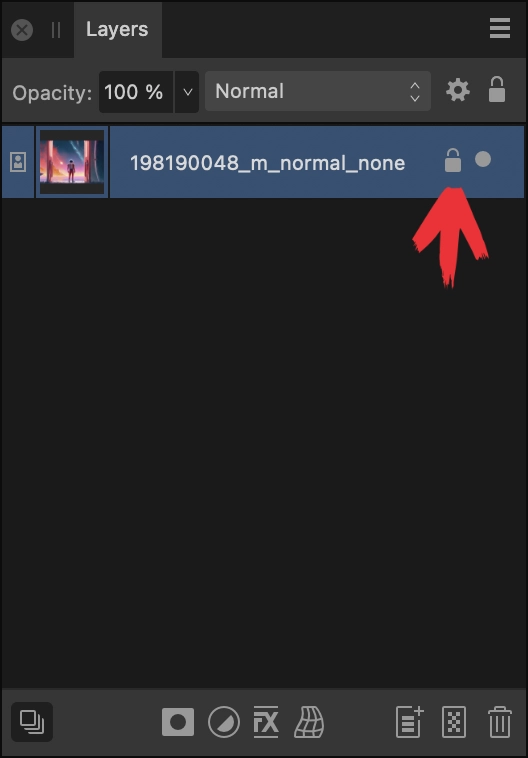
When working with images in Affinity Designer you’ll want to ensure that the image’s layer isn’t locked first. You won’t be able to edit the image if it is, and depending on how you opened the image, it may be locked by default.
Check the image’s layer to see if there’s a lock icon next to it. If so, click it to disable the lock:
Now we have to “rasterize” the image so that we can make pixel-based alterations. To do so, simply right-click the image layer and select Rasterize.
Step 2: Create a selection around your image using the Pixel Persona
Since we are working with pixel-based imagery we will have to navigate to the pixel-editing environment in Affinity Designer, which is the Pixel Persona.
Click the icon at the top-left of the screen to access the Pixel Persona. You will see the tools on the left-hand side of the screen change to pixel-based tools:
![]()
Choose one of the following tools to create a selection over a portion of your image:
- Rectangular Marquee: Allows you to create rectangular selections over your image. Ideal if you want to move a square or an entire segment of the image.
- Elliptical Marquee: Works similarly to the rectangular option only it lets you create circular and elliptical selections.
- Row Marquee: Creates selections over an entire row of the image.
- Column Marquee: Create selections over an entire column of the image.
- Freehand Selection: Allows you to manually draw a selection area. Ideal for creating a quick and simple selection.
- Selection Brush: Lets you create a selection by painting over an area with brush strokes. Ideal for making intricate selections with lots of detail.
- Flood Select: Generates selections based on similar pixels throughout the image. Ideal for separating subjects from backgrounds.
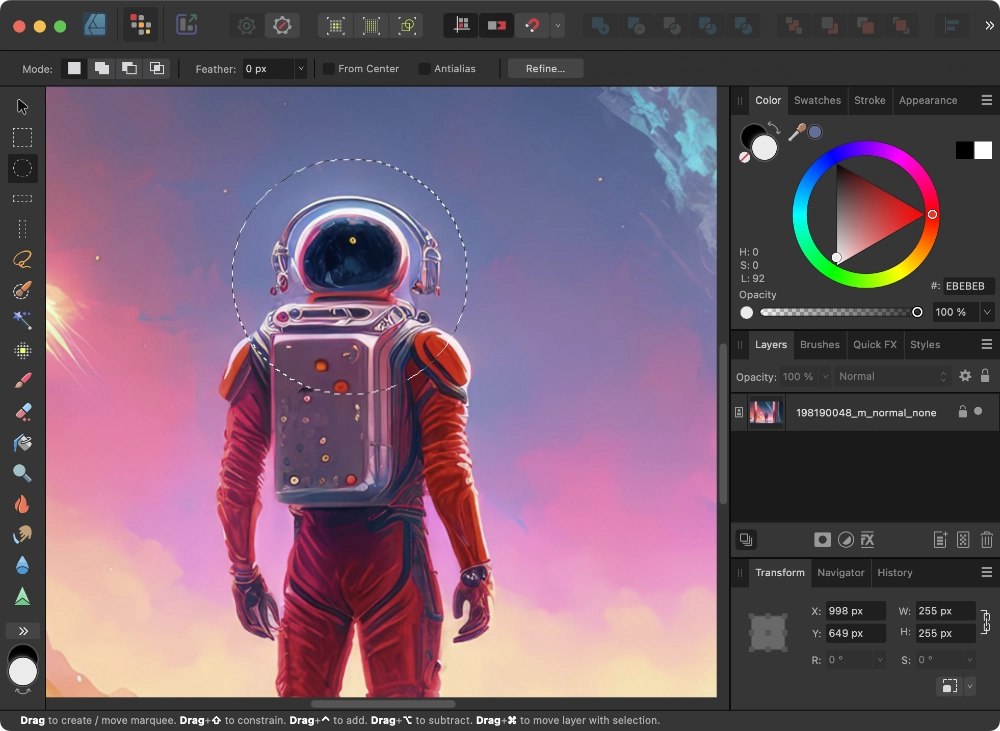
For this demonstration I used the Elliptical Marquee Tool to create a circular selection over a portion of my image:
Click to enlarge.
You will see a dotted line (also known as “marching ants”) going around the selection, which indicates its boundaries.
Step 3: Cut and paste the selection into a new layer
Once a selection is enabled we must tell Affinity Designer to separate that area of the image from the rest of it so we can continue editing it independently. To accomplish this we will be using a simple cut & paste prompt.
Navigate to:
Edit > Cut
Then, navigate to:
Edit > Paste
Finally, disable the selection by navigating to:
Select > Deselect
If followed correctly, the selection area will now be on its own layer and will be editable independent of the original image:
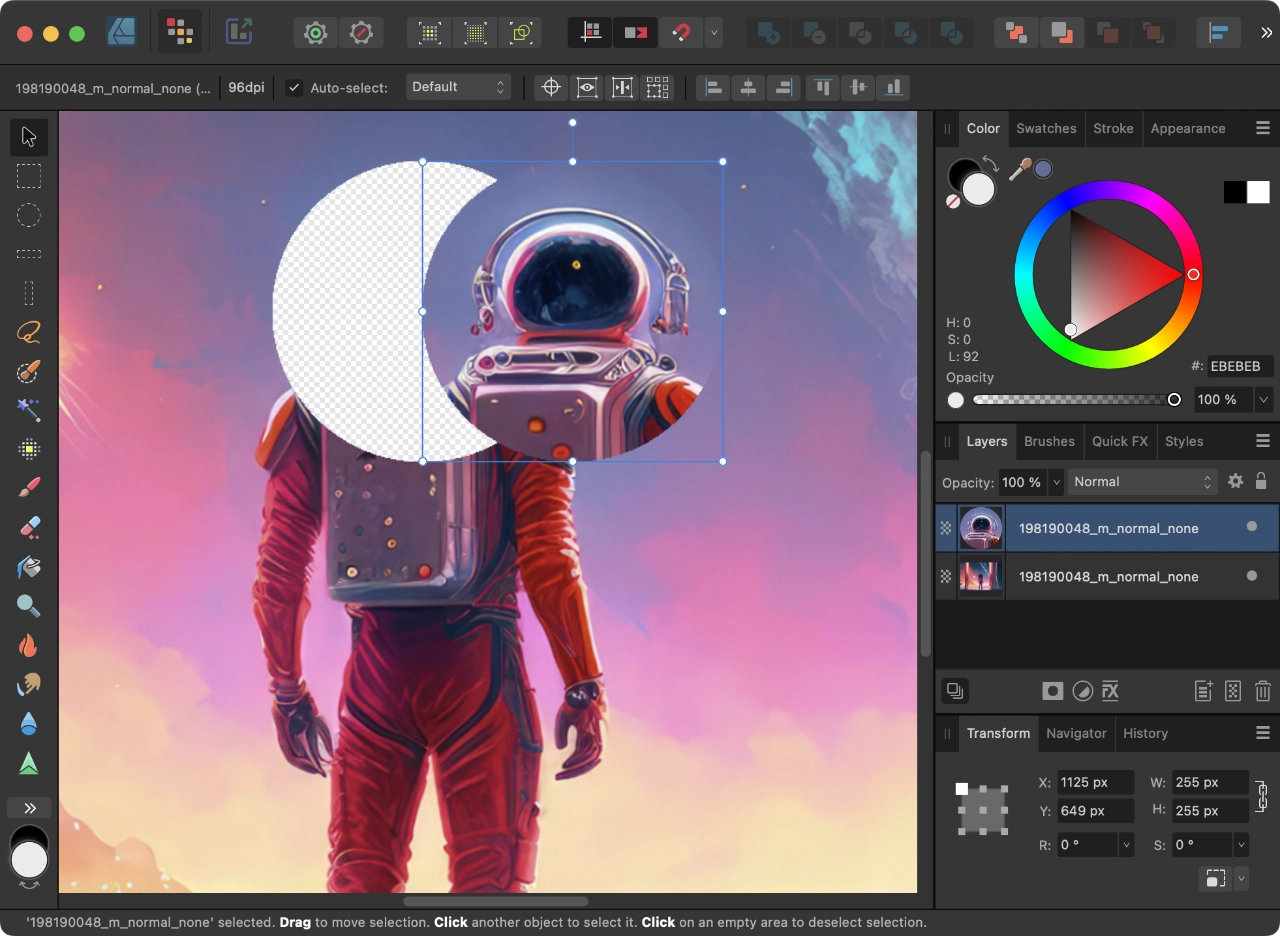
Once the selection is separated to its own layer you can use the Move Tool to move it (click to enlarge.)
Conclusion
Moving part of an image in Affinity Designer may be a bit perplexing for users of other applications as some have dedicated functions for this. One example would be GIMP with its “float” function. However, as evident in this tutorial, a simple cut and paste can sometimes be just as effective.
Learn To Master The SoftwareGain a complete understanding of your favorite design apps with my comprehensive collection of video courses. Each course grants access to our private community where you can ask questions and get help when needed.
|
||||||||||||||||||||||||||||||||


Leave a Reply