5 Easy Ways To Delete Background To Transparent with GIMP
5 Easy Ways To Delete Background To Transparent with GIMP https://logosbynick.com/wp-content/uploads/2018/07/gimp-delete-background-transparent.jpg 800 470 Nick Saporito https://secure.gravatar.com/avatar/8e31bf392f0ba8850f29a1a2e833cdd020909bfd44613c7e222072c40e031c34?s=96&d=mm&r=gIn today’s tutorial I’ll be demonstrating how you can use GIMP to delete an image’s background to transparent while leaving the subject in place.
There’s a variety of ways to accomplish this with GIMP, but I’ll be covering the main methods that are easiest to apply as a beginner. The method you should use depends on the type of image you’re working with and how comfortable you are using GIMP to delete backgrounds to transparent.
If you already know how these methods work but are having trouble with making your image delete to transparency instead of white, black, or some other layer’s properties, be sure to check my post about erasing to transparent using GIMP.
Using GIMP To Delete Background To Transparent
The following video tutorial will walk you through 5 different ways in which you can delete a background with GIMP:
Continue on for the written instructions.
The first step is to create a selection from either the subject or the background. Whatever is easiest is what you should choose. Also, be sure to check out the video tutorial at the top of the page where I demonstrate how each of these works!
Method 1: Fuzzy Select Tool
According to GIMP’s documentation, the Fuzzy Select Tool allows you to select areas of an image based on color similarity. This method works great if your image’s background has a different array of colors than the subject you’d like to crop out.
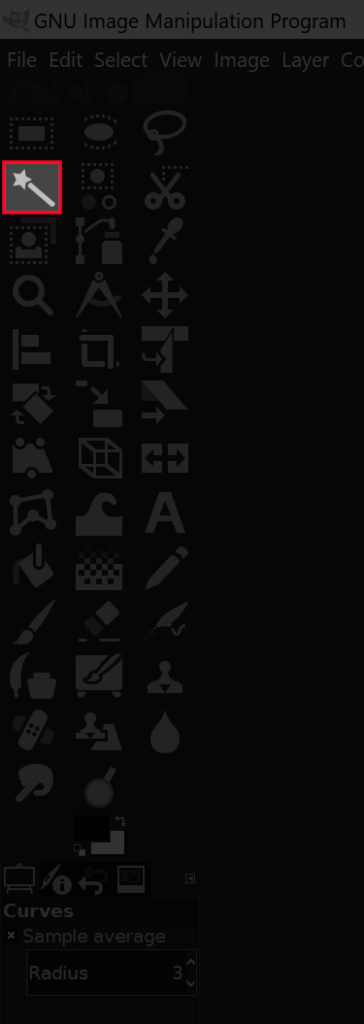
Grab the Fuzzy Select Tool by clicking on the icon highlighted in the above image, or simply press U on your keyboard.
With the tool selected, click and drag on your subject to create a selection. Drag the cursor to the right to increase the size of the selection and to the left to decrease it. You can add to your selection by holding Shift and clicking on another area, and you can remove unwanted selections by holding Control and clicking on them.
This will create a dotted outline around your subject known as a selection. If you created the selection by clicking on the background, simply press Delete on your keyboard (or go to Edit > Clear if using Mac) and you will have successfully used GIMP to delete your image’s background to transparent.

If you created the selection by clicking on your subject, you’ll only have your subject selected. Since you want to delete the background and not the subject, simply go to Select > Invert. Nothing will change visibly on the screen when you do this, but what happened is you inverted the selection so that you now have the background selected and not the foreground. Once you’ve done that, simply press Delete.
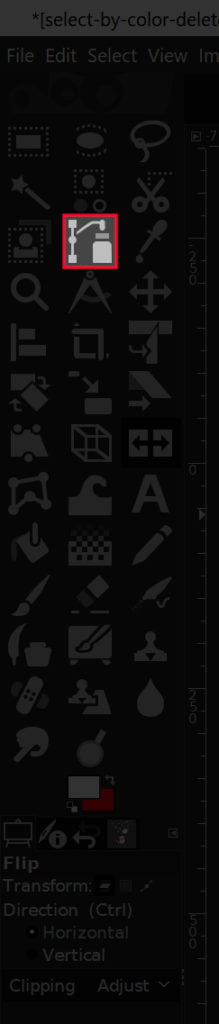
Method 2: Select By Color Tool
An even simpler method — similar to the Fuzzy Select Tool — is the Select By Color tool. Once you click on a specific pixel with this tool, it will create a selection around it and every other pixel with the same color. This tool works great if you have an image where your background consists of just a single color and maybe a few different shades of it.
Grab the Select By Color tool by clicking on the icon highlighted above, or by simply pressing Shift + O on your keyboard.

As previously mentioned, simply click on a segment of the image that contains the color you’d like to delete. You can increase the size of the selection by clicking and dragging to the right, or decrease it by clicking and dragging to the left. You can also select additional shades of the same color by holding Shift and clicking on them as well.
Once you’d created a selection from your background, press Delete on your keyboard, or go to Edit > Clear if you’re using Mac.
If it’s easier for you to create a selection from your foreground/subject instead, go ahead and do so, then just go to Select > Clear before deleting the selection.
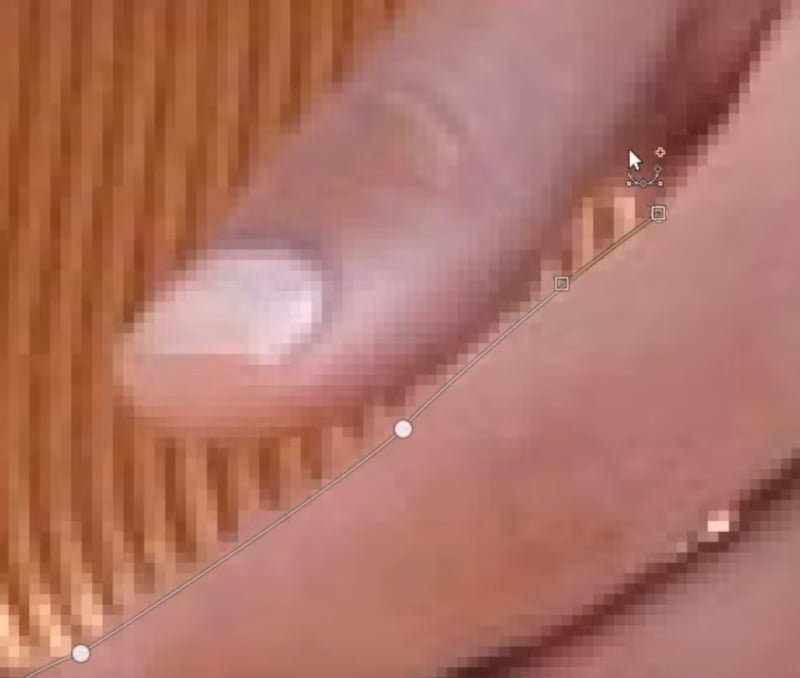
Method 3: Paths Tool
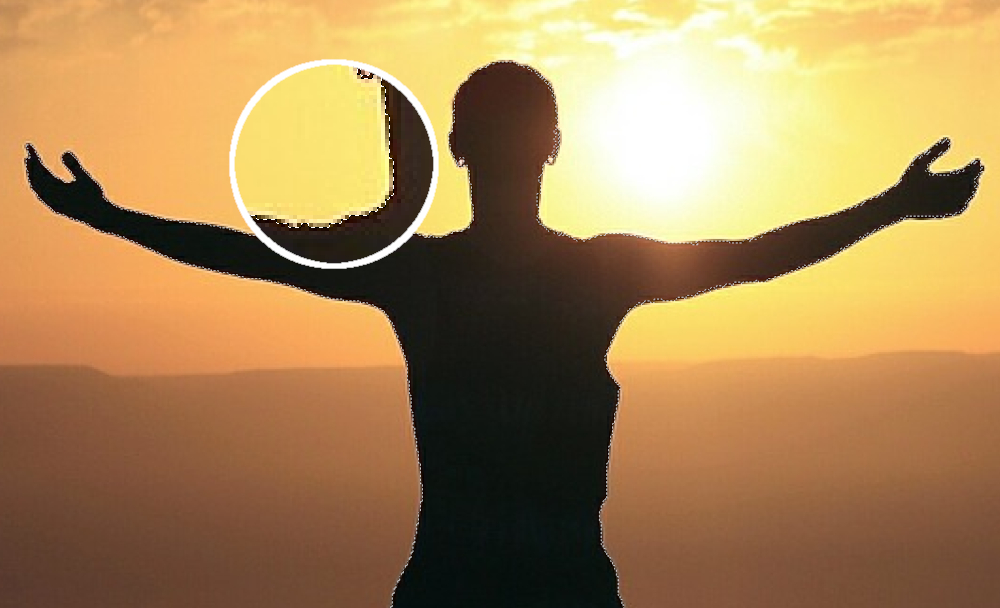
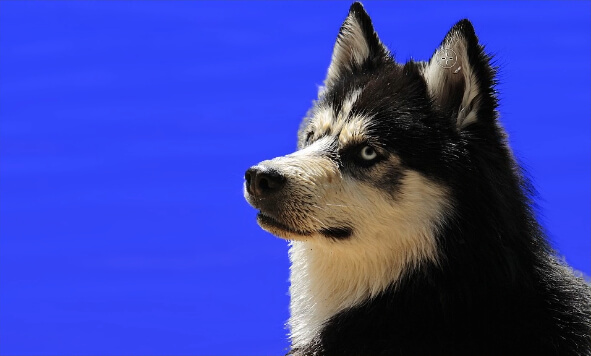
This is the method that requires the most skill and takes the most time, but it’s also the best method of using GIMP to delete background to transparent in my opinion because it produces the cleanest, most professional result. This is the method that was used to crop the bird image in the header of this post — the Paths tool.
The Paths tool allows you to create a selection by manually placing smooth lines and curves via node placement. This is the ideal method to use if there is simply not enough contrast between your image’s subject and background for the previous methods to work.
Grab the Paths tool by clicking the icon indicated above or by using the keyboard shortcut, which is B.
Since this method is far too nuanced and complicated to try explaining via written text, I’d suggest watching the following video tutorial I created a while back. The video has voice narration and step-by-step instructions that even a first-time used can follow along with.
Skip to the 3:59 point in the video for the segment about using the Paths tool to delete backgrounds to transparent using GIMP.
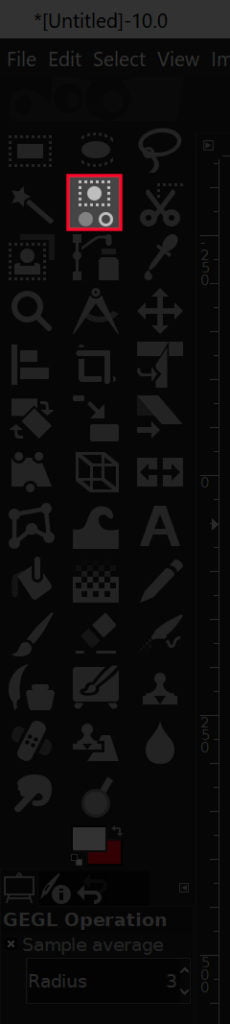
Method 4: Layer Masks
The final method I’ll be outlining isn’t necessarily a tool, but rather a series of functions. The idea behind this method is to strip down your image to black and white, then adjust the color curves to create some separation between the foreground and the background. Once that’s done, we’ll use layer masks to define the transparent areas.
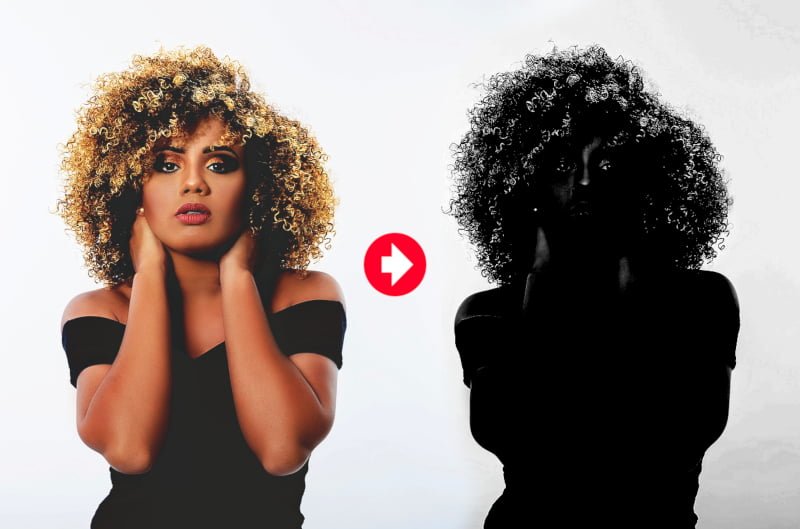
This method is ideal for cropping out subjects with fine details like fur or strands of hair. However, it’s the most complicated method of the 4 I’ve over, so it’s much easier for me to explain it via video…
Bear in mind that this method won’t work for all images. There has to be some degree of contrast between your subject and the background.
Method 5: Foreground Select Tool
The final method that I’ll be going over is the Foreground Select tool. This method would also be a good choice if your subject has a lot of fine details, like strands of hair.
To get started, grab the Foreground Select tool and manually draw a rough outline around your subject. Don’t worry about it being precise, this is just meant to be a very rudimentary tracing. This will create a dark blue area over your background and a light blue area over your foreground.

What you can do now is manually brush in the areas of your subject, making sure not to get too close to the boundaries. You can increase and decrease the size of your brush by using your left and right bracket keys. Again, don’t worry too much about this being a precise tracing. This can be a simple, rudimentary outline.
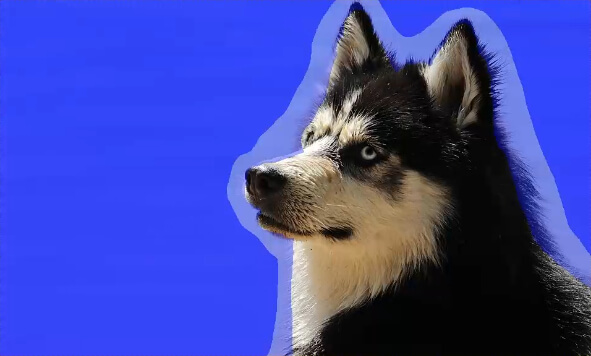
Once you’re finished, you can toggle the preview setting to see how it looks.
If you’re happy with how it looks, press Enter on the keyboard to convert it into a selection. Then, invert the selection by going to Select > Invert, and then press Delete on your keyboard to remove the background.

And that should do it for this tutorial about deleting backgrounds to transparent with GIMP! If you have any questions just leave a comment below. As always, thanks for watching!
Learn To Master The SoftwareGain a complete understanding of your favorite design apps with my comprehensive collection of video courses. Each course grants access to our private community where you can ask questions and get help when needed.
|
||||||||||||||||||||||||||||||||


You might also like


30 comments
-
-
Sabrina
I have been working on the select foreground method, but every time I try to put the image with no BG onto my background, there is a white line around the whole thing. I can’t find anything on removing the white line or where it even came from. I’ve been working on this for DAYS. Can you help?
-
-
Jaimee
um. it keeps deleting to white. i already knew how to do all this. this just tells how to use color selection tools, not how to make it transparent instead of white. kinda useless. thanks though i guess.
-
Nick
It’s because your layer doesn’t have an alpha channel. You have to right-click your layer and select “Add alpha channel”
-
-
-
Lucie
I am 81, female. My sister and I are taking up a laser class at Makerspace to learn how to make wood cutouts. I don’t have a website per say. I am posting images to my blog for review. Image of doll using 1st message and image of baby buggy using 2nd method (could not get full background to clear)?
-
-
John L Evans
your videos are great thanks for all your work on this. I try the color selection option and it clears perfectly but when I export it it is still there. I did as a png like recommended.
-
Anonymous
It just keeps changing the color to whatever I have as my background color. Doesn’t change it to transparent.
-
Nick
Sounds like you need to add an alpha channel. Right-click the layer you’re deleting the background from and select “Add alpha channel.” Make sure there’s nothing else beneath your layer.
-
-
-
u
Hello, Thanks for the information.
I’ve tried the first two methods here, and the background does indeed become transparent after I’ve performed the steps. Then when I save it, it reverts back to having a full white background – which I’ve tried sticking on another image, and it is certainly one big white square covering everything in it’s path.
Any ideas?
I can try the slower methods next, but the background border is simple, so the quick methods should be fine.Cheers.
-
Nick Saporito
It has to be exported as a .png file. Other formats like JPG don’t support transparency.
-
-
Christine Parker
What boxes need to be checked or unchecked when exporting? IE how do I save the transparent background now that I’ve achieved it? I export as png and leave everything checked as is and the background is not transparent but has a light blue tinge to it? Hope you are still able to answer this as it’s been a long while since your last comment/reply.
Thank you for your videos-
Nick Saporito
If the background has a light blue tinge then that means it wasn’t fully deleted to transparency. Try selecting by color and getting rid of it.
-
-
Nita
I am looking for a simple way to make the background pure white. I sell small objects online. My photos are up close but no matter what light I use I end up with a grayish white background with shadows. I saw one tutorial where they used eraser or a paintbrush to erase the shadows on photo but when I try nothing happens or worse yet when using the paintbrush I end up with gray lines wherever I draw. I do have the opacity set to 100%.
I have at times managed to get the background in a pattern that I think is called transparent but is that the final step? How do I get it to appear white before exporting-
Nick Saporito
Hi Nita, you could add a new layer and fill it with white, then position it beneath everything else as the bottom layer. Or you can right-click your layer and go to “Remove alpha channel”. This will make it so that the eraser erases to white instead of transparency.
-
-
-
Rachel Macam
Nick your tutorials are amazing! Thank you so much for all the hard work and detail you put into your posts.
-
-
Sean Hyland
Kept deleting to grey for me. The way I got it work was by creating a transparent layer (Layer>New Layer) which I then rearranged as the bottom layer (below my image layer), and then deleted the white background with my image layer selected. Might want to update the article with that info.
-
Mark
Didn’t work. The area I want to delete is highlighted after using the fuzzy select tool, but hitting delete or edit-clear doesn’t work. It just doesn’t do anything, just shows that the areas are still selected. Frustrating!
-
-
Anonymous
I am having this exact same problem. I just have one layer so no chance of the wrong layer being selected. I am on a mac.
-
-
-
-
Derek
Hello: First I want to say a special THANK YOU for taking the time to create and publish this article for the FREE benefit of the general public. It took me several hours overall to digest it so I can’t imagine how long it took you to create, edit and publish it. Thank You!!!
I had a few problems getting to the final result. Some of what you did didn’t work for me.
First was your image showed up as a Pasted Layer whereas mine showed up with the filename dot jpg. It took me a while to duplicate that one. I had to copy my image and “Paste” it into a new window (Ctrl+Shift+V) as a new one. That got me the pasted layer in the layers dialog box. Don’t know if that had any significance or not but it wouldn’t work properly until I did that.
Next I got to the Edit/Paste part … no matter what I did I got the “Floating Section” as Pasted Layer copy #2 and it was 2nd from the top whereas yours was at the top of the layers list and was Pasted Layer Copy #1.
After that nothing worked. I got a FULLY transparent image when I did the Color / Invert.
Eventually I juggled things to get to where you were.
Next in the Colors/Curves I had to move the lower left corner node almost to the top – NOT to the right.
Anyway, thought I’d pass that on to you as much for the benefit of others as to see if you had any comments.
Thanks again for you taking your time to share. Derek. -
Nancy Cooper
Hi – I have successfully dropped the white background from my logo and rid some of the type with trapped white space. But so many of the features I try to use in adjusting our logo are coming across with the X and circle around it – the ghostbusters symbol that it is not available. For example, I have a few pixels I would like to clone white or turn white, but none of the tools will let me. I would appreciate your help with this. I can send you the file, etc. written on 1-30-19
-
PMae
Thank you so very much for mentioning that Mac users can’t use the delete key. I wasted hours today wondering why no transparency tutorials would work for me. (I also needed to convert my jpg to a png.) On the flip side, I discovered a super fast way to invoke transparency after a selection has been made (and inverted if need be) – I just went to Color/Invert and my transparency was done. Yay!
-
Roberto
Just my humble opinion:
You really know a lot about what you have shown and written about this subject. to all of us. Thank you very much.