How To Create Vector Textures Using Inkscape
How To Create Vector Textures Using Inkscape https://logosbynick.com/wp-content/uploads/2019/08/vector-textures-inkscape-1024x602.png 1024 602 Nick Saporito https://secure.gravatar.com/avatar/8e31bf392f0ba8850f29a1a2e833cdd020909bfd44613c7e222072c40e031c34?s=96&d=mm&r=gIn today’s tutorial I’ll be demonstrating how you can use Inkscape to create vector textures to apply to your designs. This will be a little different than other tutorials I’ve done where I demonstrate how to mask a rasterized image on top of an object. Instead, we’ll be producing true vector textures with nodes that you can alter the same way you would any other vector graphic.
The following is just a brief overview of the steps taken to create these textures. For complete step-by-step instructions with voice narration, please watch the video tutorial at the top of the page.
How To Create Vector Textures
The first step is to grab a photograph or raster texture that you’d like to vectorize. For this tutorial I’ll be using the following image of a piece of wood.
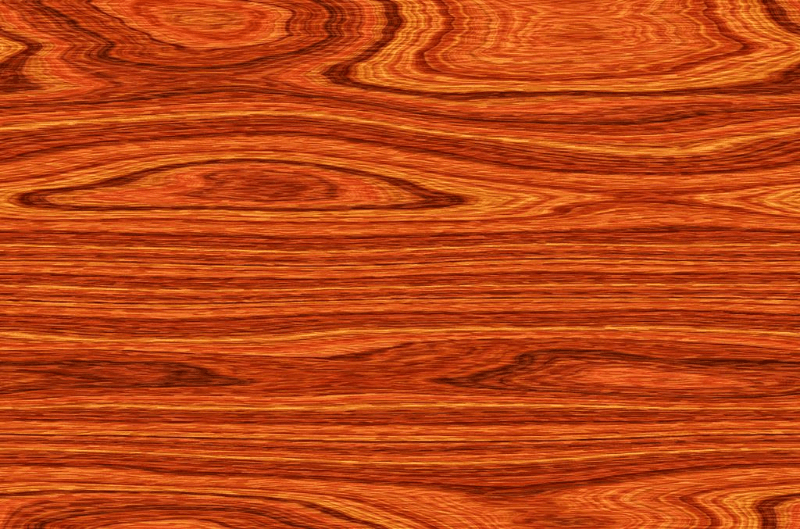
I would recommend checking out Pixabay for free texture images.
Go ahead and paste your texture image into Inkscape, select it with the Select tool, then go to Path > Trace Bitmap. The Trace Bitmap menu should appear.
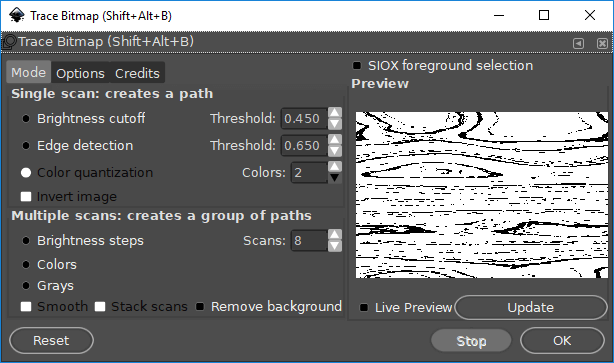
In the Trace Bitmap menu we’ll be focusing our attention to the Single Scan area. You’ll notice there’s three different tracing methods: brightness cutoff, edge detection, and color quantization. You’ll also notice an invert option in case you’d like to create an inverted tracing of your photo.
On the right side of the menu you’ll see a preview of what will be generated. The white areas represent transparency, or negative space, and the black areas represent the vector tracing that will be created.
Go ahead and cycle through each of the the three tracing methods and click Update to preview the tracing that will be created. The best option to use will be determined by the composition of whatever photo you’re using, so the only way to know is to try it out yourself and see how it looks. Once you’re happy with the preview, go ahead and click OK to generate your tracing.
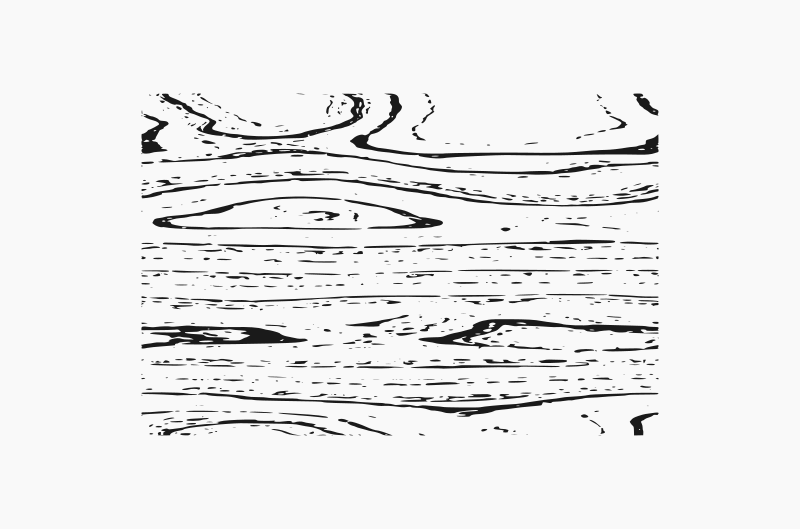
The result will be a true vector graphic that you can use in all of the ways that you’d use any other vector graphic. You can change the colors, apply path function, and even alter the individual nodes with the Nodes tool.
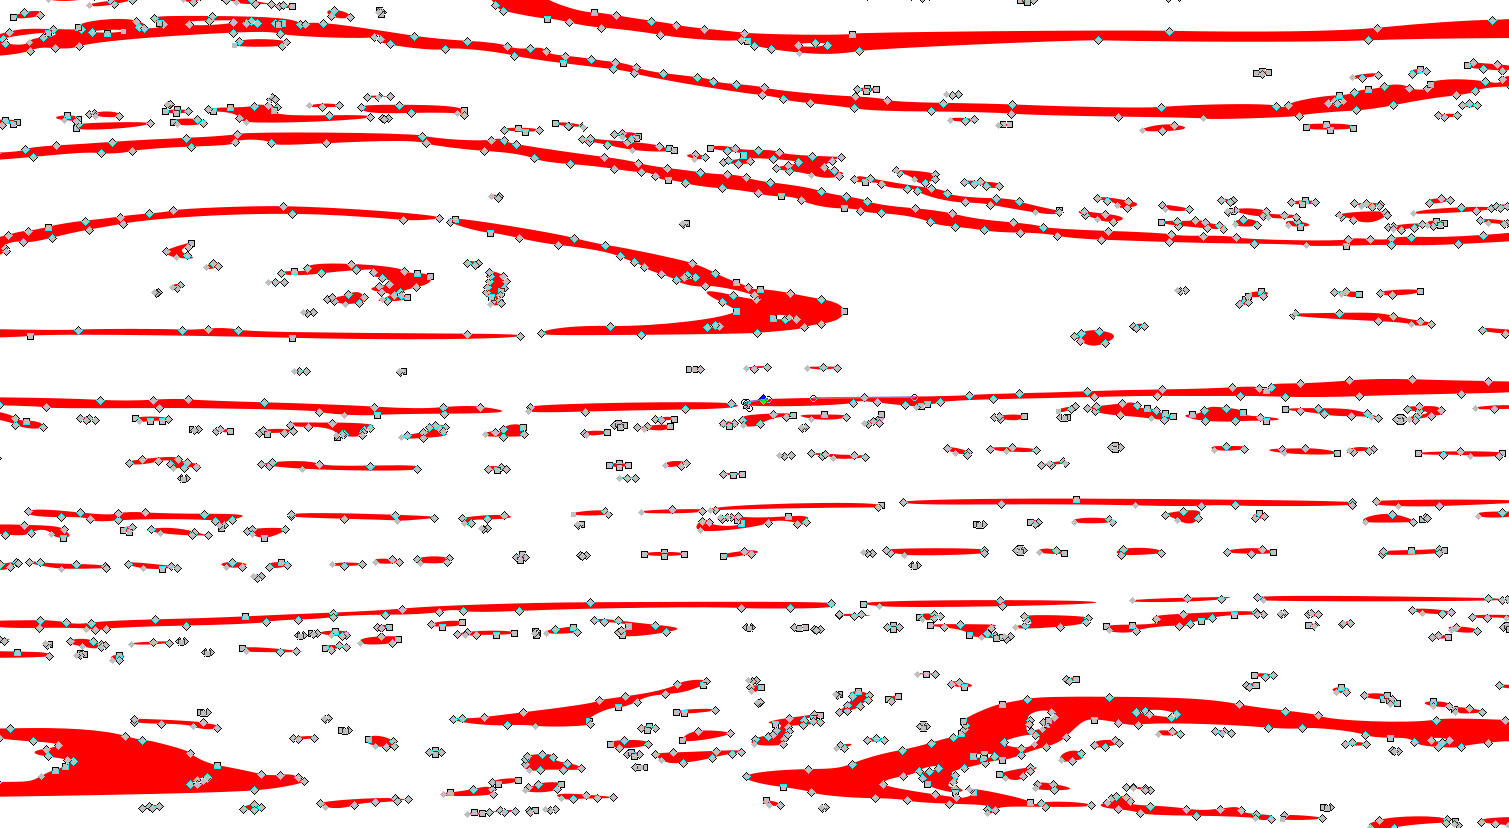
One way that I always love to use vector textures is applying them to text using the Path > Difference path function.

If you want to learn more about path functions and how Trace Bitmap works in Inkscape, be sure to check out The Inkscape Master Class — a collection of over 50 videos where I go over every single tool and feature in Inkscape and explain what it is and demonstrate how it works!
If you have any questions simply leave a comment below. As always, thanks for watching!
Learn To Master The SoftwareGain a complete understanding of your favorite design apps with my comprehensive collection of video courses. Each course grants access to our private community where you can ask questions and get help when needed.
|
||||||||||||||||||||||||||||||||


