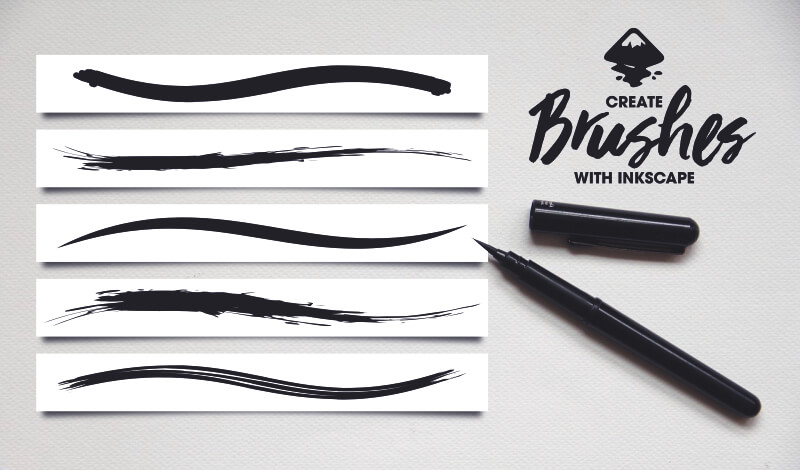
How To Create Custom Brushes in Inkscape
How To Create Custom Brushes in Inkscape https://logosbynick.com/wp-content/uploads/2020/05/inkscape-custom-brushes.jpg 800 470 Nick Saporito https://secure.gravatar.com/avatar/8e31bf392f0ba8850f29a1a2e833cdd020909bfd44613c7e222072c40e031c34?s=96&d=mm&r=gFor those of you who are freehand artists and illustrators, you may find yourselves working with brush strokes and pen tools more frequently than someone like me who does logos and branding. Sometimes the default options just won’t do though, so in this tutorial I’ll be demonstrating how to create custom brushes in Inkscape and use them in your work.
The following is a written overview of the steps taken to create your own brushes. For a more in-depth lesson with step-by-step instructions, be sure to check out the video tutorial below:
Create Custom Brushes in Inkscape
Believe it or not, Inkscape doesn’t have an actual brushes feature. However, you can do something similar by copying shapes to your clipboard and using the Draw Freehand Lines tool (which I’ll be referring to as the Pencil tool for the rest of this tutorial) to stretch those shapes along a path, which is pretty much exactly how brushes work in other applications.
To create custom brushes in Inkscape, grab the Pencil tool by pressing P on your keyboard, and where it says Shape make sure to select From Clipboard from the drop down menu.
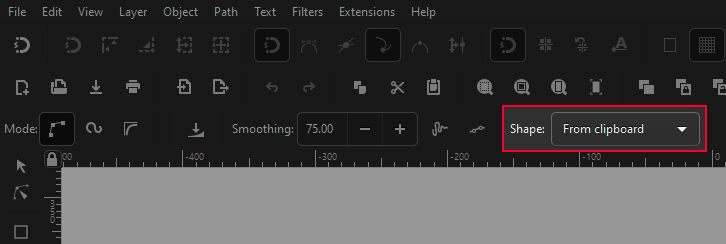
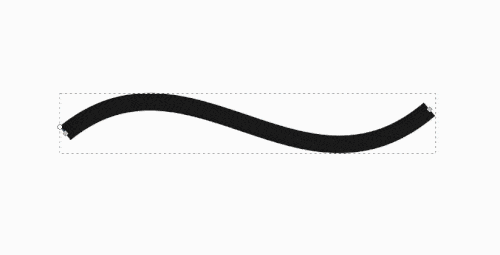
With this setting enabled, it will allow you to draw with whatever shape you’ve copied to your clipboard. You can see what I mean in the example below where I made a square and used it as a brush.
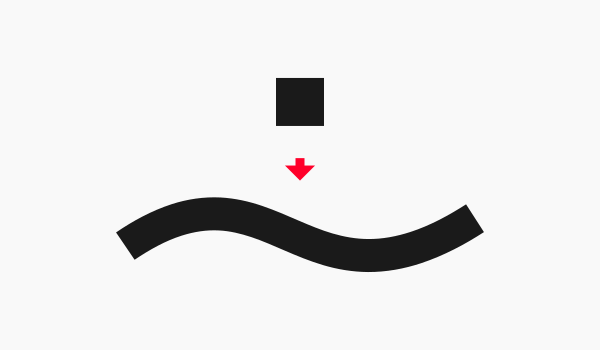
As you can see, it basically took the square and stretch it out along the path that I manually drew with the Pencil tool.
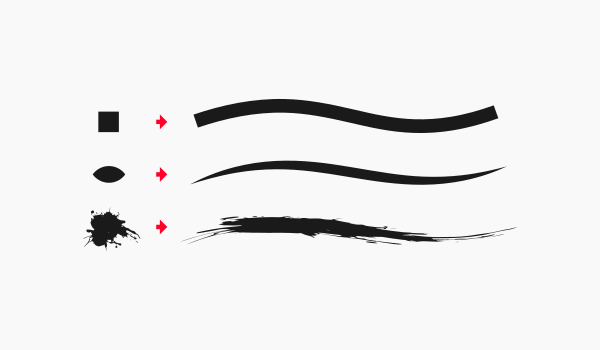
This works the same way with any other shapes you may have copied to your clipboard, and as you could imagine, it’s easy to let your creativity run wild.
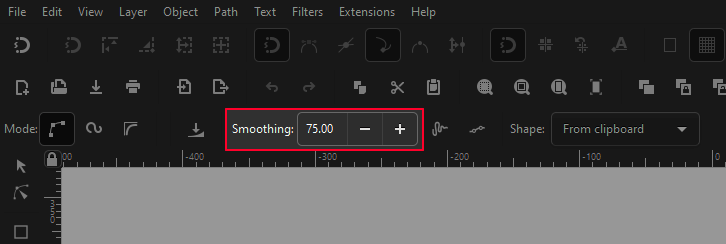
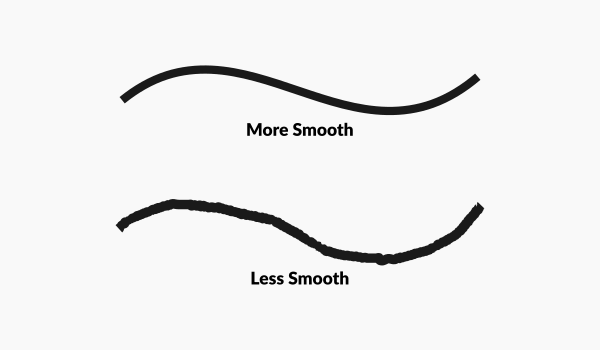
One thing you may want to pay attention to is Smoothing in the tool settings.
Lower smoothing means that the line you draw won’t be as smooth because it will be following your hand’s motion more precisely. Higher smoothing means the line will be much more fluid, but it’ll be more difficult to control because it won’t be following your hand’s motion as accurately.
Finally, at any point you can adjust the weight or thickness of your brush stroke by grabbing the Edit Paths By Nodes tool (keyboard shortcut: n) and adjusting the little circle node at the left edge of the design.
And that is how you can create custom brushes in Inkscape! If you have any questions then leave a comment below. As always, thanks for watching!
Learn To Master The SoftwareGain a complete understanding of your favorite design apps with my comprehensive collection of video courses. Each course grants access to our private community where you can ask questions and get help when needed.
|
||||||||||||||||||||||||||||||||


Is the a way to say this so you can just grab it in a brush set,instead of re creating it over and over ?
Not directly. You could save it as an SVG file though and import it when needed.
Hey. Nick I’m not able purchase the 3courses bundle from the logosbynick academy teachables through PayPal, it’s says something went , checkout again. I have tried multiple times but nothing happened.
Sorry for the trouble. Could you try another payment method? If not then send me an email and I’ll arrange to get you enrolled directly and bypassing the checkout process: nick@logosbynick.com