Color Match In Procreate By Holding A Tap Over The Image
Color Match In Procreate By Holding A Tap Over The Image https://logosbynick.com/wp-content/uploads/2022/02/color-match-procreate.png 800 470 Nick Saporito https://secure.gravatar.com/avatar/8e31bf392f0ba8850f29a1a2e833cdd020909bfd44613c7e222072c40e031c34?s=96&d=mm&r=gWhen working with images and paintings in Procreate for the iPad, you may be wondering if there’s a way to sample color from somewhere in your image so that you can paint and draw with it elsewhere. Well, you’re in luck, because the solution to this is simpler than you thing. All you have to do to color match in Procreate is simply hold a tap over the area of the image you’d like to sample color from.
That’s literally all it takes to color match in Procreate! You can stop reading now and you will know everything you need to know to start working with the colors in your composition. However, continue on for a more comprehensive explanation of how this works, as well as some handy tips to make your workflow more efficient.
How To Color Match In Procreate
That’s not all there is to color matching, though. There’s actually another way to select colors from your images as well, and it may be an easier method depending on how you prefer to work.
The following video tutorial will walk you through a demonstration of both color matching methods:
Continue on for the written tutorial.
Table of Contents
|
In standard graphic design software, color matching is usually done using a dropper or color picker tool of some sort. Procreate doesn’t exactly have a dedicated tool for this, and the reason why is because there doesn’t need to be one. This can be done with a simple hand gesture or by using the interface controls.
Let’s have a look at each method.
Method 1: Color match by holding a tap
The first way in which you can color match in Procreate is by using your index finger to hold a tap over the area of your image that you’d like to sample color from.
When done correctly, a ring should populate on your screen where the cursor is located:
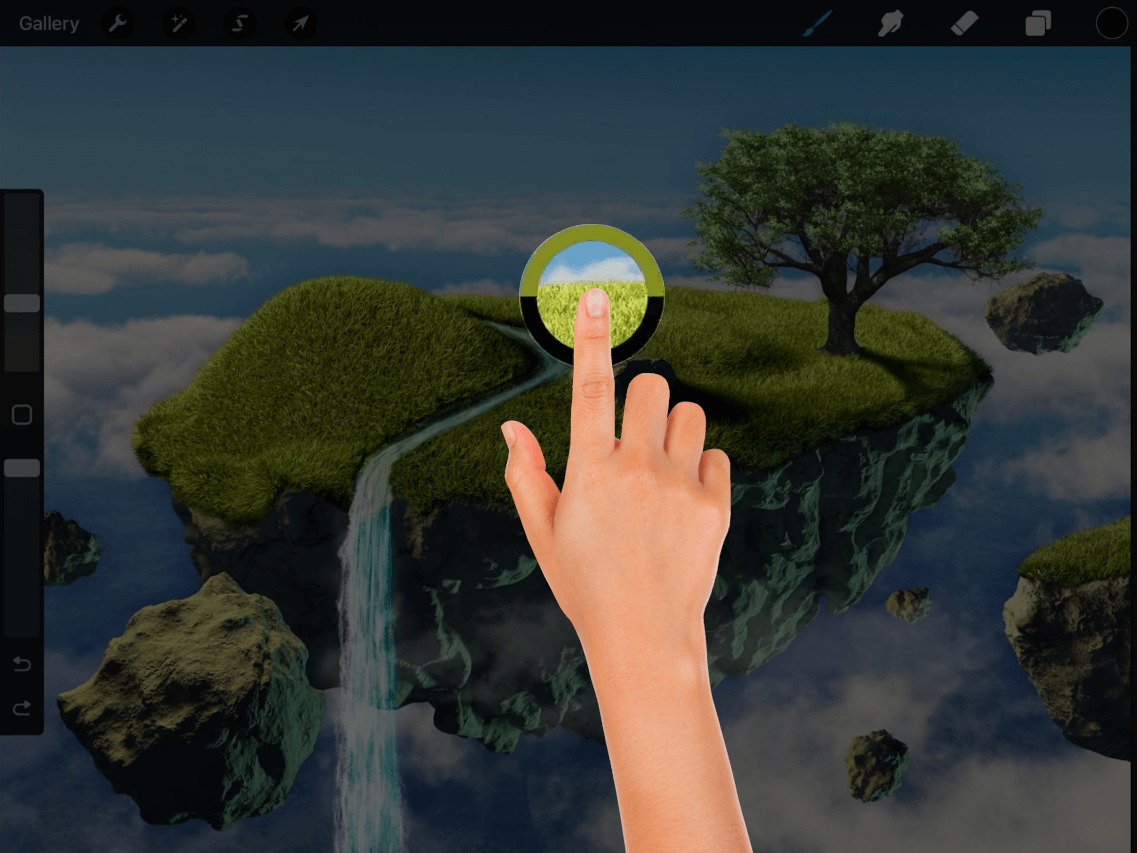
Holding a tap over the screen will populate the color picker ring, which allows you to sample color from the target area.
The bottom half of the ring represents the color you currently have active in your Color Panel — represented by the small round disc in the top-right corner of the screen.
The top half of the ring represents the new color that will be sampled from your image. This color is defined by the area of your image that you currently have your cursor/finger placed over.
As you swipe your finger across the screen, the ring will follow your hand movement, and the color will be sample from the pixel area you have the color picker placed over.
Once you have identified the color you’d like to sample, you can do so by releasing the tap. Your color will then be selected as the active color, as indicated in the Color Panel:
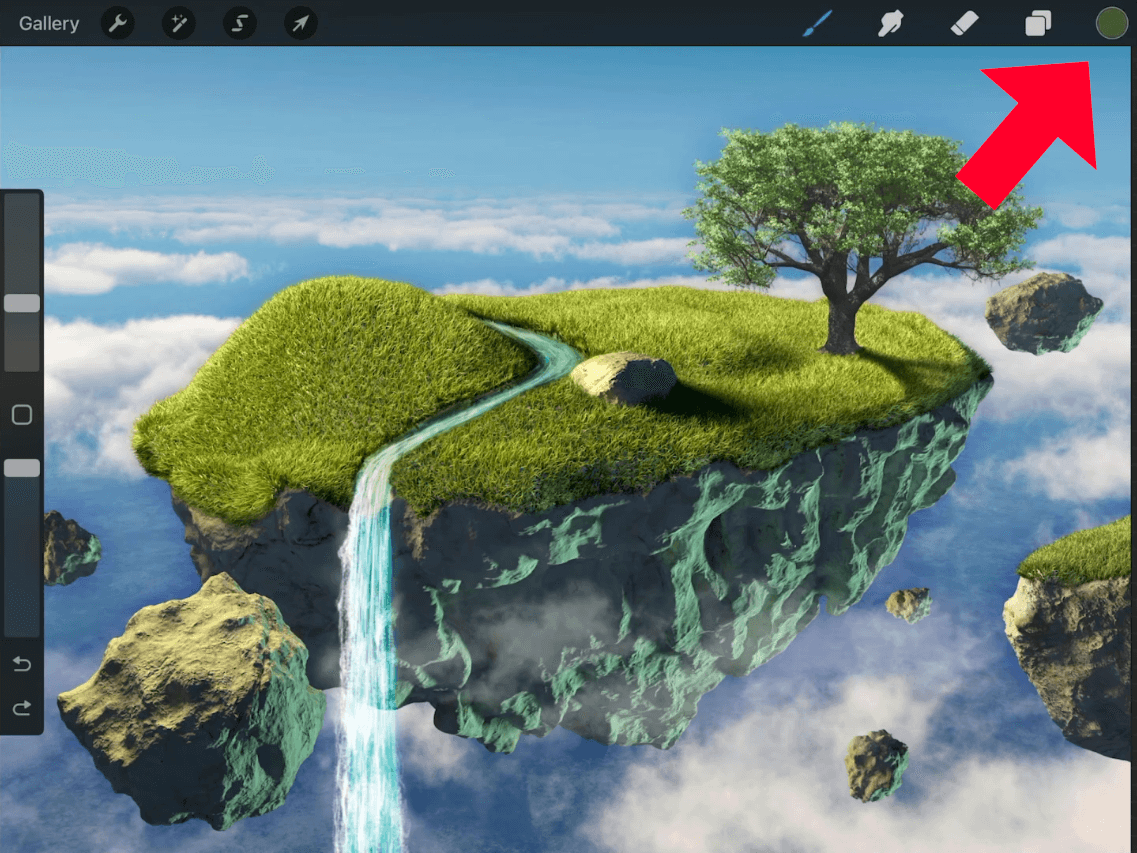
The color chosen with the color picker was added to the Color Panel as the active color.
One thing to keep in mind is that this method only works when using your finger. If you are using a stylus (such as an Apple Pencil or some equivalent,) then this tap-and-hold method for color picking will not work.
Method 2: Color match using the Modify button
Another way in which you can color match in Procreate is by using the Modify button, located in the user interface between the brush size and brush opacity slider:
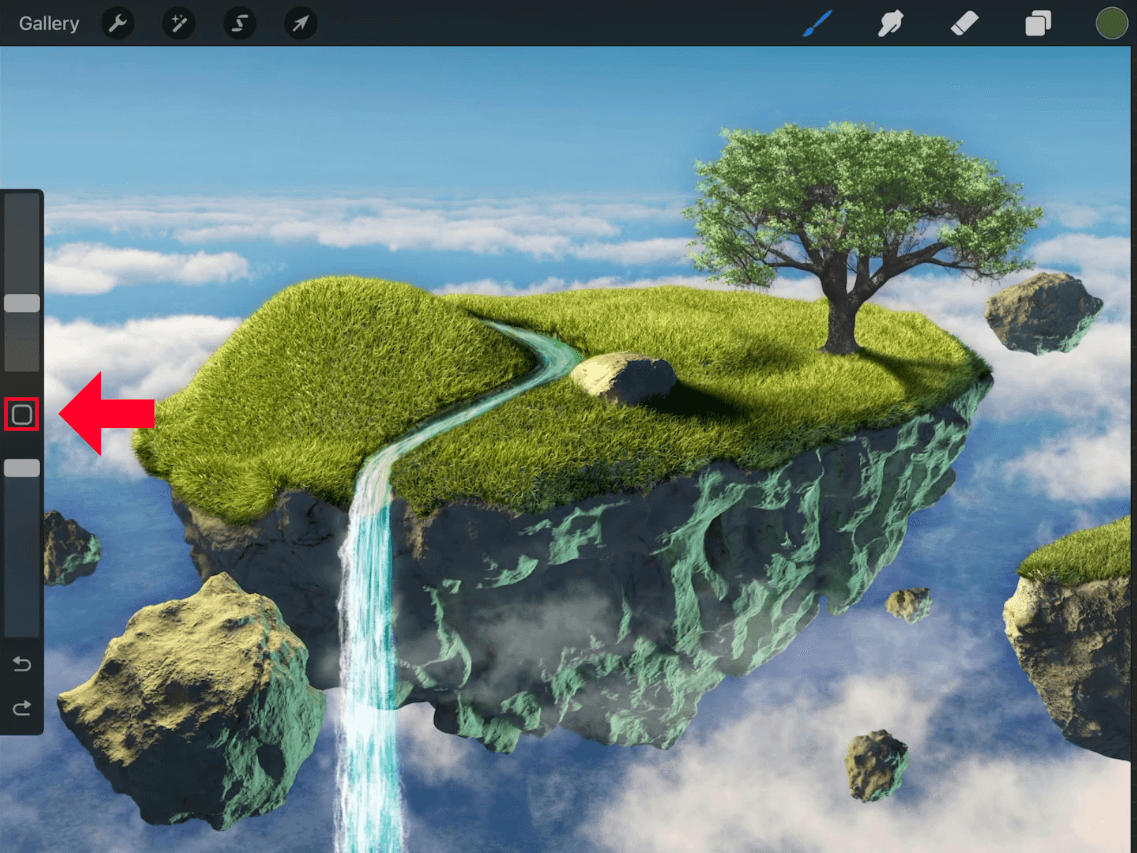
Tapping the square modify button on the left-hand side of your screen will also allow you to color match.
This method of color matching allows you to do so without putting down your pen or move it to free up your index finger for tapping.
Tapping on this button will place the color picker ring in your canvas:

The color picker ring populates on the screen using this method as well.
This color ring is the same as the ring from the previous method, and it works the same way — the top half represents the new color, and the bottom half represents the current active color.
You can now swipe around your canvas to find an area of your image that you’d like to sample color from. Once you have identified you chosen color, you can simply release the tap and it will then be applied as your active color in the Color Panel.
The benefit of using this method for color matching — assuming you’re right-handed, that is — is that it allows you to pick colors without having to put down your pencil, although it does require you to use both hands.
The ideal workflow for this method is to use the index finger on your left hand to tap the Modify button, then use the pencil/stylus in your other hand to sample colors from the image.
Conclusion
Thanks to the brilliantly designed UI, knowing how to color match in Procreate is simply a matter of hand gestures. What’s more, an alternate option is provided as well so you can try out both to see which is more compatible with your own workflow.
If you’re working with one hand and would rather not get the other hand involved then color matching by holding a tap with your index finger makes that possible. However, if you don’t want to interrupt your wielding of the almighty pencil then tapping the Modify button with the index finger of your other hand allows you to color match uninterrupted.
Try them both out to see which method works best for you. If you have any questions or need clarification on any of the steps we’ve gone over in this lesson then simply leave a comment below.
Learn To Master The SoftwareGain a complete understanding of your favorite design apps with my comprehensive collection of video courses. Each course grants access to our private community where you can ask questions and get help when needed.
|
||||||||||||||||||||||||||||||||


Leave a Reply